DIY Modern Pendulum Art
Who doesn’t have some walls to fill with art?! (ok, I might not have any left…) But do you want to pay big bucks for that abstract art? Or do you just want to be so proud and say you are now an artist?! Here is a way to create your own magic! I mean MAGIC! I am an artist, but this Pendulum Art is so amazing, I could cover the world with these. Artistic talent not needed, so why not?
What do you need?
You do not need very specific supplies.
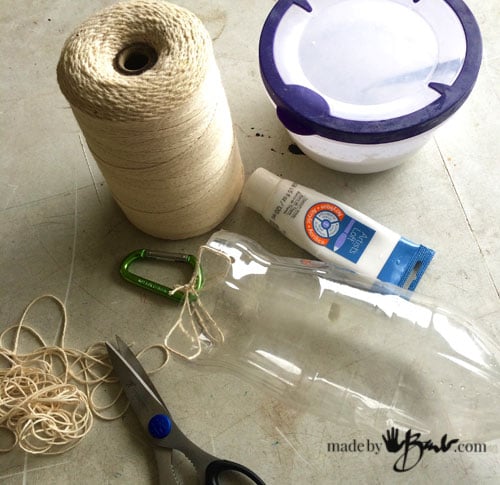
- You need a vessel to hold the paint, Such as a pop bottle/plastic bottle with holes punched/cut and a tip that is able to be closed such a dish soap top.
- String or yarn of some type
- Acrylic paint, Latex or any kind can work. Paint consistency will affect the flow of paint and absorption on the canvas. You will need a fair amount of paint depending on the size of art. (I tend to GO BIG, so I used household latex paint and some acrylic artist paint.
- I used a carabiner to allow detaching from the string for easier cleaning. (perhaps wire could also work)
- (not pictured) You need a place to hang the vessel from. Any pole or stick or hook on the ceiling will work. The higher = bigger ability to swing. ‘Think back to geometry. It should not touch the canvas at low point. I used a tree pruner pole suspended from a ladder step to a shelf in the garage. My large canvas was about 4′ x 7’. You could start small and use a broomstick across some chairs or even a tripod.
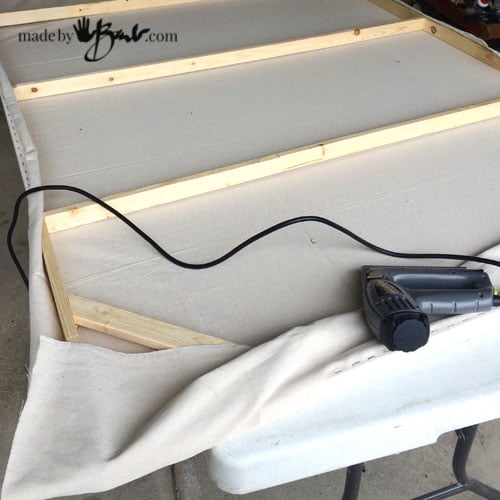
- You will need a surface for your painting. I used a canvas cloth like this, as they come in large sizes. Paper, pre-stretched canvases or boards can also work. I chose to have it stretched prior, however you could also create the art first and then crop your art out of the whole. (oh, wait! New idea; you could also make a multi-canvas arrangement). There are no rules here, just have fun.
The Canvases:
I like to be cheap, (no, I like to save money for other better things) so I stretched my own canvas, enjoying the use of my new electric staple gun. When stretching a canvas over a frame the staples are started in the centre of each side and worked outward all around. I like the natural cotton canvas colour so some remained raw. Take some cues from your own colour scheme. Any background color can be your starting point.
This method creating modern art is based on the force of gravity. I like to share my tips, as I actually DO these projects.
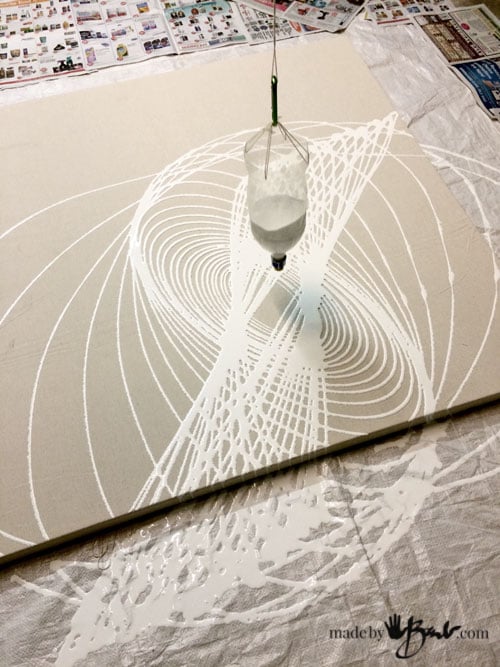
Tip #1: each paint has different density so you may want to practice on some newspaper first. I like a solid flow line, however slower flow, thicker paint would make drips that form the pattern. You may not quite know what shape you will get. It’s like Spirograph in a sense. So much fun! Do notice all the newspaper and tarp to cover the floor. Plan to over-shoot the canvas.
Tip #2: try not to wriggle the vessel as you let it go as it will then give “wriggly” lines. If you are concerned you may use a pole rather than a string for more assurance of no “wigglies”. Gravity has a way of making the pattern so exact it’s mind-blowing!
As you see here the amount of paint was quite wet, so it needed longer to dry. My studio was not quite large enough. (Garages aren’t just for cars anyways…)
I do love how this ‘scientific’ method creates such perfect shapes & designs! Once it is swinging it is best to let it continue in circular motion in order for the designs to be complete.
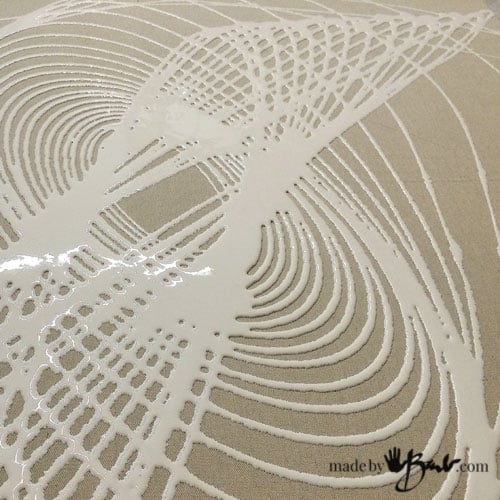
Tip #3: Keep it simple and choose colours that are not too contrasting. There is a lot for the eye to look at so I kept it more monochromatic. That is really a taste issue. I like subtle contrasts.
An interesting thing occurred here by accident in this end result. The paint that was poured into this cup was different shades, so it changed as the design flowed. Such a cool phenomenon! So many possibilities.
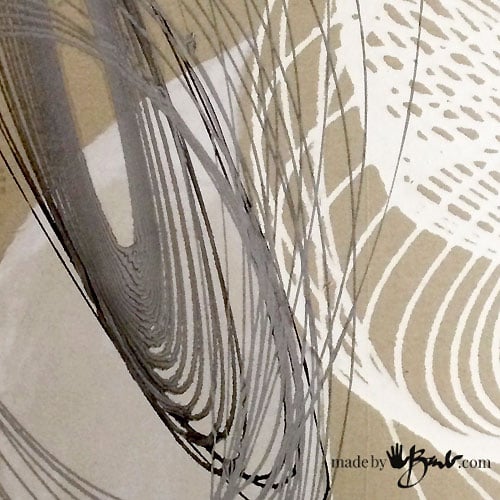
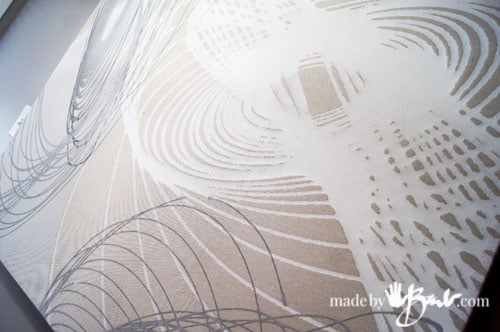
I am happily surprised how this turned out and it was my first attempt. Greys are great in decor now and I feel I will not tire of the colours.. I had painted in some of the negative space, subtly, but again, not necessary. I must admit; this felt more like playing as a kid than as an adult.
A tripod can make a great smaller scale setup. Smaller canvases ganged up together can also be easier than one large canvas.
What do you think? Once you start the problem is deciding to stop before it gets too busy… It gives suggestion to flying atoms…
This Pendulum art works great in this throwback 50’s modern kitchen. I chose to keep it unframed, to again keep it modern. My DIY light shade is also my DIY project here and accents very nicely.
Alright, here is a video, but please don’t laugh…
This larger canvas of pendulum painting was lots of fun as well. And yes, grey again. If the pattern does not turn out as you like, just paint over it or use the current wet paint to smooth out a background colour. It is somewhat of an experiment, until you get the hang of it! But it is doing the work for you…
This art form had so man different patterns & is fun to do with children to teach about gravity & creativity. Make sure the workspace can handle the mess and paint drip…





Clapping … I needed to see the video to figure out how you did this … you needed a high degree of co-ordination to manage this … and a fair amount of devil may care … love the ombré effects with the geometry too … and how it all goes so perfectly with the string dipped lampshade of a few posts ago … well done!
This technique could be used for traditional floor clothes I bet.
Thanks! It was a lot of fun! Especially anticipating how it would swing to make the shape. I’m itching to do it again really soon. But this time a smaller version, as my walls are pretty well full. Save your dishsoap bottles! Between this and the concrete casting,I look at recyclables in a whole different way — ‘oh, what can I do with this shape/bottle?!’
Georgous, I’ve always wanted to learn how to make on of these it soothesr my anxiety, its a beautiful art form , I just love it, I’ve tried ed several Times and failed to build one I hope you can help me, a patient in Florida with RSD world’s most painful nerve disease, reflex sympathetic dystrophy, Lisa Harms I love watching your videos!!!!!!!!???????????????????????
If you want to make a smaller version pendulum you can use a camera tripod and have it swing between the legs. I’ve had success with that when a smaller scale is needed. Place multiple canvases underneath. Hope you manage to make some. Part of the challenge is making the paint thin enough to flow well, but not too thin. I test on newspaper first. Sometimes I just paint over it if I don’t like it. Each media has a learning curve. No on can anticipate it perfectly without practice. Good luck and think positive!
Love these fun way of painting videos.Would like to no what paint is best to use on the canvas.
It is best to use acrylic as it dries permanent as long as you do not dilute it too much. It is so much fun for kids too!
Wow, Im impressed , what a great idea . I may try it on a piece of fabric for a sewing project.
Thought Id seen it all , haha. the Curious Cat
It is so much fun! You won’t want to stop!
I’ve seen websites suggest tempera paint mixed with water, acrylic paint, or interior home paint. Have you experimented with these, and can you describe the differences of how the type of paint affected the end result? Or any links to helpful resources on this subject? I’m an art student and am interested in playing with this technique in my free time during the COVID 19 pandemic but money is short so I don’t really have the money to experiment with a ton of resources
Being an illustrator for many years; be careful about just diluting with water as it will change the nature of the paint. This art form does need a good consistency as too thick or thin makes different effects. I would avoid tempera as it is not water safe. I have used interior paint with good success as it’s plentiful, even use acrylic to tint it. If you have any clear medium that will also extend the paint. When in doubt; experiment BEFORE the canvas! The ‘nozzle’ tip size is also important. Best of luck!
Thank you for this post! I am very inspired by your project. I am also using raw canvas and my husband and I teamed up to create a 4’ x 7’ canvas Of our own.
I’ve been experimenting with different acrylic paints and mixing with water. I’m using the spout from glue. I’m having trouble getting a solid like of paint. I have the vessel close to the testing canvas and the paint looks as it’s almost beading up and resulting in a dot pattern. Any suggestions on how I can get to a line flow?
Thank you!
Ah yes, the consistency is key. May the viscosity of the paint is just too thick for the nozzle. I used a dish soap tip as they can pop closed. I hate to thin the paint too much as then it changes the permanence. There are also pouring mediums and Floetrel that is used for pouring art. I did do some that were made of the dots and they looked interesting as well! Good Luck!
Use alcohol
As another tip, regardless of your canvas size, taping weights around the bottle/cup/paint container with a hole in the bottom will help keep the pendulum action going, and can also help to quell those wriggle lines you mentioned:) Bonne Chance!
Oh yes! Smart! If I had enough canvases I could do this forever!
Hii…I loved your pendulum painting alot!!! I want to make it…I have a doubt…can we add water in the paint and is there a ratio of paint to water?
I wish I could have a specific ratio but paints are so different. It also depends on how small the hole is on your vessel. Sometimes it would make a pattern by dots instead of lines. My suggestion; mix a test and try on newspapers. Then if needed more water or paint can be added to adjust. I recall sometimes having to wait quite a while for the design to dry since there was quite a ‘puddle’ of paint. It is all really art anyways – Good luck
These pieces are absolutely gorgeous! I’ve done a lot of pendulum painting with kids. I love it! So fun, and beautiful and unique results! After seeing your work, I’m inspired to make my own!
Could you share what lid/opening you used on the bottle? I’ve been using a glue cap, which I’ve had to hot glue and then duct tape to a water bottle. Thanks so much for sharing!!
Yes, I understand the issue as I also had to adapt a bottle top. I used the one from a dish detergent bottle, it snaps closed but did not screw on the bottle either (if I remember right). I wanted something that can close easily and also flow pretty well. The key is size of hole, and consistency of paint, but it’s all in fun!
How long was the dry time for the large canvas?
As I remember it was about one day. It can vary as if the hole that allows the paint through and the consistency of the paint can affect the lines and how thick they are. Experiment on paper first…