Rustic Resin Pendants
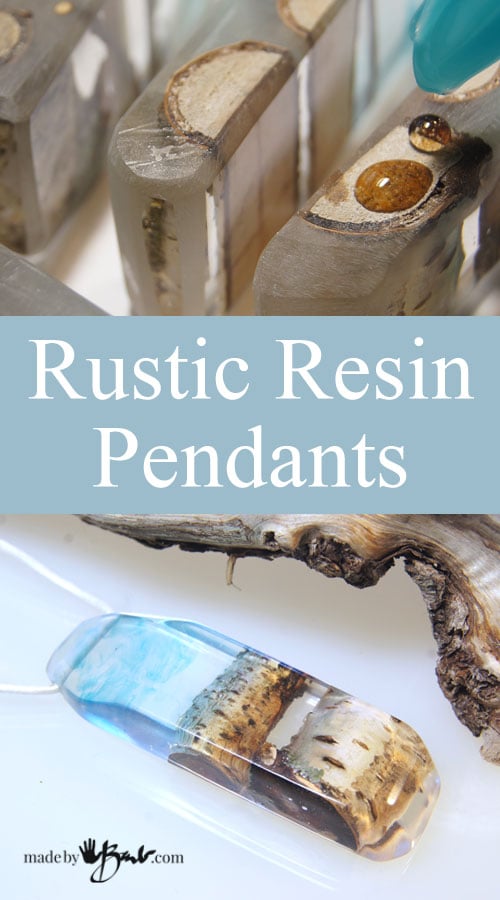
My apologies; I have been really busy with an exciting new media; Resin! It’s so exciting to be able to show you how you can cast and form your own absolutely unique resin jewelry. Natural ‘live edge’ elements are very ‘hot’ and this has so many possibilities… but don’t blame me if you also become a ‘resin addict’! Check out my tutorial; how to make your own super-unique jewelry:

My starting point was again nature. I took some inspiration from Britta Boeckmann‘s early jewelry but wanted to be even more rustic. I am always wearing pendants, the type that make a statement. Nature supplies so many textures and designs if you open your mind to the possibilities. Go! outside! and check out what nature has to offer. There are so many amazing pieces of wood and branches and bark and leaves and… It just boggles the mind.
The Resin:
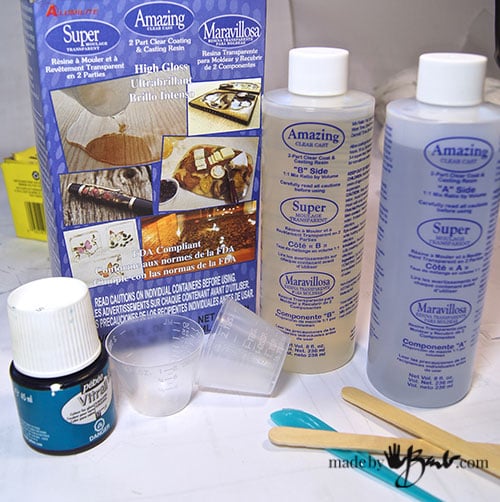
I am using a readily available resin called Alumilite Amazing Clear Cast. It is sold by many hobby and craft supplies and quite reasonably priced. It is not a polyester resin so I don’t find that it has any toxic fumes however it is still suggested to use under well ventilated conditions and avoid skin contact. (once cured, it is food safe though)

The Imbeds:
I collected a variety of wood branches. I love the great textures that bark and birch have as well as the lichen that grows on it. Anything can work within reason, that it is not too rotted or soggy. You will however need to let any wood dry thoroughly or use a very low setting to dry in an oven. Resin doesn’t like moisture!
Also, prior to embedding I like to ‘stabilize’ the wood as much as possible if it is old or soft. Stabilizing means making the wood more solid, as replacing some of the ‘air’ with a solid product. The professionals use a pressure chamber and force ‘cactus juice‘ into the wood. I use a paintable product; ‘Wood Petrifier’ that does a similar job and easier for the DIY’er. Give the pieces a good coating or 2 and let thoroughly dry. It sinks right in. The pieces can be used whole or cut as preferred, but keep the design simple. I had definite visions in my mind’s eye.
After prepping the wood I arranged how I wanted the pendants to look. I was anticipating cutting them after casting. I used a small shallow square silicone cake mold that was slightly greased with vaseline.
Mixing the resin:
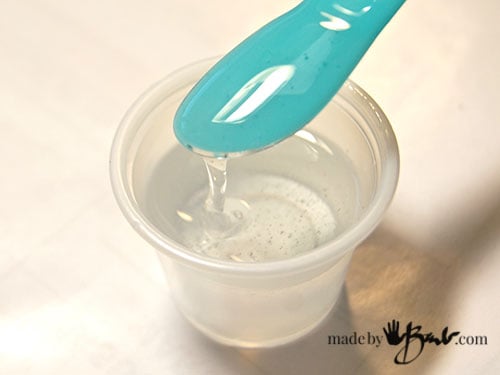
The key to a good cast is having absolute exact measuring. This resin uses equal parts of A & B. I use tiny transparent cups that allow reading volume easily. Mix slowly but thoroughly until it is very clear and has no striations. Do not get over excited stirring as you don’t want to mix in any air bubbles. Scrape the sides often to make sure all is completely incorporated. This resin is quite slow to set,(30-40 minutes working time) so it lets you play with the arrangement of the items.
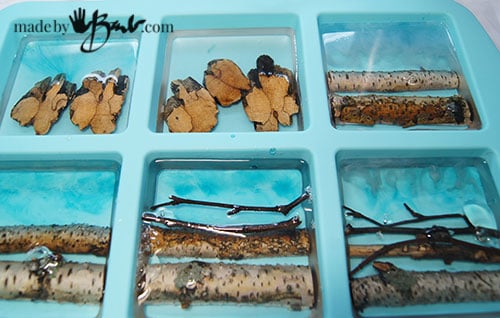
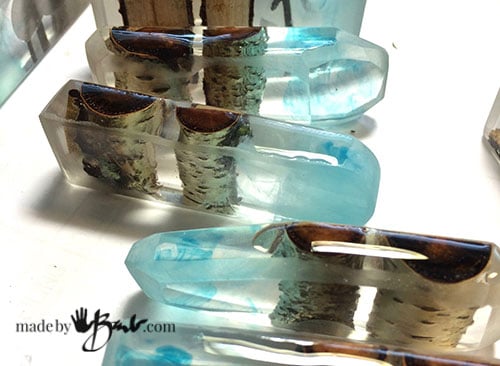
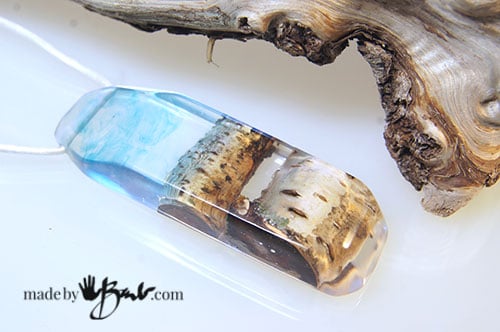
Here’s an important trick: WOOD FLOATS! Yes, I found that out the hard way! Pour as thin layer and set your pieces onto it. Let this cure until it is set. This will keep the wood parts from floating once they are covered with the rest of the resin. For colour I used a tiny bit of Pebeo Vitrail Ink to slightly tint the resin (turquoise). You can also have fun with leaving the swirls visible. (mix with toothpicks) I wanted the wood to be completely embedded and poured another layer to cover.

Once it is poured, a small lighter/torch or blowing with a straw will make the bubbles that are on the surface burst. Sweep quickly across the surface so as not to scorch the resin. Let it sit 24 hours or until hard. Once unmolded, I will decide the shapes I’m going to use. If your mold is the exact shape then you can skip next step.

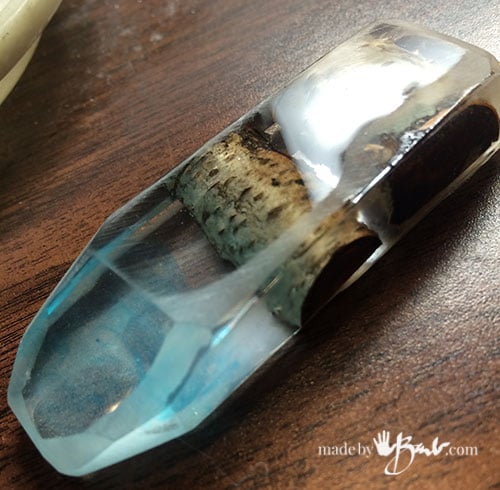
They look wonderful and clear!

Shaping:
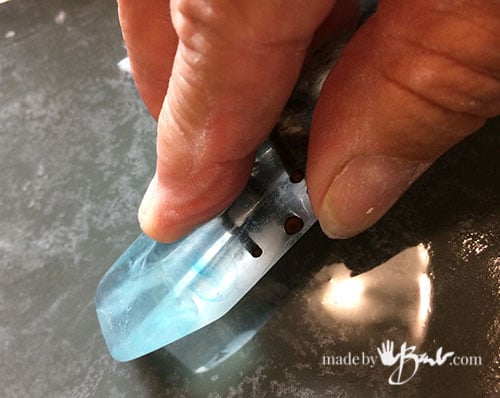
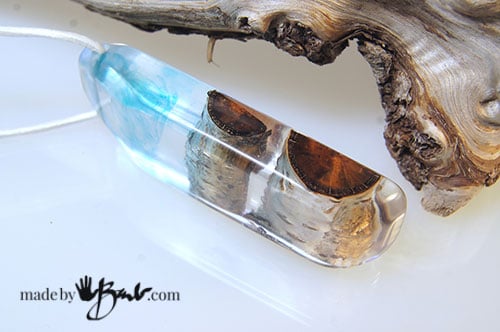
To cut the shapes I used my new Dremel Moto-Saw Scroll saw. It is a a great little/mighty tool or beginners who do not want to use powerful tools. To protect the resin I covered it in masking tape. Slicing them length-wise across the branches gave me the long shapes I was after.

The wood has now been sliced through as well.
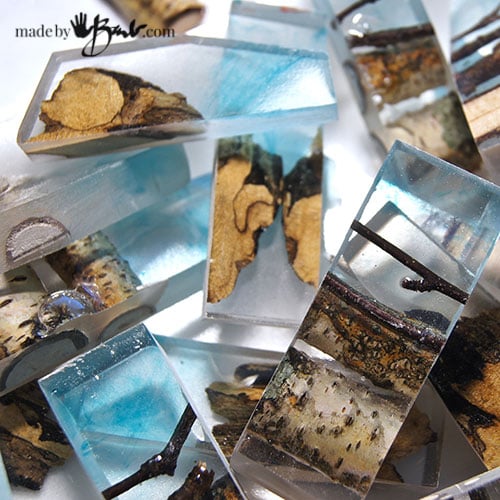
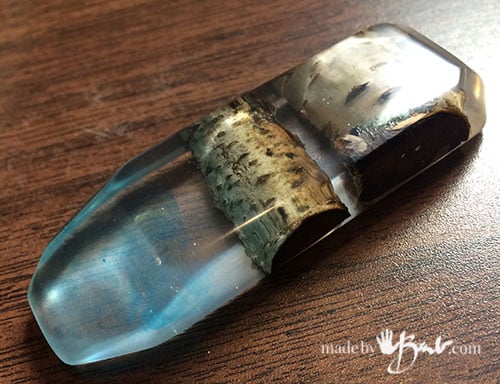
Once untaped, they look wonderful already, like little blocks of frozen ice!
Finishing the Pendants:
To even out the sides I used a rough 200grit sandpaper.

Working with resin has some downfalls; sanding! My intention was NOT to make any dust by dry sanding, as it is a nasty health hazard! Once the surfaces were pretty even, I mixed up a bit of resin and spread it carefully over the rough ends, and let it dome. Do not over-pour or it will drip down the sides. Just drip a bit and spread it out, it will self-level.
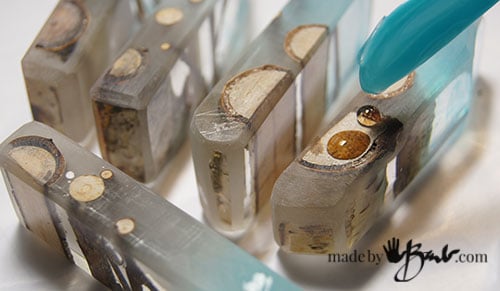
I wanted all the wood to be encapsulated in resin to allow wet sanding without the wood pieces absorbing water.

You will see the great shine it also makes.
Coming along nicely…

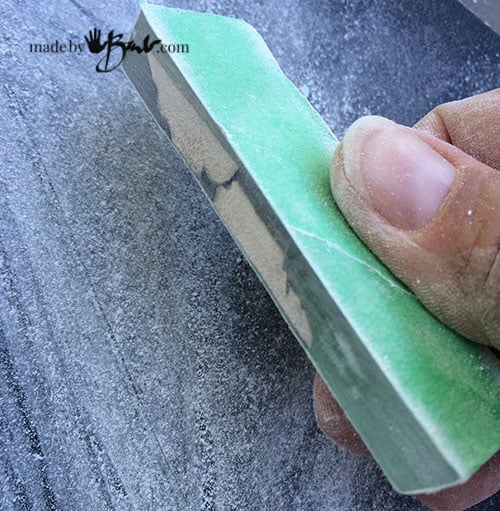
Wet Sanding:
Once they are coated on all sides, the wet sanding can start. Once Alumilite is cured it is food safe, and the water keeps any dust from forming. I use a large cafeteria tray to catch any stray water and work through the grits of wet/dry sandpaper.
The sequence: (wet/dry sandpapers may be found in the automotive area of the hardware stores)
- 200/220 grit – rough shaping
- 400 grit – medium smoothing
- 600 grit – medium-fine shaping
- 1000 grit – fine for removing scratches from shaping
- 2000 grit – super fine sanding
- Novus #2 Scratch remover (liquid polish)
- Carnauba Wax for shine
Shaped with 220 grit

Edges softened with 400 and 600 grit.
Further smoothing with 1000 and 2000 grit.
Polished with Novus #2

There may be other polishes that also work, but these are great. (and who knows if the car headlights will need some someday). Inspect your piece and backtrack if you find scratches. Use some muscle to be thorough with wet-sanding. Rinse in between grits (keep a bowl of slightly soapy water handy) When it looks good, use a car wax or the Novus #1 to shine the piece.
Finishing Touches
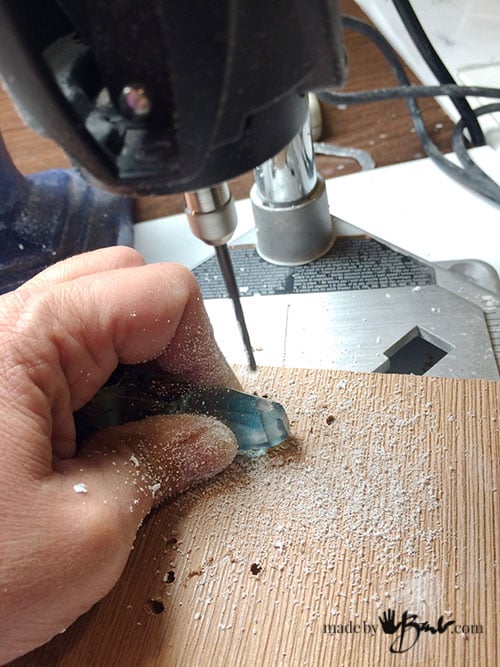
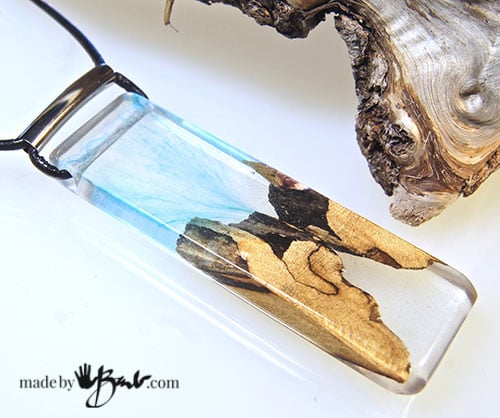
To be able to hang your pendant you will need some sort of way to hold the chain or cord. Bails are available that can be glued or attached with a small hole. I decided that a drilled hole would be simple and strong.
My Dremel is mounted in a Workstation to allow drill press type work. It is a super handy addition to the already great tool.
It is so satisfying to see such a transparent shiny artifact that is hand created and can also be worn. See more here
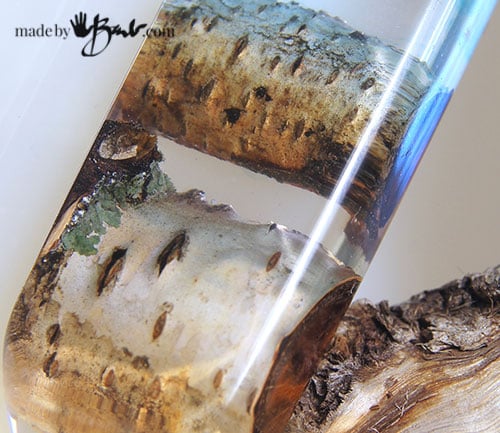
Closeup inspection and you see the lichen frozen in time.
Be creative! And proudly wear your piece of unique jewelry! High five! Alright, alright, if you’d rather just buy one; check out my new Etsy store. It’s what happens when you just love ‘making’ and make too much…
Hi Barb,
Your resin looks great. You make it look so easy 😉
I was wondering what blades you use for the dremel saw. I have one and had tried cutting my resin with it but it is very slow and I was worried I was going to start melting the resin. Does your cut fairly fast? I had my saw motor at 4.
Thanks for any info you can share.
I am using Aluminite resin and i am also trying out the Art Resin (no voc)
As far as I remember I used a blade meant for wood. I used a high speed and it moved fairly quickly through the material so as to not melt it. It may involve a bit of ‘trial and error’ as your embeds may be denser than mine. Hope that helps…
How absolutely gorgeous these are! I love the wood, I love the colouring of the resin, absolutely fantastic thank you so much for sharing your technique! I want to come play at your house! LOL! xoxox
Thanks! I’d always entertain some one coming to help clean up… after the fun! I never tire of looking into transparent jewels to see what’s hiding in there…
Wow these are SO COOL!
Thanks, I never tire of ‘stuff’ imbedded in clear resin… Always looking for unique things to imbed.
Oh, also, friends of mine picked up a table that I’ve seen done before, pennies embedded in resin, but *theirs* was mother of peral pieces embedded in resin. GORGEOUS. Iirc, the pieces were uniform disc sizes, but the mother of pearl gave an opalescence & the resin gave a gloss. I asked for it in their will, if they pass on before me. I think that natural look will appeal to you too.
I’m hoping to make a live edge stream table. My sense of time seems to allude me though, as I don’t get as much done as I’d hope in a day. Stay posted
Hello and Thank You for your detailed tutorial. I have moderate experience with resin but typically use images and small trinkets to create small dioramas. The problem that I’ve been seeking an answer to is: how to encapsulate lichen into my pieces without the color draining from the lichen. Each time Ive incorporated lichen into a piece, the color leaches out and the plant matter turns from green to yellow as the resin cures.
Have you run Into this problem at all? Or is there something I should be coating the lichen with prior to setting in resin?
Thank you in advance if you are willing to offer any tips!
🌿Lea
The lichen that was on my branches stayed the same colour. Perhaps there is some chemical reaction happening with your brand of resin. I’m pretty sure that Art Resin does not react with lichen colour, but I have yet to try it. It’s on my radar of things to try… You could try a coat of a clear acrylic matt medium
I sand to 320 grit, then go to my buffer, with a spiral sewn wheel charged with swirl mark (e.g., McGuire’s) remover for polishing auto paint.
Wow, I would have though that you could not skip to polishing so quickly unless that polish is acting as the finer sandpaper. Thanks!
Hi, It is really a pleasure to see your work pieces, Great
Ah yes, resin has so may possibilities, I keep collecting inclusions…
Hi, thank you for a wonderful tutorial. Can I ask where I might be able to get the blue square Mold? Thank you so much
Michelle
Australia
I bought it at the Michaels Craft stores here in Canada. But I am sure you could find something on amazon that is similar. You could also make your own like I did for these. Some just make a temporary mold with cardboard or similar since it gets shaped later anyways. Happy making. PS, do research the amount of yellowing that your resin has. I have noticed some in my pieces.
Wow wonderful and nice Instruction. I need to know some tips from you . that is when try to put some wood in resin its floating and bubbles coming, how to reduce this issue and how to make bubble free pendant
Have you read the post? The application of heat with a mini torch or even bowing with a straw will burst bubbles. If it floats you can pour a small amount and let it set in it to anchor it and then add the rest later on. You also need to make sure that the wood is really really dry, as you read in my post I did put it in the oven to dry out. Some wood may be too deteriorated. Good luck
Hi Barb. Absolutely love you pendants! I hope I didn’t overlook it in your tutorial but what size drill bit did you use for the chain hole?
Kindly,
Sherry
Oh, I probably did not state it as that would depend on the chain and specifically the loop on the end of the chain. Start with smaller and the try it…
Wow! This is great resin art. I really love it. Please how can I contact the supplier if I want to get some of all the items
I am not sure which items you are referring to. The inclusions are natural things and I have made the pendants. I have had some for sale in my etsy store