Concrete Geometric Polyhedron Container and pattern
Who can really resist the allure of a diamond?… Er, I mean a diamond shape?! This unique concrete geometric polyhedron container (and pattern) can sit at multiple angles since it isn’t symmetrical and resembles a faceted diamond. I’ve designed my own original mold pattern and it is made of a unique material that only costs pennies. Go, download my pattern and ‘shine bright like a diamond’…
Geometric shapes are contemporary and provide a fresh feel to decor, not to mention the cool mathematical calculations needed to create polyhedrons. Planes catch the light and dazzle the senses.
The Geometric Polyhedron Form:
When designing this form I wanted it NOT to be symmetrical, but still based on the diamond. My brain just about exploded trying to figure out the various facets and planes. This is actually right up my alley as I am constantly drawing forms.
After a few drafts of ‘cereal box cardboard’ the polyhedron worked! Hallelujah!
I had been wracking my brain for quite a while to figure out a good material to use to make the pattern. I hate the ones made of cardboard. Always being practical and wanting to be able to use it multiple times, and be inexpensive is important. Peel-and-stick floor tiles are great for this as they are super cheap (2 for $1) and cut easily. They are smooth and shiny which is great for concrete.
The Pattern:
You can down load my free PDF pattern (that I really really slaved over)
Print both pages, cut out and use it to trace around onto the back of the floor tile. Both should fit on one square foot. Note the centre line shows where to ‘mirror’ the shape. You could print 2 and tape them together.
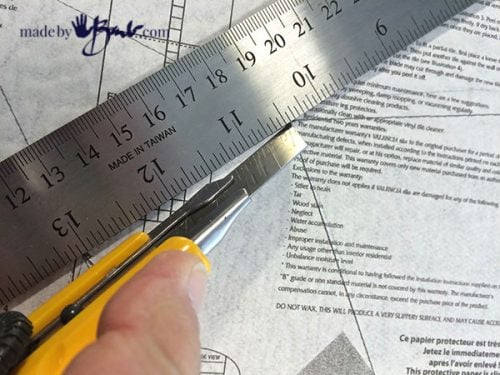
Cut around the shapes on the outside. I cut from the back with a good xacto knife and metal ruler.
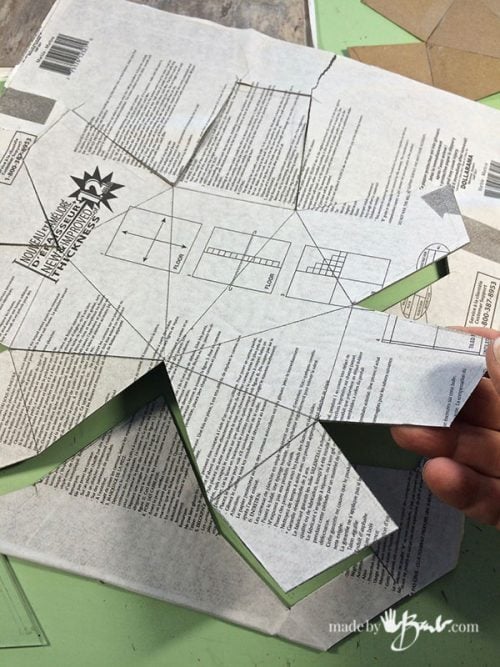
Snap it and then cut through to detach the pieces. The sticky back paper is still attached.
Once you have the major shape cut you can then partially cut through at the interior score lines. DO NOT CUT THROUGH completely. You want it to be able to bend it to provide the corners of the polyhedron.
Take the stick back paper off.
Use some packing tape to bring the bottom of the shape together. It will remain together during casting.
This vinyl tile is great. It has a subtle stone-like texture. The surface is strong and works great to bend and give a crisp corner and since it has a sticky back the tape holds really well.
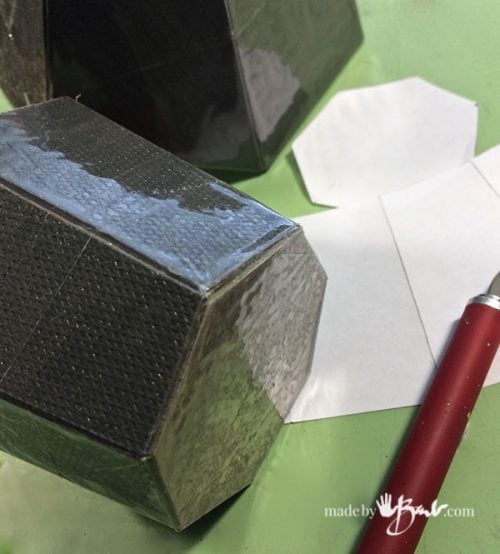
Tape it together in preparation for the pouring. Aren’t you impressed?!
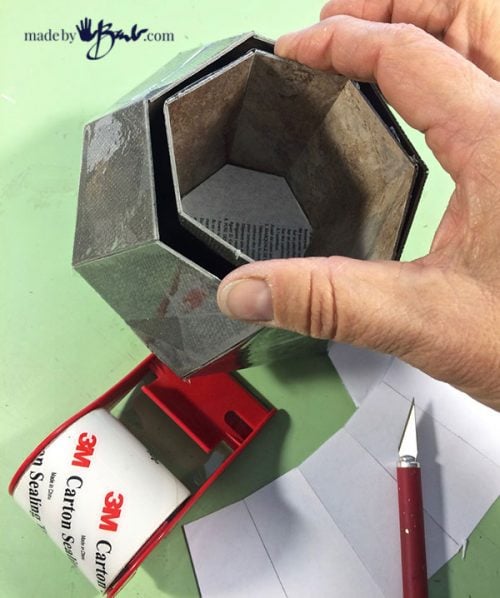
Print the second page of the pattern and repeat with the interior shape. I suppose of you are lazy you could just use a cup or something. But it won’t match the shape.
Gee, it fits inside nicely… thanks to my geometric brain!
Tape it well from the outside.
Concrete Pouring:
I have been loving RapidSet Cementall lately as I have had to resort to pouring in my basement. Do wear a good dust mask. This mix is very strong and cures ridiculously fast. It is almost too fast, so be ready! It has about a 10 minute working time and is ready to unmold in 1 hour. Crafters are very impatient people!
Add water slowly as it absorbs really well into this mix. It usually gets too thin and I have to add more mix since it has a plasticity to it. You will want it to have quite a flow, like a watery pudding. It is made to be used in various consistencies.
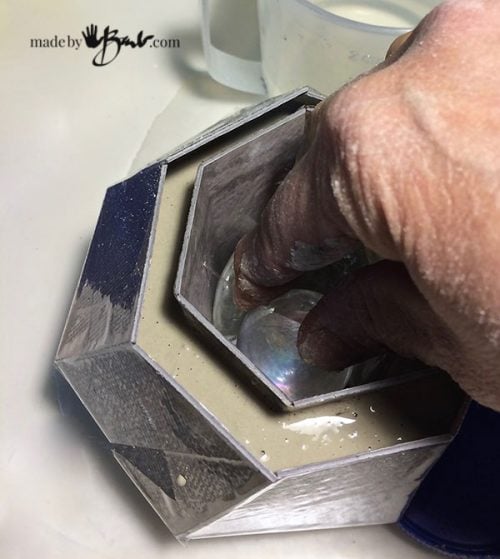
Push the middle piece down into the mix and centre it. Add some rocks or marbles to weigh it down or taping can also work.
All set, propped up to make it level.
All ‘Set’:
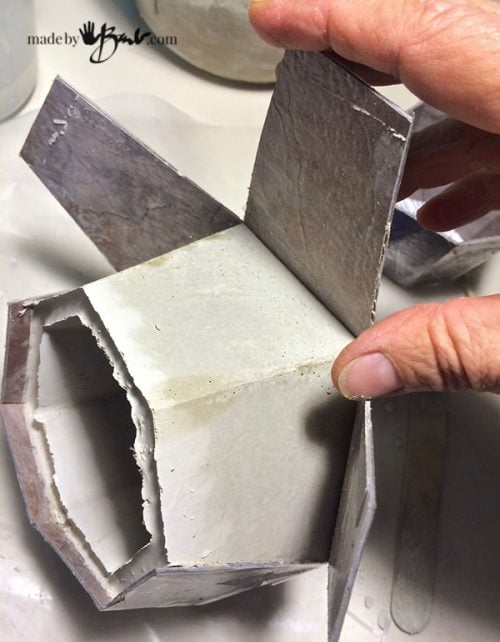
Go have a break. An hour later and you can feel the heat from the setting stage. Cut the corners and wiggle it until it lets go. The centre mold can pull out as well, if stuck slide in a tongue depressor to help detach it. The mold is so shiny that it does not need a release agent. The top edges will need some smoothing by sanding with a course emery cloth. Do not wash any concrete down the drain, just let it harden in the container and knock into the garbage when cleaning up.
I am quite proud of this mold! Such great crisp corners and I like the texture as well! More possibilities have been floating in my head. Tiles only cost 5o cents!
These bowls can sit multiple ways so they look like a different shape. Use as planters, jars, pencil holders… whatever suits your fancy.
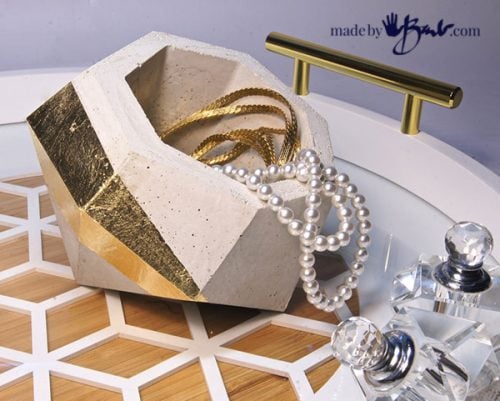
Alright lets add some bling to this polyhedron! My favourite right now is gold leaf. Tape off some sections and apply the adhesive according to the brand. This leafing comes on carriers sheets. and just needs some pressing on after glue is tacky. Use a stiffer brush to get rid of extra leafing pieces.
This turns out so contemporary and chic. Paint it as you like or just admire the concrete.
Turn and flip to other sides. Size it up or down if you like by printing the pattern larger or smaller. I’d love to see it! Impress someone, I won’t tell…










Lindo o trabalho e muito grato por compartilhar os moldes dos vasinhos.
(The work is beautiful and very grateful for sharing the molds of the pots.) Thank you! Enjoy!
Hi Barb, wow, I’m impressed is the least I can say. You’re truly an innovator and a creative! I mostly watch YouTube videos (i’m a visual learner), it’s what saved me with Physics and Calculus/Algebra in College. So when I started crafting, YouTube videos are what I went to. But I have to say, rn i’m obsessed with reading your posts/blogs and i’m really enjoying them. It’s because your crafts are so original and unique, and that’s refreshing!! Anyhow, I’ll continue to read but will spare you any more reply/comments, for now 😉 THANK YOU!!!
No need to ‘spare’ comments. Youtube is great but I like the way one can read a post at your own pace. And having taught young adults I see that retention of info is different if watched than read. 🤷🏻♀️ Maybe that is why they need to ‘write’ essays. Who knows what the future holds.
Hi, Barb,
Classy – perfect for high-end commercial display of jewelry, perfume, gloves etc.. That simple touch of gold dresses them up. One of those glass paperweight diamonds could be used as a lid and a light placed inside. I wonder what else can be done with v. tile? Could it be used to mold plastics if some of that product that is used to seal leaky roofs, basements and boats were added at the joints? Seems it would be flexible enough to remold nearly countless times. nv
Barb, your art is the best. Thank you so much for sharing as you do. I have completed my first ghoul. It turned out terrific! Look forward to more of your projects and tutorials
Oh great! Post it on IG and tag @madebybarb, I’d love to see!
lello Deer Barb
Happy New Year
Thank You for ceramic pattern
you are perfect artist and good teacher ❤️
Thank you and have a good year
Good luck making! It was intended for concrete but that’s ok…