UpCycle Denim Jeans to Jacket

What is it about denim that seems to make it never go out of style?! Traditional natural indigo was the staple dye but maybe it’s because they seem to carry a history with them. So rustic and casual, worn-in and comfortable – no wonder then! Ya, I find it hard to chuck them so… of course; make a ‘fab’ new jacket; UpCycle Denim Jeans to Jacket!
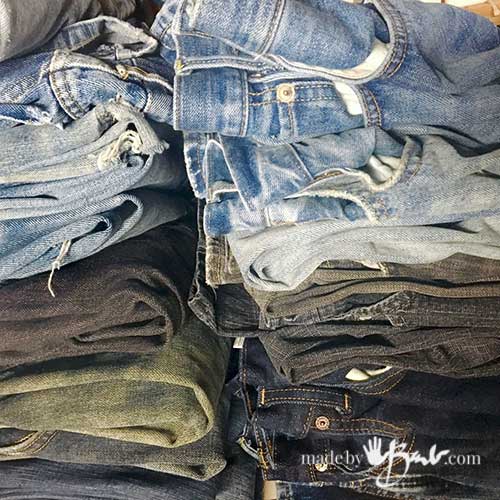
Quite A Collection:
Lucky me, (or unlucky depending how you look at it) as I am given denim by all who know I can pretty well repurpose anything. Such a ‘Rainbow’ of blues and greys. I’m mostly wearing denim since I’m always getting some stain on me from making.
Tip: If the denim is somewhat grimy looking (buildup from usual dirt) give them a good ‘scouring’. Soak them in the hottest water you can get (you can cook them too) with a scoop of Washing Soda (not baking soda) and you will be amazed at what can come out even though you thought they were clean.

The Pattern:
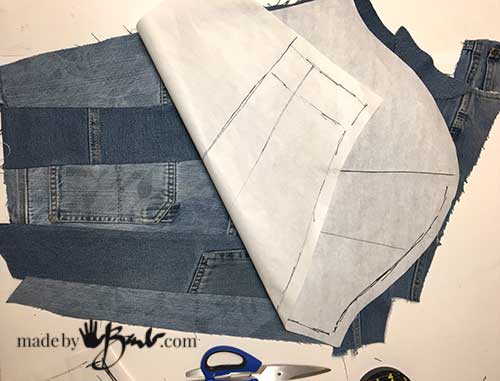
Since I am usually trying to use my time most efficiently, I tend to just grab a favourite jacket and trace it out instead of hunting and testing a pattern. It’s pretty forgiving as the side seams and sleeves can be taken in at the end if need be. Since this is pieced it could even be added to. Bonus!
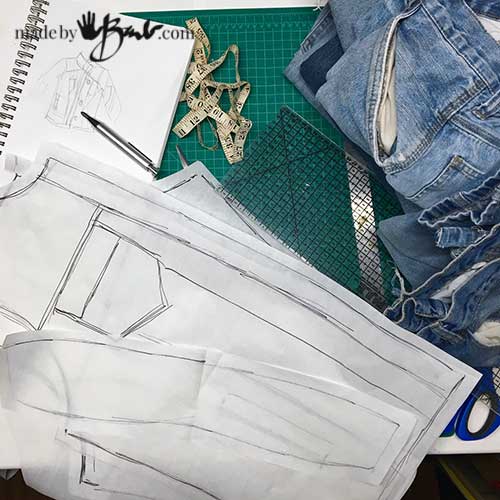
I always sketch to visualize my ideas but you may just have a Pinterest board. I did want to keep some of the feel of a jean-jacket by having something like a yoke (the piece that goes across at top of fronts and back) and pockets. The collar is a simple one; double-piece type as well.
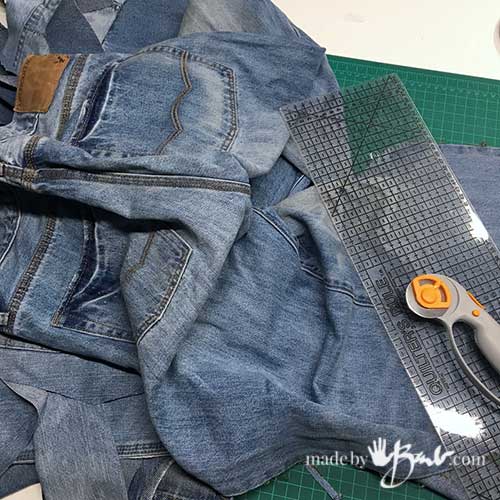
Cutting Made easy:
Thanks to instructables.com I’ve won a rotary cutter for my sewing tutorial. It is amazing and cuts the denim like butter! Using a quilt template or straight edge makes it soooo much faster.
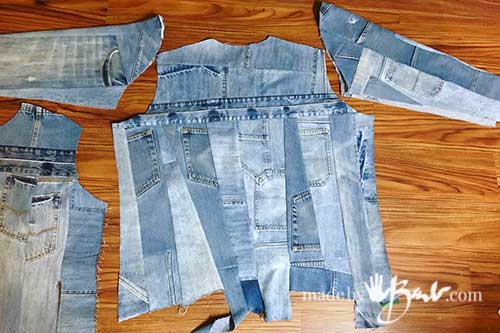
I did not want to look too patchy so I used similar tones of the blue denim. This was about fun sewing and NOT being fussy with an exact pattern so I just started piecing with long thin pieces, not necessarily rectangular. It’s an art form; just jump in, you can add more later…
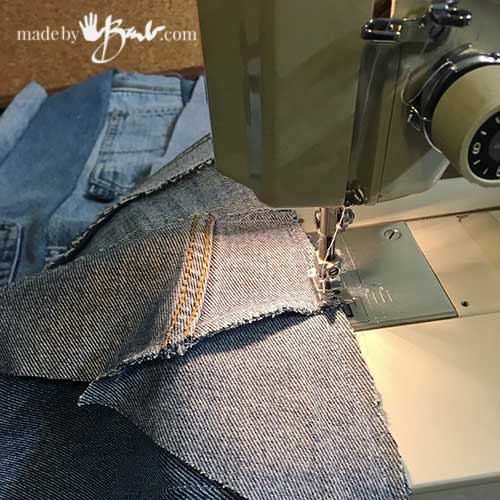
The Seams:
I do enjoy the strength my ‘vintage’ Kenmore machine(s) but I still try to avoid having multiple double seams come together. Try to stagger them so the machine does not have to climb 8 layers of denim.
An ample 1/4″ seam allowance would allow zig-zagging without the need of trimming first to finish the edge from fraying. I decided against top stitching since the heavy seems would be a problem as well. A good steam ironing is a must though. Using a medium light blue thread made it blend right in.
Keep the pattern pieces handy and check where you need to add more. It’s a rough sizing at first. Along the sleeves the pieces ran lengthwise but that’s not a rule either. When using a pocket section, sew it shut and cut away excess bulk from the back so it does not become too heavy.

For some fun I cut the back pockets in half for the long front sections. I took out the zippers of 2 pairs and made some slash pockets which would be backed afterward.
For a really aged look I even used some of the distressed sections. Not sure of the exact length yet so keep it longer until you can fit it.
After making the rough pieces, cut the final pattern shapes (fronts, sleeves, back) and test-assemble. Adjust any width of torso or chest with the seams and finalize. Sew a rectangle inside for the pocket finish.

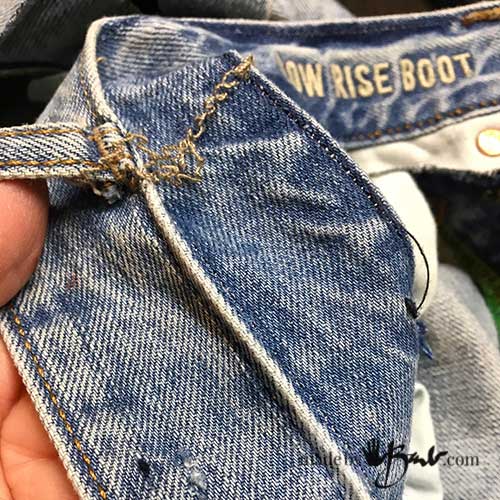
Easy Disassembling:
To finish the front and the yokes the character that the waistbands have is great! Soooo, pull the chain stitch and it will unravel as if by magic.
The Belt tabs will need a bit of snipping. Once detached give it a good pressing. Since it already has wear it is great for edging and the collar.

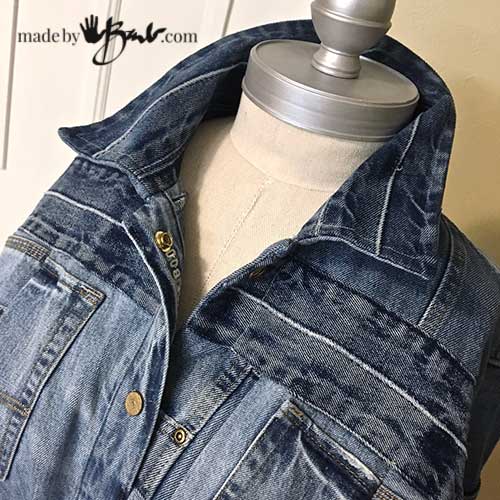
The Collar and Front closure:
The detached waistband works great to finish the front since it shows wear where it’s expected and holds the prior shape.

I would have loved to use hammer-in buttons but I was out of them (which is odd since I have enough buttons to last forever) so I went to the next best and quick thing; heavy duty hammer-in snaps. The embroidery was from the inside of the waistband.
The Bottom Edging:
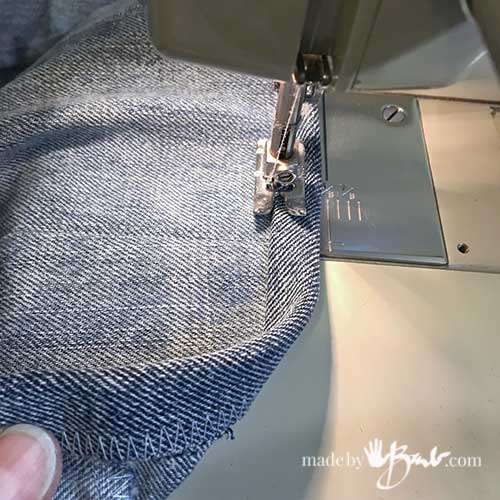
Typical Jean jackets have a waistband with side tabs. That would be quite some fussing and I wanted a straighter jacket so I opted for a simple finish.
Using a 1 1/4″ strip sewn and then folded over and blind stitched. It gives a nice small edge that does not take any attention from the rest.

Note the upside-down pieces and random pockets. This was so much fun to do! The sleeves were a simple stitched double fold-over. You could make cuffs with some leftover waistband.

Due to the amount of detail on the upper front I kept the lower more simple to draw the eye up so as not to become a focal point on the ‘belly’.
I love it! Jeans, yes, Jacket oh better yes! ‘Low rise boot’ haha

Maybe it’s my fun with my indigo vat or the ‘blue brain’ I have from all the shibori I’ve been obsessed with; not sure… but I love my jean jackets! They make me smile and feel down to earth – no pretentions there.
This looks so cool. We ran into a couple at Universal Studios and they were both wearing these types of jackets. They bought them in Korea. The waist band was used for the front edge on one and the belt loops moving up like that looked really cool. Searching for more is hiw I stumbled across this site. Most I’ve done is dyed some older jeans. I’ve done orange, wine, and purple. Jeans need to come in more colors.
Thanks! I have a quite the collection of ideas spinning in my head but want to be able to dedicate a bunch of time… Stay tuned; I’m quite excited!
This is awesome. Beautiful. Such a great idea. I now know what to do to upcycle my denim vests. I also have jackets that are too tight. This is a remedy for those. Thank u for sharing. 💙🙏🏽💜
Thanks! You can also add window pane sections to jean jackets There are endless possibilities with denim!