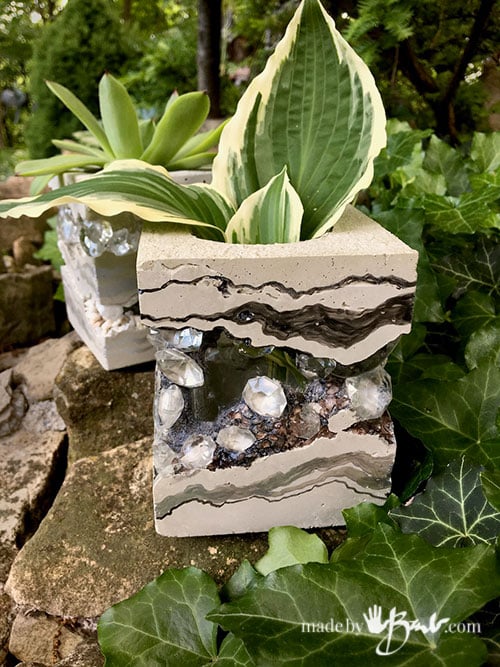
Unique Layered Concrete & Jewel Vases
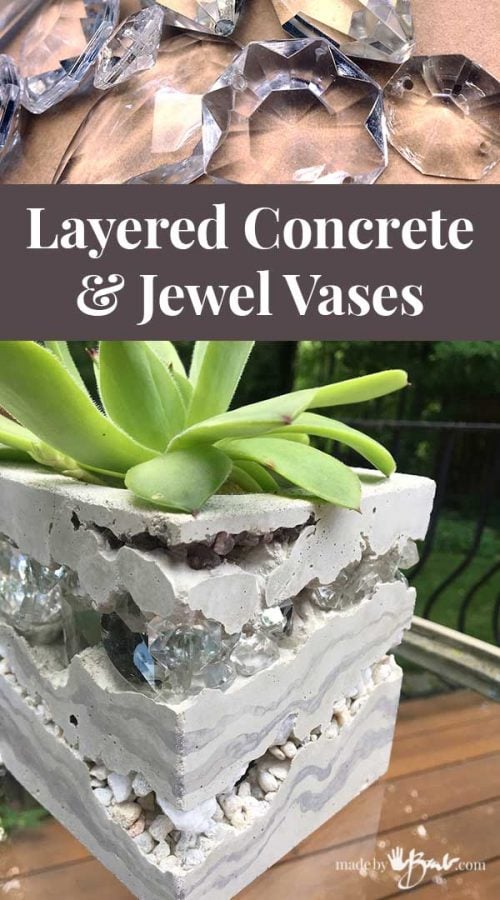
Nature constantly inspires me. Concrete is my own version of rock so why not combine it with some ‘bling’?! You saw see it first here; my Unique Layered Concrete & Jewel vases.
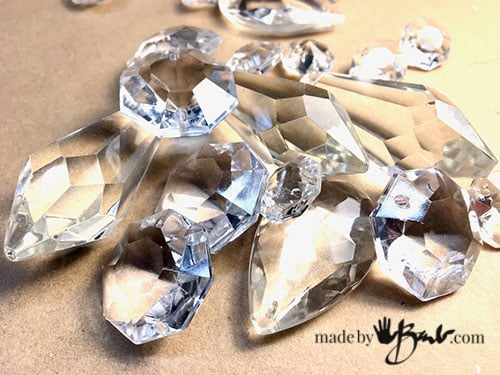
The Other Family Jewels:
I could never get myself to get rid of the chandelier crystals. I tend to appreciate how the elders had cherished them and feel better if they can be useful. Since they are glass (newer ones are plastic and don’t work) they clean well and the wires are easily clipped and pulled out.
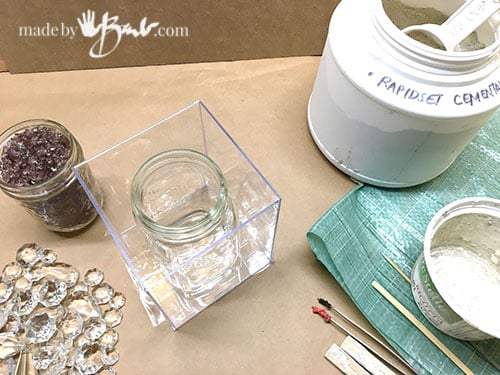
The Concrete Mold:
For these layered concrete vases or vessels they will need an inner container like a jar that stays in place since it will have some voids due to the layers. Plan the jar height with the outer shape mold.
To make it easier to visualize how the concrete will look I like the ‘box’ mold to be clear. Plexiglas can be expensive so I opted for some cheap ‘dollar-store’ frames as a source for the plastic. TIP; to cut the rectangles, use a straight edge and Xacto knife to keep scoring the cutting line. After multiple passes it will be able to snap at that line when forced over an edge like the table corner. No power tool needed!
To attach the pieces, (don’t forget the bottom), use some clear packing tape. The last side seam can have a fold over flap to make opening easier later on. I do not use a mold release as the concrete does not stick to plastic.
The Concrete Mix:
Yes, I am using my favourite mix again; Rapidset Cementall. It sets very quickly, so only mix small quantities at a time. I use a small sour cream container and let it sit for a minute to slightly stiffen. It should NOT be runny; something like a ‘Greek Yogurt’ consistency.
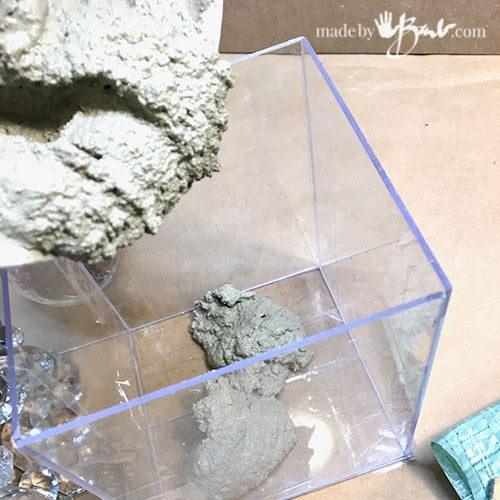
Plop some mix into the bottom of the form as this will be the base.

Press the jar lightly into the mix. Do not force it too far down to touch the bottom. I am trying to mimic the roughness of rock so there does not need to be any even shape or edges.

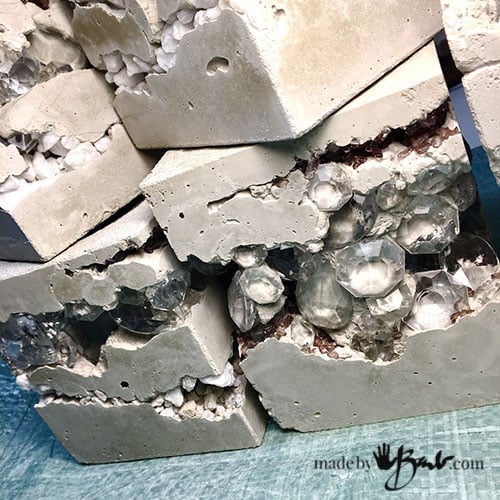
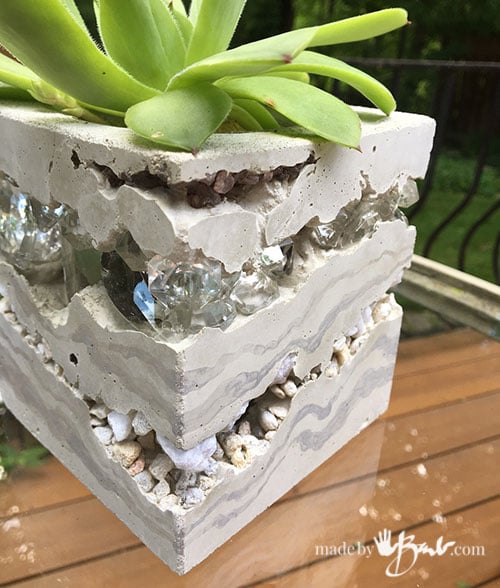
This method is really very rustic and unconventional. Layer some stone and ‘jewels’ between layers of concrete. How many and how thick is your choice.
It may get messy dropping the concrete. Help it along with some skewers or sticks but do not force it too much as then the layers will fill solid. Expect that some stones will adhere and some will just fall out. I love this unexpected way of designing…
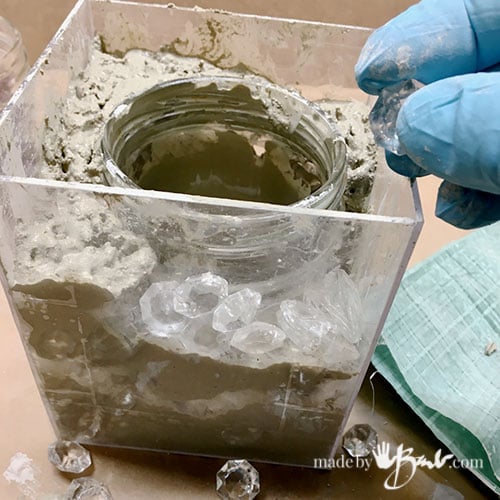
Place the jewels to be able to get most affect from them. That is why I like the transparent mold. Have as many or little layers as you like. Be creative, stone, rock, whatever combination you like. I would avoid plastic as they tend not to stick to concrete.
Finishing off:
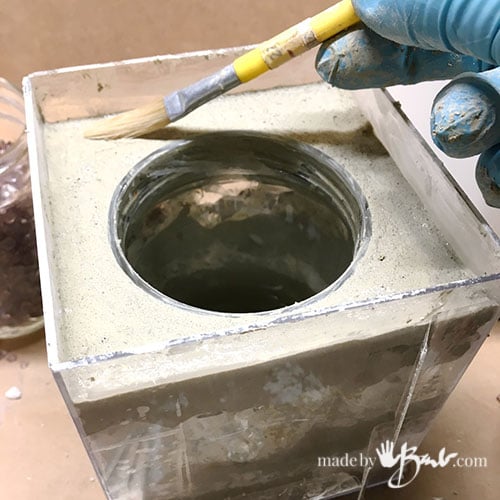
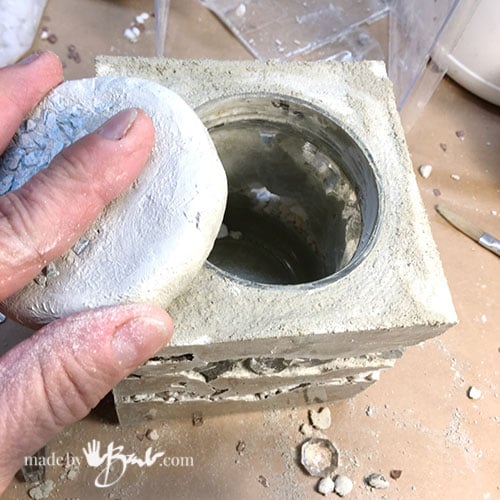
To mask the fact that it is a jar I like to keep the top flush and flat. If the surface is uneven you can smooth it with a brush.
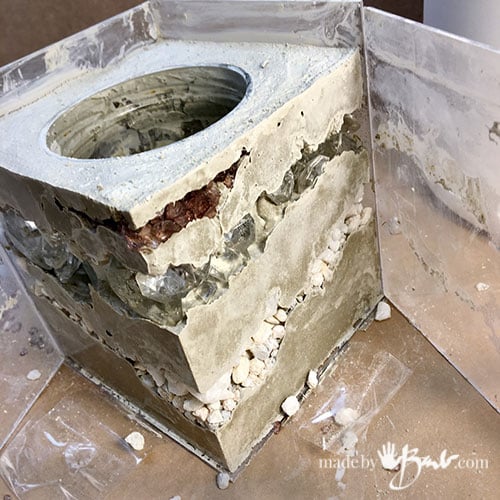
This concrete mix cures so fast. Usually it can be unmolded in an hour! When you open the tape edges many of the stones that did not get imbedded will fall out, that is normal and will give you the voids that happen in nature.
How wonderful!?!
If the edges feel to sharp, I like to use my home-made sanding blocks – yes, made from concrete! What do you think sandpaper is???
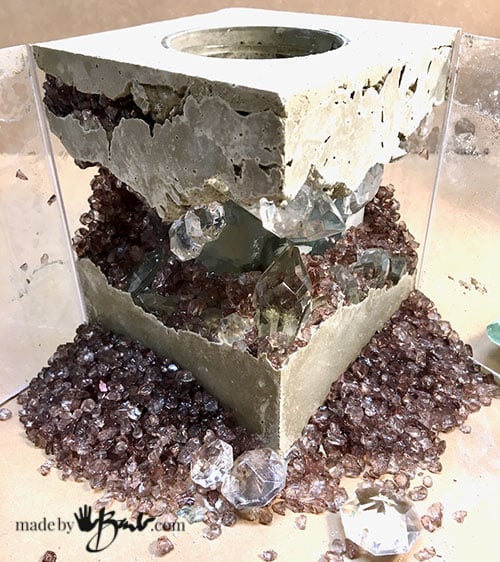
Design: Shape and texture!
I love the rough textures and the contrast of the smooth shape!

Yes, I have a new background that I made! ‘And my favourite Liquitex metallic paints and inks.

An added Dimension:
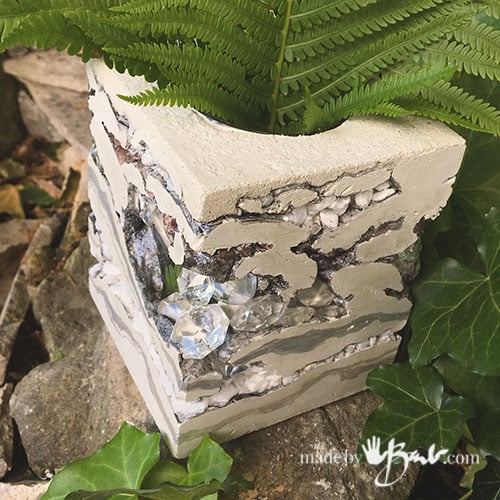
This is optional. Myself, I can hardly ‘leave-well-enough-alone’. I like a subtle (yes, subtle) added colour or depth.
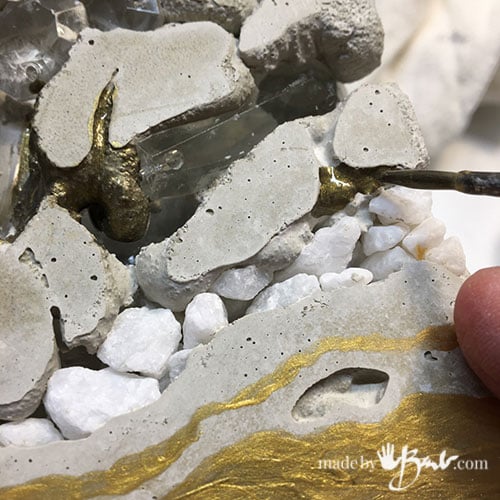
The rough areas can be darkened to mimic nature quite easily by letting the thin paint run into the crevices.
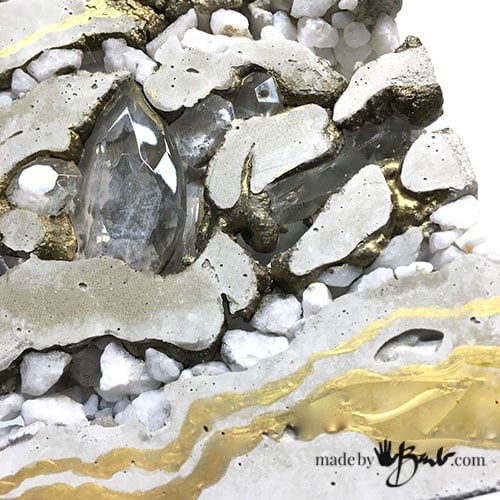
So much detail and the added surprise of diamonds – er, jewels.
Imagine these as centre pieces for a wedding… Cool! The sahpe can be waht ever you like as the geode eggs were quite similar. The taller the form will make for some added difficulty adding the layers but it’s all doable if you are stubborn.

Simple, modern and tactile. Do not leave them outside as any vessel that has freezing inside will break over a winter. Go and start to collect your jars or bottles. Think ‘inside the box’.
Maybe you will imbed your collection of see glass, or special rocks into these Layered Concrete & Jewel Vases. Even sea shells would work here. ‘You’ are making the future fossils…
Thanks for joining in my concrete addiction. But don’t stop here; there are many unique projects. Any questions about using different mixes? or some help with your first concrete project?
Good luck and stay safe!
Well, if those aren’t the most unique things I’ve seen in awhile! So pretty. Very cool.
Thanks! When ever I drive up the escarpment I marvel at the rock layers… Be open to any inspiration!
Hi did you create the mould yourself ?
Wow absolutely amazing so creative I love it 😊
In the post I mentioned that I used cheap plastic sheets from dollarstore picture frames. If you score with a knife they will often be able to be snapped along the edge. Then tape them together!
Hey, Barb. I am another HUGE fan of your site. I love this idea and would love to make large ones for my friend’s new home. Any thoughts on what I might use as molds? Also, do you think I could pour resin in w the inclusions?
Thank you so much for sharing your wonderful ideas with us all.
As I did mention in the post; I used plastic from cheap frames as it can be scored with a knife and usually snapped. Then you can tape them at the corners. If you find something it needs to taper to be able to remove concrete. Pouring resin could be a possibility but if there is any small space it will run off. I think that is problematic.
I like, I like, I like! If I put a plastic cup on the inside and then remove it, then could they be left outside for the winter?
Joni, my guess is yes, but if they are going to be left outside you might consider adding some of the reinforcing fibers to the concrete. For me I was thinking a much larger chunk that would just sit out on the patio as yard art! I love it!!
That’s a great idea too. I could also see it as a lamp base. I see many things in my minds eye. I think all the different directions of art I have made over the years are all colliding now!
Hi! How does the concrete not drip down into the lower level of rocks? Just the thickness of the concrete mix? Thanks!
The key is to let the mix somewhat thicken. Rapidset Cementall does cure fast so it’s pretty quick. Mix it to a less slump consistency. Try a small test to get used to this mix.
Just beautiful. Love it. Wish i could just buy it from you.
Ah yes, many do. The problem is shipping. I had shipped something and it was broken even when well packed. The post office says it needs to be able to withstand a drop onto a concrete floor from 5 feet. That’s quite tough considering how heavy concrete is. AND the prices make it questionable since I am in Canada… but you never know.
Love it. I always look forward to your cement projects. I anxiously wait for next creation. Thank you.
I can’t remember the last time I found a blog through Pinterest that was this well crafted (pun intended).
I enjoyed the writing, I learned a LOT, and I donated immediately.
Thanks, I am starting to think I am a concrete addict as well…
These are stunning! I love the organic appearance.
Yes, it’s a bit unexpected but that makes for some extra excitement when opening. It’s a little like playing the lottery… So much form!
What an inspiration, I have done some papercrete stuff but takes ages to dry. I live in New Zealand, I am definitely going to try this. Can you add me to your email list please. Kia Kaha (which is Maori for stay strong) Jenny
Thanks! I have done some paper crete as well, but will admit I like a 1-hour-concrete!!! You need to add your self to the list, (rules)🤷🏻♀️
Wow. I just discovered you yesterday when I went looking for how to make a concrete face for my garden. I am thrilled to have found all this valuable information you are sharing and I’ve only read four posts!! I think I’m going to try this project with my two younger girls for a 4h project this year. Thank you so much!!
Awesome! Be safe working with concrete (dust mask and gloves). Have fun. Do know this mix does set up pretty fast…
Barb, I love your projects! Have you ever considered starting a YouTube channel with your tutorials? You could add affiliate links for some of the products you use, make some advertising revenue. Just a thought. I know you have a donation button below- I’m going to throw $5 at you right now! Thank you for sharing your creativity with the world 🙂
I do have a youtube channel. I am hoping to branch out into making more! Not enough hours in the day!!! Thanks for the help!
I have been in love with these since the moment I saw them–I mean seriously in love! I bought agua and beautiful gree crushed glass, found a 10 x 51/2 x 5 1/2 acrylic vase for about $8.00 plus shipping ? coshttps://www.lofloristsupplies.com/12h-clear-acrylic-square-vase/#.XzvtcyRL_8g.email). Now I’m trying to find a small amount of the cement you suggest so I don’t have a 25 lb. bag to find storage for in my condo. I will persevere! Thank you for your ingenuity and beautiful creations we can all try our hand at. PS–will the concrete easily slip out of the container on its own??? Should I add a coating of oil or something like that to make it slip out easier?
I worry that it will not just slide out. When it is perfectly vertical it’s almost impossible. I made mine out of dollar store plastic from frames, and only taped it closed. Trust me, I ‘ve had a few bowls that would hardly budge! Good luck!
I wonder if Henry’s or Ardex feather finish might do the trick?
I have not tried that product but at a quick glance it looks quite amazing. I am not sure if it can be used that thick. I’d love to play around with it… Anything concrete-like sparks my interest.
This is so spectacular thank you for sharing. 💐❤️❤️
It seems I keep seeing more options of what I can use in concrete…