DIY “Bernie” Style Up-Cycled Mittens
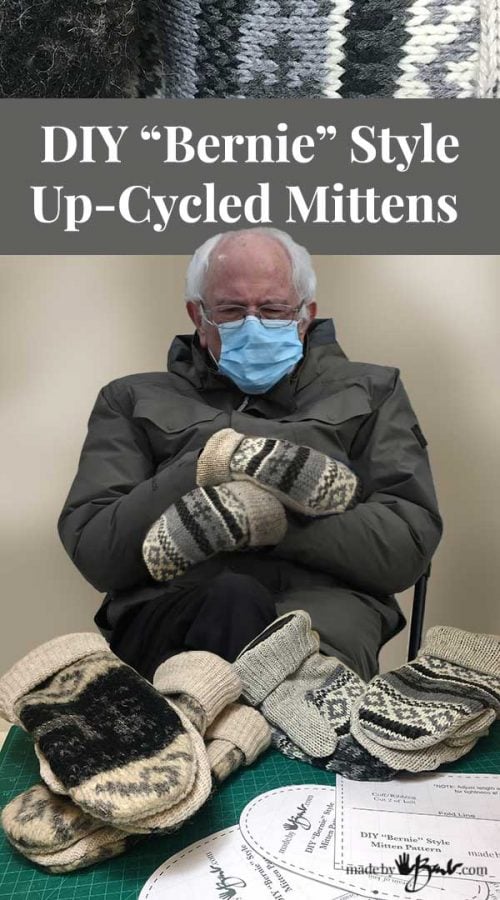
It’s no wonder Bernie loves his mittens! I have been making these mittens for friends and family for years so I understand. Here is the free and easy pattern that will make such warm and comfortable mittens out of old sweaters. Make your own DIY “Bernie” Style Up-Cycled Mittens!
The Sweaters
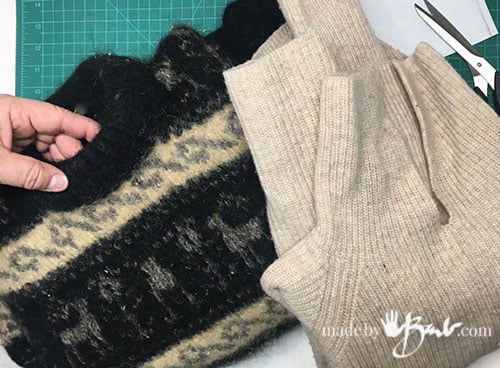
These mittens are made with sweaters of all types. Jen Ellis is one of many many mitten-makers who up-cycle. My other mitten pattern uses a different pattern as those mitts were mostly made from blankets or leather.
Yup, I hang onto stuff… Maybe a bit too much, but I always figure they will come in handy for something. These old sweaters had ‘mitten making’ in their future. If you want an even denser mitten you can ‘felt’ the sweater if it has some wool or other shrinkable natural hair in it, or maybe use that cashmere sweater that came to it’s demise in the washer! This black one was a hand-knit mohair sweater that had a couple rounds of washer-dryer and is now super thick and felted. It is the shock of temperature that make the fibres knot together (like dread locks!) You can usually get a few pairs of mittens out of one sweater. Mix and match, there’s no rules here
You will also need a lining of some type. A knit is better for it’s stretch and I prefer a thin micro-fleece. It is warm and does not make much bulk. You can up-cycle a fleece sheet or even some fleecy tights. Be resourceful as many can’t get into any shops.
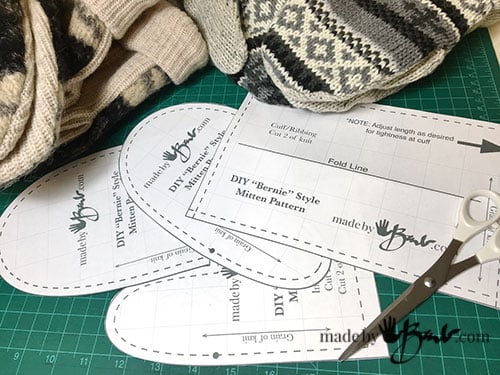
The Free Pattern:
I designed this pattern and it’s free to download here. When printing the pattern do not ‘fit to page’, instead print full size. (100%)
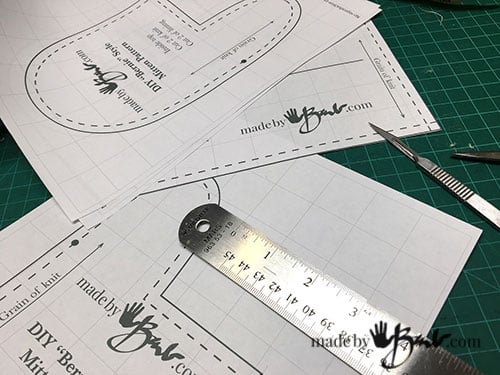
It try to offer options if you do not have a printer. You can draw 1″ squares on paper and then follow the image on the screen (download PDF) and replicate it according to where you see the lines intersect the squares. That is an old artist method to scale/draw images.
If you print, make sure the square are 1″ on the printed paper.
If you would rather watch the video:
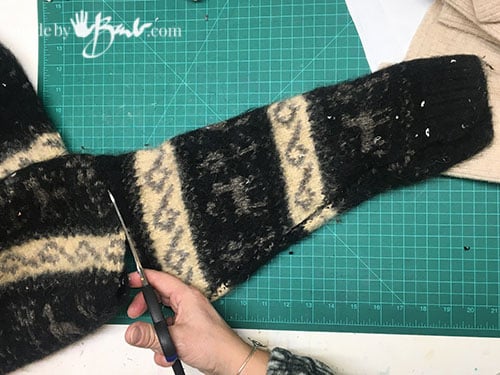
Cut It up!
Some sweater will be easier to work with if disassembled by opening the seams or you can just cut… Have a bit of plan and do not just centre on a large piece. Keep the pieces close so that you can fit more. HINT: if you cut on of the 2, place it face down to cut the next, that way you can keep track of the mirrored pairs of pieces and not end up with 2 right mitts!
Take note of the direction of the stretch as well as knit tends to stretch more across the width than the length. This pattern is a good first sewing project since all the seams are hidden in the end. The video is in progress.. stay tuned!
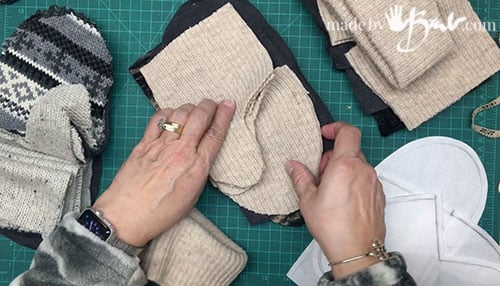
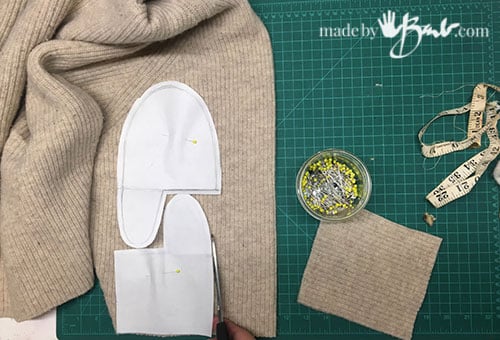
Cut the pieces needed, for the outside and also for the lining and keep them organized, then no confusion later on.

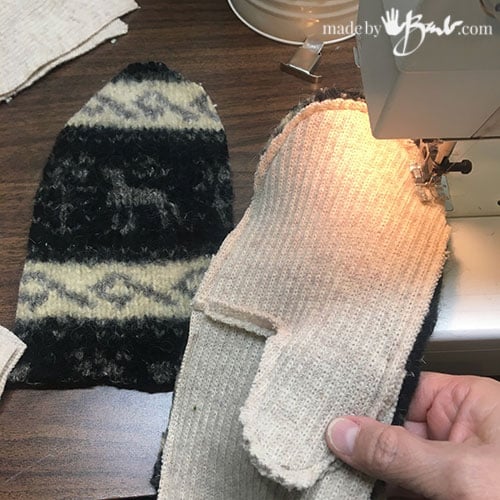
Sew the Lining:
I like to sew the lining first as that will give a good sense of the size. Each type of knit s different so some will end up smaller since they are thicker. It is easy to shorten the length after you try on the lining. Use a very short stitch to make sure you catch all the yarn quite well. Sew twice if in doubt.
Step #1: Sew the top to bottom of inside hand matching up the thumb. Stop the seam at that black dot.
Step #2 Sew the inside hand to back of hand with right sides together.
Repeat with the Outside of mitten and inside attached pair. A small clip at the dot will make the seam easier to sew over. Reinforce any of the stress points.
Turn the mitten right side out and put the lining on your hand to slide your hand into the mitten. Position the lining and line up the edges at the wrist.
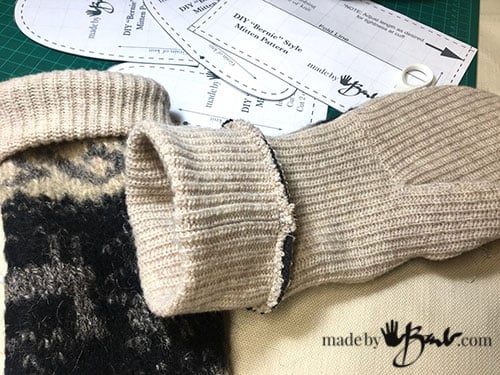
The cuff ribbing can be loose or tight depending on your desire. It is sewn when inserted into the opening. Flipping it to outside gives a clean finish at the opening.
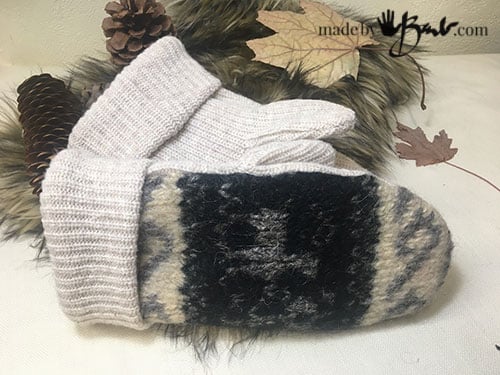
These tend to be roomy mittens as we saw with Bernie; he would have his fingers curled up into fists inside. Often commercial mittens are more snug and don’r allow this
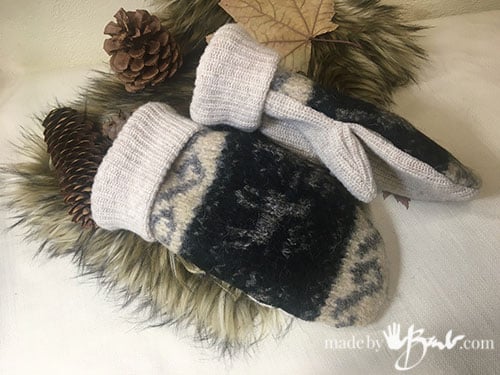
Make use of all the purging of your closets… mix patterns and colours for a boho look! Oh, by the way, you can use any leftovers and make a sweater quilt. Thrift stores often have sales as well to rid of the winter sweaters soon.

Comfy and soft. Make a keepsake from Grandpa’s cardigan or your accidentally shrunken wool sweater. Be unique and set a trend.

Soon, you too can sit warm and comfy too! Check my Etsy to see if I have any extras listed for sale… I am so thrilled that sewing and making is gaining some popularity! Woohoo!
Omg BARB!!! I love you. You’re so on point with these! Wonderful. I love all your creativity; thank you for sharing with us!
I don’t know how that idea popped into my head! Strange for a girl in Canada!
Barb I love EVERYTHING you make and post. I volunteer with an organization that walks alongside and supports our homeless population. One of our former street youth has begun volunteering with our outreach teams. Her first outing with them stirred up a great desire to make mitts for all the cold hands of street friends without mitts. She gathered sweaters and I’ve been guiding her making Bernie style mitts, using your wonderful pattern, for anyone needing some warmth and love. So thank you Barb, for all your wonderful patterns and sharing your creative passions. I think I’ve made all your mask patterns and keep a good supply in my car to give out to panhandlers (with change🤗).
You made my day! As much as I can do I am glad it goes from here to there!!! Awesome! Thanks for the note! It warms my heart❤️
This is great!! Thank you.
Laura
Barb,
I love your work and this one is hilarious, great job, keep up the good work.
Thanks! Bernie needs up-cycled slippers, and a sweater quilt… Funny he looks a bit like my concrete ghoul
I heard that Bernie’s mittens had an insulating “fleece” made from plastic milk jugs; any idea how that could be done? Sounds like a lot of work. Thanks for your pattern and sewing tips. Worked in a mission house last summer and they were sending all their gorgeous sweaters to the trash collector. They would have been worth boxing up for a few months. They were already sweaters, all new and very expensive – stylish but not as stylish as Bernie Mitts. I was there as a volunteer and too emmbarassed to ask for one. How silly of me. Anyway. that would be a sure source for mitten-making supplies. Also heard about a group of ladies who are “knitting” plastic shopping bags into soft, cushiony mats for homeless people to sleep on. Light weight to transport, maybe a little water resistant? Softer than sleeping on a rock. God help us all. When I was a kid (70 some years ago}, I used to stuff my shoes and boots with newspaper and straw. Hadn’t thought, seriously, about insulating materials for years – except for the wonderful plush mop I bought at a yard sale just because it was so soft and dense and a pretty color – thought it might make a great coat collar (if nobody realized I was wearing a dust mop) – or an old-fashioned muff. Haven’t seen a muff in years. Too many women carrying inconveniently heavy and bulky things. I guess the muff morphed into a back pack. There is a whole world of Maker Stuff out there. Call me a pack rat. I just hate to see good things go to waste. Somebody made them out of stuff that doesn’t have to be land-filled and made again.
Oh I agree with you! My mom came from a war-torn country and she could tell you stories about saving stuff to be reused. Every button and zipper came off clothes before they left us or became something else. And yes, I have added fur from her stash many times to a jacket etc. (there’s a few shearling coats calling my name to become slippers and mittens) I tend to keep much as well; right now I do not need to go out to shop to make my designs – bonus! Yes, polar fleece is often made from water bottles I do not know the origin since labels often do not state it. Once you look at reusing there’s no limit! I’ve even seen a dress made by knitting the VHS/cassette tapes as yarn! Kudos to anyone who helps. Those sweaters would have made a gorgeous quilt
Hilarious! And useful. You, Barb, are a treasure.
You are too kind! I ‘blame’ it on my mom. She was the most resourceful and strong woman who ever lived! I see my daughter also becoming a strong woman, that makes it all worth it.
Thank you so much! My grandaughter and I are going to make these!!!!!
Merci pour tout ce que vous partager avec tant de passion.
Bonne journée
Could I use this pattern for fleece mittens?
I’m pretty sure you could. always like to do a bit of a test, as not all fabric has the same thickness, stretch, or fray. Always some decisions to make…
Hello! Thanks for all your sharing. Unfortunately, the pattern link isn’t working to download. Thoughts? Fixes?
I’ve tested and it works. Perhaps try a different device/browser. ‘Many downloads today…
I love these mittens but cannot get the pattern to open.
Perhaps you need a PDF reader installed. Unless you are having a problem downloading… Try a different device/browser.