Memorial Relief Sculpture of My Pup

There’s something about having a 3-dimensional sculpture… especially one that has a special place in your heart. Making this Memorial Relief Sculpture of My Pup was so special for me.

Since we spend so much time working digitally these days I miss the tactility of dimension! I want to touch texture and feel form… I also like the challenge of translating what I would usually draw on a flat surface to sculpting 3D with tools! It really isn’t that scary.
It also gives me reason to get some new sculpting tools.

My dearest Pip left me too soon. He was an 11 year old Havanese ‘pup’. Yes, he always looked like a puppy since I gave him bad haircuts that looked like a puppy cut. They call this Havanese breed ‘velcro dogs’ since they always need to be attached to their ‘person’ and that was so true of Pip. He was so attached I feel like I have lost a limb.
Find a Good Picture:
To make a relief sculpture I did not want to use a typical front view, but rather a 3/4 view for some variety in depth. It’s acceptable to work from photos as they are your own images. If the picture has lost definition in the dark areas like the eyes use some photo editing software to bring out some of the eyes ‘lights’, as much life comes from the eyes.
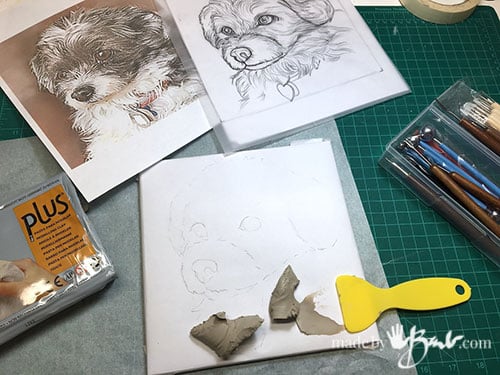
I decided to use a parchment paper as a base and lightly transferred the image onto it. I am using a waterbase air-dry clay. I am adding flat areas of clay to buildup depth slowly. Smooth it on with a spatula or similar. The concept is to minimize the true amount of relief into a more flat version of the whole pup..
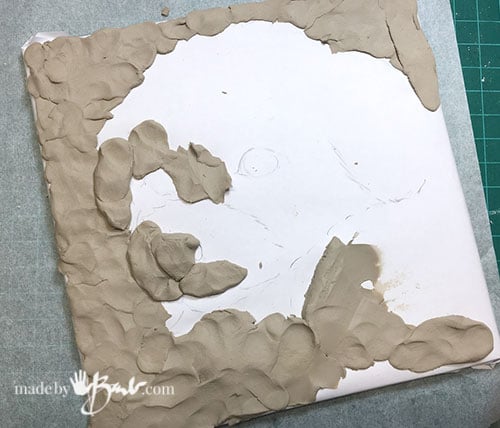
Don’t be too afraid of this form of ‘drawing’ as it is not permanent. You can add and then you can take away again. It’s therapeutic since there isn’t that expectation of perfection right away. Add and take away, repeat… until it looks good. I enjoy it for that reason, almost like child’s play.
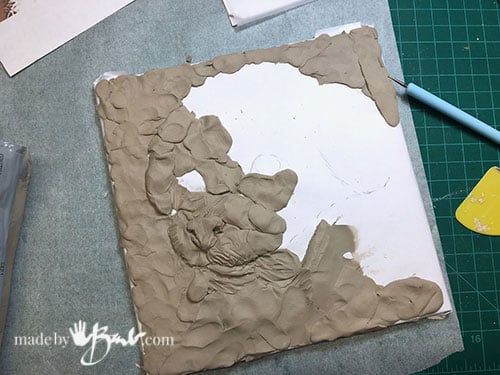
Keep building up the depth of areas in relation to each other. The textures do not need to be exact yet since this is just the rough building. I often just use fingers for this stage of the blocking out.

It does help to have a lamp that is directed from the side as it gives more shadow to show form than a vertical lamp. There is no colour at this point so depth is the only indicator of value and outline.

Adding Texture:
After you are happy with the amount of relief you can then start to add the texture. I could not help but try to get the character of his fur. The rubber ended tools as well as the ‘V’ point tools made it quite easy. I use a ceramic tile as a base since it is flat and non-porous.
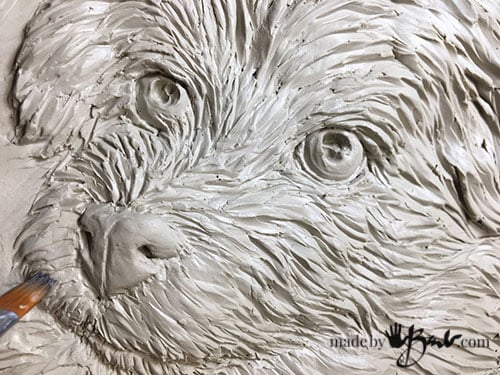
If the clay starts to dry too much it can be brushed with a dampened brush. I fondly remembered working with clay many years ago and toyed with the idea of getting a kiln and doing more clay work. (But I can’t really start another whole collection of art appliances)
The eyes are also a challenge since they hold so much of the character of the pup. After studying some historic sculptures I see that the ‘darks’ in the yes are actually quite deep voids so they will show darkness and the highlights are raised to catch light. It makes sense!

Once I was happy with the finished piece…
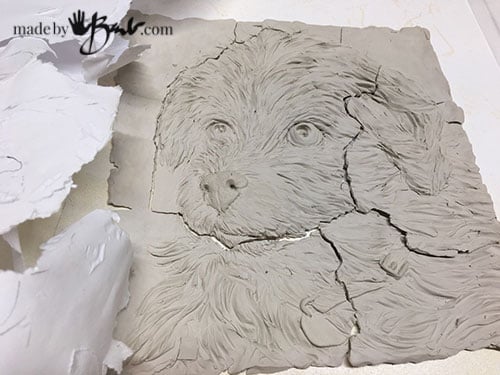
Oh No!
Well, you thought things like this do not happen to me… Well, yes they do! I came back to see the air dried clay had pulled apart since it shrank and was on a surface that did not shrink; my mistake. I was a bit surprised though as it could have just slid off the paper. I did not want to spend the time trying to patch it together…
It art, I have learnt it’s often a learning curve. Trust me, I have had much that I had to redo and that often taught me so much.

Back to the drawing board!
Again, starting with the image I am using Plastercine clay this time. I know it does not harden but I have a cool next step planned that will make a permanent final piece.
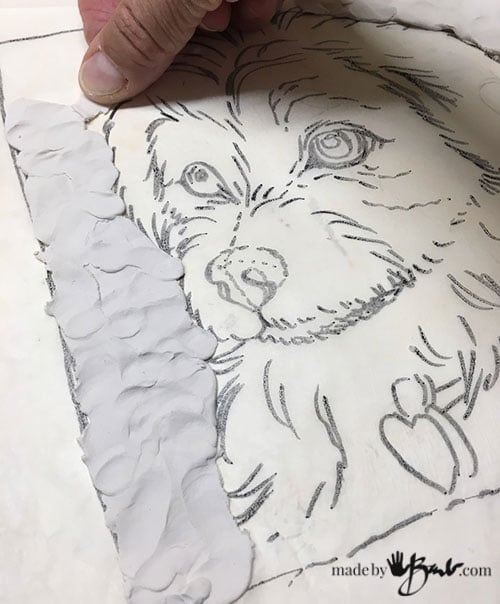
It is an oil base clay that does not dry out and does actually work quite nicely without any worry of drying out, and it is very inexpensive. It goes together faster this time since I have had practice…

The warmth of my hands softens the clay even more so it adds easier.

The rubber tip tools are fabulous since they are like little fingers and can smooth easily. The ball tip tools also help especially when giving depth to the eyes. Tip: take a break and come back to see it in ‘fresh eyes’.

I enjoy this type of work since it is quite compact, and uses only one media – the clay. No paint mixing and mess. It also makes the brain rethink how we see the form. I plan on using one of these outside as a memorial plaque cast in concrete.
I really does warm my heart to work on this in his tribute… as if I’m looking into his eyes, my sweet sweet Pip.

Do check back soon to see how I make this permanent in concrete. Don’t worry it’s quite easy.
Go give your pet a kiss…
I love everything you do. You’re so inspiring! My heart goes out to you and your precious pup. They come into our lives and we’re never the same. Then, the last best thing we do for our best friend is the hardest. Another puppy won’t fill any holes or take your pain away, but they sure give you a place for all your love. They are good medicine. 🙂
I always enjoy exploring your projects, and today is no exception! Your beautiful fabric birds pulled me in today, but my heart jumped at the sight of your sweet puppy! Our 13 year old Husky passed 3 years ago, and we still tear up every time we see his picture, or even talk about him. Our animals are family, and this is a wonderful way to honor them! Ironically, I am garden planning, and have wanted a way to add a reminder of our sweet boy in a place he loved to be so much–I can’t wait to create this project and showcase it in his favorite garden spot.
Oh I know that all too well! I cry so many times when I come across a memory. I do not think people understand; when you have a velcro-dog like my Havanese – they are attached ALL the time! Losing them is like like losing an arm. 😢 I hope your husky sculpture will help!