Beautiful Concrete Bubble Orbs
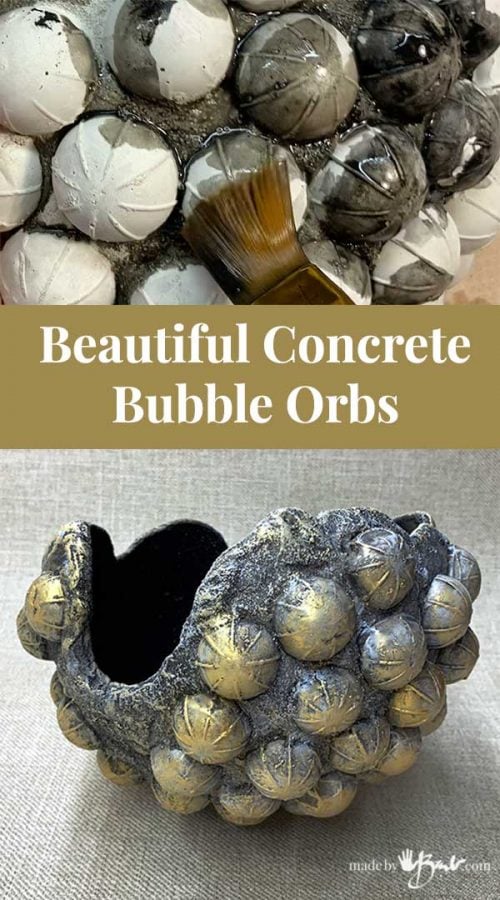
Before you start laughing, let me say I have had this idea mulling in my brain for a while now! As a concrete crafter I always assess the feasibility of using ANYTHING as a mold… Wierd may also mean unique; you won’t believe how these Concrete Bubble Orbs are made!

Come on, eat chocolate:
Did you recognize the shapes?! Maybe you do not eat enough chocolate to know – Toffifee! ‘Or maybe it’s Toffifay if you are in the United States. Ok, I didn’t eat them all at once but I have been saving the containers for a while. Toffifee is a yummy small bite caramel encased chocolate with a hazelnut in the middle, and it is a ‘half-sphere’! I love my orbs, balls and spheres so I knew I needed to make something with them.

The packaging is flexible and smooth and does pop back into shape pretty easily after using. Make sure to use a fine, fast setting concrete mix though – RapidSet Cementall is perfect for this! The concrete is mixed a bit on the more fluid side and poured easily into the forms without a mold release. Since the Toffifee packaging is shiny and smooth plastic it does not stick to the concrete.
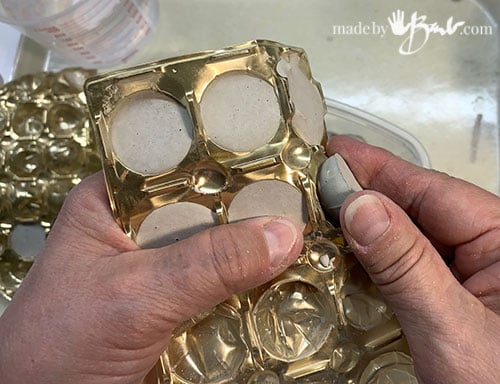
Pop, pop, pop, out come the cute little concrete bubbles, pretty perfectly formed… and many of them!
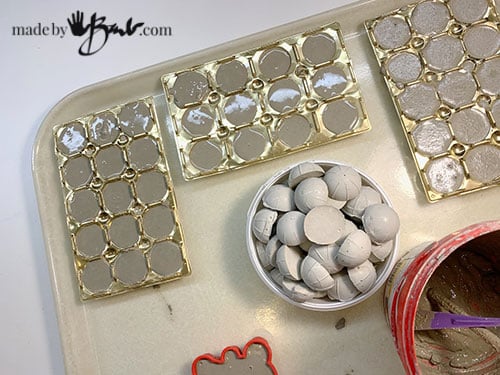
Make a few batches as you just never know how many you will need! You can not have too many…
Find a Ball:
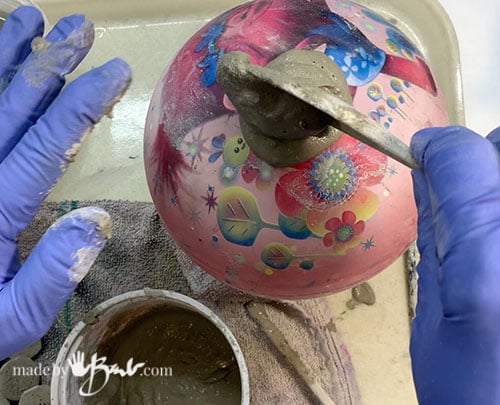
I prefer to use cheap play balls that are inflatable rather than balloons (more round) since they do not burst unexpectedly. I had to go find the ball that my grandson had decided was his soccer ball… Set it on a wide bowl to steady it.
Again the Rapidset Cementall is great for this (see alternate mixes here). The key to not having a fail is making sure the consistency is just right… like when you ice a cake – too runny icing and it will slide down.
Soak your cured ‘bubbles’ in water.
For this concrete mix I start with a small amount of water and then add the dry mix and let it absorb. For some tips see here. Surprisingly it will absorb quite an amount of the dry mix. When it is not sinking down any more I will stir it to see how much it flows or slumps. It sets really quickly especially if warm so mix only a bit at a time.
Giving it a 30 second rest will also have it thicken a bit. Plop some on the top of the ball and see if it stays… If, then start to set your wet bubbles (blott them before adding) into the wet concrete. Simple as that….
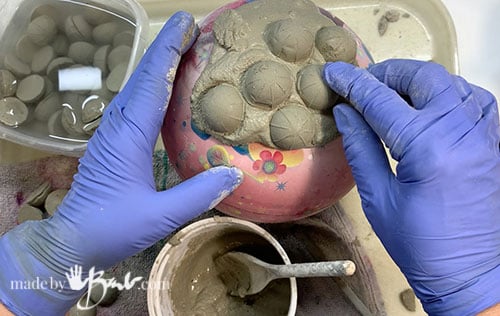
It is a bit of a balancing act. as you work further outward reposition the ball to keep balanced. Make sure to keep access to the valve for deflation later on.
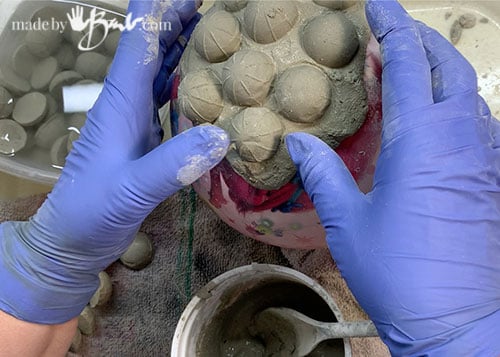
When adding another section having a wet edge will make sure they bond. Keeping a brush with water handy is helpful.
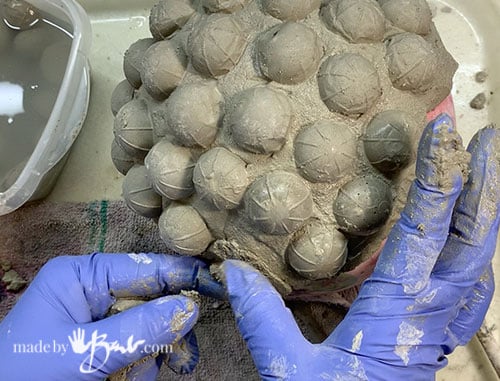
It is up to your design; space the bubbles or keep closely covered, whatever you wish. You may almost cover completely if you let the bottom half cure enough to turn over. My intention was to make a vessel of some type – like a bowl or planter.

Super smooth perfection is more difficult than some texture so I embrace detail texture.
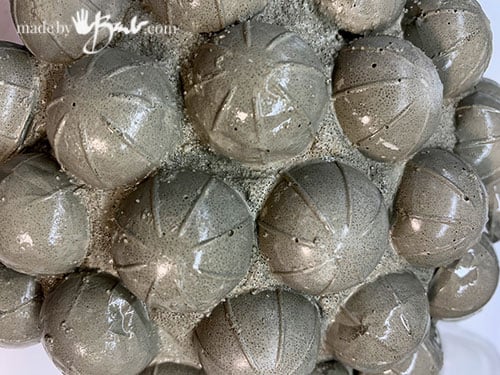
These shapes remind me of space and satellites. I have yet to come up with a great name?
These lil’ bubbles would also be interesting as a base for a lamp! Can you picture it?!
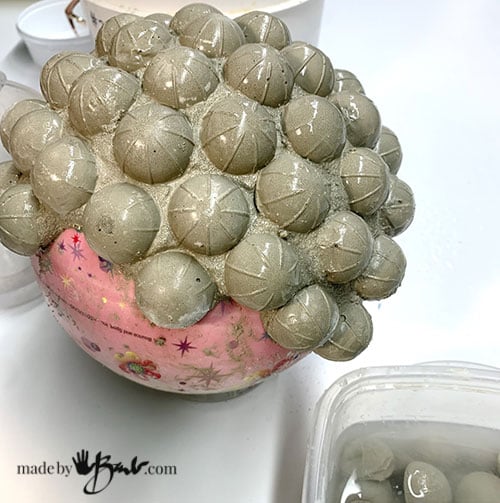
‘Fun stuff and also quite simple since the little bubbles are doing most of the ‘design work’. During the curing (not drying) it does help to mist it with water to give the concrete strength.

Simple uncoloured concrete has it’s charm too. If you plan on using this method for a larger garden orb you may want to reinforce with some drywall mesh imbedded into the first layers like my other orbs. The design of the edges is your preference, and as you know I am usually a bit organic in my choices.
Softening & rounding the edge comes easily with a brush/water. I rather finish it when wet with a brush than sanding cured concrete.
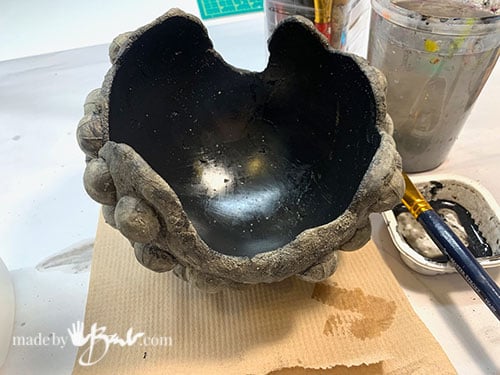
Adding Colour Accent:
To allow flexibility I keep a neutral palette; blacks, grey and some metallics. I imagine a moss garden in it or a catch-all at the front hall table… whatever you desire.
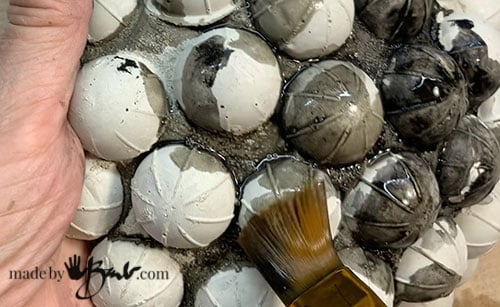
Thinned acrylic paint that seeps into the crevices accents the textures.

Cover completely with this thin coat. On exterior concrete thin coats tend to stay put. The concrete is allowed to breathe through it and it does not peel. Thick coats tend to get pushed off by the moisture escaping the porous concrete.
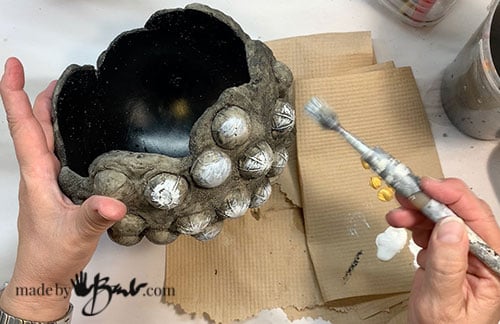
To make the bubbles ‘pop’ (stand out) some dry-brushing with white lightens them subtly.

Only a small amount on the brush is best when dry brushing. I was in a bit of a hurry as I just finished this the day before my second knee replacement. ( I need to keep up for my readers!)
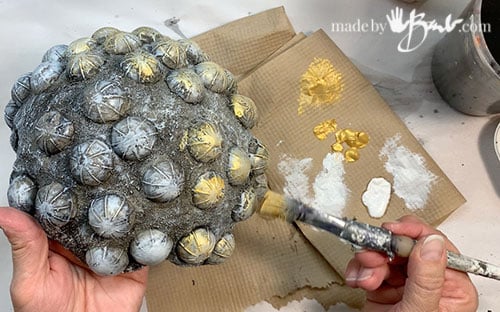
Metallic seems to always be a great accent as it adds shine to the bubble Orbs and also some life to the grey. Bright gold dry-brushed onto these ‘silly barnacles’…

I love my old brushes, by-the-way! They may be worn out, taped together and have quite the history but I can’t seem to say goodbye to them!

One Orb – many looks!
Asymmetrical edge design means it looks different from each direction! The ‘nubblies’ also allow it to sit at different angles; perfect for planting vessels.

‘Barb’s Barnacles’ on a concrete Orb! Silly but Aesthetic design! What do you think?! Will it make you eat some chocolate?!

Thanks for joining me…

On my crazy concrete escapade! Best thing – a reason to eat chocolate! Enjoy & Let me know how your bubble orbs turn out! Ouch… I hope this darn knee does heal fast! It really slows me down! 🦿
Happy Making!
Hi Barb, OMG! your designs and videos are absolutely inspirational. Luv luv luv the bauble container….just beautiful! Cheers Kath from Australia
If someone would have told me that someday I’d be sharing so far and wide I would have laughed! I’ve got many orbs! Happy Making!