DIY Surface Design – Tips & Tricks

Did you know there’s such a thing as ‘Surface Design’? I’ll be honest; I knew designs existed but not that there was a name for all these great types of artwork and images. The best thing is that anyone can be great at it… Come, I’ll share some of my DIY Surface Design Tips and tricks.

It’s Everywhere!
Surface design is the creative image-work that you see on practically everything. It my case it is mostly what use to enhance fabric and therefore clothing. In the past most surface designs were very specific and predictable, often crisp and clean repeat patterns.
I would often look through the fabric shops trying to find something that appealed to me and even though there were miles & miles of fabric designs I was ‘bored’ with them. I think that is why I just started to just create my own.

Creating my own designs also let me revamp or up-cycle fabrics (or clothing) I already have. The other part – It’s really really fun!
Once you get over your inhibitions of ‘drawing or painting’ you’ll agree. I remember when I was first in art college and needed to come up with design ideas for projects I’d be so stressed. I was just trying too hard. A design does not need to be so perfect; any shape/line can be design.
I’ve heard that expression ‘I’m not artistic – I can only draw stick people’ way too many times, even from my students at the college level. I believe everyone can be creative in some way if you allow yourself the freedom, and forget the criticism.
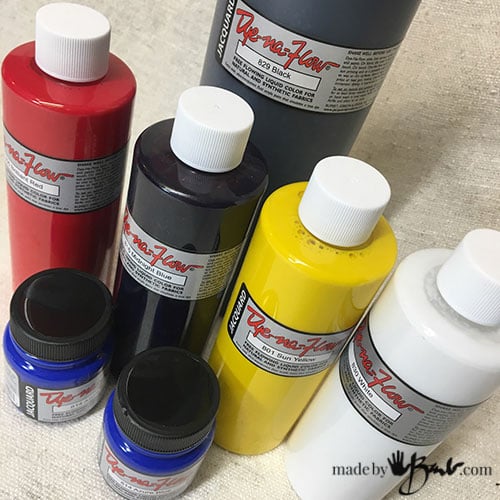
My Colour & Media
Since discovering the Dye-Na-Flow dye/paint it has really opened up so many possibilities. Yes, it’s true any media can make Surface Design depending on the use, but this is so close to the properties of painting I love and applies to fabric.

It is very fluid so that makes for great expressionistic designs! Have you noticed the type art that is trending lately?! As an illustrator who made much effort to paint realistically I find it quite comical. I am actually finding it is a bit refreshing, liberal and opens the world for everyone to create art.
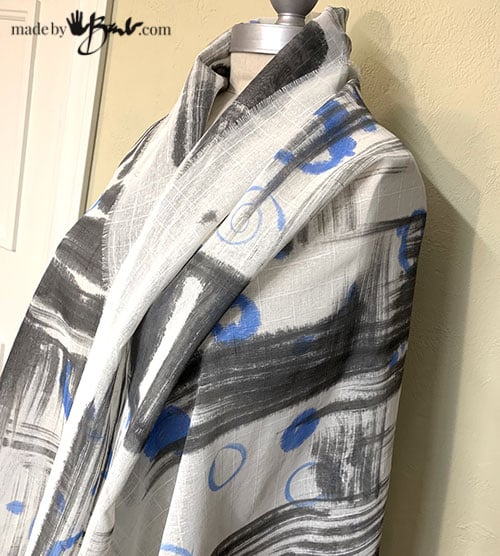
Notice the way the paint has bled on this cotton? Nope, I’m not going to fret it as a mistake but rather embrace it as a great design element – texture & line & playing up that theme with paint splashes.
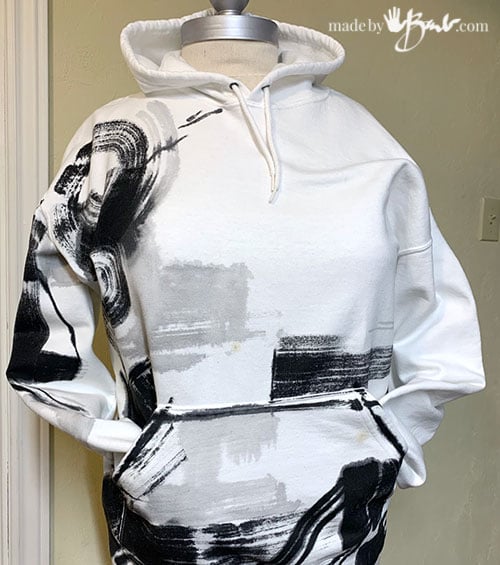
My graphic hoodie; large swoops of brush work that took seconds to make! Larger marks make more impact than all-over designs. Would you wear it?! If there was some designer name attached or runway model you’d probably see it in a different light!

So Many Colour choices!
Just because you have ALL the colours does not mean that you actually NEED to use them. I have a funny analogy I would tell students; if you throw on all colours it sorta like pizza; you can’t tell anything from each other.
Tip: Choose a simple palette of colours and the shapes. They can vary in size, texture and space; common elements of design.

This was a plain teal linen shirt. There wasn’t that much planning, first the blues and then the free-hand circles. Tip; add some contrast so that there is something for the eye to follow. Doodle on a scratchpad and soon you’ll come up with some shapes that seem to speak to you.

Truth here; I kept dripping some dots so they then became intentional as well! ‘Just squares, here and there…
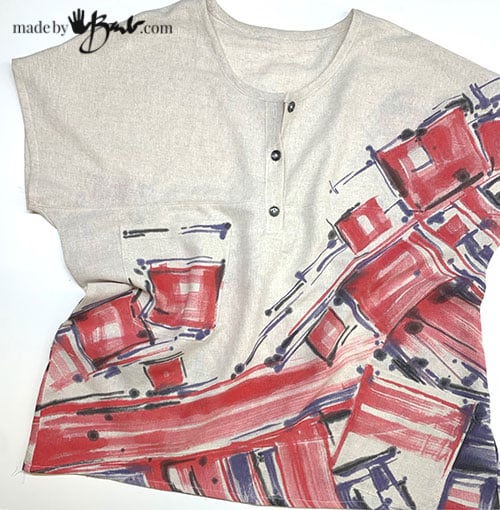
Loose all-in-one sleeve linen-blend top using only a couple of colours.
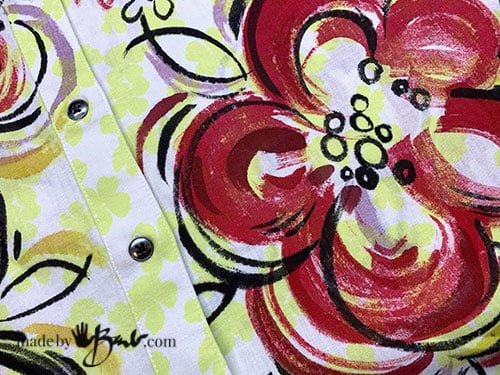
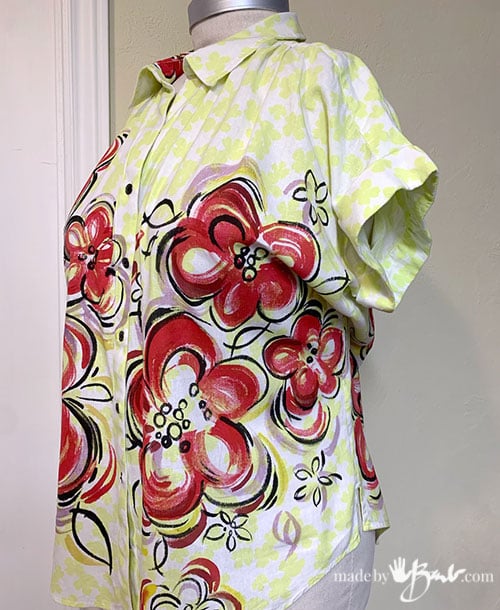
Perfection is overrated
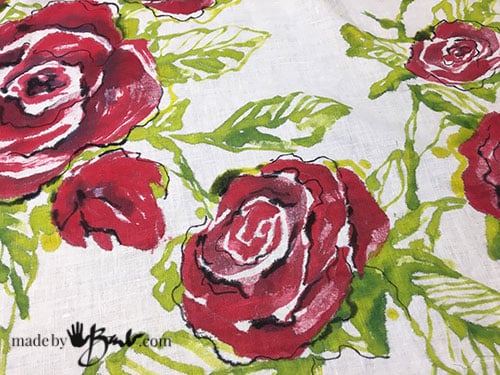
This is a suggestive and graphic representation using only a few tones of a colour for the easy roses. When you look at a reference picture; squint, you will see less detail and more of the shapes. That is a trick I use a million times. It allows you to see where the dark values/colours are and the lighter ones. It’s like those colours that all blend from a distance to form one. ‘Mistakes’ can’t be noted if you keep it loose and less defined.
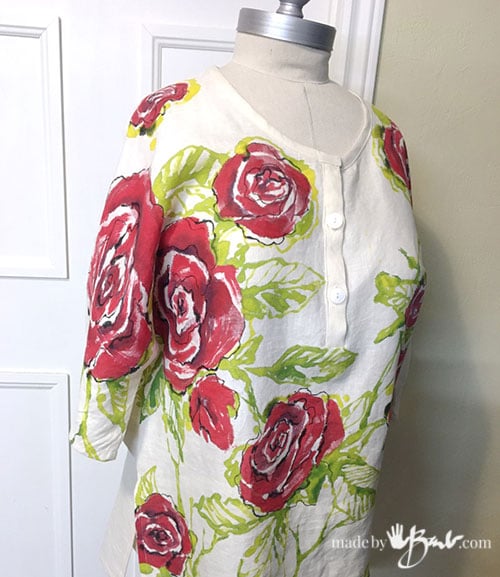
Yes, I agree; ‘go big or go home’, but you can choose – no rules.

Pattern?!
Inspiration came from all the geodes I’ve been making and it really made sure no mistakes could be made. Just make sure the colours also help tell the same story.
Almost EVERY ‘surface design’ fabric used to be a pattern that repeated exactly! Great effort was made to replicate patterns before technology made it easy Now, happily, I’m seeing that change.
I do hope to share some designs on Spoonflower in the future as it will then also allow sharing to others and will open the possibility of ANYTHING to be printed on fabrics and more! How amazing technology that is!

Polyester kimono that did not bleed and has held amazingly through washing!
Whimsy:
The more you want perfection, the more you stress… That seems to be true in all parts of life. Maybe after all the years of fine commission work I am done with that too! Bring on the fun whimsical flowers, no planning just fun brushwork on an up-cycled blouse.
Playing with a brush and you’e got the most unique wardrobe. I’m not a plain shirt type of person, especially since everything I do can possibly cause stains!
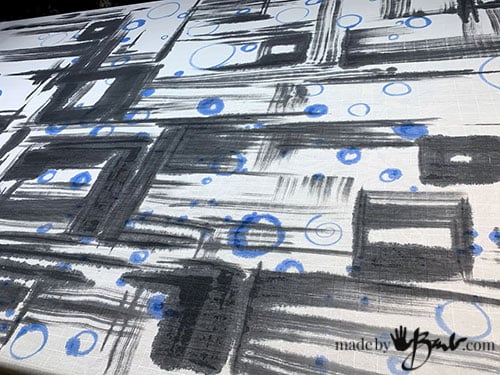
When I first test how the fabric accepts the Dye-Na-Flow I decide the style of design according. The bloated lines in varying thickness, a lesson in texture, line accent the contrast blue circles. Space is also an element of design as the empty spaces are just as important as the filled ones.
Soon to be maxi-dress?
Maybe no Painting?
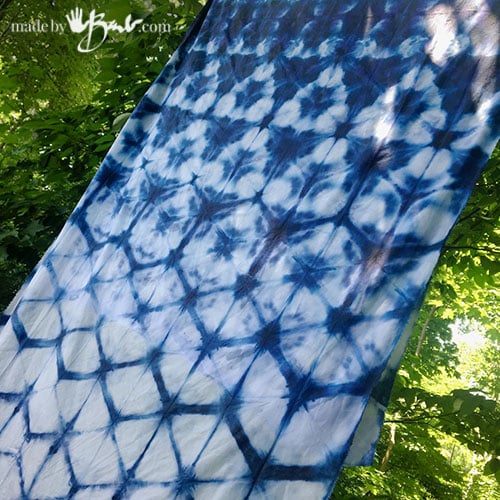
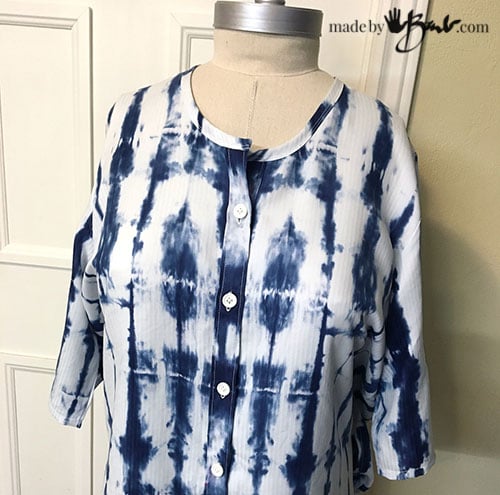
Perhaps you do not want to pick up a brush… then there’s design by folding; Shibori. Depending on the folds & colours this design process has endless options. In this case the Shibori Ice Dyeing method was combined with the folding.
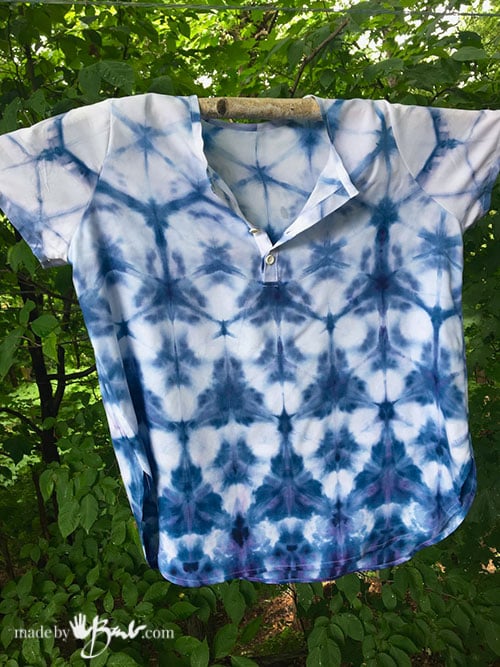
A soft Bamboo sheet is now a flowly super unique top.
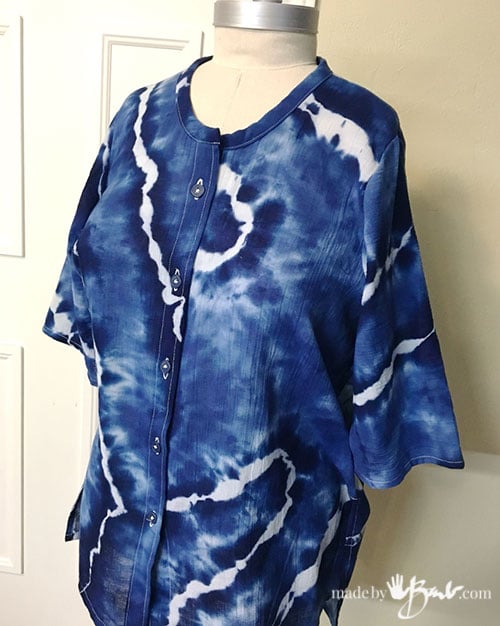
Tie one on!
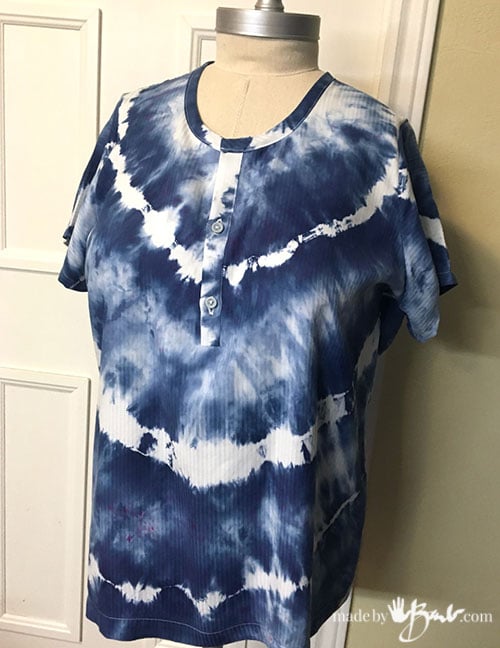
I’m not quite a conventional ‘groovy’ tie-dyer but do love the designs it can bring just by accident. Some Fibre reactive dye and some tying make that shirt something completely new!
Rectangular folds yield a different pattern; almost like a loose plaid print. I see ‘tie dye’ everywhere and I think variegated prints are here to stay!
Tip; Simple colour
As soon as you add colours, they mix and before you know it, it looks too complicated. That is one of he most important tips in my art brain, especially if you are going to wear it.

Did you know that colour can be removed from fabrics as well? A non-bleach method to take the black t-shirt to the next level! The Fibre Reactive Dye (Razzle Dazzle) actually spilts to create the unique colours

Swirl & swirl your designs with Fibre reactive dyes and a trick – shaving cream! It was so much fun and can be used for many objects like shoes and hats as well!
One for the Grandkids!
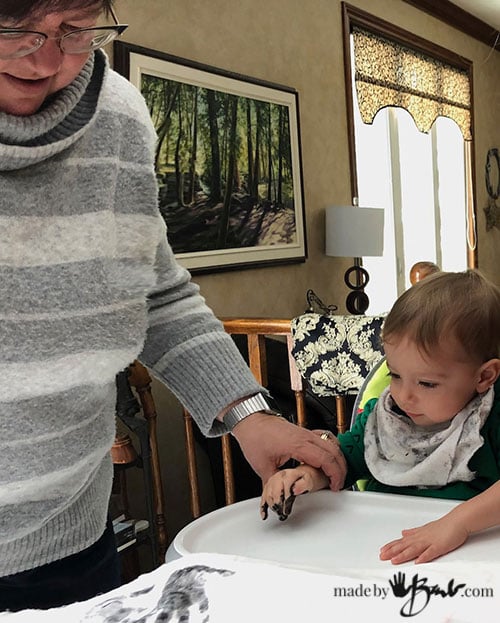
An over excited little one gets to have his hand painted with some acrylic paint mixed with a textile medium. Just make sure it gets printed on the fabric (old bed sheet)! He loved doing it and he was only 2. This was an afternoon of fun! Planning is key; I’m brave to not wear an apron.

It will be a reminder of how small his hands were, even the chubby little details! To blend with the rustic feel I free-handed some hearts and some splashes of paint. It’s a perfect fabric for an apron! Go grab some little kids…
Phew, that was a lot of ‘design’ to digest! I hope I’ve inspired you to throw some paint, dye or colour around to enhance your life. Start small or start big – I hope it makes you smile!
This is such an inspiring post! Thank you for sharing.
Thanks kindly! You are very welcome!
I love this post! The brush marks on the fabric look fabulous! The rose one was awesome! Thanks for the inspiration .
Oh, I’m glad to inspire; it’s the rewards of being a teacher!
Barb, I have spent years working with dyes, especially ice dying, making designs. However, recently I noticed that I am really drawn to the more simple designs like these. I love the boxes and lines. They are so beautiful. I’d wear any of those! I have several shirts and a jacket that may be seeing paint soon! Thanks so much for the inspiration.
I completely understand!!! Since I ran out of wall space for my paintings, all light garments now have a new possibility! I’ve got no shortage of ideas… Enjoy!
As usual Barb, you have amazing projects. Thank you for all the stimulation. Barb