How to Design a Simple Art Quilt

Can you see it? I designed a quaint lake-view appliqué style quilt made of fabric scraps, fused onto fabric and machine embroidered. Let me share how to design a simple Art Quilt and get it done quite quickly.

Method to the Madness:
Well, you can imagine; I have fabric… lots of it! But it has so much potential; so many colours, designs that I just can’t bear to get rid of even the scraps. Indigo dyed, ice dyed, tie-dyed, shibori dyed, and eco printed, make for quite unique choices. It just seemed perfect to create a water-themed art quilt!
This is not the type of quilt making where seams are important, it more of a appliqué type of quilt that makes use of a fusible webbing to hold thins down. That means it’s forgiving, quick and simple to design and make. It’s great as a start and doesn’t need fancy sewing skills

When using fabrics to create an image there are a few things to think of. Colour is important but I would not get too obsessed with having it ‘match’ too perfectly, design gets more interesting when there is a bit of ‘tension’ or variety of hues.
Value; how light or dark a given colour or hue is seen. Values are best understood when visualized as a scale or gradient, from light to dark. To see past the small details in a print squint your eyes and you will see ‘value’ more so.

Tips for Designing an Art Quilt:
I wanted to keep this simple, similar to a a graphic painting. You can use a photo as reference but simplify to major areas of value. If that is difficult for you then using some photo editing software (like Photoshop) can make it into a posterized image.

Planning the basic values is a good idea before choosing the fabric. Often; the distant areas (background) are somewhat faded/lighter compared to the darker/richer (foreground). The sky is darker close than further near the horizon. The challenges are much like painting but here you are painting with fabrics.
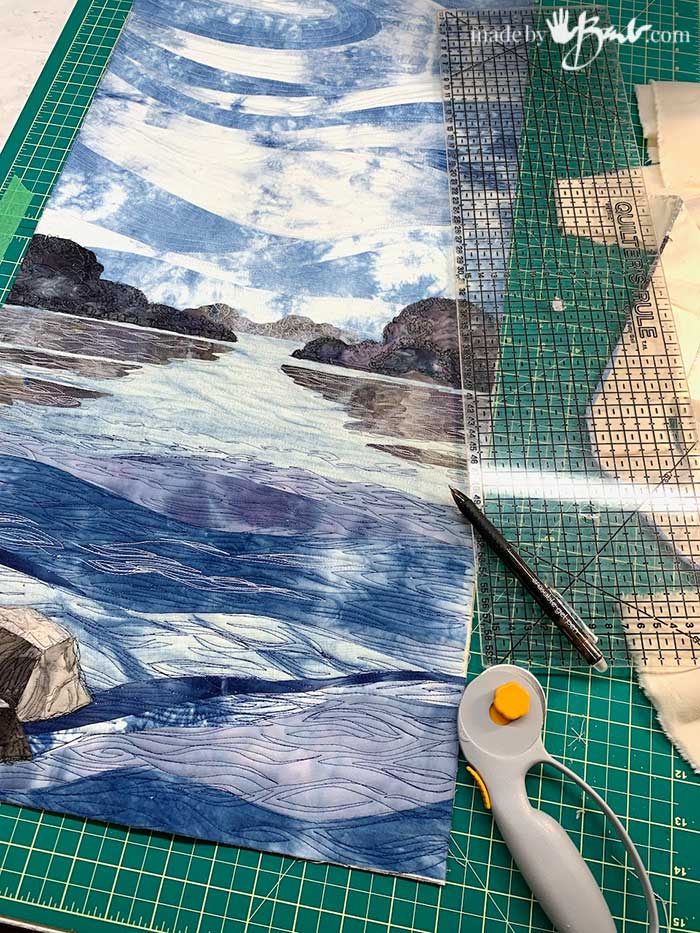
Making the Puzzle:
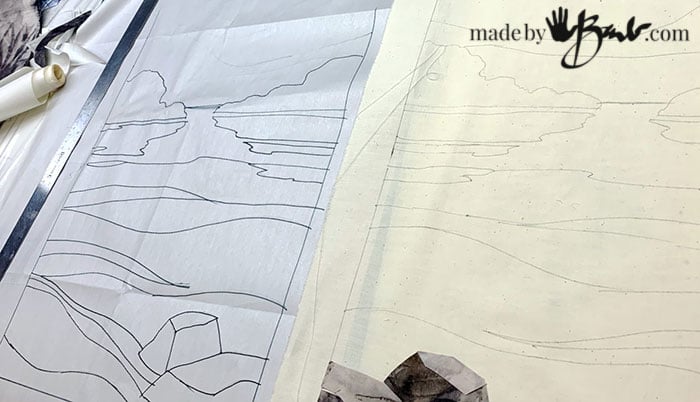
Once the pattern was decided it is traced onto the unbleached cotton with an erasable gel pen. (heat will erase later) The master pattern is also retraced onto the back of the paper so that I have reverse image.
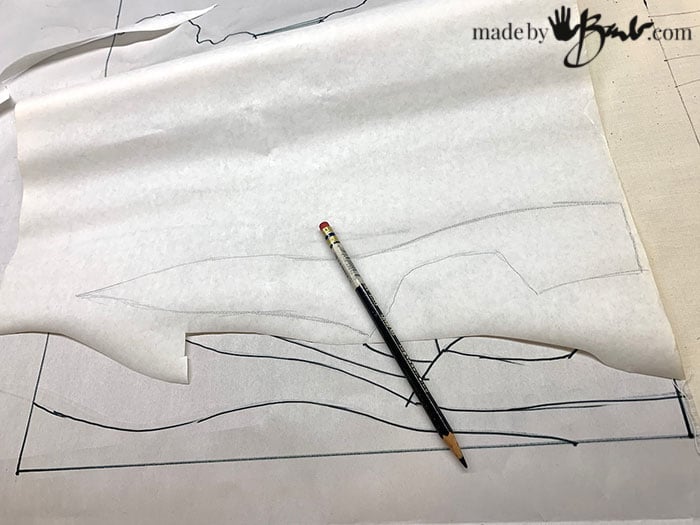
I used the reverse image to trace each of the sections/shapes onto Fusible web. Fusible web is a paper backed heat sensitive layer that is ironed onto fabric to give it the ability to iron on to other fabric. I rough cut each pattern piece first and then ironed the webbing piece onto the back side of each of fabric choices. Once it is ironed and cooled the exact shape is then cut out.

The paper peels off the fabric and that piece will now fit into the design. The pieces can have overlap if desired or careful exact edges. It is a matter of style in my opinion. It is like painters; some have a loose style some not.
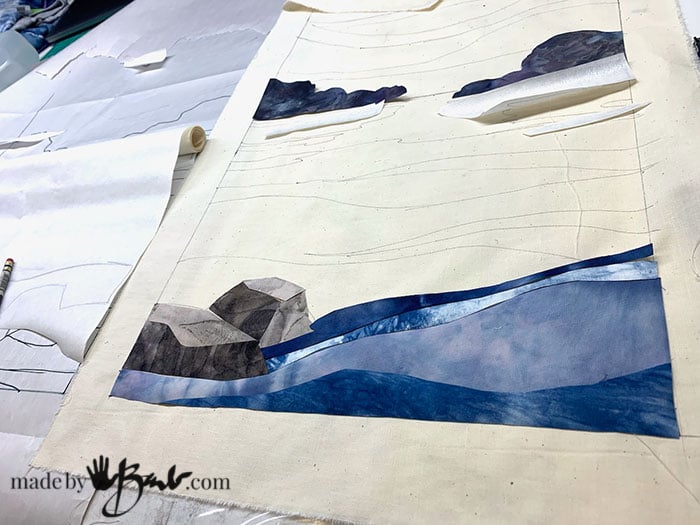
I place the iron-ready pieces in place but wait to attach and iron down once I see them all together.

Design Coming together:
Maybe as you see it all together you may add another shape or swap out a value for something lighter or darker. It’s a process as most art is! It was fun to see the odd patterns in these fabric scraps; some were so much like water or rock.

Since these pieces are only raw cut-edge pieces there is no frustration of seams! I love that since traditional quilting always aggravated me when seams did not line up; that is why this style is called ‘Art Quilt’.

I was pleasantly surprised how quickly this came together. It is a very heart-felt gift for some special family. These art quilts make great meaningful gifts since you can completely customize them for the recipient.
Once each piece was to my liking I ironed them all down one by one. If you are concerned about your iron these mats can help protect it.
Added Touch:
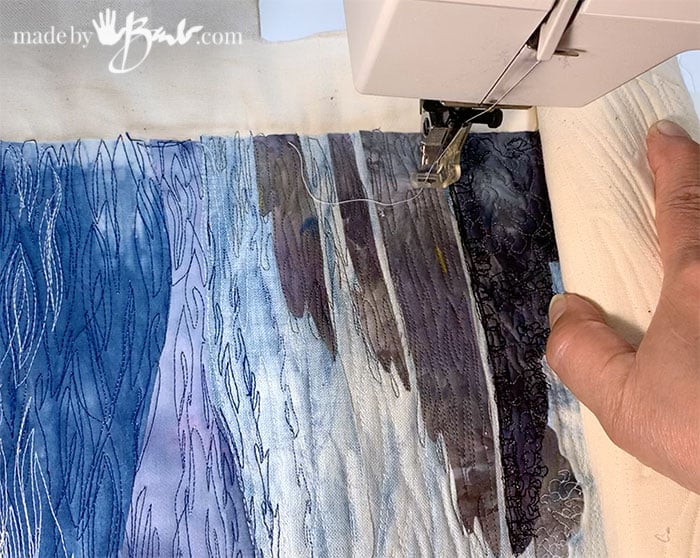
I added a thin fleece as a mid layer and cotton backing since I did not want too much ‘loft’. I always look forward to the free-motion embroidery step even though it did look pretty finished once all pieces were attached. Every sewing machine likely has an attachment (often a darning foot) available to allow moving the fabric freely under the foot, sometimes even no foot at all. It goes quickly as you can really speed along without stopping to turn.
If you want a very controlled embroidery it will be more difficult. Try some scraps until you are more confident. In my mind it is like doodling without taking the ‘line’ off the paper.

The choices of thread colour and shapes is endless. I used white as I wanted it subtle and also kept it quite unstructured so any odd lines did not look out of place.
Finishing Edges:
The art quilt has become very stable with all the embroidery and can now be finished at the edges. Carefully cut the final rectangle and make sure it is ‘square’ (90º corners)

Bias edging is easy to make and attach with just one line of sewing.

After and the corners pre-finished. Yes, all the sewing is visible from the back…

Since I wanted to keep with the rustic cottage theme, a piece of wood is added through the loops.

I added a centre nail loop is screwed into the back and it’s ready to hang! Vertical pieces are my favourite since they hang nicely and do not take a whole wall.

Is it perfection; no, but I like this way of creating art with scraps!

The sky reminds me of ‘Group of Seven’ artists in Canada. I’m happy how it turned out and hope the receiver also enjoys it!
I love this project. I have always been interested in how colour beside colour changes it’s intensity. I recently made a fabric B-Day card, an impulse bc, had no paper card. Made by fabric painting watering down acrylics + water colour, markers & a mix of hand & machine embroidery, with a jute glued down macrame frame. 1st attempt working with fabric & ideas from my imagination. 2 birds in a tree with sun My oops of spilling water on the corner produced a nice blend of colours + the iron was too hot adding more texture of steam dots seemed to fit with the scheme of things lol All & all i sent it off & my sister loved it. This has spurred me on to be interested in working with textiles & fabric. Better late than never. Now I am like a sponge I want to learn & try things using a mix of techniques like wax,dye & batik also wool fibre & free motion embroidery. What ever strikes my imagination. Your work inspired me Thank you
Oh, you are on your way! Once you start to allow your creativity to come forward there’s so much that can be done! The best is when you cross the boundaries as well. Look around, there’s a lot that will inspire you. Eco printing would also be a great addition. I understand, as an illustrator and also someone who’s been sewing for over 50 years (gulp)! Enjoy!
Love this—-I am trying to make a bach scene 2×3 ft waves with cheese clote etc -I will have to read you blog several times io get it right—not sure how you finished off the edges of cut fabric thank you –Susan
Oh don’t feel so pressured to be perfect. Since there is the use of fusible web that keep the edges tidy but it’s more of an art piece than multiple washing type.
Wow…beautiful
Thank you! It’s very enjoyable and forgiving… Enjoy!
Beautiful! Thanks for sharing your knowledge.
I hope I’ve inspired you. I believe that every bit of creative therapy will help…