How to Make Glass on Glass Mosaics

Can you believe that this art was made with scraps?! Let me show you how to make Glass on Glass Mosaics. I love soldered stained glass; but this might actually be a bit easier…
What is Glass-on-Glass Mosaic?
This style of mosaic pieces uses shapes of glass but they are adhered to a clear glass instead of soldered together. This method gives the option of being transparent and somewhat similar to stained glass pieces. The spaces between the pieces are filled with some form of grout later so they look much like a stained glass window. This method is perfect to up-cycle those old picture frames. The glass pane can be used as the base glass and the finished piece set back in the frame.
What do you need?
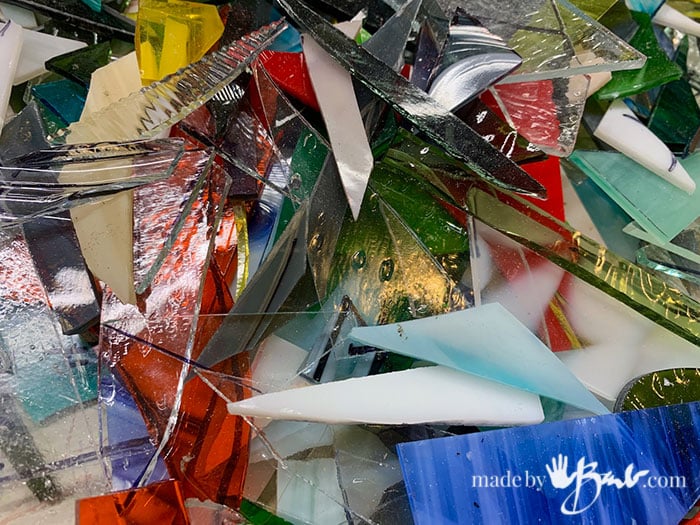
Alright, you guessed right; you need some glass. Let me tell you my secret; these are just scrap pieces of glass that may have gone to the recycle bin. I ‘begged’ a sweet stained glass artist/teacher for her scraps and I scored a big box full. I’d rather not break perfect large sheets of glass for small bits. The idea of using up what exists always excites me…
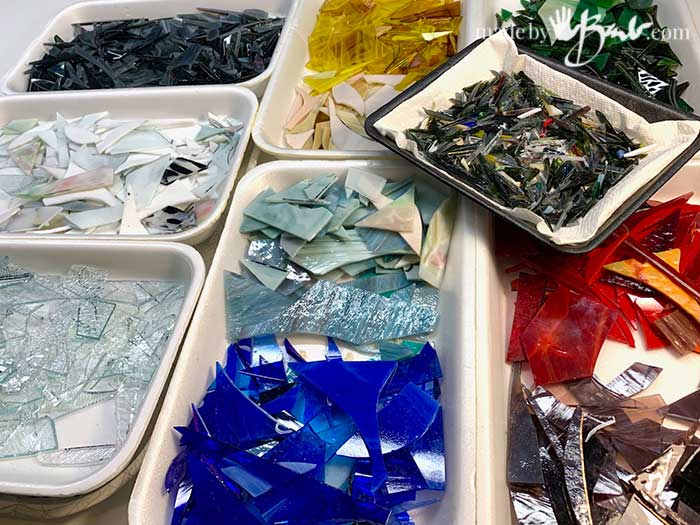
When these glass scraps were a big mixture of colours I could not quite visualize the potentials. After sorting I can now see what options I have in my ‘palette’ of colored glass. My theory of creativity; you need to be more innovative when you meet more challenges of the media. This collection of colours can still make much amazing glass art.

What tools do you need for GOG?
Another reason I like this Glass on Glass mosaic is that it doesn’t need really fancy tools. I used this set which was inexpensive. The special Running Pliers with the curved jaw are the GREATEST! See how they work in the video. The Glass nipper pliers (has 2 cutting wheels ) are also fantastic to nip smaller pieces of glass effortlessly. The flat pliers and tweezers also come in handy. If there are any really sharp points you can use some emery cloth or a diamond file to round them, that would depend on your final purpose for the piece.
It is good to have a surface to work on that may be damaged from the glass cutter. Keep a sweeper handy as there will be glass bits everywhere… There are many glass cutters on the market; some have a more ergonomic handle that may suit you. I was fine with the basic one but I agree it could feel better in my hand as a fair amount of pressure is needed when scoring the cut line. Also, keep the carbide wheel well lubricated on the cutter.

What Glue to use for Glass on Glass:
Whenever it comes to using glues and adhesives I have pretty well used them all over the years. Crafting, teaching model building and general repairs has taught me much. This site is a good resource for figuring out which type of adhesive for various materials. Mac Glue is a popular glue for glass on glass but I could not source it here in Canada. I gave these popular a try & test; WeldBond, Ge Silicone 2 and Kwik Seal. Since it is on glass I wanted a clear glue.

WeldBond:
I was hoping that this would work well since it cleans up easily and is pretty inexpensive. It is PVA based so recommended for anywhere that may get wet. It dries clear.
Kwik Seal:
This acrylic latex adhesive is meant for bonding and also sealing. It also has an easy clean up. It is white until dry.
GE Silicone 2:
This is a 100% silicone sealant that is waterproof and low odour. It also comes out of the tube almost clear (buy the clear option)
Results of the Test:
After testing the 3 kinds and waiting for the Weldbond and Kwik Seal to become clear I gave up waiting. I understand that these PVA glues have a difficult time to dry clear since they are not exposed to air when sandwiched tight between glass pieces. I am almost positive they would work great when adhering mosaic tiles on a porous base like a wood board or similar. So, I decided to use the Ge Silicone 2.

Create a Design:
When creating a design for Glass on Glass mosaic there are a few things to consider. One of the main advantages is that the final piece can be used in a window or place where light will shine through. Clear glass, both coloured and uncoloured will give the art a sparkle.
Some glass will have more opaque qualities and therefore not seem the same colour as a window pane. As a beginner it is best to keep the design simple and graphic; large areas of contrast colours. It is also important to consider the sizes of the puzzle pieces as they may be tedious if too small.

The patterns in insect wings reminds me of the sparkly glass in stained glass so that is how I was inspired to create a bee. The fuzzy body would be made up of many small shards so I only chose shapes. You certainly can be very intuitive and just make pretty abstract designs as you go along.

Cut Glass and Glue:
I have a light table but it is not necessary. Tape your design behind the glass, making sure it is very clean and wiped with rubbing alcohol. The glass base will allow your design to be seen through easily. Check out the video to see the glass cutting.

To make sure the assembly is as clean as possible a small amount of the Ge Silicone is put in a small ziplock baggie and forced into the corner like a piping bag. Cut a small corner off the bag to squeeze tiny amounts on the back of the tile piece.

Check the Progress:
Push and press each glued piece down firmly to rid any bubbles underneath. Keep an eye at the negative spaces between the shapes as they will be like outlines later on. You have the choice of the grout joints acting as a dark or light outline.

These simple instructions make this come together quickly. Do not use too much silicone as then it will ooze out the sides too much and hamper the grouting.

How to Make Glass on Glass Mosaics
Equipment
- Glass cutter
- Running Pliers
- Glass Nipper Pliers
- Optional Ruler
- Flat Pliers
- Permanent Marker
Ingredients
- Various pieces of coloured glass
- Base sheet of clear Glass
- GE Clear Silicone 2
- Drawn Design
Instructions
- Collect Supplies
- Plan and draw design (keep it simple)
- Tape design to back of clear glass pane (may be from picture frame)
- Mark shapes with marker to cut into required shapes
- Cut the shape with glass cutter if larger cuts or nipper for smaller adjustment
- Put silicone into bag for easy piping
- Piece by piece, apply silicone to back of piece once sized for the space
- Press each piece firmly onto base glass (wipe any excess if needed)
- Be aware of spaces between pieces and finish background
- Add grout (see Part #2; post coming soon)


The silicone works well when small amounts are put in a plastic bag and used like a piping bag. This allows a very small tip as very little is needed at a time.

Just as with any art form; your own style can shine through. Make it as precise or impressionistic as you like. Myself, if I want to have the joy of making something I do not want to add any frustration of needing absolute perfection. ‘Embrace that imperfection!

When you pull the pattern design away you can see your progress. The black lines from the markers should be buffed off with a bit of fine steel wool.
This is not finished yet as it still needs to be grouted (next step will be up soon) but here is a sneak peek:

If you feel intimidated about working with glass, let me reassure you it isn’t as scary as you may imagine. Yes, there are things to consider about safety but it is a wonderful media to work in… I am sure there will be more design ideas popping up! Stay tuned for Part #2 – the Grouting.
I have had problems with the larger glued on mosaic glass pieces cracking when applied to glass and after grouting. This is after the piece is completely dry and hanging. Have you by any chance had this problem before? I have tried several different adhesives, but with the same results. I’m the same as you about the drying time of the WeldBond and other acrylic latex adhesives. I have not tried the GE silicone 2 but will give it a try. Also, often times, the grout will suck up under the glued pieces if the adhesive is not completely to the very edge of each piece and will ruin all the hard work.
Thanks for all your suggestions!
I have not had that happen but I’ve also not used anything other than the silicone. Your problem baffles me… I think there must be some shrinking or expanding that is causing it. I had glass that was imbedded in concrete crack but that was from the excessive temps outside. I wonder if it’s an issue of temperature, perhaps hanging where it gets hot and tries to expand. The glues you used and grout might be of different densities. Do the individual glass pieces crack or the entire assembled piece?
The grout sneaking can happen so I make sure to cover entire piece. There is a practice of doing a wash of weldbond to fill those possibilities but since I do not use the weldbond I don’t do it, but might be an option for you. ‘Hope that helps!
I think you may not be using enough adhesive to be sure you have a complete coating between the tesserae and the glass you are using. Also, you need to make sure it is 100% fully dry before you grout. I would recommend that if you are unsure, do a line of gluing and let sit overnight in a room that has circulation. I find that a small fan or overhead room fan works well. Work your gluing session line by line. If there is a hint of dampness, your wet grout will mix with those sections of glue. It’s hard to resist, but find you next pieces and ready them on a sheet of paper like a copy of your drawing and work those pieces before gluing your next line. Also, if it’s too warm, the glue may appear dry when it’s damp beyond what you feel is dry and again, wet grout will dampen and give you the same effect. Bon chance! Adrianne in Maryland
Hi Barb,
It is interesting that after “lead”ing and foiling that I/we live in the world of mosaics. I had one leaded piece that literally took me 10 years to finish. I mean it ended up beautiful but the foiling was sooo boring. On antique roadshow (A few years back) there was a tiffany mosaic (circa 1910) that was large and it looked like a painting. There were no gaps, no grout! And the depth was amazing. They had taken some pieces where they wanted brightness on one end of a piece of glass and shade on the other end. They accomplished that by etching the top surface with acids. Absolutely wonderful and it allowed a smooth 3D effect… It priced out at over $200,000. I like your use of silicone and totally love your plastic squeeze bag. And I love how fast the mosaics are. Can’t wait to see what you do next.
I am still running some Mosaic ideas through my mind! It’s a great way to combine my love of illustrating and glass! Stay tuned!
It looks like very little adhesive was put on back of glass. How do you prevent grout from going under edge of glass? Grout bleed? I’m just beginning to do this and I had grout go under one piece of glass. Thank you.
I know that when some use the Weldbond glue they do a glue wash to make sure they do not get the ‘grout bleed’ so I made sure to have enough of the silicone and push down to make sure it is covering all of the back. I had to grout bleed under glass. I hope that helps!