How to Make Alcohol Ink from Old Markers
Don’t you just love it when you can make something without hardly spending any money?! I knew there was a reason I just couldn’t trash all these felt tip markers. In this tutorial I will show you how to make Alcohol Ink from old markers so start looking in those drawers…

What is alcohol ink?
Alcohol ink is a very fluid ink that is highly pigmented. It can be diluted with alcohol or a commercial solvent. These ink mediums are fun to work with as they can dry very quickly with the use of some air or heat gun. Since the ink can be reactivated with alcohol you can ‘move’ it again after application. Alcohol ink works best on a non-porous surface as then it does not soak into the surface. There are many crafts that may use this alcohol ink to create unique designs quite simply.

My old dried-out markers are a combination of many years of art, some from illustration & fashion design. I have some markers that are older than my kids but still work and new ones that don’t last a month. Some of these are water-based and some are permanent markers(alcohol-based). I had all kinds of brands including copic markers, Sharpie, & studio markers. Since I taught marker rendering at the art college before technology it was a quick way to get some colour onto a page without any printing.
I hate the amount of plastic (lid and caps) that will be trashed but have not found a way to reuse that part.

Disassemble the Markers
Put gloves on as it’s a messy job. Pull out each marker tip/nib and toss it into a jar. Behind the tip is usually a long fibrous material that soaks & holds the pigment. Slide it out and cut it up to fit into the small jars easier.
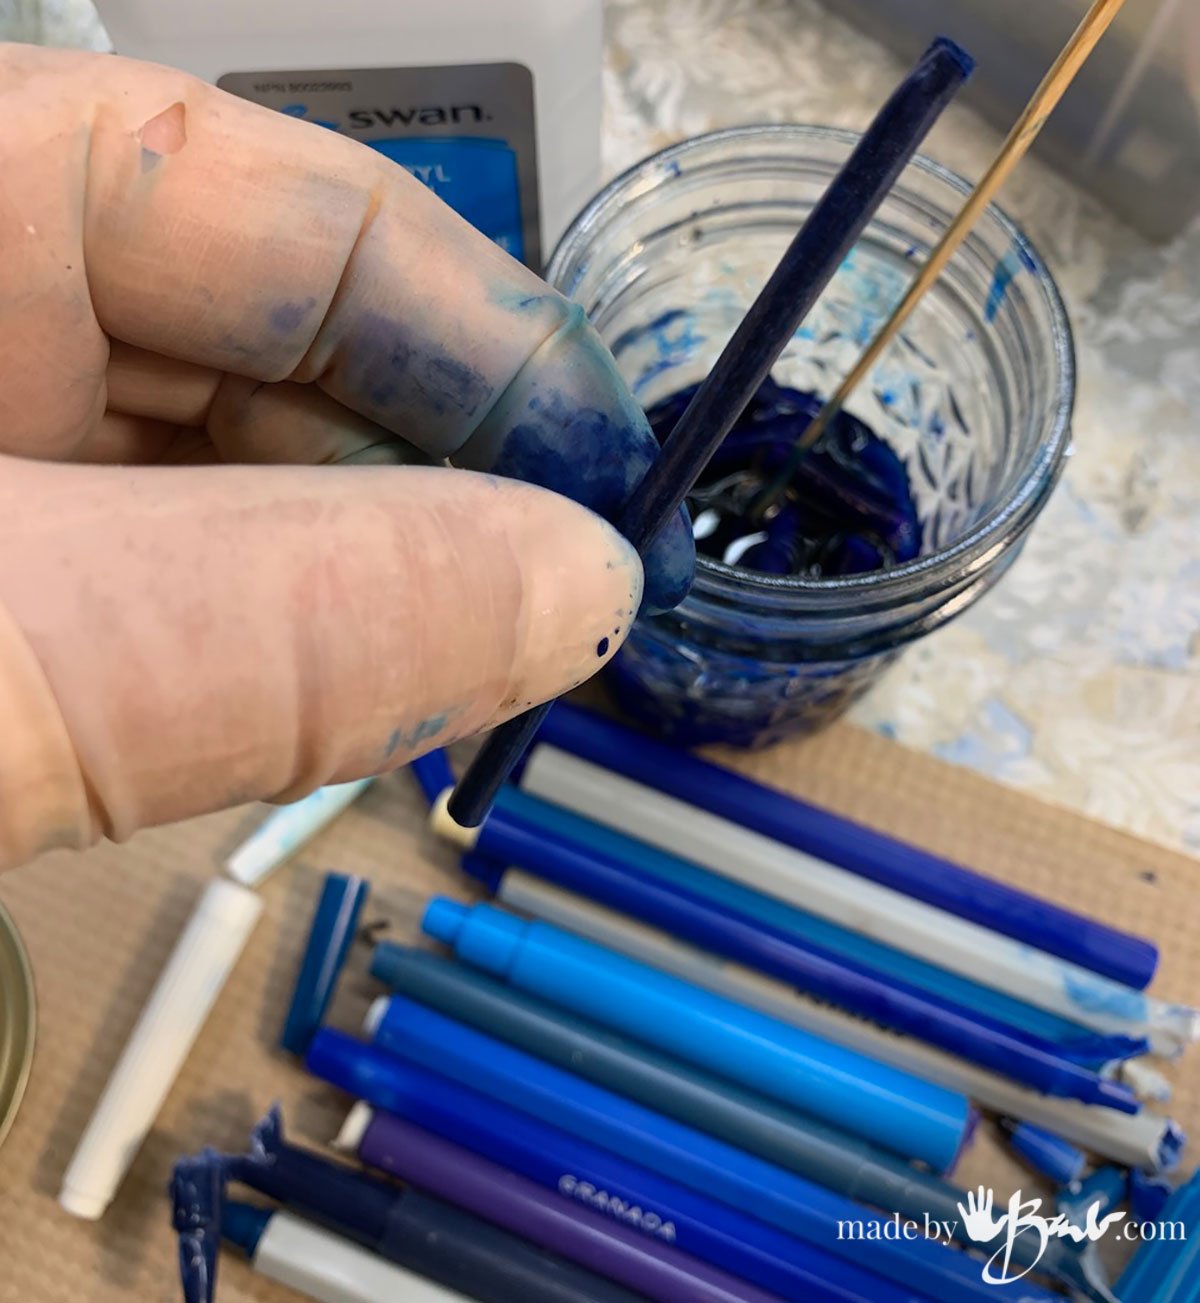
Since I had a lot of colours I grouped them into colour groups and did not get too fussy about the exact matches. The basic primary colours of red, yellow and blue will give you a versatile way of mixing a lot of colours. I also made a green and black.

Small glass jars work well to hold the bits. Since I had so many I wanted a concentrated colour. I can always dilute it more later on.
Add the Alcohol:
Some commercial alcohol inks use a stronger alcohol called ethanol. Using isopropyl alcohol (rubbing alcohol) for mine worked well. If you can find it use a high percentage of 70% or higher. I filled these small mason jars about half way.

After soaking overnight the colours were quite strong and quite fluid. I was happily satisfied with the bold ink colors that I got.

Bottle the ink:
To make the ink easier to use I like the glass dropper bottles. I actually have some very old markers that were in tall glass screw-top jars to enable adding solvent, before the days of ‘disposable’. I reuse some of my essential oil bottles as well. You should cover your work area as there will be spills…
Isopropyl alcohol has some safety things to be aware of. It is flammable. The fumes may irritate the eyes, skin and respiratory. It is best to work in a well-ventilated area.

Tip: Do use a funnel as the jar does not pour that well. Wipe up any spills with the rubbing alcohol. Seal the bottles well as the alcohol evaporates quickly.

How to Make Alcohol Ink from Old Markers
Equipment
- Pliers
- Scissors
- Gloves
- small funnel
Ingredients
- Old Felt tip Markers
- Rags
- Small Jars
- Isopropyl (Rubbing Alcohol) 70% or Higher
- Glass Dropper Bottles or Similar
Instructions
- Prepare & protect your work surface as there will probably be some spills or splatter.
- Collect the containers & tools.
- Using the pliers open the ends of the markers and pull out the tips.
- Cut the middle fibre tubes into small pieces and put into jars with the tips.
- Add as many used markers as you like (keep in groups of colour).
- Add about half jar of Isopropyl Alcohol (70% – 90%).
- Seal well to prevent evaporation.
- Let soak and check for desired strength
- Pour into Small dropper bottles using funnel

Prepare the Surface for Art:
Many like to use a special paper; Yupo paper for alcohol ink art. What makes Yupo paper special is that it is not made of rag (cotton) to absorb pigments; it is made of polypropylene and has a very smooth surface. The non-porous surface allows paints and inks to be reactivated and ‘moved’. If you have any experience in painting and drawing there are certain ways to apply media and also remove it to achieve what you want.
Ceramic tiles also work well for alcohol ink since they are super smooth. I would suggest a sealer however to make sure it is permanent afterward.
To prepare your own surface for this alcohol ink it will need a good quality primer and smooth surface. Zinsser Bullseye Primer provides non-porous surfaces that will not let the alcohol ink sink in. If you buy pre-finished canvases test a small area. In my case I used wood panels and gave them a couple smooth coats of the primer.

How to use the Alcohol ink:
I try not to be too specific about particular methods for using certain media as it may then stifle my creative style; in other words ‘try’ whatever works for you. The alcohol ink can give nice nuances of colour as it dries at the edges. That is one of the traits of watercolour that I like as well.
This alcohol ink can be forced to dry faster or even move with the help of air (blowdryer) or a straw. A heat gun will also dry the ink very quickly without too much force of air. See the video for details of my ink in action.
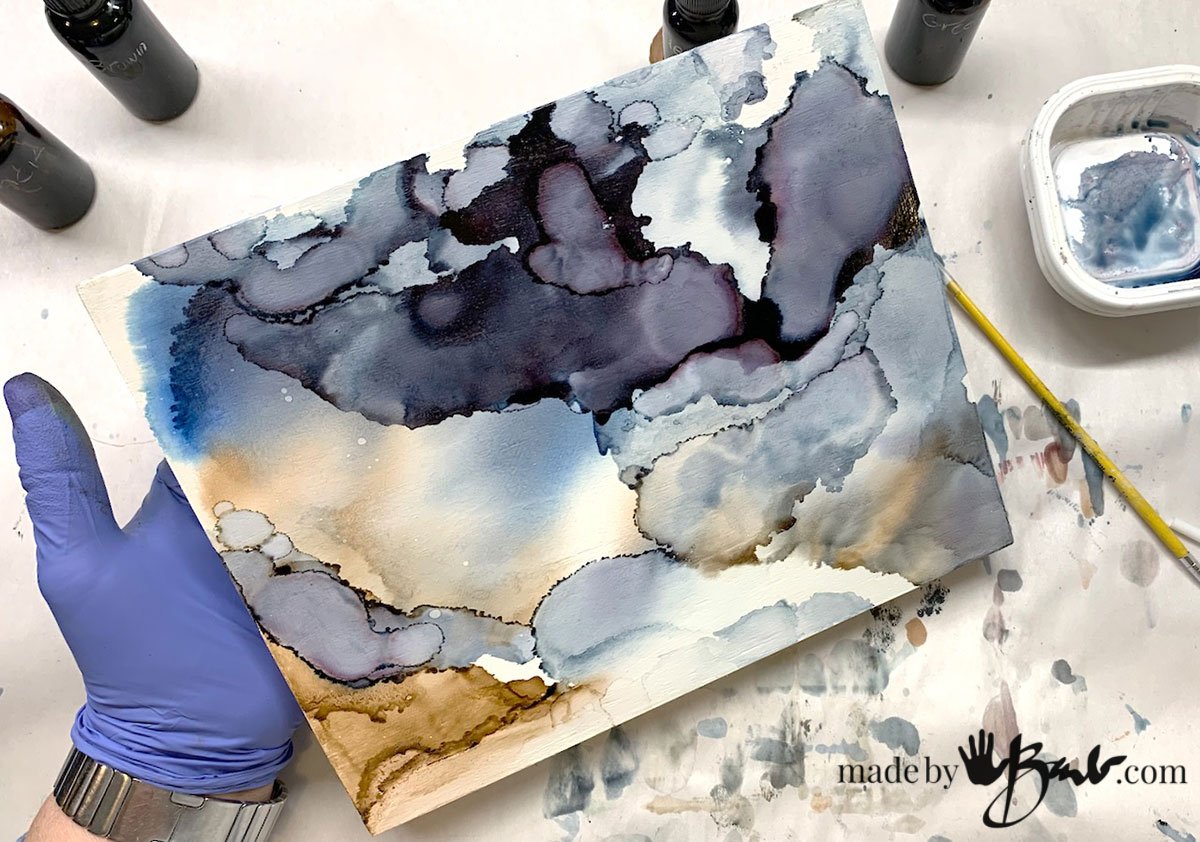
These types of designs are quite subjective so it all depends on your desire. Differences in contrast, colour families and details will all be your choice. I try to keep things somewhat simple as then the ‘eye’ does not get so overwhelmed with a lot of chaos.

As you see here some small drips can reactivate the alcohol ink to force it to ‘move’ and create a bit of contour edges. The isopropyl can wash away the ink but may leave a bit of stain from the dye depending on your surface.
Make some Alcohol ink Art
It was quite fun to try this DIY alcohol ink. Let your expectations go and have fun. Being an illustrator makes that a bit more difficult for me, but I found it quire refreshing to just dabble…

What do you think? Be aware that using too many colours can become muddy if they mix. I have a plan for these boards as well…

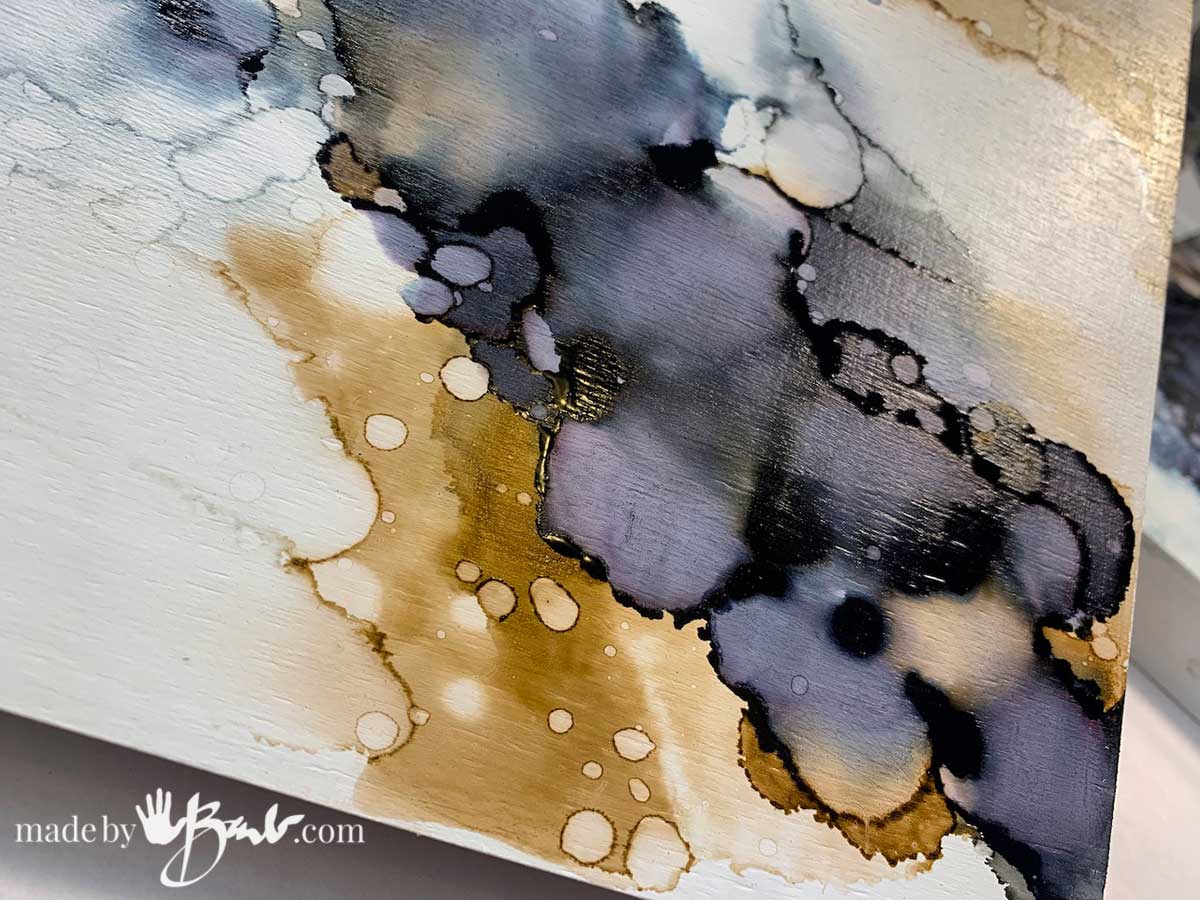
Look at how the pigments separated here! Sometimes we just do not have complete control and the magic just happens. Hmmm, if lottery tickets would be the same…

Once they were dry I did see that in some places (highly concentrated) there were some small spots of the pigments that were a bit sticky. I blotted them with a towel to remedy.

These could be fine as is but I have a plan… I’ll share soon.
I wonder if these could be used on glass, like a plate, to reverse add color? Not sure I was clear on what I meant. What do you think?
Did you mean on the back?I don’t think that it would be permanent or washable. Depending on the kinds of markers used it can also be affected by water so use for art is best. I plan on using a resin topper… you will see soon! ‘Can’t wait!
Just want to thank you for all your creativity! You are a most excellent teacher!
You are so very inspiring!
Please tell me more about the beautiful gold metallic streaks.
Haha; that will be coming out soon… I like to be thorough and do a good test run. Stay tuned.
Looks like a great project to do on the garden work bench … once the snow is gone!
Expensive, dried out markers once a bummer … not an opportunity. Cool beans, can’t wait.
Hola, me encanta tu sitio web, fantásticas tus ideas!
Quisiera saber cómo aplico tu idea de tinta en alcohol para teñir pañuelos de seda, usando tintes de seda, puedo usar marcadores viejos para que impregnen en tinta de seda con alcohol??.
Se podrá usar esto en Fieltro de lana de oveja??
“Hello, I love your website, your ideas are fantastic!
I would like to know how I apply your idea of ink in alcohol to dye silk scarves, using silk dyes, can I use old markers to impregnate silk ink with alcohol?
Can this be used on sheep wool felt?”
Well, I would be excited if that could work but I am sorry to say it will not. Since some of the markers were not the permanent type it won’t last. You can however use fibre reactive dye if you use an acid first (like vinegar) or if you want to paint Dye-Na-Flo dye will work on silk. It works on other fabrics as well. It is like a dye and a paint…
I’m not sure about that actually. I think the permanency is determined by the carrier and not by the pigment itself. So if you have the pigment and you put it in the proper carrier you could use this on fabric. Because the pigment is the same across everything it’s just what you mix the pigment into whether it’s oil paint watercolor paint or alcohol ink. At least that’s what I think LOL curious what you think
I have used almost every kind of paint in my decades of art but I have not made paint. It intrigues me and I hope to try it in the near future. I suppose I could try some of this ink mixed with a textile medium but not sure about the alcohol part.
Saw on YouTube, mosaic artist used plastic bits like pens, lids, etc., cut up and used in a mosaic. Thought it was a unique idea! Can’t remember artist but sounds like a good idea to try.
I have been exploring using more reusable things too. The only thing about plastic stuff is that it difficult to adhere since the thinset will not adhere. Metal and old jewelry is also great! The worst thing trying to decide when there is just too may options!
I have found a use for the plastic marker bits! i have been gluing bottle caps to the ends and using them in collage and mixed media for mark making. you can really glue anything to the end, they’re just useful as handles!
Oh yes, good idea! I still have a bunch, they might help when working with texture paste too! Perfect to make some simple tools for clay etc…
Good as stirring sticks also!
I love this idea for re-using markers as ink. I even did a project with markers and alcohol ink on a t-shirt, which had to be air dried to allow evaporation and heat setting because the inks I made were not all permanent so heat setting gave them a better chance. I was very happy.
You said you did not know of a use for the marker bodies but I found one somewhere on Pinterest.
I cut the tubes with a dremel tool and filed them or sometimes didn’t it depends on the project.
I used them as beads or similar to macaroni art or mosaic.
I happen to work with mixed media collage and sculpture so I just keep a box of the tubes to be cut or used in bigger projects.
Oh yes I had thought of using them for beads! They would also make a inclusion in a resin bowl formed on a lathe! Perhaps someday…Happy making!
Good morning.
Thank you for sharing.
About plastic, I saw some tests with extruders for home use so, I think that soon, we will be able to turn these plastic into filaments for 3D printers.
I have seen plastic bottles cut into filament. As much as 3D printing is great I am trying to put that off. Here we have access to 3D printers at local libraries too.
Hi barb! I love your creativity! You inspire me.
Just a note, ethanol is merely drinking alcohol. So if you bought everclear which has a very high alcohol content that would work. Everclear is 95% ethanol
Thanks! ‘So happy to inspire! I don’t know if I could get Everclear here.