Build an Arbor With Copper Pipe
This is actually an unplanned project… I have marvelled how well this has stood the test of time so I feel it is really worth sharing. I was so much younger when I built this but you too can build an Arbor with Copper pipe!

Why are Arbors so Great?
The great thing about arbors is that they give some tall design elements in the garden but do not really take that space on the ground. That offers better space management in a small space. Arbors also give some shade or privacy from the neighbours and still allow travel underneath. I am actually somewhat surprised that mine has been such a great addition.

I designed & built this arbour over 20 years ago. The challenge is to use standard 1/2″ copper plumbing pipe and only typical fittings; 90º elbow, Tee fitting and 45º elbow. This copper pipe arbor has held over the Canadian winters perfectly.
Since it is so old and has withstood the growth of a Honeysuckle and Climbing hydrangea I’m sharing the design with you. I will provide all the technical design details.

Another benefit is that the dense foliage in the arbor seems to be a favourite for our feathered friends, which gives great photo ops. This Arbor is about 82″ tall in the centre and 50″ wide.

What do you need to build a Copper Arbor?
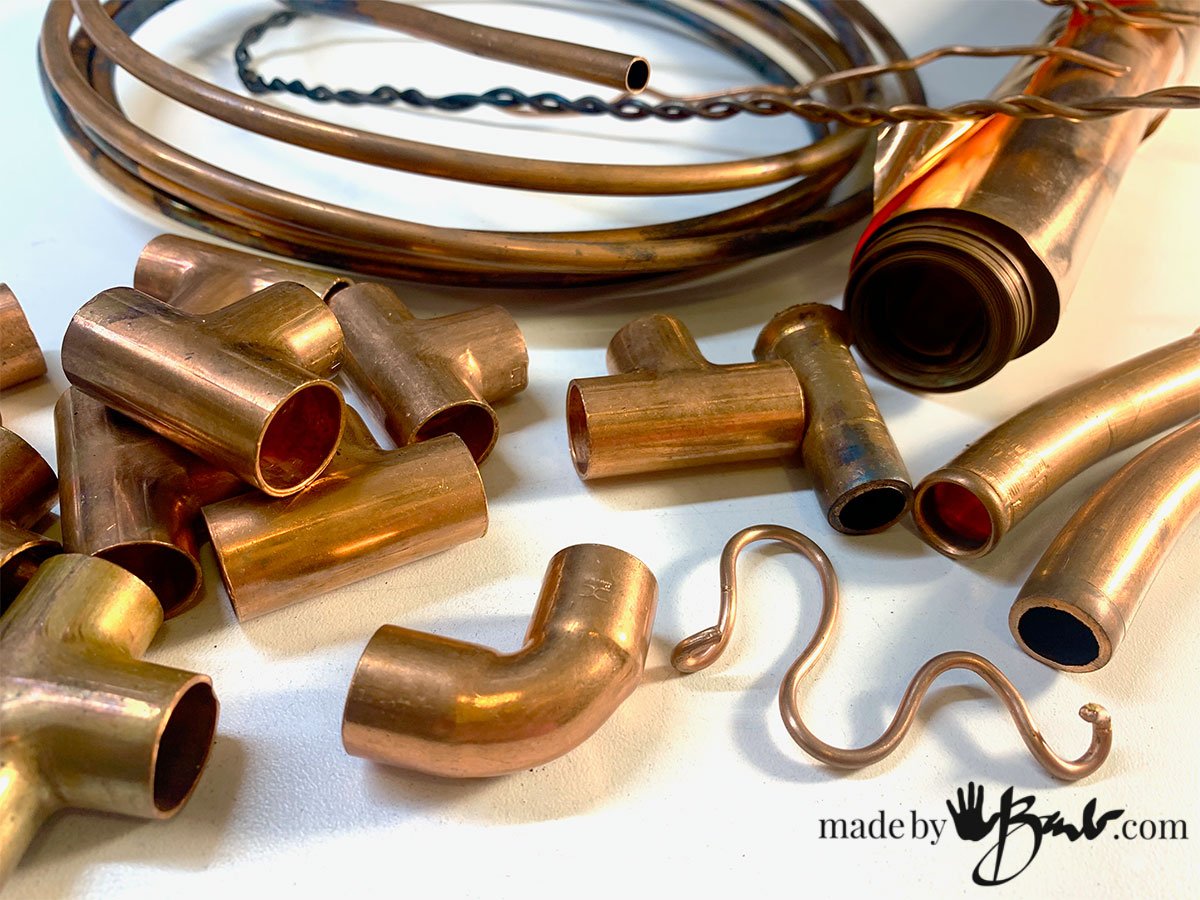
This design which is my unique made original, is made with about 64′ of 1/2″ Copper pipe. There are many pieces so perhaps it could be a project to use up smaller remnant pieces.
The method of assembly is the same as usual plumbing soldering so a propane torch, flux and solder is needed. Clamps may help keep things in place during planning.
The types of fittings available determines how the pieces attach. There are no ‘x’ fittings so using the ‘tees’ becomes the challenge to design a sturdy structure. ‘But it can be done! The top has a couple angles that are created with the 45º fittings. The interior rectangular shapes are connected with the 90º corners.
Design embellishments with some curves were added using the easily bent 1/4″ copper tubing. Feel free to adjust to your own design.

Do not fret, the details are available to download. Copper is quite easy to solder so I had some extra fun using up some copper wiring and also hammering the scraps flat to make some leaves. If you look closely you’ll see the spiral tendrils as well.

As with any design work, plans are drawn to scale help to see all the structural details. As a technical illustrator I prefer to make most decisions before cutting any pipe pieces or parts. It’s much easier to revise a design when it’s still just a drawing on paper…

How Strong is the Arbor?
I now understand how well copper lasts and stands up to the elements. I had cleaned it as much as I could in hopes of it getting a patina of green. There are only few spots, generally it has just become a darker bronze colour.

The Honeysuckle has been winding itself around the arbor for a couple decades without any damage. The vines are now over 1″ in diameter and perennials filled in well underneath. They are now together forever….
It is best to buy the joint fittings and copper tees (three-way tee) in multi-packs. This project has about the same difficulty as plumbing, probably even easier. Before soldering the sections together, all the pieces should be laid out according to the plans.

The design illustration and scaled plans are available for download here. The sides of the arbor are symmetrical. The design template could also be adapted as a trellis instead. The squares/rectangles & crossbars can be incorporated furthermore into a simple vertical upright shape trellis with the 90-degree elbows.
How to anchor the Arbor:
This will somewhat depend on whether you have a lot of freezing in your area. The pipes are thin so the frost should not be able to push them up much. Mine is about 10″ into the ground. The plants act like anchors once they entwine around the arbor’s legs and grow upward. A piece of rebar (narrow enough to fit in pipe) can be hammered into the ground and the pipes can be slid down over them.
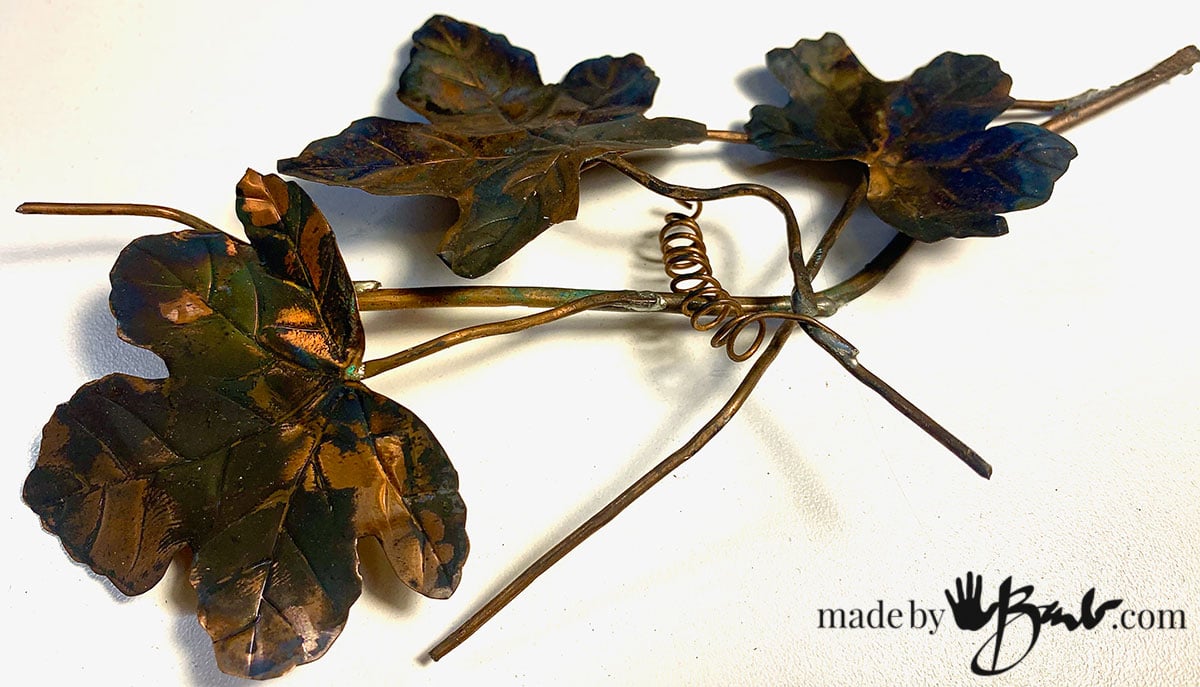
Solder embossed Copper sheets to wire for more botanical accents & leaves. It all depends on your desired look.

How to Cut Copper pipe:
Instead of using a saw, there is a great device; pipe & copper tubing cutter. These are quite inexpensive and easy on the hands. Tighten the cutter around the pipe and and then spin a few times until the groove cuts through. Copper is not a very hard metal. I also cut some of the scrap pieces open using tin snips and then hammered them flat to allow more leaf shapes to be made.

Thinner copper sheeting is fun to work with as it inscribes quite easily. To add stems to the leaves solder some copper wire onto them.

Carefully bend the thinner copper tubing can by hand so that it does not kink. Combine the smaller curved sections with the pipe.
How to join the Pipe pieces:
Once you have the pieces cut; at this point it is advisable to dry-fit how they all come together. The pipe sections slide into the fittings easily. Only use the propane torch under conditions where there are no flammables.

I assembled my arbor on the concrete garage floor. I then assembled the side sections before joining them with the top section.

How to Build an Arbor with Copper Pipe
Equipment
- Pipe/Tubing cutter
- Propane Torch
- Measuring Tape
- Design Plan (drawn or download mine)
Ingredients
- Copper Pipe ( 1/2" or larger) according to plans
- 45 degree Copper Fittings
- 90 degree Copper Fittings
- Tee Copper Fittings
- Flux
- 1/4" copper tubing for added curves
- Copper wire, leaves, if desired additions
- Solder
- Emery cloth
Instructions
- Plan space & design (see download)
- Calculate how many fittings, feet of pipe are required & obtain
- Cut sections of pipe according to plans
- Dry-fit sections together prior to assembly
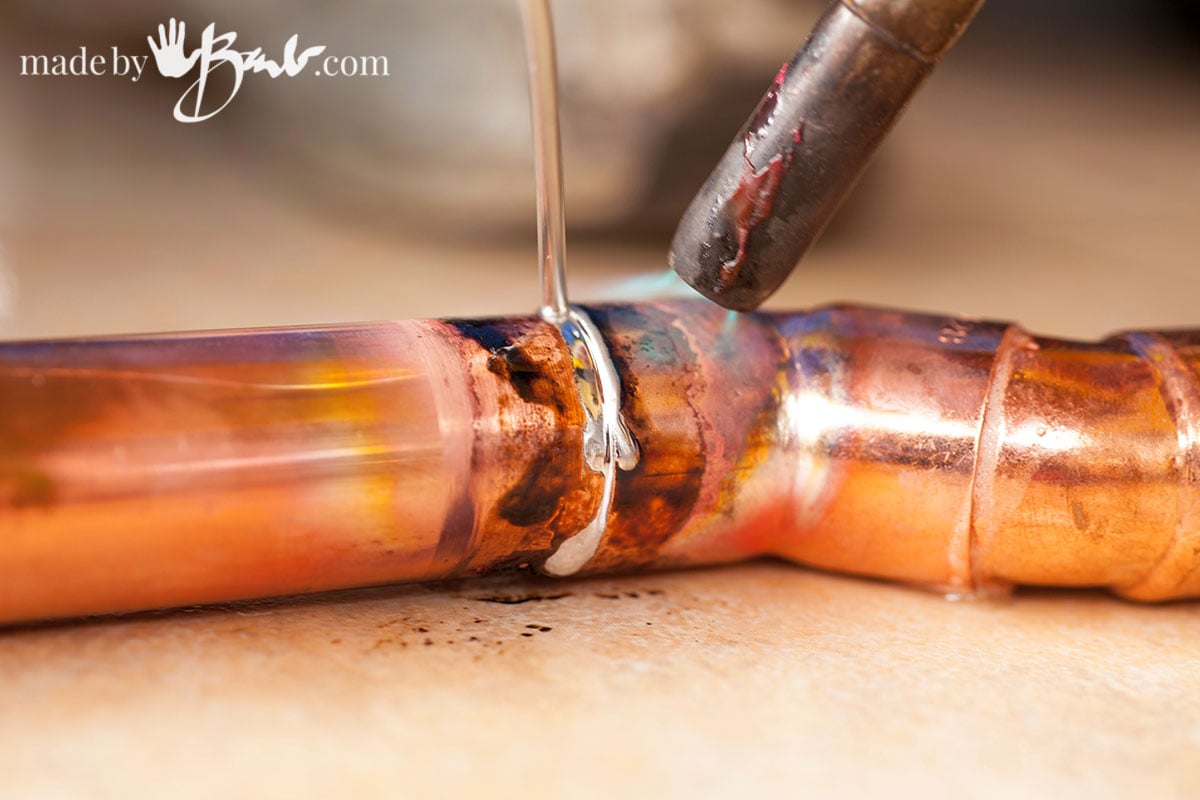
- Using safety precautions solder the pipes together using the fittings with a propane torch. Clean pipe ends with emery cloth, apply flux and heat until solder melts in.
- Work side & top sections first before attaching
- Set into space, rebar foundation if possible to anchor.

Garden design is a process, plants grow and start to show their beauty. It is often a lesson in patience and perseverance. For more garden ideas; ‘The One woman Garden Makeover’ & How to design an Award Winning Garden. Happy gardening!
You are so amazing! I always look forward to your posts.
Thank you for sharing.
That’s so great to hear! It is a ‘labour of love’. I don’t think I really understand how far and wide I do reach!
There are no adequate words to describe my admiration and awe of your unique talents and creativity! Sharing an arbor just when I’ve been dreaming of them is beyond the pale! I’ve experimented with many of your projects and wear the scarf I purchased from you to many compliments. Thank you!
Expat Canadian in Virginia ❤️
Oh my goodness! I quite stumbled onto it when I was trimming the Honeysuckle after the baby Robins flew the nest. I guess I have always been a ‘maker’ & designer. So glad you love the scarf. Unconsciously I’ve developed quite a nature theme, I guess that is truly me…
Your arch is brilliant, Barb! I have made many copper trellises and “garden angels” in the past, and mine have also held up well, for about 20 years now. I have a cache of copper pipes, tubing, and connector pieces, and never thought to make an arch. Thank you for the wonderful idea and sharing your instructions. You’ve figured out all the little details so I don’t have to 🙂
Oh, so glad to hear that! I’m sure you can add your own touch!
Hello
Unfortunately, the download link doesn’t work
Odd, I do see others get it… It takes you to a page where the button for the PDF is and then you also get an email.
Breathtaking, Barb! nv
You are amazing! I love that you don’t stop at just one thing. You add such interesting things to my day.
Oh thanks! I often think I am into too many directions, but they all seem to overlap in some way.
Love this!!!! It is gorgeous. I tried to download the instructions etc and it would not download. I thought maybe it was the browser I was using but I tried 3 different ones and still nothing.
I agree with poster below. Link to the download does not resolve properly. It simply loops back to this article.
Here’s the details of the link. Does it look correct to you?
I tried both Google chrome and safari.
https://www.madebybarb.com/downloads/how-to-build-an-arbor-with-copper-pipe/#edd-free-download-modal
Unable to download copper trellis video
Sorry, you can’t download the video, only the pattern
Hi Barb! I have been reading about so many of your projects and I’m hooked! I was wondering if you had any advice for this– I have an 8 foot round “moondoor” that I bought off Amazon.ca that I want to grow some vines on. However, since I bought the cheapest one I could find I’ve been scouring the internet for ways I can pretty it up. Do you think that wrapping it with cement soaked cloth would work? Or would the cement be too heavy? Anyways, love your trellis!!! It looks amazing 🤩
I am a bit confused since I am trying to picture what you bought. If you are a subscriber you can reply with a picture to my newsletter. If it is wood, I wouldn’t cover with concrete but I am sure I can ‘imagine’ something! I have no shortage if ideas; only energy to get them made!