How to Print Drawings on Cotton Fabric
It’s great to be able to make a digital drawing! ‘But what if you want to have it printed on fabric? I’m excited to share my new discovery – how to print drawings on Cotton Fabric at home.

Why do you want to print on Fabric?
Since there are such great ways to be able to draw and make art with devices like an iPad or tablet we look for ways to take it further. Once the image is applied to fabric it opens more options to be even more creative. Hopefully these instructions will help you make something new.
There are ‘print on demand’ services where you can upload your digital images and have them printed onto a variety of things like fabric, clothing, even household items. I tested one of these; Spoonflower and the results were quite impressive.
Since I am always trying to accomplish things in a quicker, more inexpensive way I wanted to use my own home printer for this printing process; a black & white laser printer (letter/legal size paper)

The Challenge of Fabric in a printer:
I have a long history in the graphics arts. Computers did not exist and photocopiers were not as great as today, colour copies were just developing when I was studying art. As an illustrator it was always a challenge to reproduce any of my work. (see video below)
In this method; ‘How to print drawings on cotton fabric at home’ a basic home printer pulls printer paper through and prints with either a water-based type of ink (ink jet printer) or a heat set ink that comes in the form of toner powder in a laser printer. The problem is how to have the piece of fabric make it through the printer and remain flat.
How to adhere the Fabric:
It is a common suggestion that fabric can be ironed onto a waxy surface; (freezer paper method) to allow it to run through the printer. Nowadays freezer paper is very difficult to find so I wanted an easy alternative for this fabric printing method.
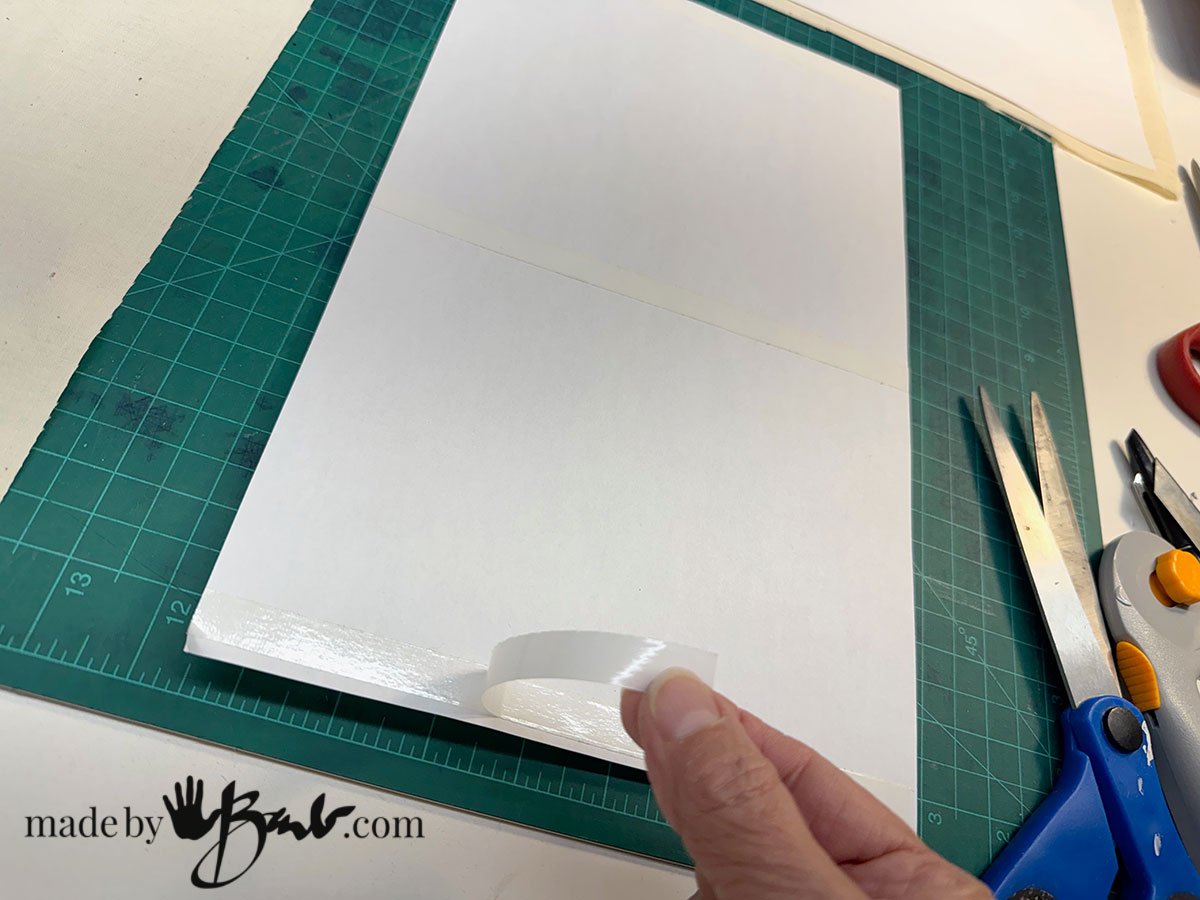
Double-sided tape is available everywhere and is very inexpensive. Since I would not be covering the entire sheet I placed the tape at the top, middle and bottom sections of the paper. Peel the wax paper strip off. Spray adhesive could be a viable alternative but let me forewarn you; it is really messy to work with as any overspray will make your place STICKY!

Adhere this sheet onto your fabric. To make sure the fabric is as flat as possible give it a good ironing. I used unbleached cotton muslin fabric. The weave should be quite fine to have a very crisp print but you could experiment for various affects.
The heating element in a laser printer can be as high as 400ºF (200ºC). For that reason I would suggest to use natural fibres like cotton, linen, hemp, denim, etc. Polyester will melt at about 480ºF so avoid 100% polyester fabrics.
Trimming the sheet:
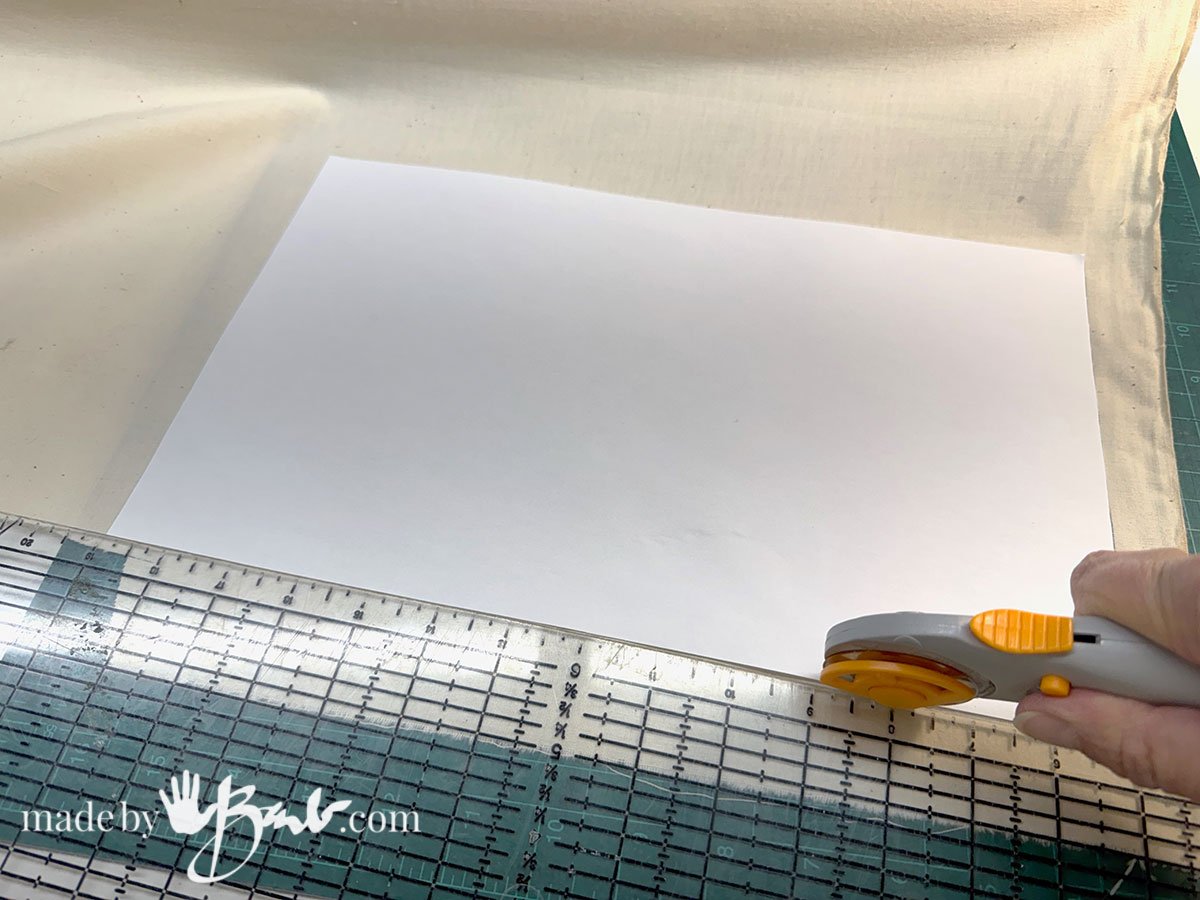
To make sure the page travels through the printer with ease trim closely to the paper edge. Use a rotary cutter to allow the cleanest straight cut, (no loose threads) and an edge guide rather than scissors.

Printing the fabric;
Take note of which side your printer prints onto in order to position the fabric side properly. In my case the paper runs through and prints on the upper side (underside once through) My printer settings were a simple black print on legal size paper (8.5″ x 14″)
I have used special printable fabric sheets in my inkjet printer so I know it would work similarly. The ink does need some time to dry and may be more susceptible to water damage than laser prints. This tutorial is meant for decorative use but I have seen that some have had good results for washability.

The fabric sheet does peel off the tape on the backing paper pretty easily and it retains enough of the stickiness to be able to be used as a carrier sheet again. A small amount excess ink did go through the fabric but that did not affect subsequent prints.

Heat set Assurance:
When doing some rub tests I did notice some of the toner was not as permanent as I wanted so I gave the printed fabric an extra ironing with high heat iron. Make sure to use a piece of parchment paper to protect the iron surface.

Where & How do I get the drawings?
Ok, here’s my little secret; I do the drawings on my Apple iPad Pro with my apple pencil and the Procreate app. It might seem like cheating but I use photos and then trace what lines I want. This software allows you to make layers somewhat like having a tracing paper over your photo. I can lighten the photo to make it less visible and hide it when I want to see how it’s going. Any mistake can be quickly redone with just the touch of 2 fingers – bam – no erasing!
These drawings are all sentimental and special to me… ‘But you can use whatever you like.

I am trained as a traditional artist but I do love all the brush choices and the undo feature. Do not discount that you can do it before you even try! It is so much fun!

Eventually you start to see how minimal line work is actually needed to represent what you want in this outline style. The pencil tip is pressure sensitive and can be adjusted in many ways, colours, texture, style, etc.

What to use these Fabric Prints for;
This vision in my mind was to create a bulletin board for my Grandson for his birthday. I used my collection of images and would sew the pieces together. This quick method made short work of getting all the images done…

Various things will be tacked to the board so I kept it simple black line. If you have a colour laser printer the method would be the same.

The sheets were sewn together like a quilt to make one large sheet to cover the cork board.


The cork board was covered with some old blanket and poly fibre. The majority of the stapling was done on the back of frame and then covered with a strip of bias fabric (left over from making strip rugs)
Black elastic was stretched between the sections (over the seams). Use what you have…

Yes, my gifts tend to be quite sentimental… That’s just how I roll… If this can make a small impression my on ‘lil one to be creative in the future I will be so happy!

Spend the time with the youngsters even though you think they will forget; they do not. I saw my mother being so creative all my life and she never showed any frustration. That taught me a lot about being persistent and determined.

What do you think? Please, tell me that you believe that you could do the same… I know you can! Here’s to hoping that this tutorial; ‘how to print drawings on cotton fabric at home’ will come in handy at some point!
‘Just a thought; this method could be the starting point for a stitchery, needle felting, painting, or even some FME (free-motion-embroidery) ‘Those wheels are turning in my mind again!
Amazing idea. Ok now I really need to upgrade my iPad and get procreate
I do a lot of my planning sketching on it since I can easily use pictures in the layers. I bet I haven’t really discovered ALL the things it can do. Surface pattern designs also come together quickly in Procreate. There are surface protectors that make it feel more like paper too, yay!
Hi Barb, I have printed quite a bit on fabric as that is my substrate for my art. My easiest way is to use full-page labels that can be purchased online or at office supply stores. Just remove the label from the carrier sheet, and put on the backside of fabric, cut and run through printer. I don’t use a laser but seems like it would work fine. Love your tutorials.
Thanks for the tip! Can they be used more than once? I know there are specific labels for each type of printer.
Do you then print it in reverse with your technique?
No, I don’t need to reverse it in this case since it does not get ironed onto anything else, it is just like a regular print.
Thank you for the info. The June Taylor label sheets have gotten so expensive. I get 12 labels per page. Our charity sewing guild put our tables on lap robes for senior citizens. So you gave me another option to try.
Oh good, let me know how it goes. I’m keeping my fingers crossed!
My Sister and I use spray starch on 100% cotton and iron (2 or 3 applications) to print photos and it works great. It has never jammed in our printer, ink jet. Love your blog and all of your creativity.
Oh, that sounds great too! I do think that would be water soluble though, so it depends what the use would be. Thanks for chiming in! Hmmm, I wonder how these prints would be with the addition of some Dye-Na-Flo painting! So much to try…
Thank you, Barb for all of your wonderful creative ideas.
Have you perfected a technique for transferring images using inkjet printed images?
You’re welcome. I get frustrated with the new ink jet printers as they seem to run out of ink or think they have very quickly. I have tried some of the special products specially made to be able to be ironed onto fabric with good success, they do get expensive though. When I tried regular cotton through the ink did not adhere enough. ‘But somene did mention using spray starch first. It also depends what you want to do with it afterward.
I never fail to be impressed – amazed, even – by your creativity and your skills! The clear way you explain your processes makes them seem doable for those of us who only dream about being as creative and as skillful! Thank you – for explaining this latest project, and for all the others I have enjoyed and benefited from, but have not taken the time to express my appreciation for.
Awe that’s sweet. I think I use my experience that I gained from being in the classroom at the college. Often, it’s the encouragement that is so important, not just technique!
Barb, Thank you so much for the wonderful tutorial!
Thank you Barb for sharing all your techniques for your beautiful artwork!
My pleasure! I find it such a joy especially since it’s so special to me. I hope you give it a go!
Fantastic work barb, i like it a lot, i will try your method. Thankyou Michael
Thank you! ‘Happy to inspire!
Hi there, I would like to do this for my embroidery kits but I don’t have a tablet to draw directly on to use as the image. Is there a way to get my drawn image from paper to the computer to then print out?
Many thanks
Lucinda 😊
There are many ways. If you have a phone you could take a picture and use the photo editing on your phone or computer before you send it to the printer. There are also home scanners (sometimes they also can print) that will scan your drawing into a computer. I can ‘air drop’ images from my phone to laptop. I hope that helps!
Thank you, I will give it a try today 😊