How to Paint a Custom Door Mat (Easy DIY Tutorial!)
If you love creating personalized home décor—or if you want a quick, high–impact DIY gift—painting your own custom coir doormat is one of the most satisfying projects I’ve whipped up!
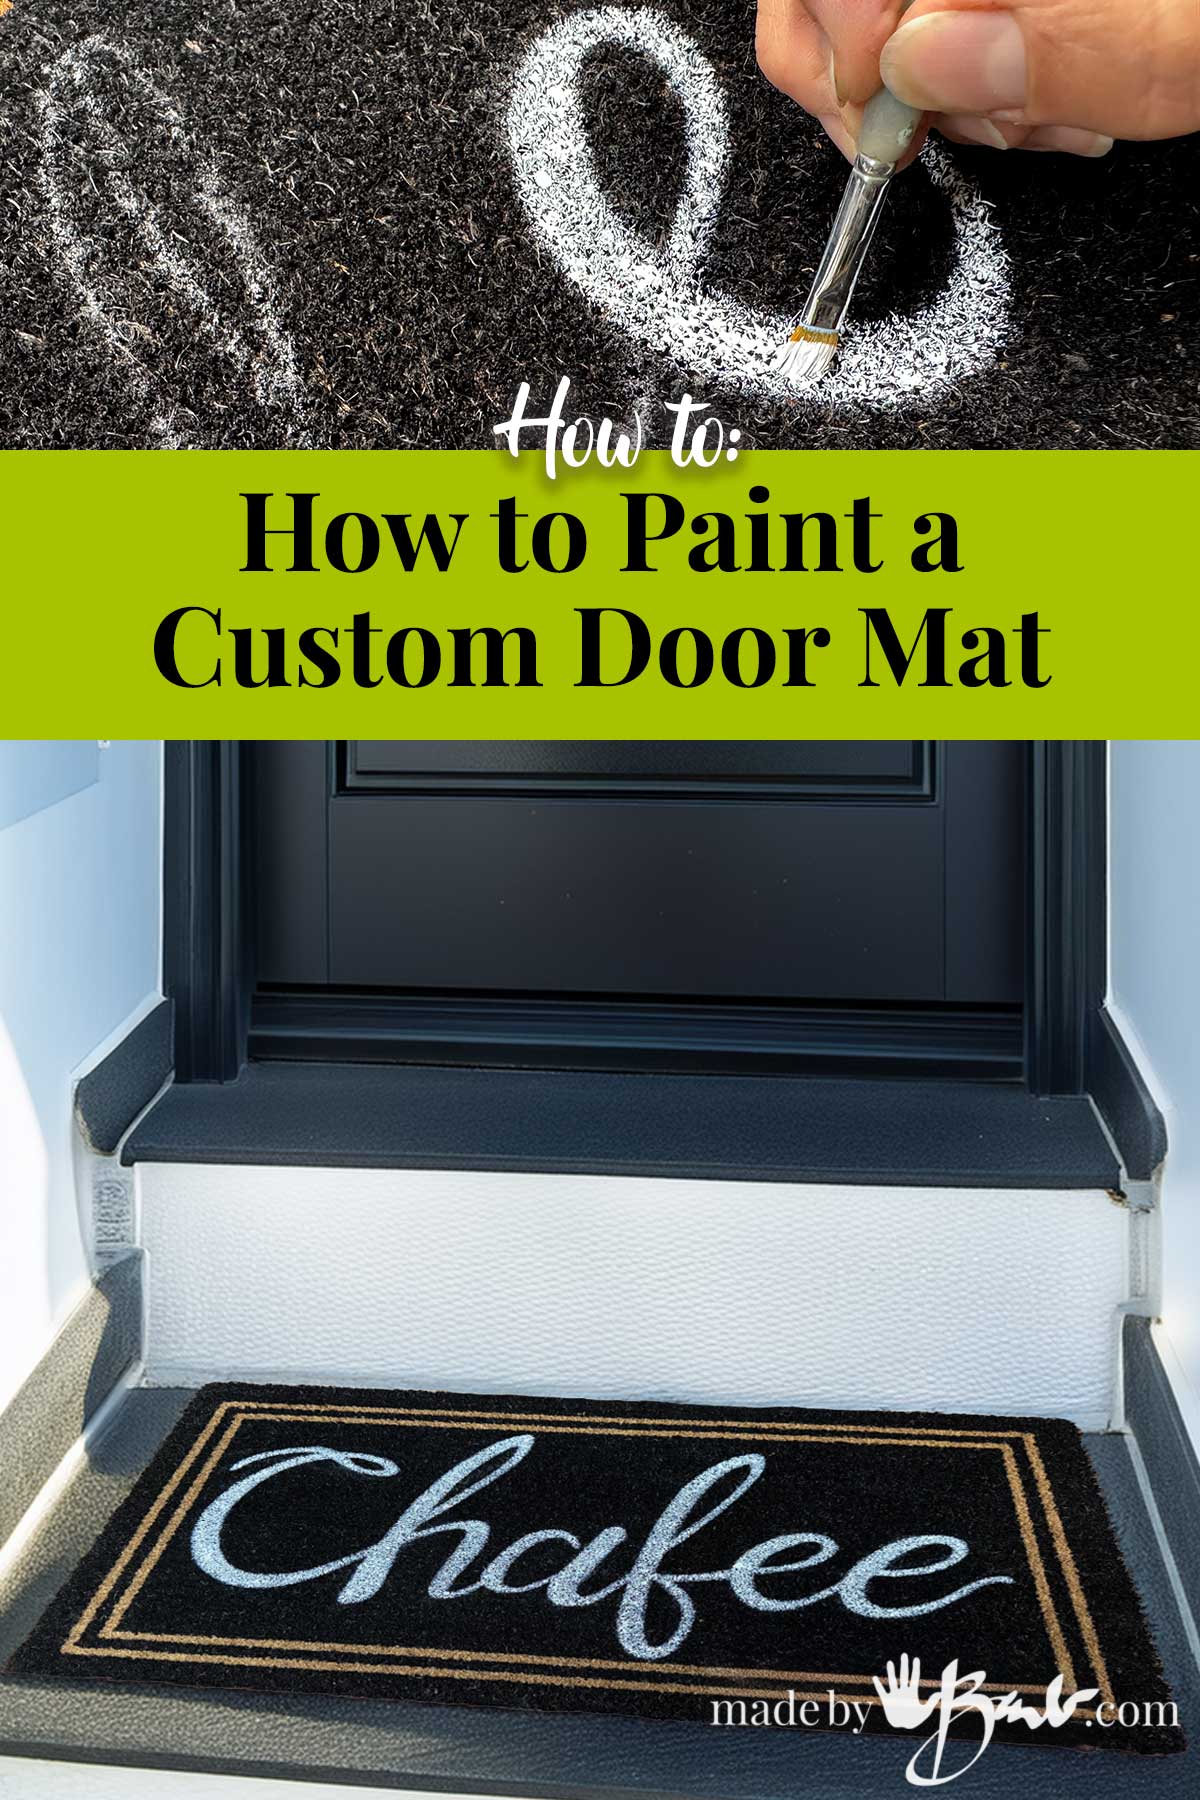
Best of all, the process is simple, budget-friendly, and endlessly customizable. Coir mats are durable, natural-looking, and perfect for adding personality to your entryway.
Here’s a step-by-step guide to help you design and paint a doormat that looks crisp, clean, and professionally made.
Why Coir Mats Are Perfect for DIY Designs
Coir mats are made from coconut fibers, which makes them:
- Tough and weather-resistant
- Great at trapping dirt
- Easy to stencil or paint
- Aesthetically neutral (perfect for any design)
But don’t feel limited to coir, as other carpets also take the acrylic paint quite readily. I know from accidental spills on my carpet…
The textured surface also soaks up paint nicely—as long as you use the right kind.
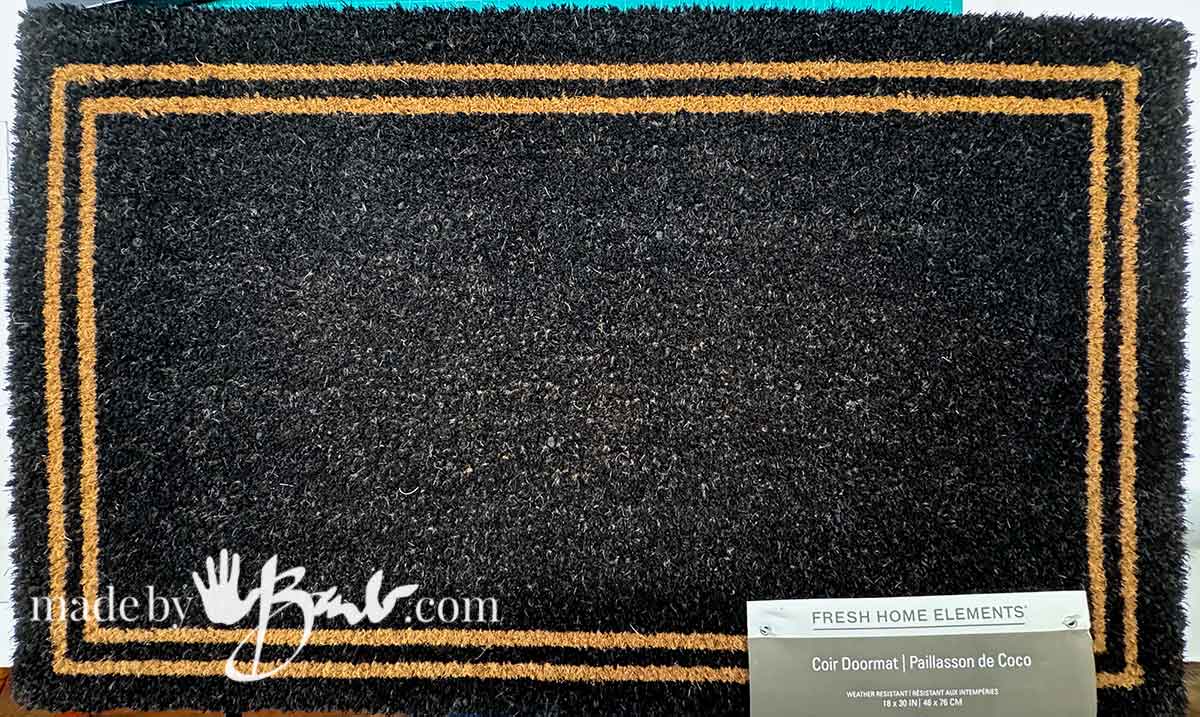
Materials You’ll Need
- Plain or simple design coir doormat (IKEA, Home Depot, Hardware Stores, Dollar Stores, or Amazon)
- Outdoor acrylic paint or outdoor latex paint
- Hand-drawn design or Stencils (store-bought or DIY using cardstock or vinyl)
- Stencil brush, stiff brush or dense foam pouncer
- Painter’s tape
- Piece of cardboard (to slide under)
- Clear outdoor sealer (optional but recommended)
- Weights (optional, to hold stencil down)
- Sketch Type Ideas or Cutting machine (optional—for custom fonts or logos)
Step-by-Step Instructions
1. Prepare Your Workspace
Lay down a drop cloth or garbage bag outside or in a well-ventilated room. Coir mats shed a lot, so keep the mess contained.
Slide a piece of cardboard under the mat—it helps keep the paint from bleeding through.
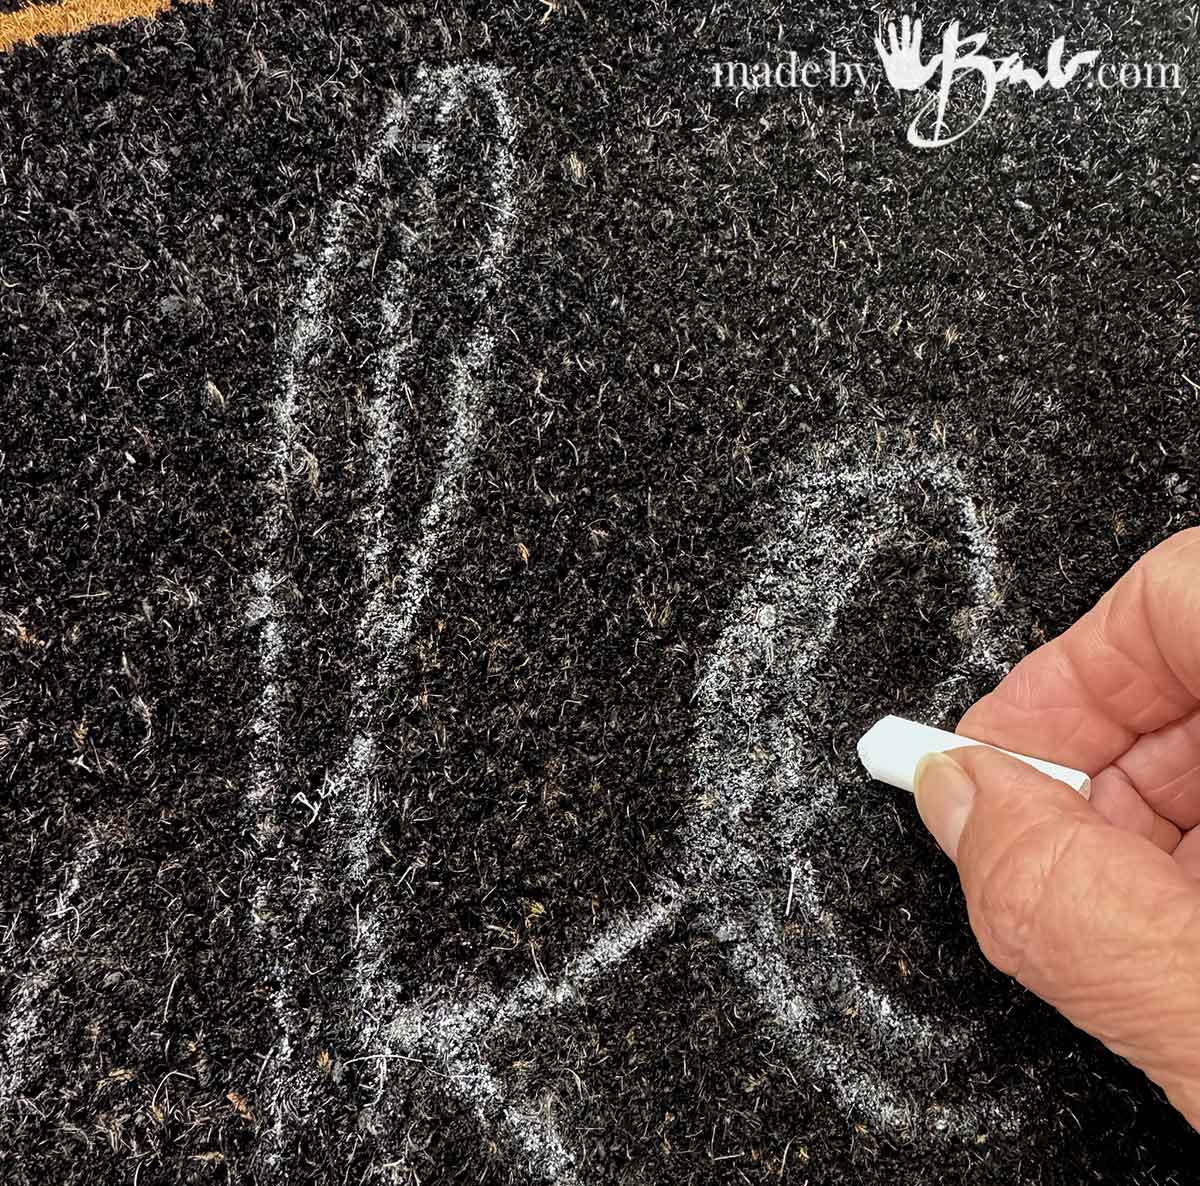
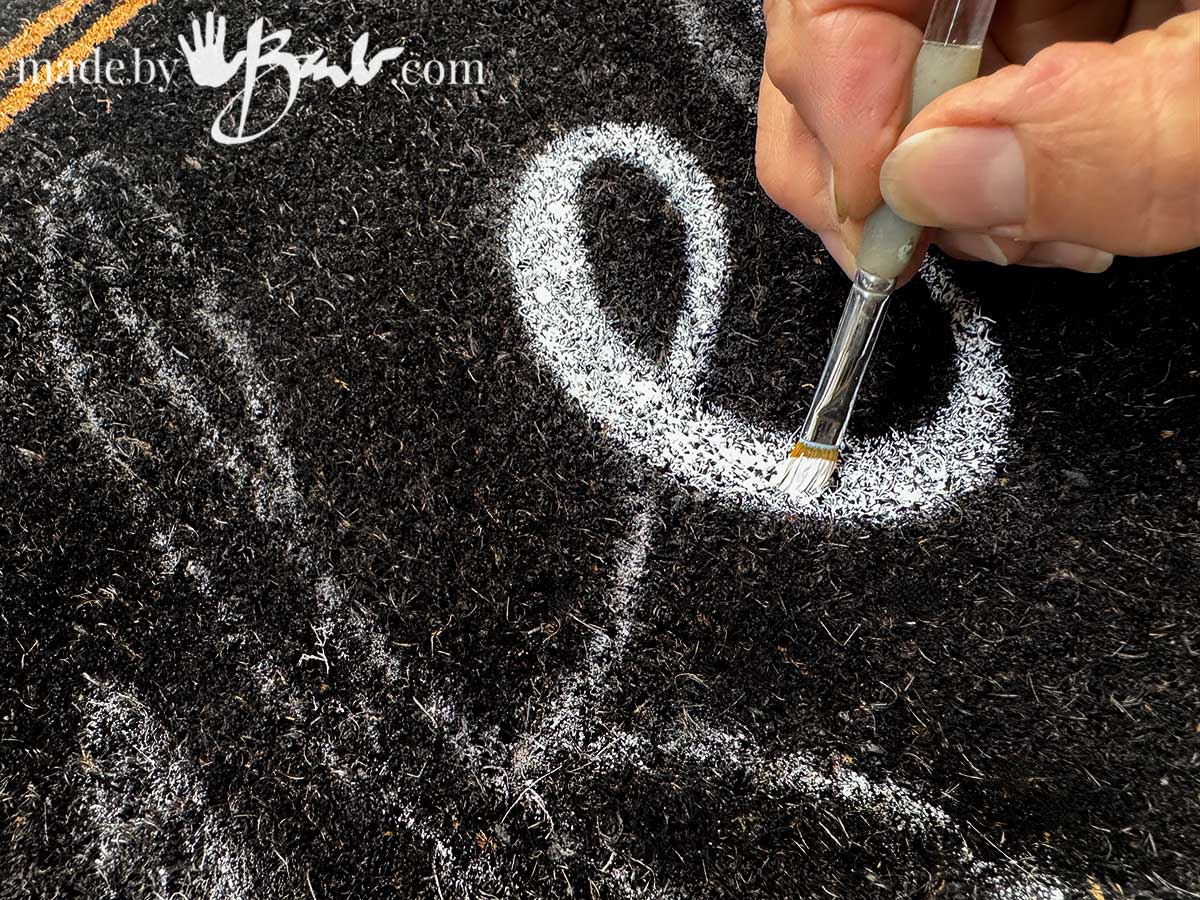
2. Transfer your design
Whether you’re using a pre-made stencil, cut one yourself or freehand-draw your own (my choice) size to the space.
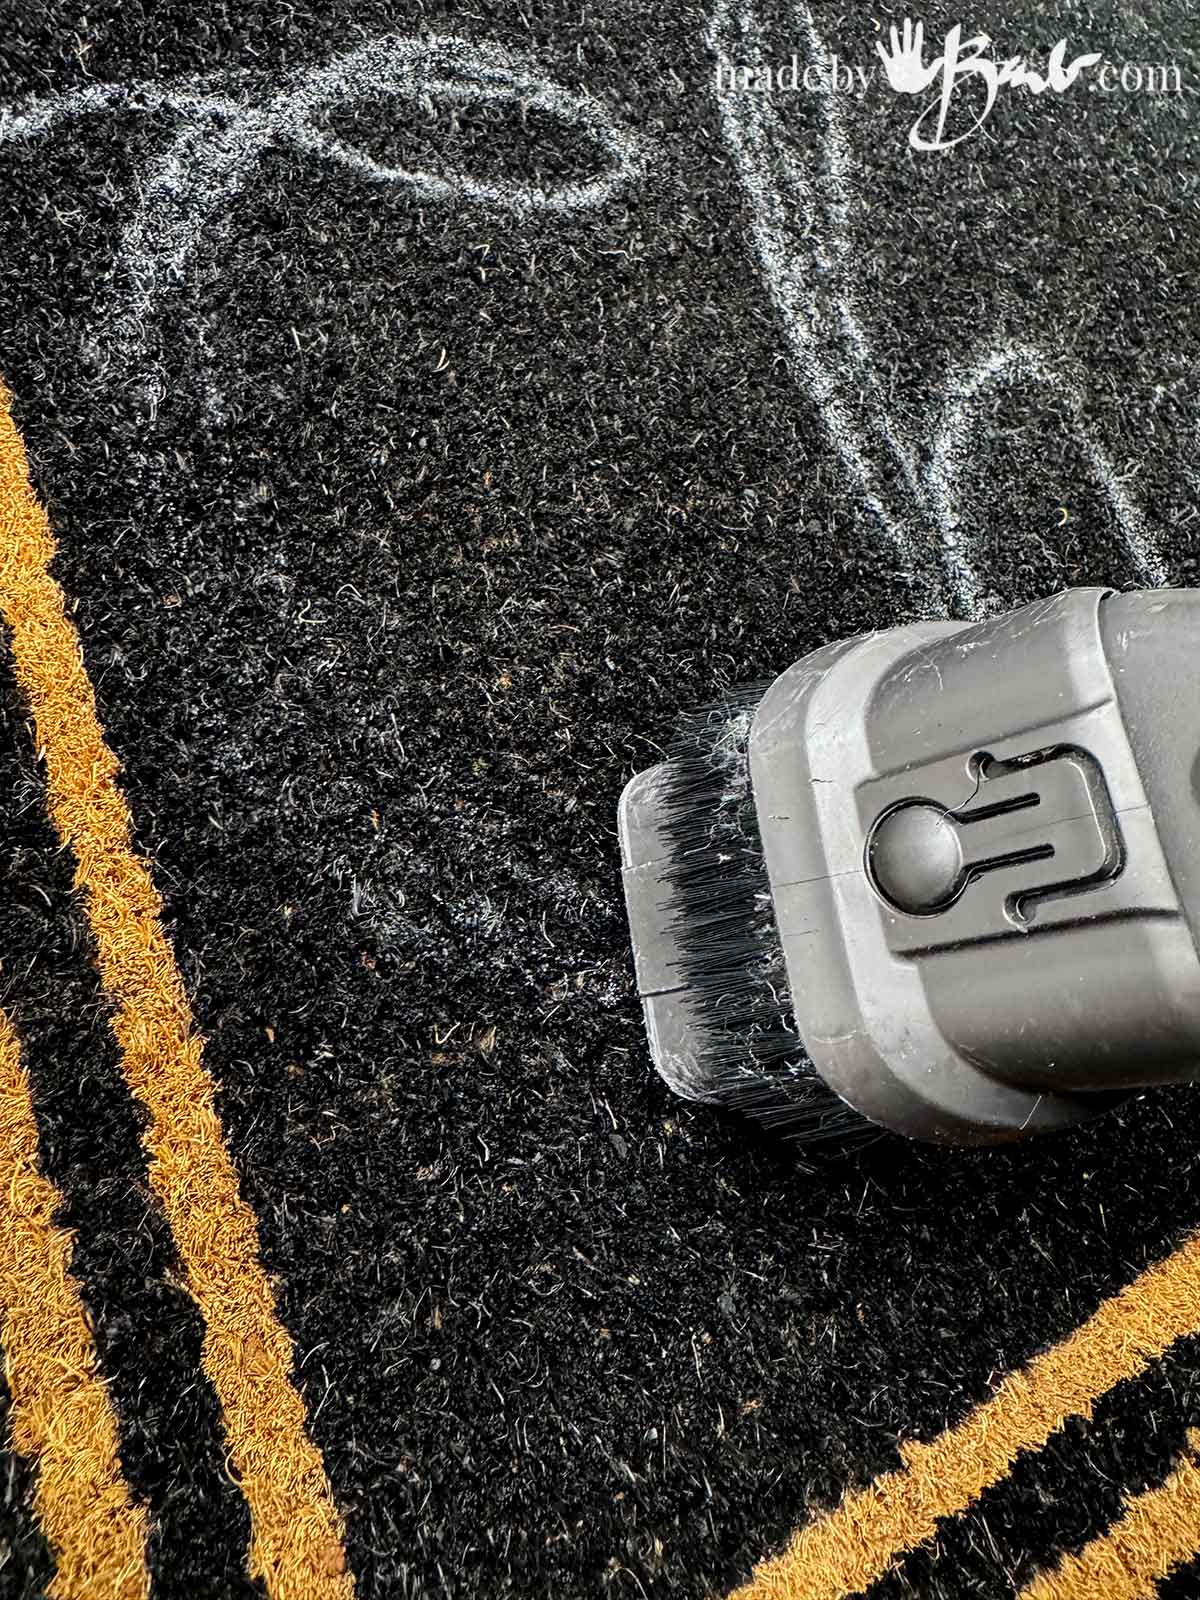
- TIP: to draw design use chalk as it can be ‘erased’ by vacumming up whatever you do not like.
- If using a stencil place exactly where you want the design, tape to secure edges.
- For more detailed designs, use weights or coins to keep the center pieces flat.
Tip: Simple, bold fonts and shapes work best on textured coir.
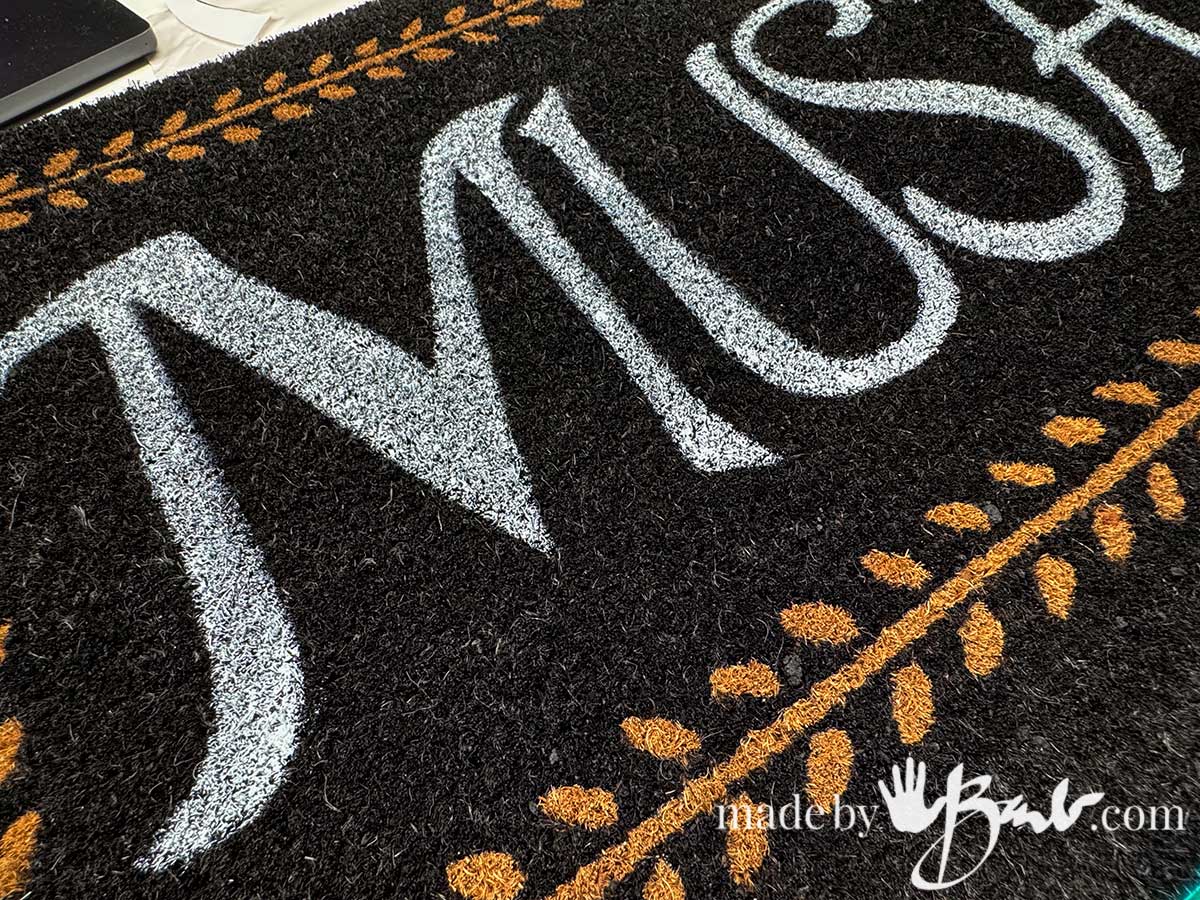
3. Use a Pouncing or Dabbing Motion
Dip your stencil brush or foam pouncer lightly into the paint, then blot most of it off onto a scrap surface.
You’re aiming for:
- Thick paint
- Dry application
- Firm, vertical dabs
Do not brush or drag—that causes bleeding under the stencil or blobs of uneven paint
Instead, build the colour slowly with several layers of dabbing.
This technique can also work on other types of mats or carpets. Consider the background colour.
4. Apply Multiple Thin Coats
Coir fibers are uneven, so one thin coat won’t reach all the nooks and crannies.
Let each layer dry for 5–10 minutes and repeat until the colour is fully opaque or as much coverage as desired..
Pro tip: For super crisp shapes, push the paint downward, not sideways.
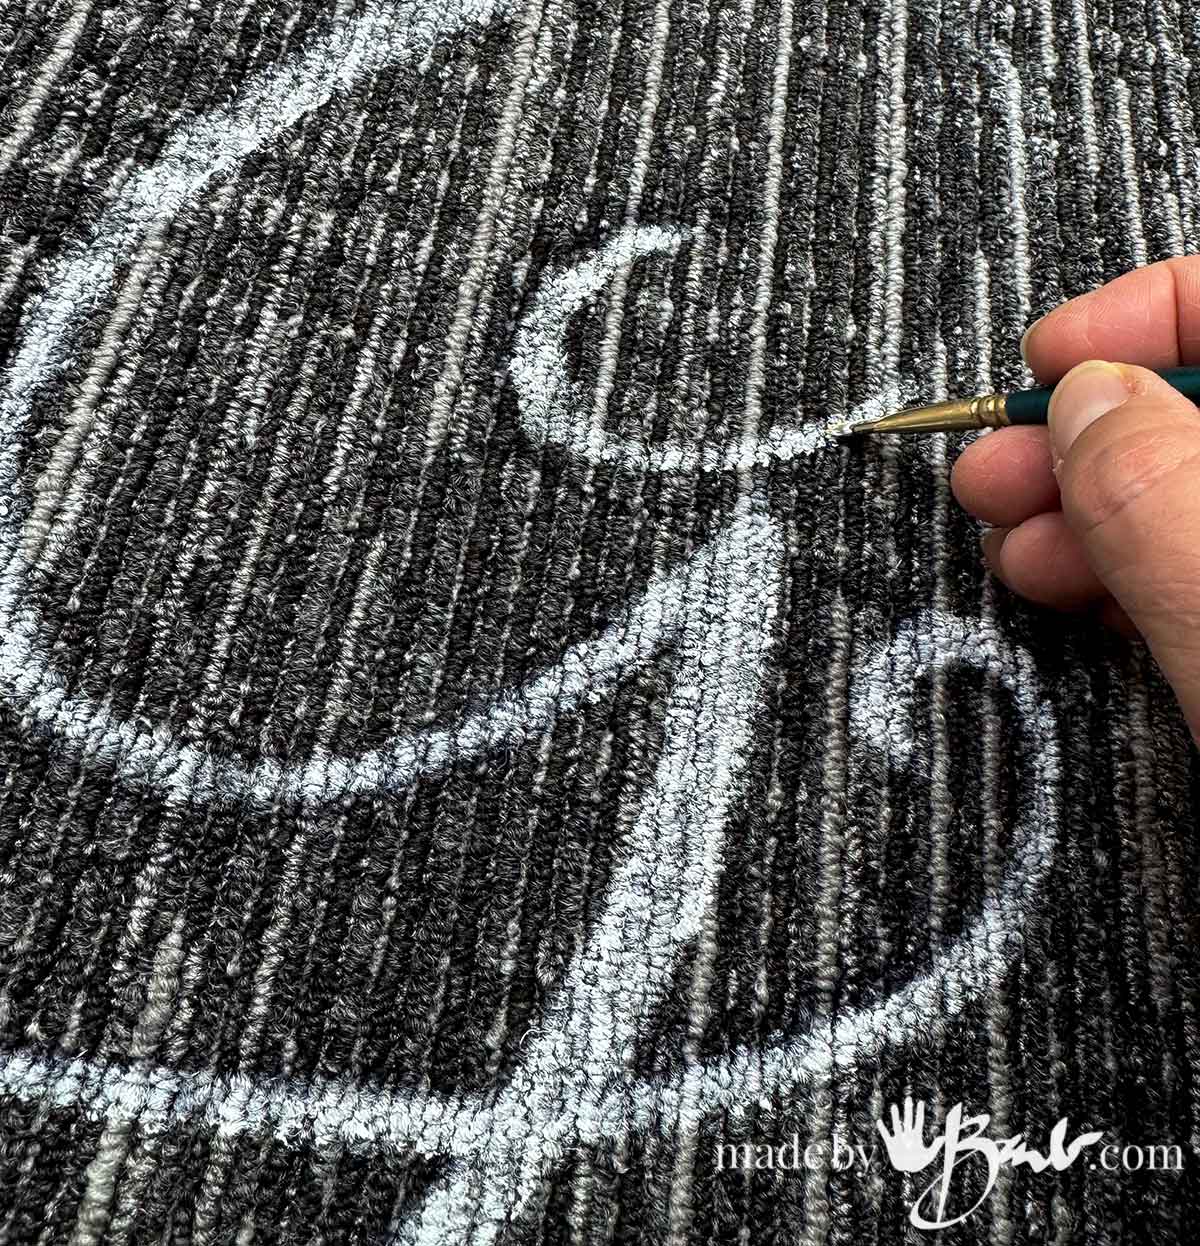
5. Define the design
Check for a clean edge of the design if painting. Peel the stencil upward carefully while the paint is still slightly damp.
This prevents cracking or lifting.
If any areas look light, do small touch-ups with a tiny brush. Depending on background colour some extra paint can accentuate edges. Some basic mats come with a pre-printed border or graphics to make the process even easier. (shhh, don’ tell)
6. Seal Your Design (Optional but Recommended)
To keep your design vibrant longer—especially in wet or snowy climates—use a matte outdoor polyurethane spray or clear weatherproof sealer.
Spray lightly and evenly across the surface. Let it dry for 24 hours. This won’t make the mat waterproof (nothing really does), but it will extend the life of your artwork.
Design Ideas to Try
- Classic décor greetings: “Hello,” “Welcome,” “Home Sweet Home”
- Seasonal themes: pumpkins, snowflakes, hearts, bunnies
- Funny sayings: “Hope You Brought Wine,” “Nope,” “Doorbell Broken—Yell Ding Dong”
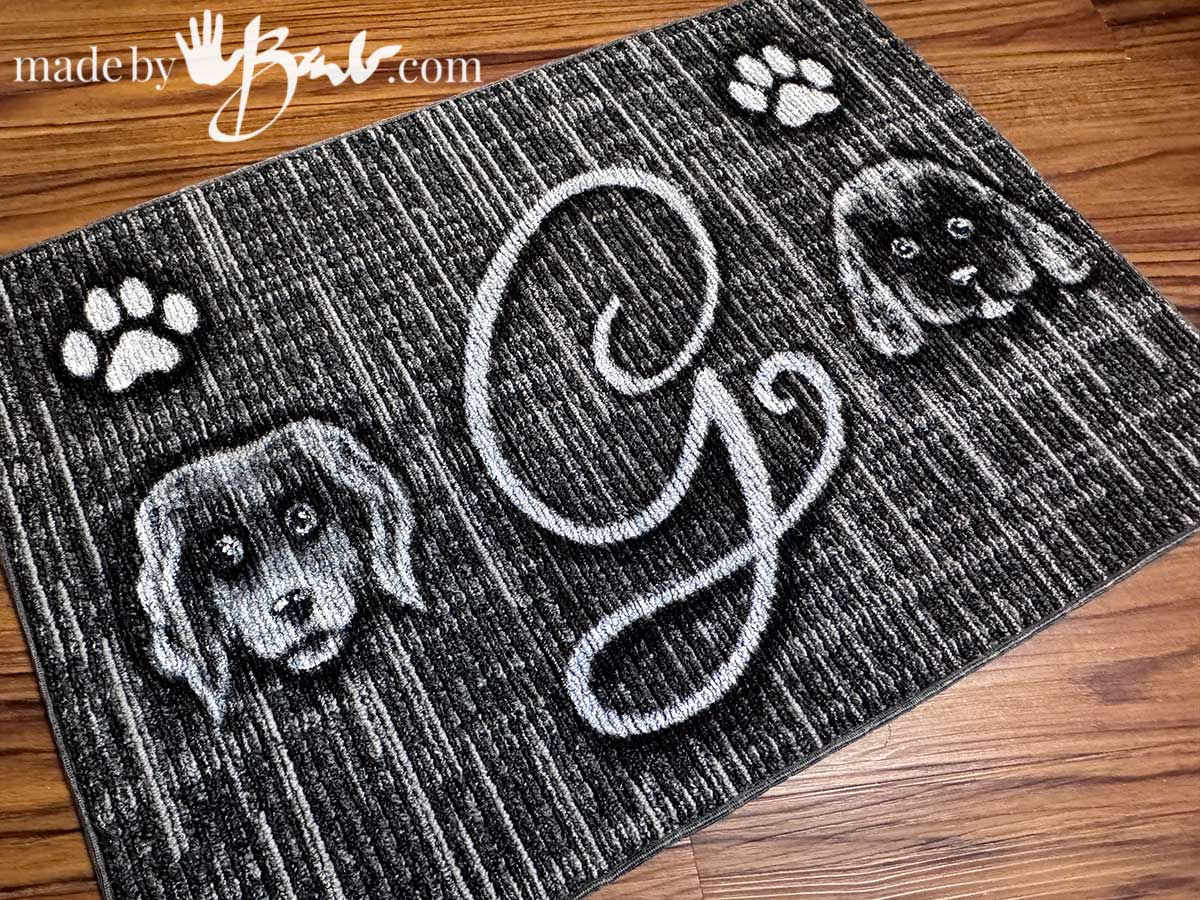
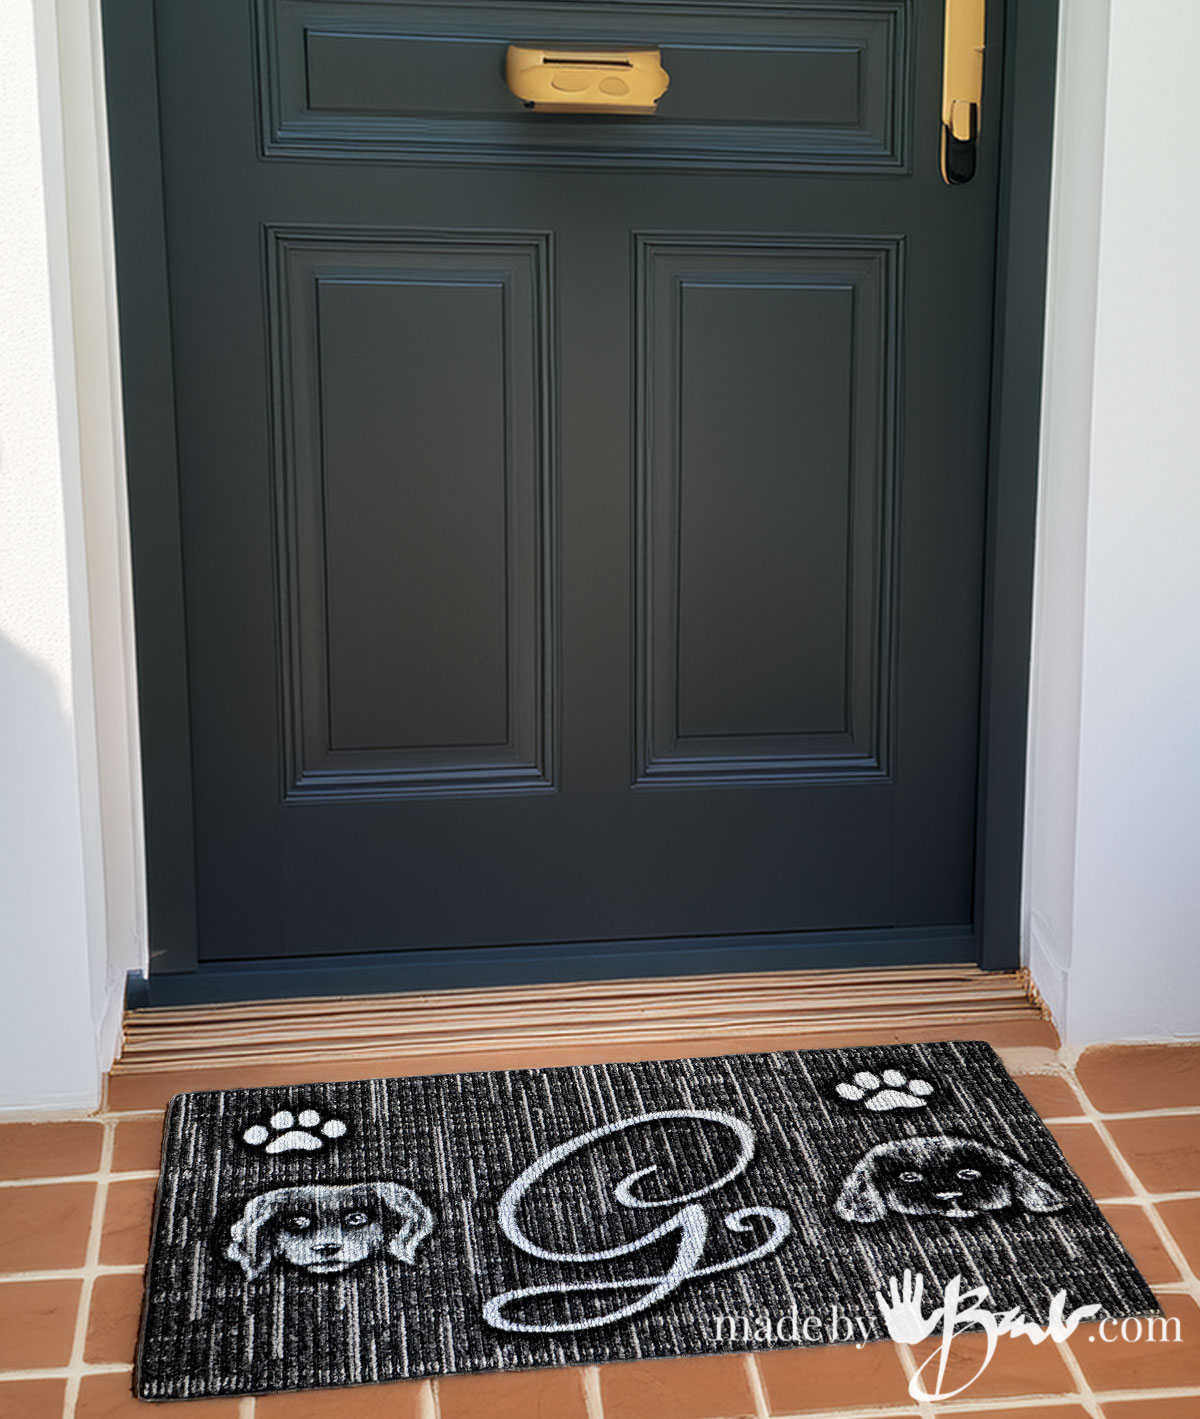
- Pet-themed: paw prints, silhouettes, “Wipe Your Paws”
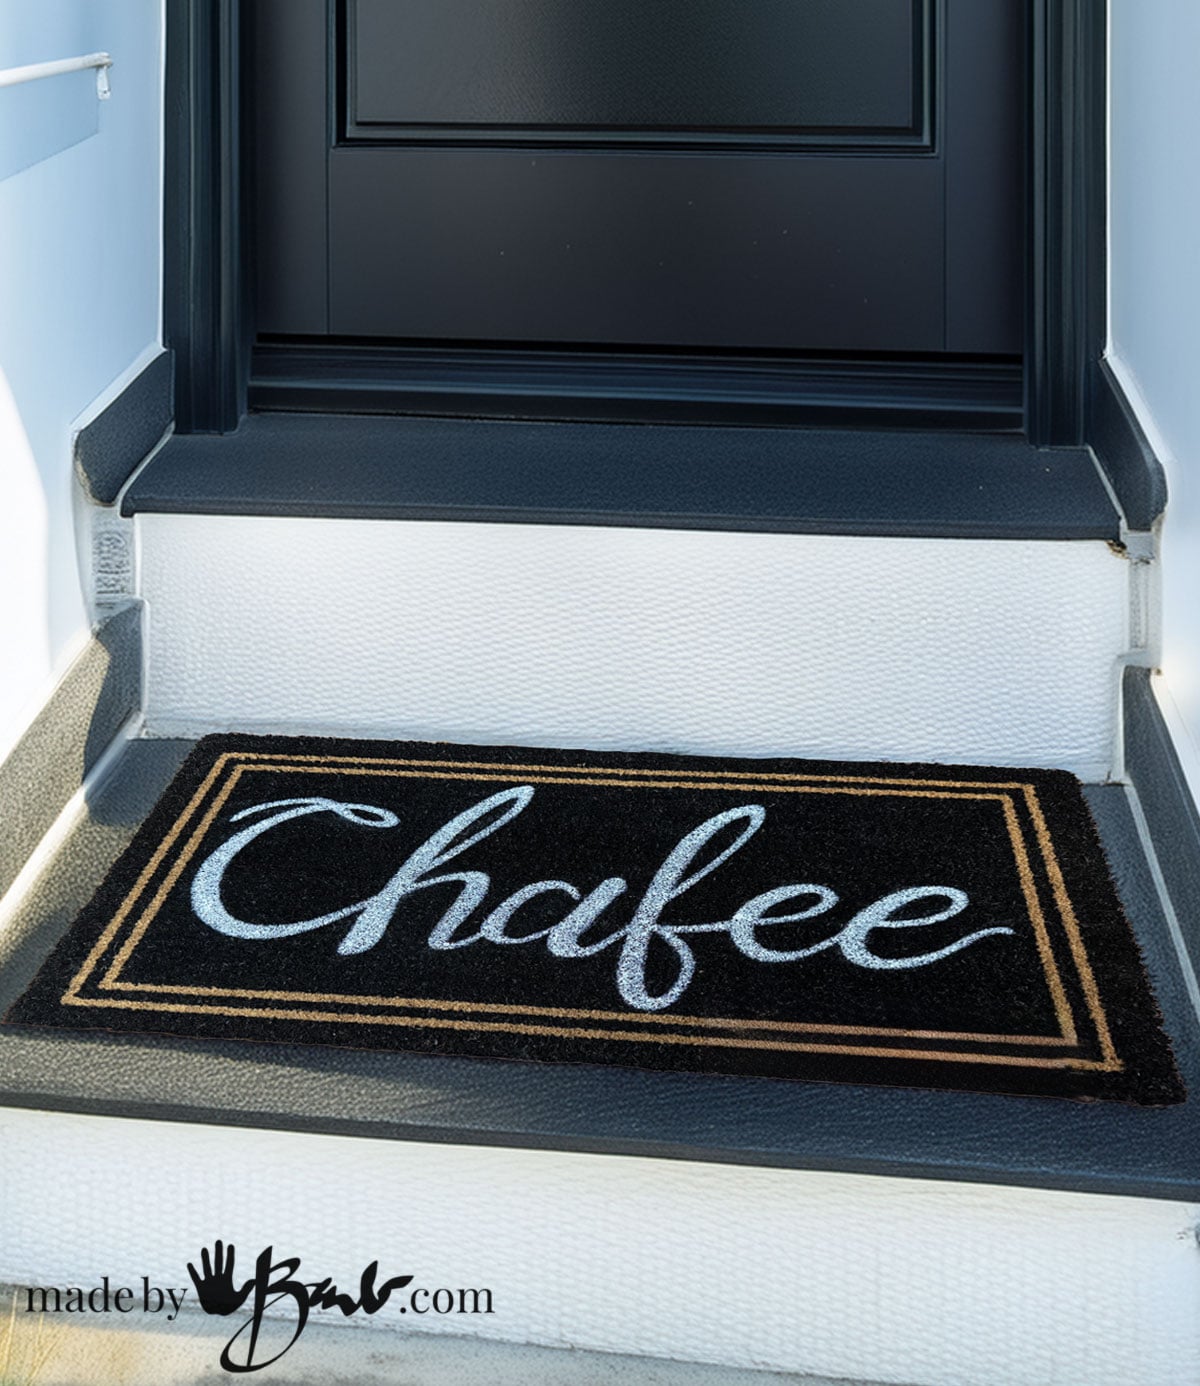
- Holiday-specific: Merry Christmas, custom monograms
- Custom names: perfect for housewarming gifts
You can also match your mat to your wreath, porch décor, or Christmas display.
Tips for the Best Results
- Avoid super thin-line fonts—they get lost in the texture.
- Darker colors show up best on coir.
- If using white paint, plan on extra coats.
- Let the mat dry at least 24 hours before putting it outside.
- Store under a covered porch for longer life.
Handmade, Personalized, and Totally You
Painting a custom coir doormat is one my favourite DIYs that look far more expensive than it is. With just a bit of paint and a simple stencil/sketch, you can create a mat that reflects your style (or the personality of whoever you’re gifting it to). Whether you love minimalist designs, bold graphics, or seasonal humour, the possibilities are endless.
YOU are one talented woman! So love seeing all your creative outlet projects and THANK YOU for sharing and building inspiration in the rest of us.
It’s very rewarding to be creative, but even better when you can share it far and wide! It’s my way of giving back! Thanks for the note.
Wishing you a verry Merry Christmas and a terrific New Year!
From: Colorado Springs, Colorado
Awe, thanks! ‘Same to you from up here in Canada!