No-Sew Perfect Little Purse

“Nice purse! Where did you get it?” your friend asks. I made it myself last night, you say with accomplishment. Yes, I know it’s difficult when you don’t have all the sewing skills, so I designed a pattern for you that is NO-SEW. It worked great in felt and also worked wonderfully in a medium to heavy weight leather. But really, it could be made out of whatever material you can cut and punch holes in. I have used pop-rivets to hold it together, and it is really strong. Most guys have a rivet gun in their tool drawer… just gathering dust. So, here goes your tutorial with the pattern. Enjoy!
Step 1:
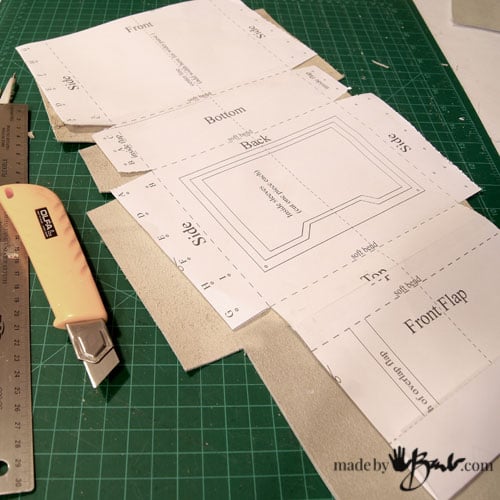
Fill out form for instant download link. Print it, (it is large so you may need to print it on 3 separate pages and tape it together) If you want a wider purse, cut along center line and make it wider by adding some extra paper.
Step 2:
Lay out pattern on your felt or leather (or vegan leather). Since this is not sewn it’s best to be some material that does not fray and has some stability to keep it’s shape. Tape or pin your pattern and cut carefully with a rotary or matt cutter. Decide how much of a front flap you like. It can cover the entire front or be shorter as the felt one. The “soft bend” lines gives you the idea where the “corners” are. Poke holes through the pattern to make markings for the hole punching.
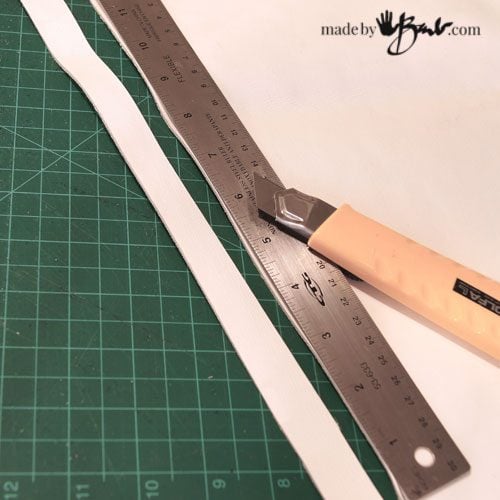
Straps can be cut from leather or from felt. You can also use a webbing material similar to seat belting. It is usually available in the trim sections of fabric stores. Or be resourceful, see what you can find. Even a dog leash works well. Or that old leather belt (kudos to your up-cycling) I like my purse as cross-body so I make it 48″. You can adjust to what you like. Be creative…

Step 3:
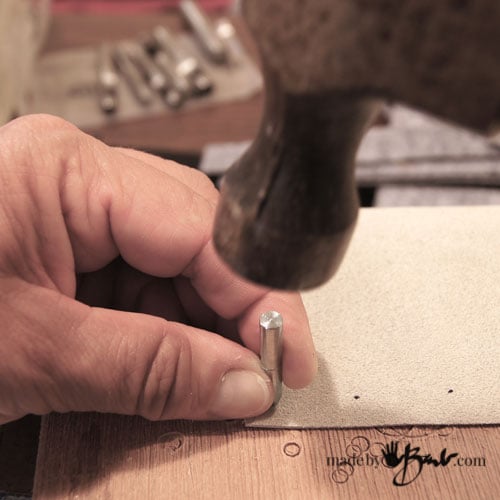
Punch holes. I use a hole puncher from a snap installer kit. Or you can use a leather punch tool.
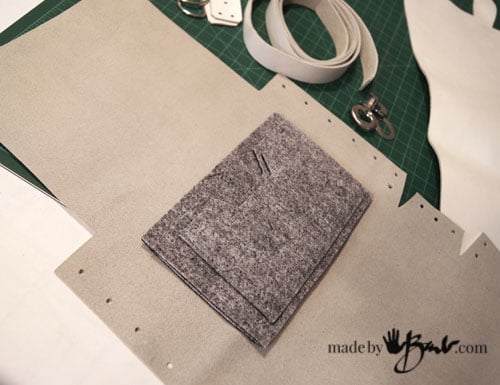
If you would like an interior pouch, you can sew one. If you use wallets you don’t really need this.

Or you can rivet it together and fasten in with a couple rivets as I’ve shown here.

Step 4:
There are a lot of options for closures. Many fabric stores have appropriate hardware as do some leather supply places. You can also be creative and use carabiners and grommets(eyelets). I will include a list of links for my favorite suppliers locally. I found mine in an upholstery supply store. Tip: use tape to plan where you want it. It is best to install the closure prior to assembly.
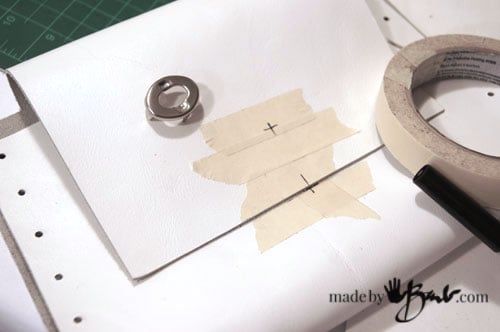
Mark center and amount of overlap.

This “Coach” inspired closure is a turn style that needs a hole.

After punching line up back plate…

…and bend tabs inward.

The other “male” part only needs small cuts for the prongs and also has a back plate to install. I have given it a double layer for durability.

The clips used here are similar to the dog-leash style. I cut the 2 small tabs to attach the “D” rings to the purse.

Step 5:
Tool time! The size of rivet depends on a few things. How many layers and how thick the material is. I used the 1/8″ size that was 1/4″long. I also sourced some small washers under the head. NOTE: you also need to buy the rivet backup washers that fit your size of rivet. It holds it from the inside. The rivet gun pulls the rivets from the outside. I work from the bottom of the purse outward, matching the holes by letter. Make sure backup washer has enough depth to catch at the inside.
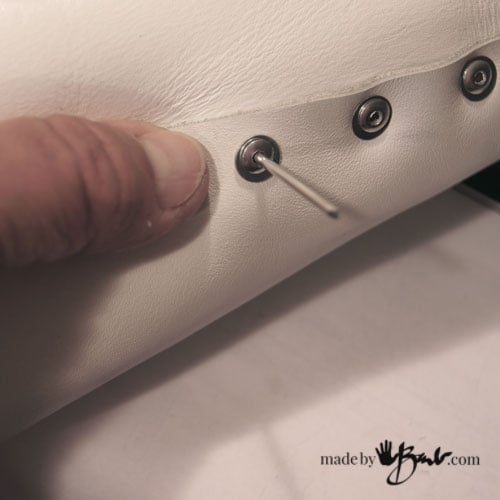
Once the gun pulls this tight, the shaft “pops” off, hence called pop riveter.

Note how the tab is held with 2 rivets and shares a hole. Rivet the “D” ring. I overlap front to back. Rivet your straps to the clips. Once you get the hang of holding the rivets it gets easier. Share your projects and questions. Enjoy carrying your creation!
Hi there
Lovely bag. Wanted to make one, but the pattern doesn’t seem to want to download. Any tips?
check your email as well…
Also have a problem with link for download. Greetings.
I just tested, it works… Perhaps try a different browser or device. Thanks
Beautiful bag. I cannot believe how imaginative and talented you are.
Nothing happens when I click on the pattern button. 🙁
A window should pop up for email address, It works but sometimes browser settings etc can hinder it.
Good day
The link to open download doesn’t work
I have tried on my phone & my computer
Perhaps you have a pop-up blocker in place… That stops the email form from coming up. It is working
I have tried everything possible to download this free template to no avail. The link does not even open. Please help
I just tested and had no problem on Chrome. Sometimes it is the way your system has been set up. This may help.
Hi, I cannot download the link too to get the template. Looking forward to try it out.
Perhaps your browser settings has it blocked to allow popups. Check your settings I test and it works, many seem to manage every day.
Brilliant Bag! I’d love to make one but I’m having the same issues as others. I’ve tried different devices, browsers, unmarking the pop up blockers. I’ll enter my email and name and will get a screen that says “cheatin’ huh?” I went to your download page and tried from there. The download worked, however it’s for your Easter card. I think you definitely have an issue with the button. I’ll go back to YouTube and see if I can pattern one out myself. I’d even be willing to pay for yours. Happy Crafting!
Thanks for the info… There’s so much ‘tech’ going on behind the scenes. I think it may be fixed. I tested and it worked for me. I am always on a laptop where all the downloads work using Chrome. Best of luck
i hope this gets me the pattern
Yes, it should, many have…
Hi Barb,
I’ve been following you for years, but I can’t get this bag pattern to open or download or even show up. I can’t imagine how you keep up with all of the technology.
It often depends on how/what your browser is set up like. I tested and it works fine. A window pops up to have the email address so the pattern can be emailed as well as the PDF opens.I use (up to date) Chrome browser on a laptop. Yes, there’s a lot of tech going on behind the scenes.
Would like to do pattern
You can download it here.
Keeps going back to main page when trying to download
Check your popup blocker etc.