Rustic Concrete Pots & Planters

Summer delight! Putter around the garden and figure out where to plant your darling little green things that you so lovingly grew… Make some unique rustic concrete pots & planters that show off texture. There’s definitely a resurgence of concrete materials to accent the starkness of contemporary design. Wouldn’t these planters look great on a wood live edge table?! Add some painting effects that are super simple, and you’ve created a designer planter piece.
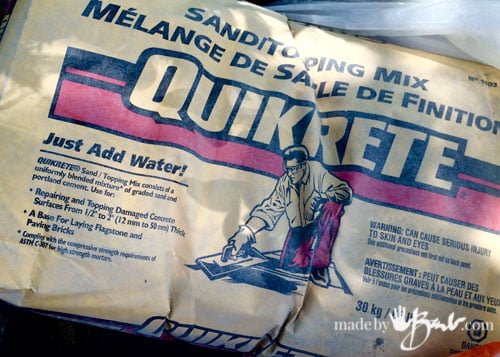
This tutorial is much the same as my Concrete Bowl one. It uses the same mix and most of the techniques. This Quikrete is available quite readily and is meant to be used less than 2″ thick. It does not contain gravel, so it works great for these uses as well as my stepping stones.

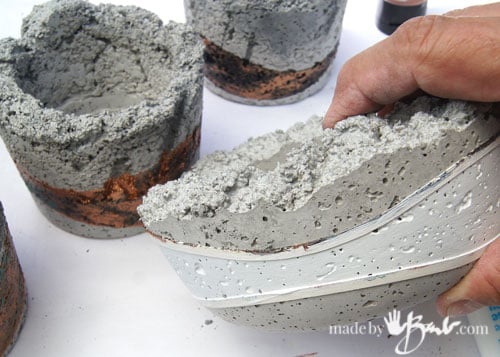
Slowly add water to the dry mix, and stir, stir, stir. You can add fibers as shown here or leave without. Since these are not that large they will be fine without. Larger ones need more reinforcement as we support it less when moving and carrying.

As with the other bowls, any containers that are somewhat tapered will work. I used large yogurt containers and some plastic cups in the centre. Spread Vaseline on the surfaces or spray with cooking spray. Fill the containers with the mixed concrete but DO NOT tap or vibrate. We are NOT trying to get rid of bubbles this time. This will give the stone texture we are looking to create. The key though is that the concrete was mixed well. As usual, let sit in a shaded area and mist with water during the curing stage. Once hardened, 24 hour or so, pull out of the molds. I soak mine for a couple days in a bucket of water to leach out any extra chemicals and further cure the concrete.

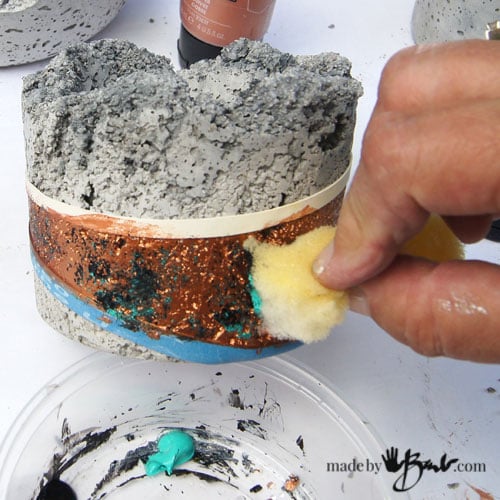
Once dry, it’s time to embellish and colour (your option). I like to create tensions of colour and material, so I really like the metallics. I use acrylic paints which adhere well to this rough surface. Concrete is porous to a degree, so acrylic is best to eliminate peeling since it has some breathing ability. You will also need a piece of sponge for some detailing.

I employed some of the tricks of other crafts such as Ukranian easter egg painting which employs the use of elastics to keep edges masked. It also allows you to curve the edges quite nicely. Masking tape can work but is a bit more temperamental to use since it’s harder to curve.
Paint the background/base colour first. Colours and tones that are lighter or darker than concrete work will to set it off nicely.
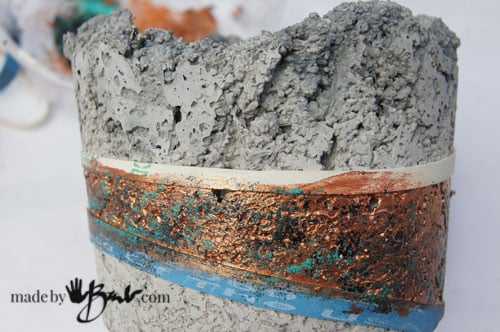
I added black and turquoise to ‘age’ the copper somewhat.
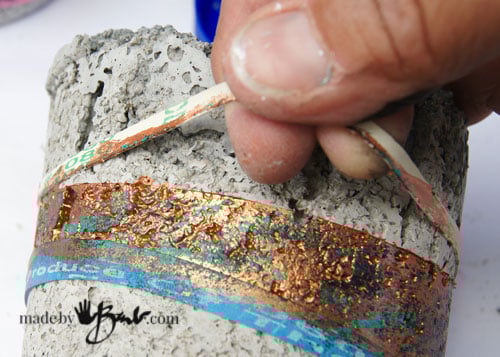
Once you are happy with the design and it is dry, pull off the elastics.
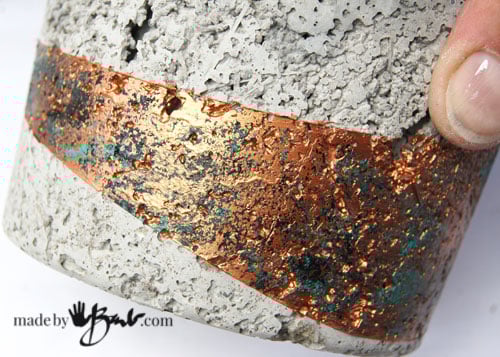
It is so easy since the texture makes anything look well done. There is no perfection in stones. Perhaps add multiple strips and create your own geological layers! Or tie some heavy rope or sisal, no skill needed.

A dark background works well too. It mimmicks the layers of stone in the earth’s crust.
You can use these outside or inside. If outdoors, do not let them freeze when full. You can allow drainage if you insert a dowel through the bowls/containers when pouring. I like to keep mine solid so I can use them on tables without spillage. Since they are small, the water evaporates quickly anyways.

You will start to look at your recycle bin much differently. If you need to create some gifts, these are great and very inexpensive to make. Add some succulent propagating and you’ll save tons!

Ok, I admit, I couldn’t stop myself… and made quite a bunch. They could also be used for candles, or any storage.

Simple design, mother nature inspired, but easier than making a cake! Wait! You could use cake pans…
Nice Work – lots of variations to play with between the smooth textures of your first ones and these and then with all the different textures of succulents … I’ve got my eye on some Lee Valley bonsai tools!
I’ve always loved rocks! So much colour and texture, so overlooked! And people pay a lot for clear colourless ones that are soooo tiny!!!
Can’t decide if I like the smooth or rustic bowls more. Really like the copper/turquoise combination in the stripe … what a great idea to use elastics for marking the stripes.
Yes, I do too. Those colours are opposite on the colour wheel so they are a great contrast. ‘And copper ages turquoise when it ages naturally, nature has us beat!
Love your ideas,I am an artist also.Just now getting into cement,it is exciting
It is such a fun medium, and is really quite forgiving. I’ll warn you; it gets to be a bit of an addiction. ‘Would love to see some… Good luck
Beautiful idea! I love the finished look! Thank you for posting and contributing to the world of art!
Oh thanks! I’m glad to contribute!
Barb, how do you remove all the Vaseline or cooking spray from the finished concrete item? Cooking spray just doesn’t do the trick for me. I keep getting my pots stuck in the containers I use. Vaseline worked but now how do I get all the vaseline removed? Thanks.
I have not really found a release agent that I really like yet. I’d rather keep the mold (flexible plastic or silicone) clean. If you have used the vaseline you may need to use something like a soap to break down the greasiness. A soft brush make help scrub it off and dry well. Concrete is pretty porous so it’s hard to get everything off… as I see that one driveway stains too.
Yes, I have used soap and a brush and still could not remove all the vaseline from the planter. 🙁 So many of the molds I find and want to use are of harder plastic and are hard to remove the cement from even with the use of some kind of release.
I’m like you Barbmaker. I LOVE rocks and roots and limbs. They are natural and awesomely (is that a word. If not, that ok, its MY word) lol. beautiful
It’s strange how beautiful these odd things can be. I keep getting inspired by more & more. It gives me a sense of peace as well… Glad to share with you!
Hi Barb. I love your rustic bowls/plantars. I made a couple with a layer of stones. I love the way they look but one of them… the top 1/3 that I added stones to separated from the bottom. I need to know how to attach top to bottom leaving the original look (open areas that reveal the stones. Glue of some kind or cement? Thanks for your guidance and your enthusiasm for cement. You are right. It can be addicting.
I have good success with Rapidset Cementall, maybe use it as a mortar/grout on the inner areas. Just make sure to dampen the original concrete. 2 Part epoxy can also work.
I use cooking spray and it’s working for me. Here’s another tip, sometimes i turn the mold over ( upside down) when it has hardened, then pour hot water over the outside of the mold. The cast will ‘pop’ out of the mold, just lay it on some soft ( foam or old carpet ) to ‘drop’ out on
I have used the cooking spray, works ok but the mold does need washing as it gets gunky. Interesting hot water idea! I think I’ll try that today! Timely! Thanks so much!
I would think Dawn dish soap would work?? Or maybe rubbing alcohol ?
Rubbing alcohol evaporates quickly. What are you trying to achieve?
Hi Barb, I always wanted to try these and so impressed seeing your easy methods of making pots and stepping stones.. Thank you so much and all the best for your passion…