Chubby PaperCrete Bird
People always say: “I am not artistic, I can only draw stick people”. I aim to prove that wrong! I am always simplifying projects so that those who feel challenged can also tackle it. In my concrete journey I have now expanded to add paper to the recipe and make papercrete; a moldable version of concrete. Can you make a round ball?! Then you can make this Chubby PaperCrete Bird; plain and simple. Come on I ‘dare’ you!

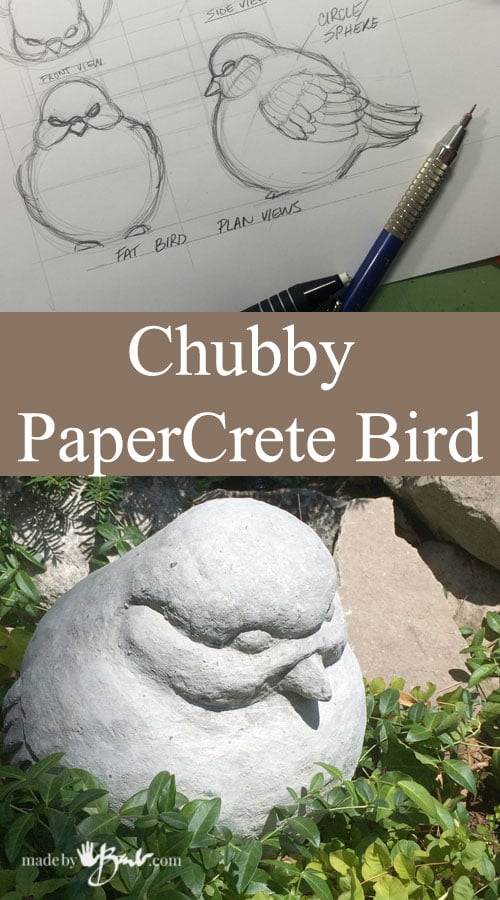
Here’s my plan, paper sketches of different views are a good way to go.

You will need:
- paper (shredded helps but not neccessary)
- portland cement (like this )
- sand
- water
- paint mixer tool (like this )
- some extra newspaper/sheets
- a plastic bag
- some wire mesh like chicken wire
- extra thin wire or string
- string or twine
- utensils like buckets, mixing spoon, gloves, dust mask if indoors
- tin snips or strong scissors
The Paper Fibres:
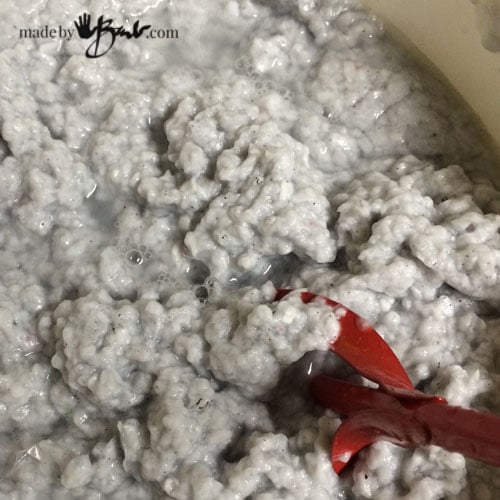
Soak your paper in a large bucket to get the fibres to start to break down. Boiling water hastens the procedure as well. I let it sit for a couple days. To help ‘pulp’ the fibres, and use less of my muscles, I used a paint mixer attachment on my drill. Safety note: you are working with an electrical tool over water! Be aware that you do not accidentally submerse the drill!!! That is why the shaft of this thingy is really quite long. Mix mix mix til you see it changing to be ‘fluffier’.

It is still too lumpy here.
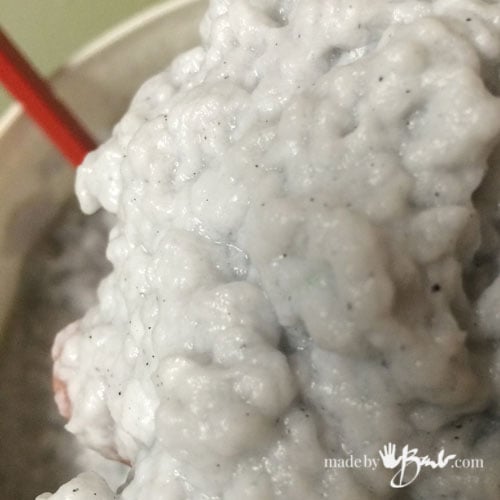
Here it is about the consistency you would like. You will notice that the amount of water seems to get absorbed by the paper and you need to add more for fluidity. That is fine, as you are suspending the fibres in water. Too much info? Ya, I know… The hard part is done.

The Shape:
Ok, now for the form. Take some newspaper and crumple it into a ball, add more layers around the outside and keep building the ball. I wanted a fair size fellow so I went to about 12″ size. To keep it secure I just wrapped twine around it.

To keep this as a dry form I put it in a couple plastic bags and tied. So far so good?!

I’m always amazed at what you can get at a dollar store. Even ‘chicken’ wire! You want some type of mesh to ‘hold’ your papercrete as you sculpt.

Haphazardly wrap the ball with the mesh. Glove your tender fingers and squish it flat.
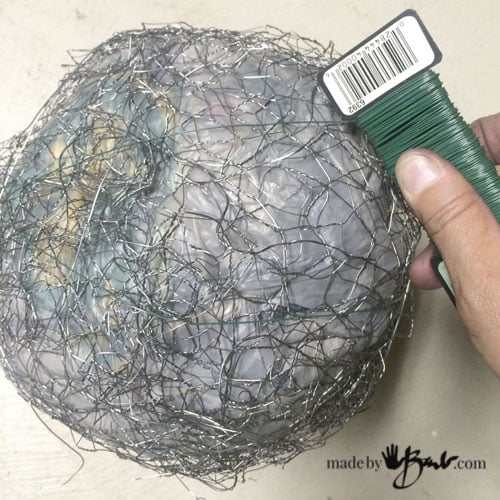
As added help to hold this shape wrap some wire or string around it. It should feel secure.

Now comes the fun part. Best outside, as I usually make a mess.

Mixing the Recipe:
Since the fibres have absorbed a lot of water I try not to bring in too much into the mix. I use a sieve to strain out the fibres.
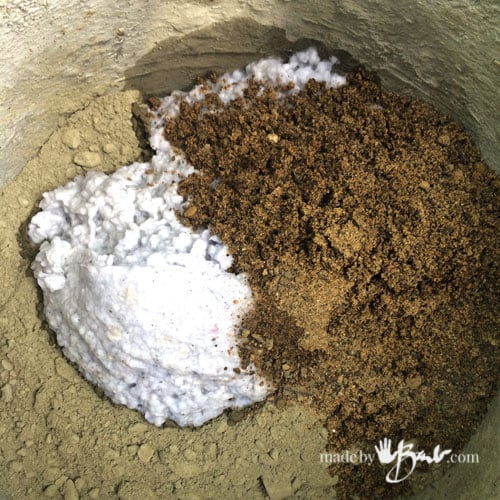
The recipe that I used was
1.5 parts Portland Cement – 1 part paper pulp (scoop) – 1 part sand
I had experimented with more paper in the mix but the final product felt to ‘papery’ and absorbent. You can vary it a bit without huge consequences. The paper is like the gravel of usual concrete, it provides the connecting particles in the mix.
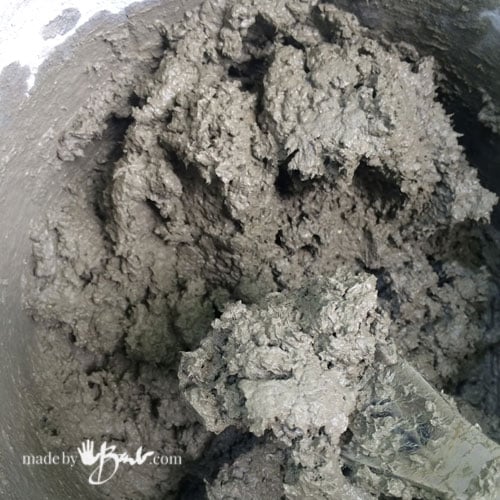
Mix the 3 ingredients and add more water if needed as the paper brings a fair amount. The mix should be very ‘squishable’, meaning it holds some shape like a clay. That is the beauty of this stuff! And the fact that the paper will take away some of the weight.

Applying the Mix:
Clear your mind, let stress melt away, and squish the papercrete to the form. Some may fall off, but stick with it, you will get the hang of it! Put the ball on a board or bucket lid so that you can turn it to work on.

Keep at it, turning and pushing on the mix.

A ball! Good job! Still alive?! Of course…

The reason I kept the design based on a simple sphere is so it would be easy to follow. Add a lump for the head. If you find that the mix is too wet and falling off as you work, you may leave it to harden for a while and go back to add more. It can be a work in progress. I just like it not be completely dry to add more for adhesion factor.

Small details like feet and beaks tend to break so keep the beak short and fat.

Look at the plans and you can visually see what you are shooting for. Use some tools like a butter knife or spatula to help smooth the shapes. Turn to see it from all directions.

I let it dry for a few hours. Plop some more on the sides to fashion as wings. The tail was just a stubby one, and I had added a wire loop into it. It does mostly just sit on the base.
Great job! Now let it cure. It will need extra curing time as the paper keeps some of the water content higher which is a plus for concrete (water helps create a harder final product)
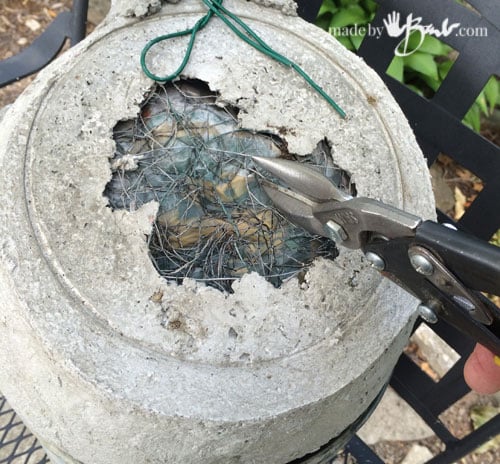
The Hollowing out:
Once you are done and it has hardened, I like to empty the inside. If this was solid you would not be able to lift it. Freezing and thawing is also better when empty. Take the tin snips or old scissors and cut the chicken wire. I propped him on a bucket while I worked.

Once you cut it it is easy to pull out the paper.

He (she) is now hollow. Perfect!

For finishing and sanding I discovered making my own sanding discs out of extra concrete. I just make a few ‘patties’ on a smooth surface and let dry. Since they have sand in them they are essentially sanding blocks. Or you can use sandpaper.
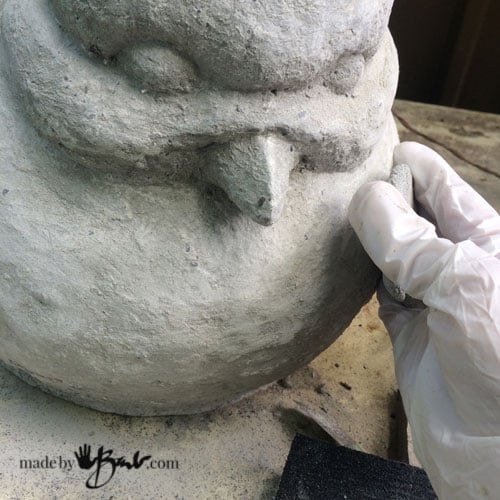
I smoothed him out a bit, but I do like texture so only a bit.
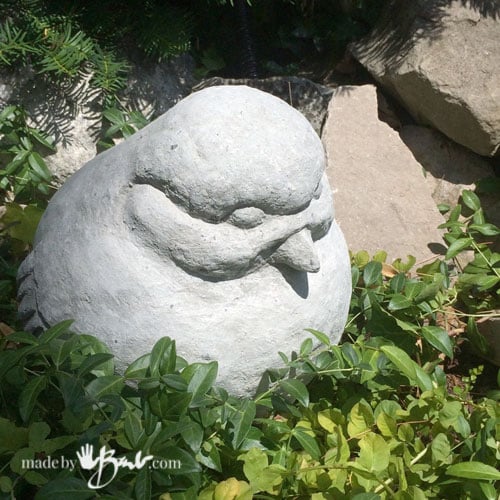
He likes his new home in the garden, tranquilly sitting amongst the periwinkle and pondering life. Ah, aren’t you proud!? and it really wasn’t that hard? He will happily stay there for years and withstand all the seasons.
Interesting to see yet another way to make concrete so it’s lighter – and using geometric shapes to build creatures! Interesting, too about water strengthening the hardening by process.
I admire your talent. Thank you for such an easy to follow tutorial.
I may revisit the ‘chubby’ animal ideas! So many can be interpreted as a version of a ball. Happy making!
Amazing work of art! U r a creator. Loved d bird. And ur concrete globes too.
A query.. Can we make a Buddha god for d garden.. A huge 1 using this technique?
My bird is still going strong out in my garden so I’d say sure! The issue maybe having a good structure to support the mix if it gets heavy. You could also make a styrofoam ‘inside’ and cover with concrete like I did for this face That is however just a strong concrete mix and may involve more sculpture technique. Just do not use things that absorb moisture inside. Lots of concrete projects…
Styrofoam makes an excellent sculpture medium for items intended to be hollow. Build the desired armature with styrofoam,, cover with concrete leaving an opening. When the sculpture is complete and dry, styrofoam can be melted away with a solvent (like acetone) to leave the hollow structure.
Oh, wow, that’s interesting! What do you do with the acetone mix? I’ll keep this in mind. Sounds like the melting process could give some interesting shapes too. Thanks for sharing!
I knew I could count on you. I’ve moved from concrete leaves to “other” items. I’ve been making concrete masks and adding flowers however they are pretty heavy (for their size) to ship to customers. I started thinking…make them out of paper! Eureka! This mix may even be better! So my question, is this blend lighter weight that just using concrete? I realize that your hollow bird id definitely going to weigh less. Obviously I can “press” this into the face mold so it wouldn’t have to be filled all the way, right? I’ll email you some pics of what I’m making. Maybe try it out for yourself and do a post. 😉
Hi Barb
I love all the projects you are posting for us and is very exited to do it especially the moulds with silicon and cornstarch
A few days ago I also write a comment asking some help with a pelican for the garden
Where do I look for the advice I am new to this and dont know where to look
Will it show here or somewhere else or on my Email
looking forward to make the pelican
thanks
I have graciously replied by email…
Thanks Barb. I do some cement crafts and I am always seeking ways to get a lighter mix and a lighter weight finished product. I will definitely try this recipe for some of my next projects. Thanks again for sharing.
There is also some interest in putting styrofoam into the concrete (haven’t tried yet) and also adding soap so that it foams and adds air. Sounds like an odd thing, hoping to try it. Good luck!
I have not started yet but I was wondering how long to cure
These take longer to cure, but you will know when it doesn’t feel damp anymore. I also noticed that since the paper is absorbent they will get damp again when in a damp environment. Mine is sitting on a tree stump off the ground for years now… no sealer.
This looks so good! I wish I had your confidence to try making this.
Hello Barb,
Thank you so much for sharing all your brilliant and beautiful creations.
My question is about the Portland Cement. Out West in Alberta, we do not have access to the Quickcrete Portland Cement. Is there something you can recommend, or info on what I can research that would be comparable? Could a premix be used and just add the paper?
I tried sending a question and I don’t think it went through so I am trying again in hopes it gets to you.
Have a great day, and thank you!
I bet there is another brand of portland cement available. I think I see Lafarge brand portland cement. Perhaps contact the local builders supply. I hope you find it!
I’m basically a fused glass and mosaic and bead mosaic artist so am not likely to do this but I sure enjoyed your excellent directions and finished work. Bravo!
Awe, that’s still nice to say. You never quite know where some cross-discipline art happens! Fused glass, hmmm, sounds like fun!
Ich liebe Deine Arbeiten. Danke, dass Du mit uns teilst.
Gern geschehen! Ein Teil meines Herzens hängt an Deutschland!