Cast your own Concrete Critter Part 2

Now that you have made your mold as shown here from Part 1, you are now ready to Cast your own Concrete Critter. Don’t worry, this is the easy part…
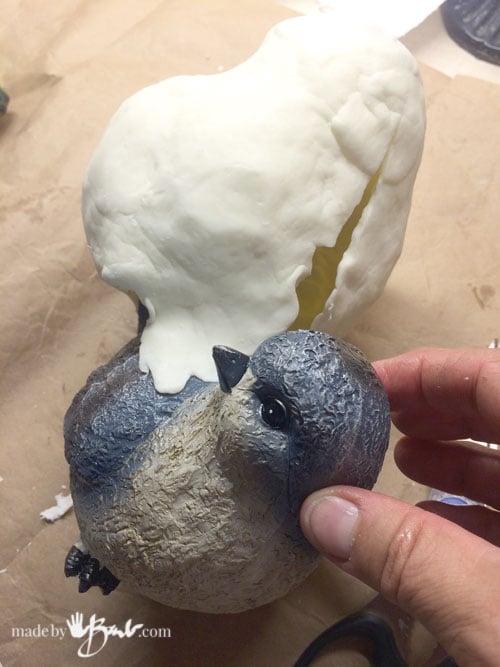
You now have made a mold with some seams that open for removal. Congrats on the hard work! If you are a bit scared of working with concrete you may want to check out this post on ‘Tips & Tricks’.
The Concrete Mix:
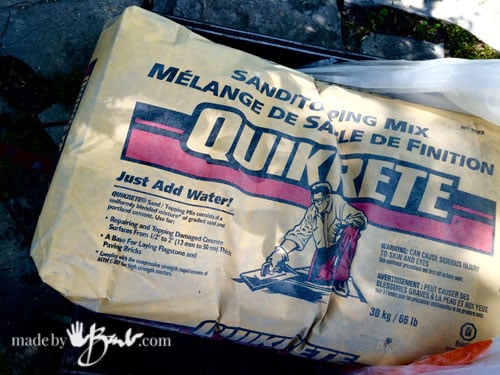
Again, as in my other concrete projects (here) I have used my favourite premix; Quikrete Sand Topping Mix. Cheap and strong stuff. It is a pretty basic concrete mix that does NOT have large aggregate (big rocks) in it, only sand and portland cement.
Update: If you want to work faster; I have found a mix that is unmoldable in 1 hour! RapidSet CementAll. It has worked quite well with my other ‘Bunny’ casting project.

Add some Quikcrete mix to your bucket and slowly add water a little at a time making sure to stir to the bottom. (Do wear a good dust mask rated for concrete work.)
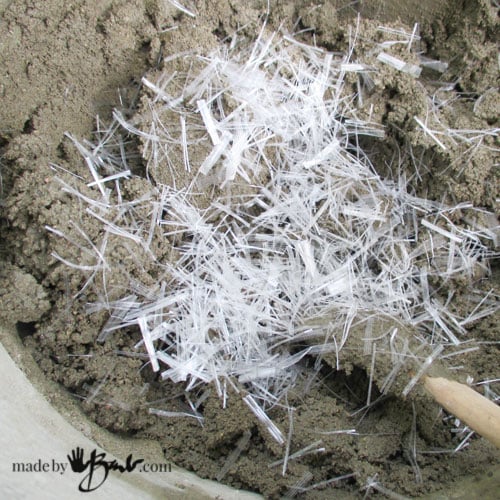
To give it extra strength I have added some fibres. You can get them at any building supply place as well. If you are resourceful you could probably make some by cutting up yarn or string into pieces. They disperse themselves and help keep the concrete from cracking. The parts that tend to break are the thin ones like beaks or feet.

Your mold will need to sit level. I have filled a container with sand to cradle the head and keep it stable. Prop yours up with whatever you have, rags will also work well. Secure the mold together with elastics/string. I have also discovered that this material will allow pins to push through to line up the edges.

The Pour:
You have 2 options for pouring. If you use only the Quikrete mix you will probably have a more rustic pour with some bubbles on the surface. If you take extra care to vibrate it and poke with a skewer, there may be quite minimal bubbles.
Your other option is to coat the inside surface with a slurry mix of just portland cement. Portland cement is the active part of the cement mixes that binds the sand/stone/whatever into the solid form. Mix a small amount to a somewhat runny mix, like melted ice cream, and pour into the mold. Turn the mold round and round til it just coats the inside surface. Jiggle and tap, and it will flow. This will give it a pretty solid coating on the outside that is less likely to have any bubbles.

Once it is coated (or if you chose not as I have since I like the rustic look) you can fill the mold with your Quikrete mix. It is really crucial that you get it in every nook and cranny. I use skewer sticks to poke everywhere, and jiggle and vibrate. You don’t want a missing beak or eye! Tap the sides and turn the mold to get the mix to fill the tail.

If the weight of the concrete pushes the mold add strong elastics to keep it closed. Level off the opening as this will be the flat base that it sits on. It is now ready to set. Don’t be over anxious to take it out early or you will break off the tail. Ask me how I know?! A good 24 hours… (depending on your conditions of temperature etc)
The finishing:
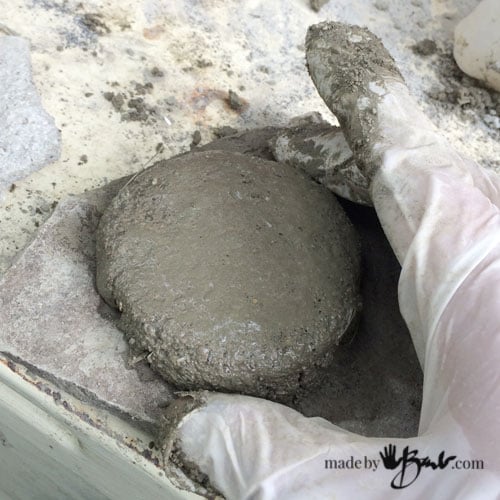
I have a really really great “Tip” that I discovered. After pouring my bowls I would sand them as well. I was frustrated with how flimsy the sandpaper I bought was. (ok, it was cheap stuff) and I saw a disk of extra concrete that I had just poured on a stone, like a coaster. I asked myself, what is sandpaper? It’s sand, just like what is in concrete. So I used this disc like a sanding block and it worked nicely to smooth out edges and seams. It is solid ‘sandpaper’.

Here are my home-made sanding discs. Pretty ingenious eh?!

Since the mold has openings, the seam lines may show as pointed out here. Take the disc or your regular sandpaper (or even a file) and smooth them off. It is concrete, not plastic, so it is quite acceptable to look rustic in my opinion.

In this world of digital reality I like some REAL TACTILE texture! Old concrete sculptures have a great ‘patina’ of texture so I really don’t mind having some here.

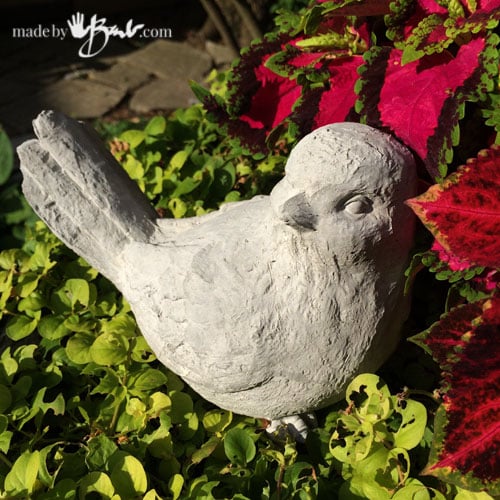
Here is the little fellow. Rough, yes, but it provides a nice accent to the stones and foliage. If it didn’t come out quite as you expected, you can cast again. That bag of mix will make a LOT of little critters! Make gifts or even indoor accents. I can imagine many uses and shapes. If you are really creative, make your own sculpture with Fimo/Sculpey and then use it to make a mold. Now you are completely original; casting your own sculpture
Tada! It is a ‘Small project’ yes, but still quite unique and still gratifying. Well done!
‘Want more concrete projects from this concrete-crazy Gal?
Hi Barb,
To get the bubbles out of the mold you said to use a slurry of Portland cement and swish it around. If you use Rapidset would you still use the cement or just a watered down slurry of Rapidset?
Rapidset Cementall is a very fine mix, yes a slurry of it in a thinner form will also make for smooth finish and less bubbles. Tap to get bubbles to rise out.
I was curious if you’d ever made a mold of a large leaf to use over & over for stepping stones? Would this be too hard?
It depends… The shape is important so it should be supported to get some nice curve to the shape. See here how they would be quite flat. Perhaps take a mold from an existing leaf is better. It would be similar to the mask mold making ‘Where there is a will there is a way’
Thank you for explaining the process simply and clearly! I think I can do it.
Whenever I am learning I do small little test pieces. Then there is no pressure or big cost. It does getting used to working with the cornstarch
Thank you Barb! What a brilliant and effective way to mold and cast concrete objects. Our project was restoring the base of a Japanese lantern. The concrete legs had badly decomposed and fortunately one was still in good enough shape to use as a master. We did the other three legs, one per day. The silicone corn starch mold is reusable.
Oh, I am so glad! I have molds that are quite a few years old! I even used this method to make one for concrete candles Here’s another post with extra info for this mold material Glad it worked!
Hi, Your effort is appreciated. The finished product needs more finish. I think you should use cement without sand and pour that in a semi-liquid form into the mold.
I understand what you mean, as that will give it a more solid smooth finish. If that is what you want, but I like the textured look of antique concrete. I don’t like the look of almost a plastic concrete finish, but to each their own! Thanks for the idea!
I absolutely love this! I stumbled across your blog yesterday looking at concrete projects on Pinterest and I’m so happy I did! I spent hours yesterday looking at your blog (recovering from surgery and this was an excellent distraction) This would make a lovely addition to a
large cement leaf. Off to the dollar store I go!
I’m glad you found me! I do have a lot of unique ways to use concrete, and still love designing more! Use the 🔎 to search for all kinds of concrete. Enjoy!