Upcycle your bottles into Cloches & Domes
Have you ever noticed how one project just leads to another? Planting my cloche waterfall/terrarium has lead me to some more creative use of glass (and it won’t be ending there…) It’s amazing how to Upcycle your bottles into Cloches and Domes by cutting Glass.
It’s sad to see that the ‘older’ generations are giving up some of their winemaking crafts! Why not rescue some of those demijohns and jugs! ‘What better way to honour them and their great wine?!
Why Cut your bottles?!
Yes, it’s cutting glass, but it really isn’t as scary as you may think. Let me share some of my tips and methods so you too can create something awesome from what might be just thrown away…
When you are a DIY’er you get odd stuff for christmas! This G2 Bottle Cutter was a gift that I didn’t really appreciate at the time… until I became ‘cloche-crazy’. I dug it out and started practicing on the wine bottles that were going into the recycle bin.
You will need:
- some glass jugs/demijohns
- gloves to protect your hands
- safety glasses/goggles
- Emery Cloth to smooth the sharp cut edges
- METHOD #1
- G2 Bottle Cutter &
- some ice and container large enough to submerge jug
- Mini torch
- METHOD #2
Method #1
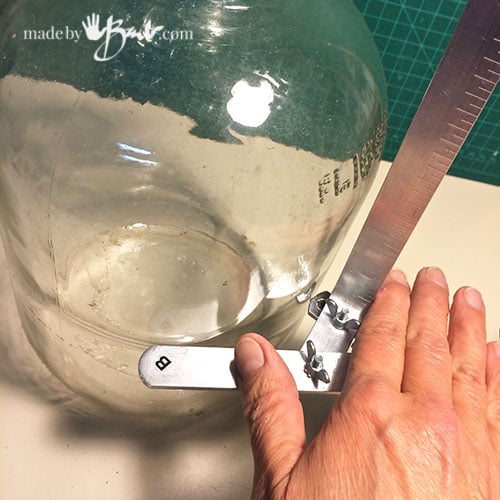
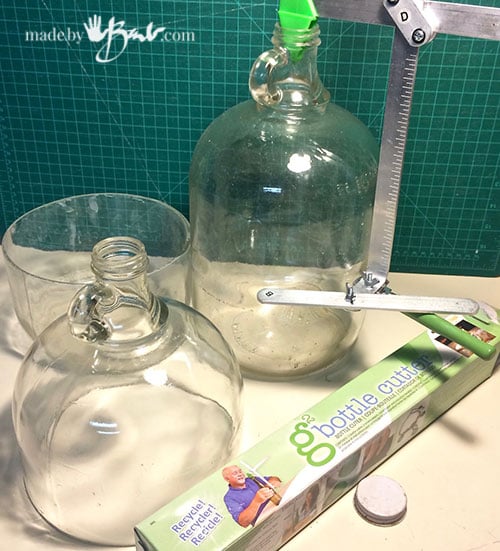
Assembly is pretty easy as explained. It uses a standard glass cutter so it can be replaced when need be. Be sure adjust it so that cutter is 90 degrees to the bottle. It is a well designed piece for the task of scoring the bottle. Decide the height that you would like (I start near the bottom so if I needed to cut again I have extra height)
Place your hand on the ‘Part B’ and keep it against the bottle as you slowly and steadily turn the bottle. You will hear a scoring sound as you travel around. Listen carefully for the moment it sounds like it is a courser sound and feels like you have hit ‘gravel’. This means you have gone all around and you should stop. DO NOT SCORE TWICE.
Notice the nice score line here… The glass will break (more like; should) along the weak point which is the score line. To make that happen you need to shock the glass with temperature changes.
Glass can be unpredictable:
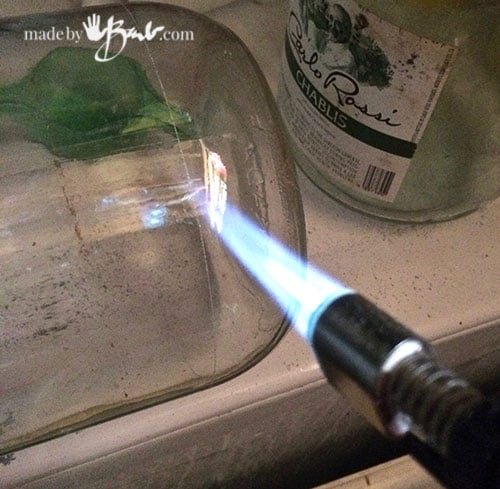
BUT, you need to understand glass (it sometimes has a mind of it’s own) can be a bit difficult to get the best results. Heat along the score-line as evenly as possible. You can also use a few candles in a row and rotate above them. The idea is not to heat it too much. If you use a torch move it quite quickly as it is really hot.
Slowly dribbling boiling water along the cut works similarly. I would just keep running out of water so I liked the torch.
Don’t rush, take a couple minutes of heating. Have a bucket wide enough to be able to vertically immerse the bottom of the jug past the score line. It may surprise you and fall off at any time so be over a surface that will catch it (plastic laundry sink is good).
Listen carefully! You will hear what it is doing. Also you will see changes as a crack will form along the score line, and once it is complete it will separate.
I find it may take a couple heat-cold cycles. I would get better results when working slower. The odd one would have a good cut and one section would be ‘off’ the line (just to be aggravating) Small bumps can be sanded off or ‘nibbled’ with pliers. Or, cut again a bit higher.
Ah, success! Both the top and bottom can be used… The bottoms make great plant saucers.
Method #2
Ask anyone who knows me… I am stubborn. The Glass cutter was working quite well, but there were some that didn’t work. I am a ‘control freak’ when it comes to DIY’ing. I want it to work out as I expect, don’t you?!
So that meant I tried another method. I remembered that I had a ‘wet saw‘ sitting on my tool shelf for the day when I would want to cut tiles. WooHoo!
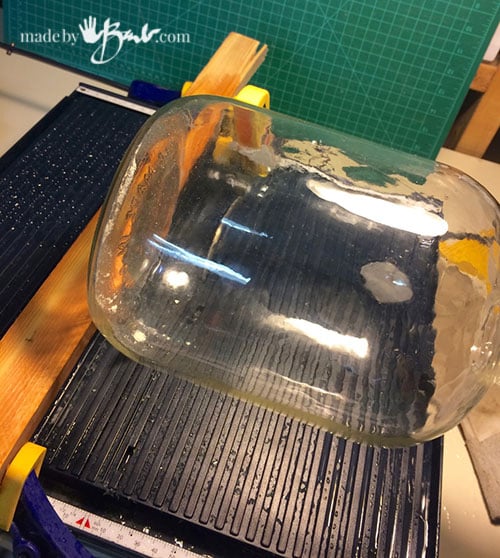
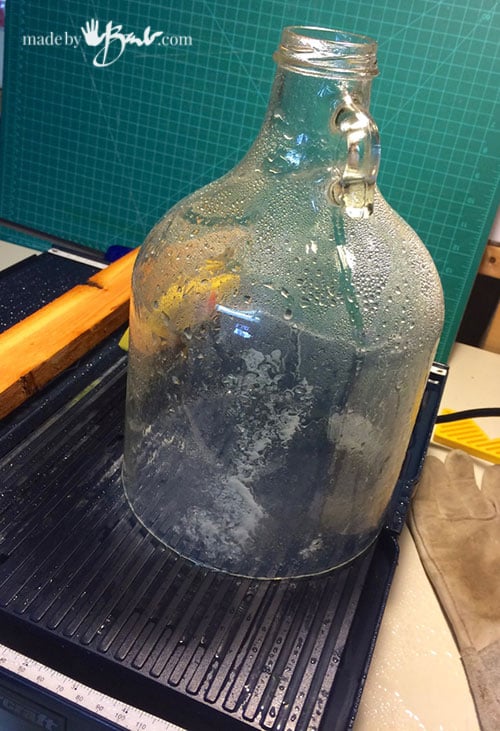
Notice: There is a reason they call it a wet-saw! I assembled it properly, filled the pan with water, clamped a board to keep the bottle steady. I turned it on and since the part that covers the blade is elevated to allow the large bottle to contact the blade it SHOOTS water right at me! Yup… WET-Saw!
See the blade through the bottle, and the yellow guard is above it. Work slowly and steadily as you turn the bottle making sure that it stays against the wood stop. Don’t push or force it, cut slowly.
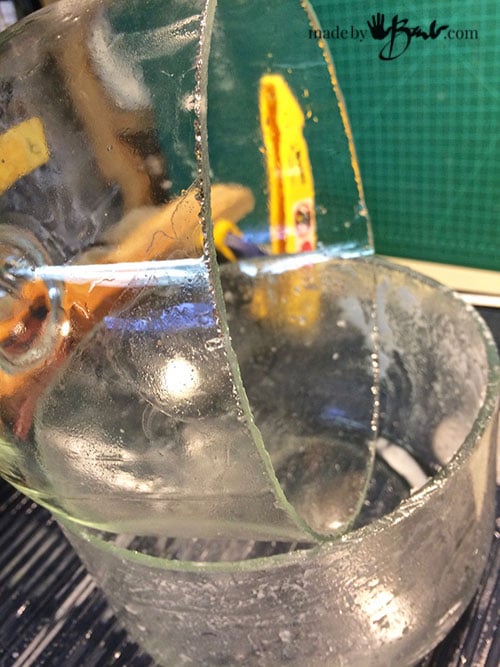
Not as bad as I expected! Pretty doable!
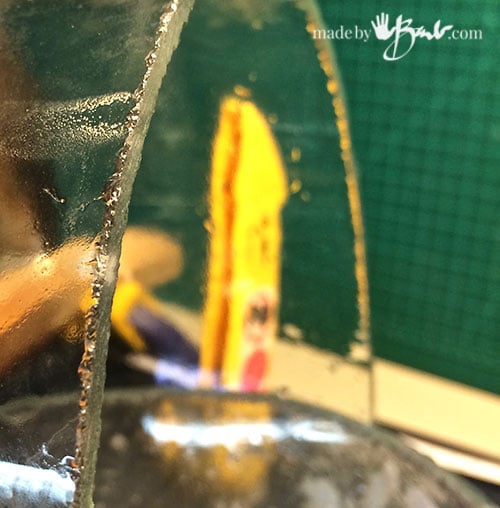
So apparently when the blade is new it will not cut as smoothly as when it gets worn in, especially on glass! (make any sense?) Or there are ways to adjust the blade…
Since I am going to smooth out the small chips with the sanding I am happy with the cut.
Make sure you have good gloves on and use some WET emery cloth starting with a rough (200) grit.
Keep it well wetted and keep sanding til you are happy with the edge. If you do not use all the grades of sandpaper to the finest grade you will have a frosty edge, which will further hide any irregularities. DO make sure there are no sharp parts left.
Mission accomplished!
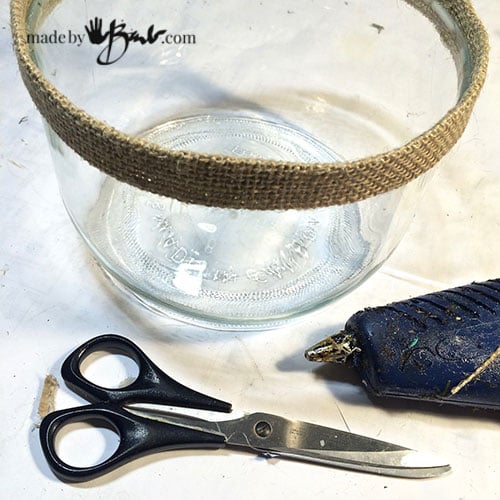
To use the top and bottom halves of the demijohn I needed to have a way for them to stay aligned and sit together. Cut some burlap strips long enough to for the circumference.
Glue the edges over each other to form a flat tube (use the lines of the burlap to keep straight)
Glue the strip around the rim of the bottom leaving about half above the edge. Hot glue doesn’t work that well on glass, but make sure the ends overlap well. Epoxy will work quite well but be permanent. I like being able to alter later on.
You can now sit the top half over the bottom. I mixed/matched tops from other bottles to get an even higher terrarium/cloche.
The jute knotted rope adds a nice nantucket feel as well.
They are quite versatile…
How awesome is that!? Sadly, the older generation of home-wine-makers is diminishing, so there will be a lot of unused demijohns in the future. What better way to honour their art form?! And with wine!
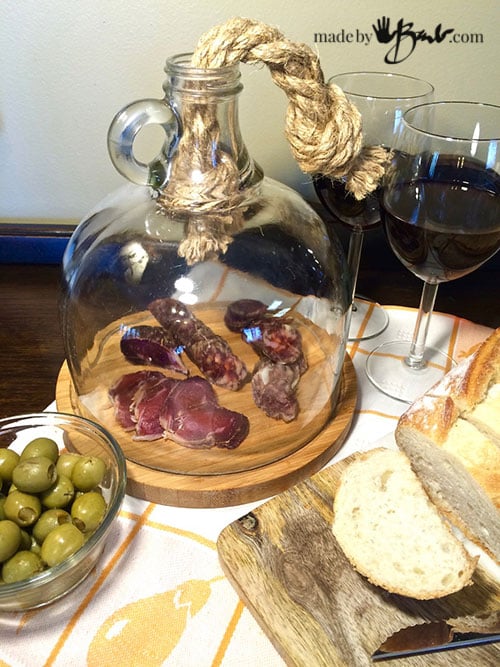
Placing cheese and crackers under a dome keeps the temperature more consistent and also looks pretty.
I almost forgot to say; did you know that you can also make your own charcuterie? I make my own dried cacciatore and prosciuttini.
Vintage glass is so pretty, rustic, and earthy; reminds me of the street cafés in Europe!
Plants under Glass:
Indoors and out, your plants can be happy as well. These cloches work well for some of those plants that really enjoy an environment that is somewhat more humid.
Well, if you just don’t have the nerve to use glass bottles, you can however also ‘fake it’ with plasticones! Cut off the obvious top of the 2 litre pop bottle. Cut the bottom off straight with scissors. Hold the bottle bottom edge in a hot pan on the stove (old one) and the edge will curl up. Use some metal polish to polish off dates. Remove label glue with some oil.
Can you tell the narrow one it isn’t glass!? These are quite amazing but as a result so inexpensive to make! I hope you’ve enjoyed how to Upcycle your bottles into Cloches and Domes by cutting GlassSee what else can go under glass; It’s all for the Birds










OK – this ones (one of my) my hands-down favourite(s) … so far!
AND great segue (by the way) … with that 90 degree left swerve right into that DIY charcuterie tongue teaser … what’s next wine-making and fancy glass carboy blowing trickery?
WhoOt!!!
Wow, I’m glad you love this one! I have to control myself from cutting every bottle in the house. Haha, I have considered making wine… Where there is a will…
Hi there,
Love these crafts! I did something similar to make a bottle candle ornament and the glass of the bottle got really hot. Is there any way to ensure that the glass doesn’t do this or anything you can put on the glass to make it heat proof ? Thanks
Maybe the size ratio to candle and the opening on the top to allow heat out. Or, another idea; use concrete to make this as it does not get hot. Good luck
Barb, I just love the outcome of this cloche. It is so elegant. Thank so much for sharing.
There is just something special about being under glass! It is one of my obsessions (which seem to be growing) along with terrariums Glad you like it!
Glasss bottles of Kraken Rum are my favourite to use as cloches for smaller portions of food.
They have double handles as well!
Ohhhh! Those are lovely! I look at every jar & bottle and envision some use of it! Thanks!!
Thank you so very much for this article. I am always looking for the next thing to master (upcycled vintage jewelry reworks ✅, soy candles in vintage containers ✅. paper roses ✅ solid lotion bars ✅ solid perfume ✅ , lip balm✅ and whipped body butter✅). I love using and upcycling vintage materials, and I have been looking to get into bottle cutting. I hadn’t really thought about demijohn cloches until I saw your blog. I have to say I want to get a wet saw now. I can pour candles into wine bottles and now I realize making demijohn cloches is also a very real possibility, too. Thank you so, so very much for expanding the possibilities for me. I really appreciate it.
Ah yes, I am the same way… I could probably clone myself with all the ideas I have floating in my head! Happy making!
AWESOME! Great use for almost any shaped bottle. I see so many uses for the bottles. I already have both a wet saw and a glass cutter.
Love it!