Stunning Silk Eco Printing
Oh my gosh, I have never really known how amazing silk is. ‘And even better than that is how easy it takes Eco Printing. How wonderful can it be when all you need is nature to make permanent impressions for you. Make yourself a Stunning Eco Printing scarf or give as a very unique gift.
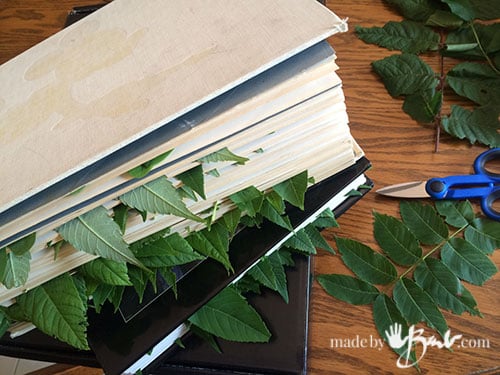
I have collected a lot of leaves to get me through the winter (sounding like a squirrel). Placed in old books or in stacks of newspaper they store well. Just make sure to not apply too much pressure as then they will turn black. Check on them as they dry. For some basics of Eco Printing check my post here
Step #1: Preparing the silk fabric
Silk is known as a protein fibre since it made by animals; silk worm. Protein fibres are easier to take dye and printing so they perform quite well with just a dip (at least 30 minutes) in vinegar water (about a 1 : 3 ratio water to vinegar). I have found that silk is expensive and finding fabric to make scarves is a challenge. You can buy finished scarves here. They work quite well and save time on hemming etc.
Step #2: The Layout
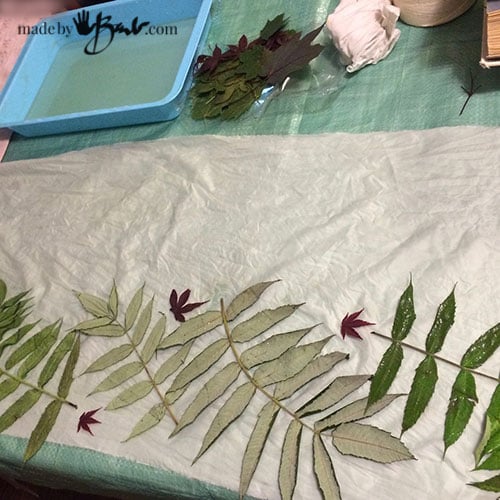
After wringing out the vinegar water, lay the silk out smooth and flat. Silk is quite strong even though it has always seemed like a fancy fabric.
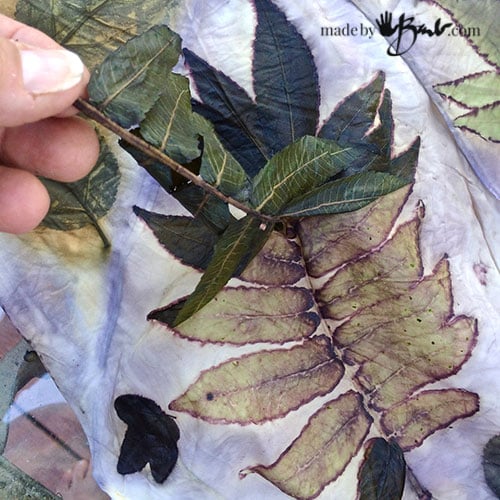
As a choice of leaves I tend to use my regulars. I like sumac, maple, japanese maple, rose, walnut, and eucalyptus. But don’t feel limited to that. Depending where you are, you may have other choices that I don’t.
As seen in the cotton printing the leaves are dipped in ‘iron water’ (a solution of water and rusty items) to make the prints permanent. I have learnt that too strong of a solution will print very black. So with the silk I use a very diluted ‘iron water’. When in doubt, do a test.
My theory; I go light so that if it prints too light I can always do another printing.
As you see in the picture the scarf is quite wide. It is too wide to fit in my steaming pot so I plan to fold it in half. Place the leaves up to the midpoint and then fold the other half over. This will allow the leaves to print both sides.
Step #3: The Barrier Layer
Since the silk is so thin, I did not want any bleed through to other layers. Plastic paint drop clothes can be easily cut to the width of strip that you require. (keep folded, cut and then unfold)
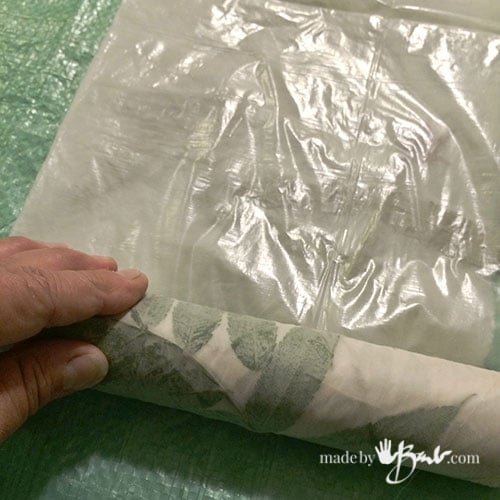
Place the Barrier layer over the top of the folded silk.
Step #4: Roll it up
Very carefully flatten and smooth the layers as you roll tightly around the centre dowel or pipe. Silk smooths nicely to provide the best prints.
Tie it up tightly and evenly. The best ‘clean’ prints happen when the leaves are well contacted to the fabric. I usually let the plastic wrap around the outside as well.
This is a natural technique but it does use energy to steam or boil the rolls. So I make sure I do a few together to make it worthwhile.
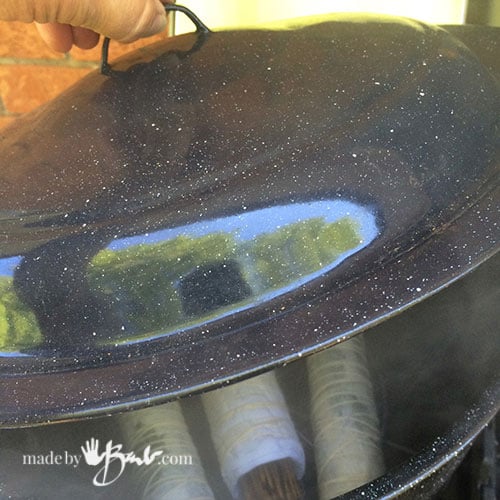
The leaves will emit some odours that may be somewhat disturbing to some, so I steam them outside or under a good vent fan. Put enough water in the bottom of the pot to keep it from running out. Use the canning insert or other steamer basket to keep the rolls elevated. Turning the rolls often will help distribute the heat and allow even printing.
I usually steam for about 2 hours. As an extra way of letting more printing happen I often leave them in a bag to cool down. In the summer they can heat up in a garbage bag in the sun.
Step #5: Check out the Magic!
Cut the string and unwind. Try to contain your excitement as it’s feeling like ‘Christmas morning’! This the part that makes Eco Printing all worthwhile and so much fun.
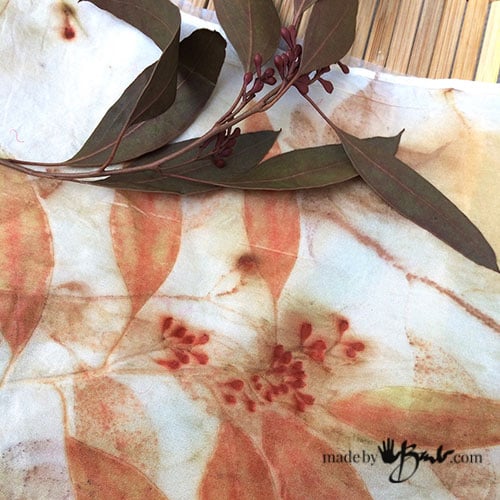
Peel off the leaves and be amazed at how they provided colour and detail.
Notice how the top and bottom printed differently. Take notes so that you can start to predict what you will get.
The Japanese maple has printed with reds; so lovely
The silk scarf will be lovely as it is a somewhat symmetrical design. Let it dry or wash and rinse right away. I use a ph neutral detergent (Dawn) and wash by hand.
Eucalyptus has been known as quite a colourful printer, however it also depends on the specific species. In canada it is harder to acquire so I stay with local (free) leaves.
Step #6: Make Many
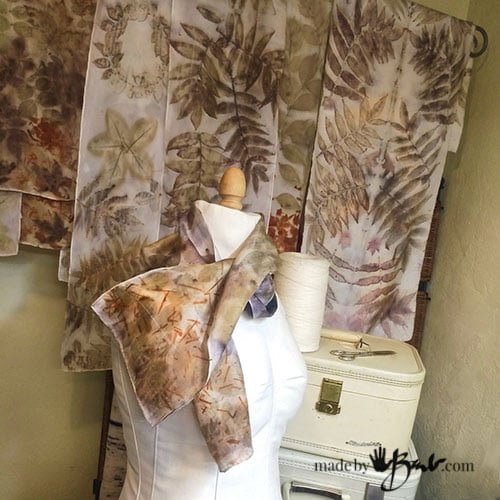
With Silk Eco printing before you now it you will be making another… and another… and ordering more scarves or looking at the labels of your clothes to see if you can dye it.
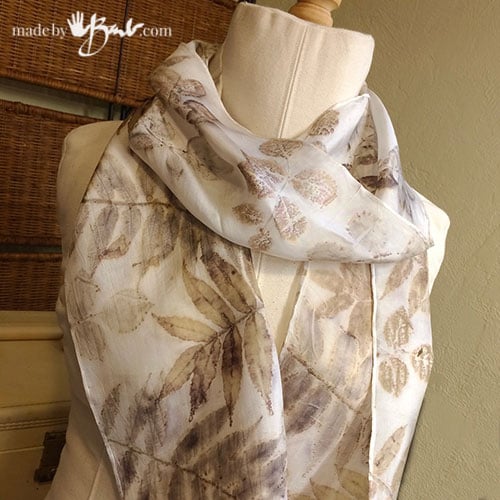
After a gentle ironing it looks so exquisite. Soft neutral and earthy tones depending on your choice of leaves. Won’t these make some OOAK (One of a Kind) gifts?!
This is by no means the limit though. This is still the start as the next stage is to add stronger colour with natural dyes. Stay tuned…






These are BEAUTIFUL and the process looks like something that will be highly addictive for me. Thank you for sharing your beautiful work and the process! I’m going to see what I can find for leaves before we get frost.
It may take some test runs to see how your leaves print. You can dry them for further use Happy printing!
Your results look just great. Do you always use fresh leaves or have you been known to use pressed ones from previous seasons?
Also, I guess the 30cm wide lengths of scarves will need to be stitched at some point. Do you do this prior to dyeing or after the event?
Lovely easy project to follow. Thank you, Barb.
I often use pre-hemmed scarves or I will hem them after with the matching colour. I do use my dried ones often, as they work just about as good as fresh. Fun stuff!
1:3 water:vinegar or vice versa
Water to Vinegar. Have fun!
Can you reuse the vinegar water or do you have to throw it away?
Sure, you can. Keep it sealed in fridge.
Hi Barb
I love your blog and have learned so much from you, I was wondering if after you are done steaming and unwrapping your silk do you need to rinse it in baking soda water or salt water to keep the iron resist from continuing to activate?
I do not but do wash them really well. I worry about changing the PH as some natural dyes are PH sensitive.
Can I prepare silk in water/vinegar solution to be used at a later date?
I would say not as the vinegar evaporate. You can mordant and dry for later use though.
Hello Barb!
I wish we were neighbors! I enjoy many of the same arts you do as a long time (old) florist!
Would you let me know which silk scarf you usually order on the link you provided?
Grateful for your content!
Deanna deannajoyart.com
I was quite happy with the Hobatai, they are cheap, strong and feel nice and light. Haha, ya, we’d prob have fun!
It’s beautiful,
I want learn ,can you help any way?
Sure! There’s a whole section of tutorials! My advice, find some non-precious fabric to do a lot of tests with different leaves and methods. It’s an art form that is affected by many variables depending where/what you use. Once you get some good results you can go from there…
Liebe Barb,
ich habe von Ihnen sehr viel (fast alles was ich inzwischen kann) gelernt. Ich sehe immer wieder Ihre Tutorials an. Sie sind so großzügig, Sie teilen Ihr Wissen mit uns Allen. Das ist ein großes, sehr großes Geschenk.
Danke Ihnen für Ihre Güte!
I
Wow, thanks! The best part; I actually can read German – Vielen Dank! I am so glad that it has reached so far and wide; many greetings from Canada!