Stunning Silk Eco Printing

Oh my gosh, I have never really known how amazing silk is. ‘And even better than that is how easy it takes Eco Printing. How wonderful can it be when all you need is nature to make permanent impressions for you. Make yourself a Stunning Eco Printing scarf or give as a very unique gift.
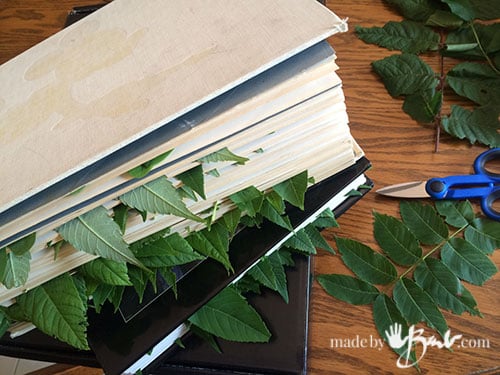
I have collected a lot of leaves to get me through the winter (sounding like a squirrel). Placed in old books or in stacks of newspaper they store well. Just make sure to not apply too much pressure as then they will turn black. Check on them as they dry. For some basics of Eco Printing check my post here
Step #1: Preparing the silk fabric
Silk is known as a protein fibre since it made by animals; silk worm. Protein fibres are easier to take dye and printing so they perform quite well with just a dip (at least 30 minutes) in vinegar water (about a 1 : 3 ratio water to vinegar). I have found that silk is expensive and finding fabric to make scarves is a challenge. You can buy finished scarves here. They work quite well and save time on hemming etc.
Step #2: The Layout
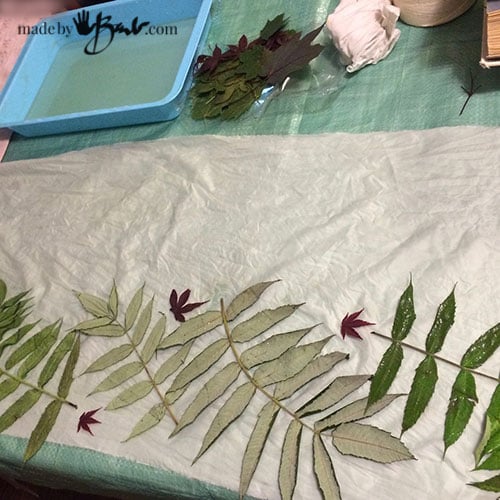
After wringing out the vinegar water, lay the silk out smooth and flat. Silk is quite strong even though it has always seemed like a fancy fabric.
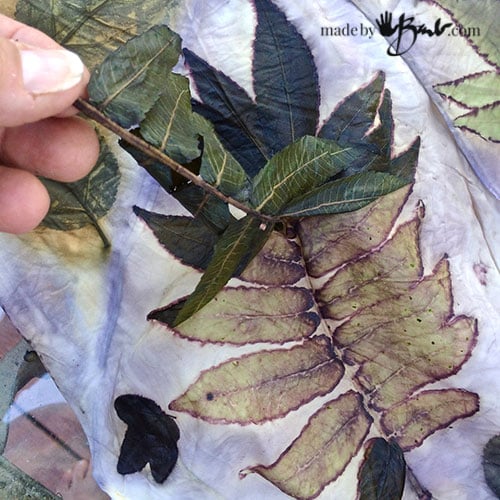
As a choice of leaves I tend to use my regulars. I like sumac, maple, japanese maple, rose, walnut, and eucalyptus. But don’t feel limited to that. Depending where you are, you may have other choices that I don’t.
As seen in the cotton printing the leaves are dipped in ‘iron water’ (a solution of water and rusty items) to make the prints permanent. I have learnt that too strong of a solution will print very black. So with the silk I use a very diluted ‘iron water’. When in doubt, do a test.
My theory; I go light so that if it prints too light I can always do another printing.
As you see in the picture the scarf is quite wide. It is too wide to fit in my steaming pot so I plan to fold it in half. Place the leaves up to the midpoint and then fold the other half over. This will allow the leaves to print both sides.

Step #3: The Barrier Layer
Since the silk is so thin, I did not want any bleed through to other layers. Plastic paint drop clothes can be easily cut to the width of strip that you require. (keep folded, cut and then unfold)
Place the Barrier layer over the top of the folded silk.
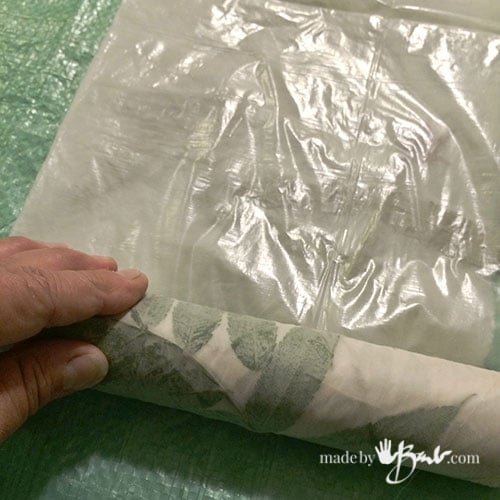
Step #4: Roll it up
Very carefully flatten and smooth the layers as you roll tightly around the centre dowel or pipe. Silk smooths nicely to provide the best prints.

Tie it up tightly and evenly. The best ‘clean’ prints happen when the leaves are well contacted to the fabric. I usually let the plastic wrap around the outside as well.

This is a natural technique but it does use energy to steam or boil the rolls. So I make sure I do a few together to make it worthwhile.
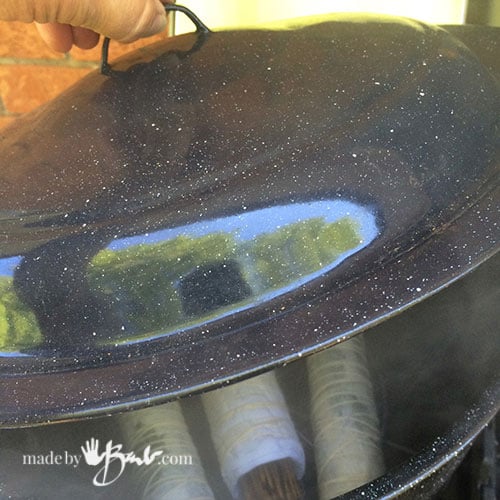
The leaves will emit some odours that may be somewhat disturbing to some, so I steam them outside or under a good vent fan. Put enough water in the bottom of the pot to keep it from running out. Use the canning insert or other steamer basket to keep the rolls elevated. Turning the rolls often will help distribute the heat and allow even printing.
I usually steam for about 2 hours. As an extra way of letting more printing happen I often leave them in a bag to cool down. In the summer they can heat up in a garbage bag in the sun.
Step #5: Check out the Magic!
Cut the string and unwind. Try to contain your excitement as it’s feeling like ‘Christmas morning’! This the part that makes Eco Printing all worthwhile and so much fun.
Peel off the leaves and be amazed at how they provided colour and detail.

Notice how the top and bottom printed differently. Take notes so that you can start to predict what you will get.
The Japanese maple has printed with reds; so lovely

The silk scarf will be lovely as it is a somewhat symmetrical design. Let it dry or wash and rinse right away. I use a ph neutral detergent (Dawn) and wash by hand.
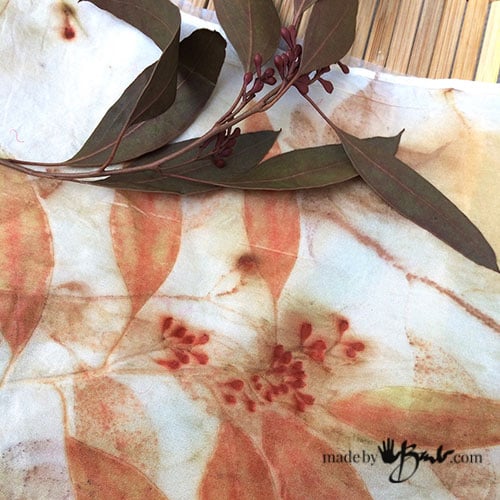
Eucalyptus has been known as quite a colourful printer, however it also depends on the specific species. In canada it is harder to acquire so I stay with local (free) leaves.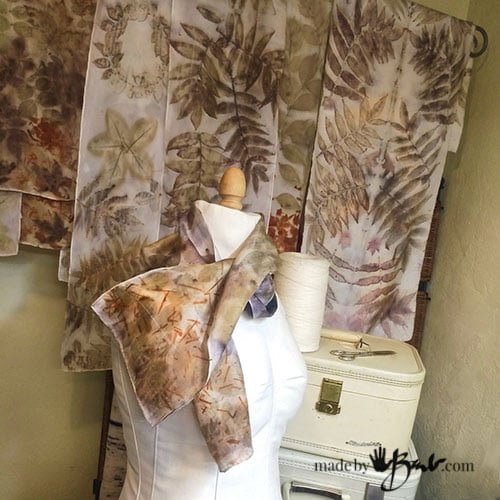
Step #6: Make Many
With Silk Eco printing before you now it you will be making another… and another… and ordering more scarves or looking at the labels of your clothes to see if you can dye it.
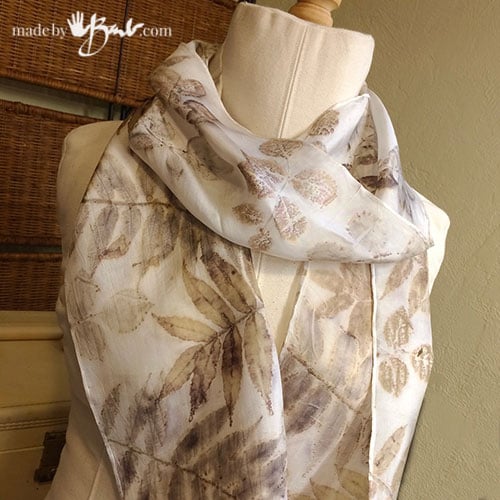
After a gentle ironing it looks so exquisite. Soft neutral and earthy tones depending on your choice of leaves. Won’t these make some OOAK (One of a Kind) gifts?!
This is by no means the limit though. This is still the start as the next stage is to add stronger colour with natural dyes. Stay tuned…
Thanks fso much for sharing this. I have some strong plastic sheet that wrapped a new mattress would this be oK for wrapping?
I think so, I have not had any melt but I do most processing in the micro now. Just be careful of it touching pot edge or water disappearing! Make sure it’s nice and flat.
Thank you for sharing, I use 8mm Habotai silk, how would the 5mm Habotai work? is it more like a chiffon? I am in South Africa and trying to buy silk from China and they keep offering me this. Dharma will not send to South Africa so I’m stuck for a supplier. Thanks again
I have not used it but from my quick research it does seem quite thin. It would probably print but the effects would be so light. It might be worth finding another supplier. I bet you can find one! Good Luck!
Have you tried making an onion skin dye first for white silk and then doing the eco printing?
I have not tried it since the onion skin does dye quite nicely on the silk and I am not sure if it would be too strong to dye over. Many do use it in the dye pot to boil their bundles so it gets into sections of it. But, everything is worth a try; that’s how some new methods develop! Happy making!
Why do you use plastic as a barrier, surely very un-eco?
Well, that is a common debate. I do not use cling wrap as it would get thrown away. I use one sheet of plastic drop cloth and cut in strips. I reuse them over and over for a long time (so far since last year) Parchment paper can be used but just think about all the energy that goes into the making and packaging for a single use. I do try to use local found leaves and simple dye products instead of fancy chemicals. If there is no barrier used the prints will leach through layers, which could be an interesting effect so you are welcome to not use it!
Thank you for your posts about Ecodyeing I have experimented with these processes using red hibiscus on watercolour paper; some beautiful blue tones resulted.
Cheers
Johanna
It is a wonderful process, I love it. Do be aware that even though some flowers give great colour it may be fugitive; meaning that it will disappear, sadly. I love printing on paper and even use any paper I scrounge up.
Hello, my name is Ligia and I am from Brazil. Your work is wonderful and I really want to try to do it at home, but here in Brazil there are not most plants you use. Would you recommend that I test native plants in my region until I select the best ones? thank you, you are awesome!
Maybe you can find some connections to see which plants work well. Look for high tannin plants. Eucalyptus is great but not sure if it grows there. I’m sure you will find some good ones! The resist method can be used with leaves that don’t have much tannins. Good luck!
Loving your work and now I want to play. I am going to get some iron water started but am impatient. Any shortcuts to be able to make a solution faster or anything else I can use now to start playing?
If you can find some iron sulphate, no waiting! I get mine from Fiber Garden or some garden supply stores or here. See more here
Good luck and have fun experimenting!
Might you share what temperature you set your oven to for steaming silk scarves in the roaster? I have been cautious about silk and high temperatures and am most likely not getting enough steam. Thank you.
Actually I have not used the oven, I used to steam (simmeringwater) on the side burner of the BBQ but found the amount of gas seemed alot. I now just use my alternative method. As long as you are aware of not using metals objects I have great success this way and sooooo much less energy!
Hi Barb I am really enjoying your site. I live in northern Ontario and have been experimenting for a year now with eco printing on silk. I love this art form! I started using flowers and leaves and yes the leaves print better if a clearer print is wanted. If anyone wants purple my smoke bush leaves produce a dark purple without the iron mordant dip. Haven’t tried it with and must do that. It would give a more distinct shape I think. So much to learn. Thanks for sharing your expertise art Barb. How do you get the wrinkles out of your finished scarf? I’m finding steam ironing doesn’t work.
Yes, so much to learn and not always exactly the same results! Try a damp pressing cloth to help get the wrinkles out, or embrace them! Who needs perfection anyways?!
Can you tell me how and when to do a base colour. I want to try the leaf dyeing but on different colour backgrounds. I’m not sure if you would dye the silk scarves first or afterwards and would you add the colour to the mordant or do it separately?
If you follow through this post and this it explains the sequence well with pictures. I dye after mordanting. I dye the background first… Happy printing!