Stunning Silk Eco Printing

Oh my gosh, I have never really known how amazing silk is. ‘And even better than that is how easy it takes Eco Printing. How wonderful can it be when all you need is nature to make permanent impressions for you. Make yourself a Stunning Eco Printing scarf or give as a very unique gift.
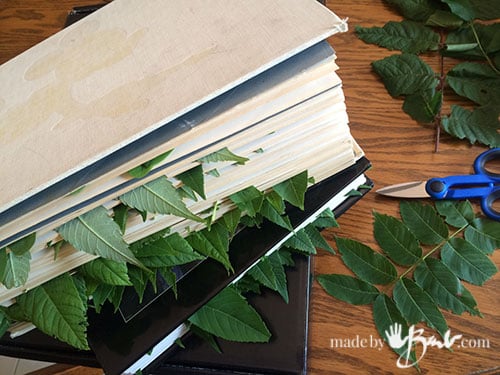
I have collected a lot of leaves to get me through the winter (sounding like a squirrel). Placed in old books or in stacks of newspaper they store well. Just make sure to not apply too much pressure as then they will turn black. Check on them as they dry. For some basics of Eco Printing check my post here
Step #1: Preparing the silk fabric
Silk is known as a protein fibre since it made by animals; silk worm. Protein fibres are easier to take dye and printing so they perform quite well with just a dip (at least 30 minutes) in vinegar water (about a 1 : 3 ratio water to vinegar). I have found that silk is expensive and finding fabric to make scarves is a challenge. You can buy finished scarves here. They work quite well and save time on hemming etc.
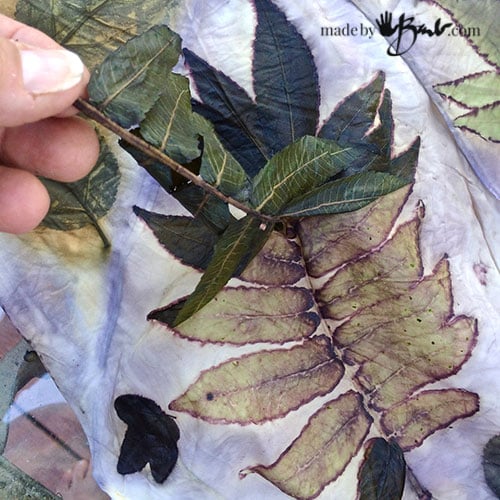
Step #2: The Layout
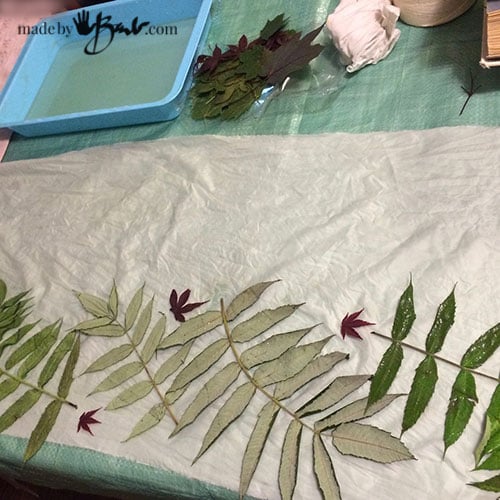
After wringing out the vinegar water, lay the silk out smooth and flat. Silk is quite strong even though it has always seemed like a fancy fabric.
As a choice of leaves I tend to use my regulars. I like sumac, maple, japanese maple, rose, walnut, and eucalyptus. But don’t feel limited to that. Depending where you are, you may have other choices that I don’t.
As seen in the cotton printing the leaves are dipped in ‘iron water’ (a solution of water and rusty items) to make the prints permanent. I have learnt that too strong of a solution will print very black. So with the silk I use a very diluted ‘iron water’. When in doubt, do a test.
My theory; I go light so that if it prints too light I can always do another printing.
As you see in the picture the scarf is quite wide. It is too wide to fit in my steaming pot so I plan to fold it in half. Place the leaves up to the midpoint and then fold the other half over. This will allow the leaves to print both sides.

Step #3: The Barrier Layer
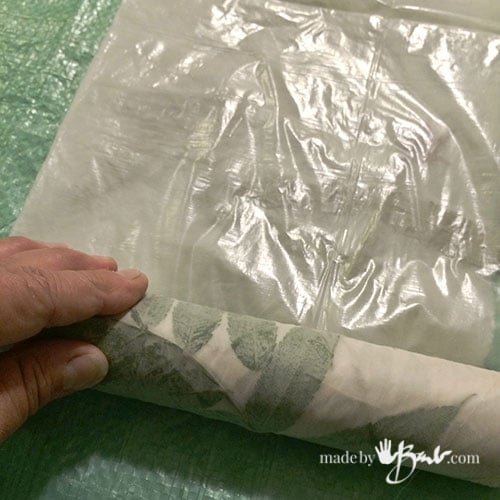
Since the silk is so thin, I did not want any bleed through to other layers. Plastic paint drop clothes can be easily cut to the width of strip that you require. (keep folded, cut and then unfold)
Place the Barrier layer over the top of the folded silk.
Step #4: Roll it up
Very carefully flatten and smooth the layers as you roll tightly around the centre dowel or pipe. Silk smooths nicely to provide the best prints.

Tie it up tightly and evenly. The best ‘clean’ prints happen when the leaves are well contacted to the fabric. I usually let the plastic wrap around the outside as well.

This is a natural technique but it does use energy to steam or boil the rolls. So I make sure I do a few together to make it worthwhile.
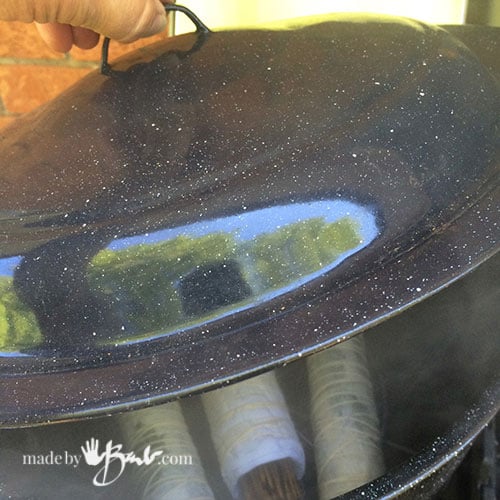
The leaves will emit some odours that may be somewhat disturbing to some, so I steam them outside or under a good vent fan. Put enough water in the bottom of the pot to keep it from running out. Use the canning insert or other steamer basket to keep the rolls elevated. Turning the rolls often will help distribute the heat and allow even printing.
I usually steam for about 2 hours. As an extra way of letting more printing happen I often leave them in a bag to cool down. In the summer they can heat up in a garbage bag in the sun.
Step #5: Check out the Magic!
Cut the string and unwind. Try to contain your excitement as it’s feeling like ‘Christmas morning’! This the part that makes Eco Printing all worthwhile and so much fun.
Peel off the leaves and be amazed at how they provided colour and detail.

Notice how the top and bottom printed differently. Take notes so that you can start to predict what you will get.
The Japanese maple has printed with reds; so lovely

The silk scarf will be lovely as it is a somewhat symmetrical design. Let it dry or wash and rinse right away. I use a ph neutral detergent (Dawn) and wash by hand.
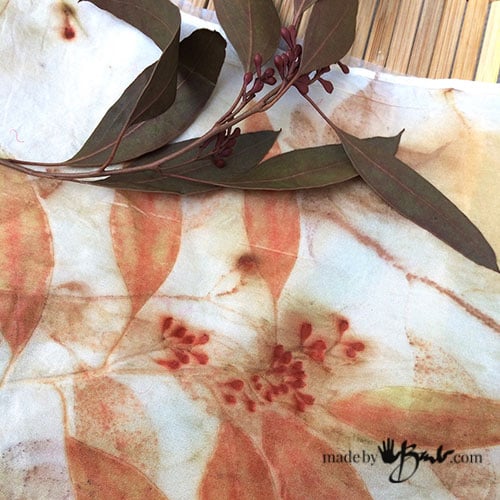
Eucalyptus has been known as quite a colourful printer, however it also depends on the specific species. In canada it is harder to acquire so I stay with local (free) leaves.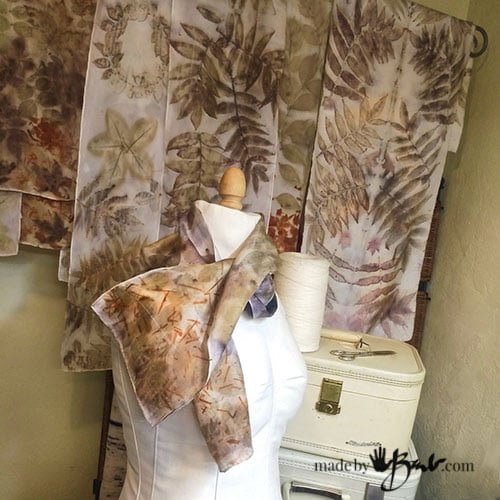
Step #6: Make Many
With Silk Eco printing before you now it you will be making another… and another… and ordering more scarves or looking at the labels of your clothes to see if you can dye it.
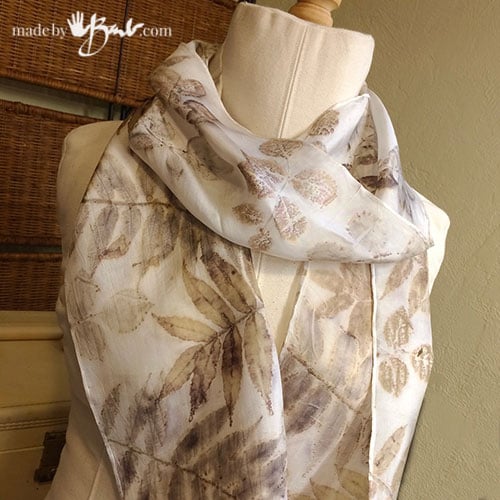
After a gentle ironing it looks so exquisite. Soft neutral and earthy tones depending on your choice of leaves. Won’t these make some OOAK (One of a Kind) gifts?!
This is by no means the limit though. This is still the start as the next stage is to add stronger colour with natural dyes. Stay tuned…
thanks for this great tutorial!!! I was gifted a handwoven wool (lightweight) blanket in India and would LOVE to eco dye it. Would i use the same method? can i use the eucalyptus from Michael’s or does it need to be alive? any ideas for leaves that might bring a blue or purple color? Nasturtium? TIA!!!!
Eco printing is wonderful but also can yield various results, some experimenting is best before working on a precious piece. I have printed wool The eucalyptus at Michaels may be dyed, but you ca use dried leaves. Depending on where you live it may be hard to find. I would suggest some small trial runs first, with different leaves and process. I have not found a leaf that prints blue or purple but cochineal is very PH sensitive so I do get a fair amount of purple from it. See here
Hello,
I make ring slings for baby wearing and was wondering if the finished product would be toxic to put in baby’s mouth. I understand that I would have to find non poisonous leaves, but didn’t know if it would be harmful because of the process. Thank you.
That’s a tough one! I don’t imagine that the baby spends that much time with it in it’s mouth. They can be washed quite well so how much ‘free’ excess would still be there is questionable. I know when working with fibre reactive dye there are many safety precautions and I bet that is what much commercial fabrics are dyed with. But that’s just my logic, not any scientific backup. Maybe there could be an outer and inner layer to avoid contact. Good luck!
I suggest reading India Flint
Eco Colour and Second Skin.
She is the expert, all you need to know and more.
She teaches workshops through Maiwa.com
Highly recommended.
Yes, I have! You must agree that this art form is quite unique as that exact recipes may not yield exact results due to the variables of so many aspects of eco printing. I wish I could have access to the euca in Australia…
Accepting each as a gift is part of the fun…
Hi. I have been eco dying paper but have not tried scarves. There are so many style and kinds on the website that you suggested . I do not know the difference in materials. Is there a certain type of silk scarf that you suggest?
Thank-you
Jane
I have mostly used the habotai with good results. Once you have a good system you may want to invest more. Good luck!
You mention garbage bags and leaving them in the sun. In north Australia the days are long and hot. How much success have you had using this technique. It seems to be much simpler. I have an eco-oven that is made of the silver type reflection material that you put in the front of the car to help reduce the heat in the car while parking in the sun!!
I have also used an eco oven and it gave quite hot temps for me but I had to keep chasing the sunny spots due to the forest. It may just be perfect for you. I’d put an oven thermometer in and keep an eye. I used a covered roaster pan inside to keep things damp. It’s pretty logical… I actually have that same material as I was going to improve my oven. It all comes down to some tests. Happy printing!
The only mordant you are using for the silk is vinegar? I used alum and leaves didn’t print as well as flowers. Also, do you use fresh leaves always or can you use leaves fallen from trees, like in the fall?
Yes, most of the time I just use vinegar. You do also need to use some form of the iron as I do in an iron blanket or dipping the leaves. Yes, I rehydrate leaves that I have dried prior by soaking a bit in warm water. Flowers may print but see if it lasts. Many only make fugitive prints. See also here Don’t give up, it’s worth it once you figure out the particulars.
Thank you! I tried it and it did work nicely. I used a plastic barrier as you suggest but it seems that the leaves run quilt often. What am I doing wrong?
You may have too much moisture. Also to prevent running, turn your bundles often during the process. Different fabrics absorb differently. Don’t worry, it’s all about learning and accepting what prints you get. I’ve had too wet and too dry as well.
Thank you!
Could you give the amounts of vinegar and water you use. Like 1 quart water and 3 quarts vinegar and the amount of iron and water you use or what you use?
When I do a pre-dip it is usually about 50% – 50% water/vinegar. The amount of iron is a bit of a learning curve. If you are ‘heavy’ on the iron it will be darker and less vivid colours. It’s hard to gauge especially if you make your own. It also depends on the amount of fibre. Best thing is to do some tests, as if it is weak you can always print a second round. I am more artist than chemist and do sometimes ‘wing it’ as exact measuring takes some of the fun away. Maybe you want to take a workshop with some of the eco printers in your area… I hope this tutorial helps but having exact recipes that are extensively tested would require me to sell the results. Go for it and have fun!
Hand rolled hem or machine hem? Also what size scarf are you using in this tutorial?
Wow, such specific questions! I’m not sure how that will affect the ‘making’. It is a hand rolled hem and was probably about 11″ x 58″ or one size larger.
I am trying the ego dyeing of silk scarves as a project with my fourth graders. I am beginning by reading and reading and reading to find the best advice and instructions. So far you seem to be doing the best at quiding us first timers. My questions are: Do you wash your scarves in Dawn water before doing the vinegar/water dip? I will be usng a turkey roaster without a basket, so if I put bricks in the bottom to keep the scarves out of the water would that work.? Is it best to process a certain number of scarves or can you pack the roaster, leaving a little space between the rolls? Does the amount processed change the process time? Please give any and all advice to this nervous teacher.(I really want this to work for my students.)
Oh boy! I am nervous too! I would make sure to do a test run with the fabric (real silk scarves?) and the leaves before doing a whole bunch. It’s a very unpredictable art form as sometimes small differences in the process/supplies can make a big change. I don’t wash the scarves from Dharma as they are dye ready. I will give them a soak in diluted vinegar water. I do not use a turkey roaster but yes some way of keeping the bundles raised from the water is good. Maybe some canning jars? Bricks seem so heavy. I would also suggest that you do it outside or where there is good fresh air as the fumes from some of the leaves may be irritating. The bundles need to have good access to the steam/heat so you also need to turn them. Yes, the amount of time does affect the prints as well. Some do anywhere from 90 minutes to 3 hours. The more I think about this I am not sure I would do it with such young kids! The careful rolling, prep, tieing, is a fairly involved process. I would also not want them to have their hands in the iron water! Maybe I would suggest a simpler eco-printing project like printing on paper. Paper prints can give a variety of results and make for beautiful framable prints. If you can grab an old microwave; that is how I process mine. I would still do a test round before the class though. You just never exactly know how your specific leaves will print, as not ALL leaves do. Children these days have shorter attention spans especially if they don’t see immediate results. Kudos for your enthusiasm though!
hi Barb
im new at this eco printing. would like to know what the standard size for a scarve should be> i went on the website that supplies the scarves – which one do you use – the size and length idont want the scarves to be to short or to long thank you your scarves are beautiful . im from Africa .
Well that’s quite a question. I am a scarf-o-holic and I have certain preferences about how many times I’d like to wrap around and whether it’s for warmth etc. Yes I do like them long but it also depends how they drape. You may have a restriction of how wide a roll you can heat process. My latest way has some width restrictions. My favourite is 14″ x 72″ or more but I’ve sold all sizes. Start with much experimentation… Good luck