Handmade Eco Printed Jacket

Brrrr, it’s been so crazy cold lately. I know it’s expected for Canada but it just seems even colder. It’s a perfect time to rev up the sewing machine to upcycle some wool blankets and create something cozy warm. Follow along to make your own Handmade Eco Printed Jacket.

The Pattern:
Being a practical sewer I hate buying patterns that I need to test first and often don’t like the fit of. Using an existing garment makes more sense to me. This jacket is one of my favourites so I used it to trace from.
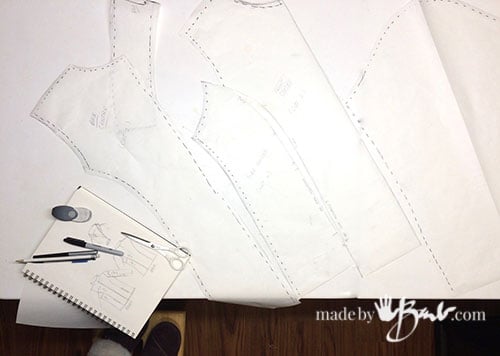
Use large rolled paper or sheets taped together. I lay each section of the garment and trace around it roughly in pencil first. I can always take in a bit but adding is usually not an option. You only need to do one half as it will be symmetrical. (with centre back/front) Label well as you will forget details.

The arm hole needs to be laid flat and follow the curve. Double check by measuring after tracing. I give it about a 5/8″ seam allowance.
This jacket pattern had side gussets to give it some shape. It was also a good design when thinking of keeping the eco printed pieces as long narrow shapes.

I will ‘rough-print’ the pieces before I cut them exactly. I cut rectangular shapes that allowed easy rolling and bundling. My vessels for steaming/boiling are not that wide so have narrower pieces worked well.

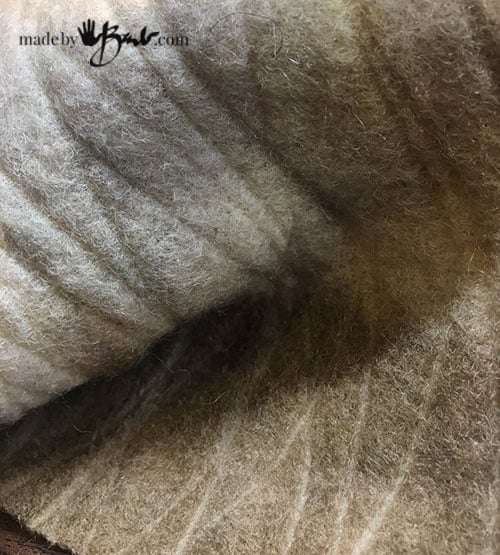
See this post for the wool eco printing. Here are the rough shapes after printing and prior to cutting. There are some extra pieces for small additions and details.
Here are some of my tips and secrets to eco printing on wool.

The Cutting:
Since the cutting/designing happens after the printing you can plan where the best prints appear. I much prefer this method to printing a finished garment. It is always risky to have the prints work where you’d like them and it becomes difficult to fold & bundle them.

Since this wool becomes quite dense and felted I decided it did not need extra edge finishing. I used one of the decorative stitches that my vintage old Kenmore machine came with.

In order to reduce bulk and piece the sections together I also opted for a flat lap-joint. The edges are layered flat and top sewn with the same decorative stitch. It was quite easy to do and offered so many options of piecing.
I like how the string makes details at the edge of the wool so I used those sections on the edges of the sleeves. There really are no rules to how you piece it together. The more unique the more designer it will look.
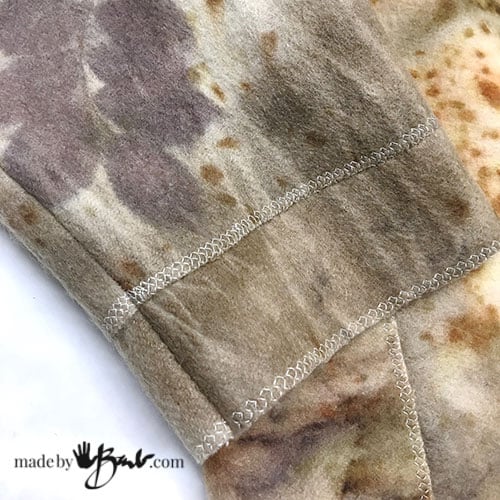
The under arm seams were sewn as usual after the cuff edges were added on.
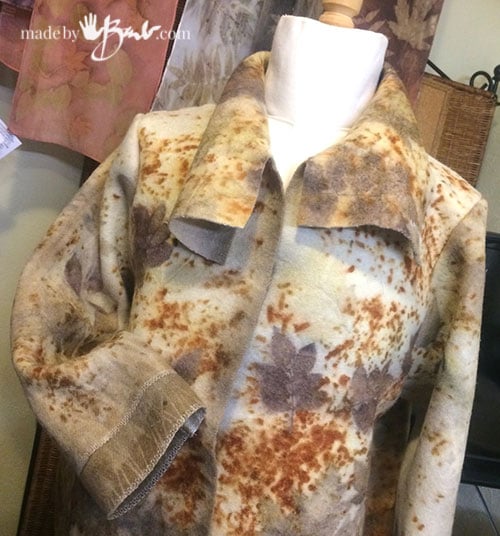
The collar was a simple band style and doubled over. For simplicity and casual look a zipper seemed perfect (and I have amassed quite the collection so there’s always a suitable one in there)

The centre front edge is finished prior to the zipper placement. This jacket will be unlined so the zipper will be stitched neatly to the inside centre front.
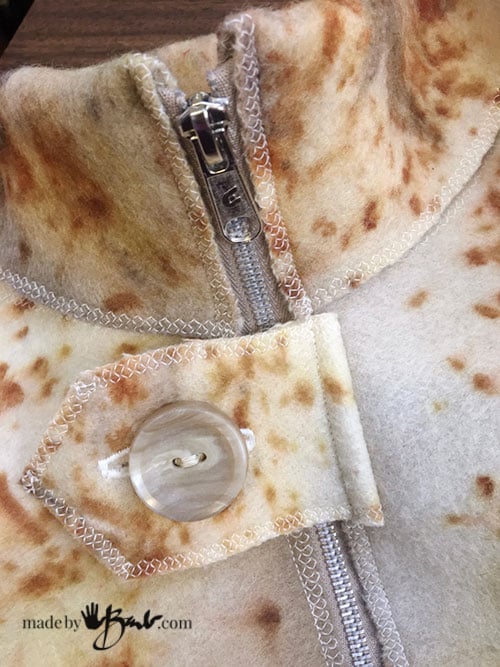
Finishing Details:
The collar is folded over and encases the zipper. A couple simple tabs are created and added at the neck and bottom front.

The Pockets:
I made sure I had the major pieces done first before I used up the small pieces for the pockets. I loved the nice details of the leaves on the pockets but needed to piece them as well. It’s much like piecing a quilt.

I made many-a-jacket for my children… And I always enjoy adding the details. They are simple but make it look professional.

Well, there you have it… No longer just a blanket sitting on the shelf in the linen closet. Designer jacket custom printed and sewn to your own specifications. If you would like to add more shape it is easy to add some darts as well. This wool steams nicely into shape with a warm iron.
If you would love to own this, I have it in my shop
I can’t wait to see it modeled!
Just speechless. You are amazing!
No, I think I’m pretty average. I’m just stubborn and determined. We used to have ‘home economics’ taught in grade 7/8 where we learnt how to make a skirt. This is easier than a skirt… I’m hoping I can inspire some younger generations to sew!
Wonderful! Love the colours and cut.
Thanks kindly! I’ve already got some new ideas in my head of other colours and designs. In my mind time goes at a ‘different speed’…
You are amazing, Barb.! And the jacket is pretty nice too.
I absolutely love this jacket …. style, colour, design, recycling …… you’ve got it all. Looking forward to warmer weather so I can see it in person. Outstanding!
Thanks Pat! It may be great for the garden since any dirt will be well camouflaged! And I’m looking forward to fresh leaves again!
I am a fan. You are a genius and a very generous genius to bat.
It is a gorgeous jacket. Kudos.
Awe thanks! It was one of my favourite projects even though it has a lot of steps… I’ve already got more ideas in my mind.
Good job! What kind of wool was your base fabric?
It was one of those vintage 100% wool blankets like the Pendleton ones. They dye great and become even more dense and thick.
Discovered your site by an instruction post on concrete crackled can planters- but found your site fascinating, as I am very interested in DIY. I’m dying to know, what sewing machine are you using? It looks very utilitarian, & I gather it’s probably heavy duty too considering your projects. Where can I get one? How do you like yours? Any recommendations? I’d really appreciate the info- thanks.
Haha, my machines have been collected from thrift stores and used ads. My original one that is over 40 years old was the same. It is a kenmore and I love these old metal machines, no bells and whistles but good and strong. There is also a facebook group for old kenmore machines. Good luck getting your’s!
I’m diggin’ on this. coat. I can picture myself in a long cape version, with some two inch wooden pegs that slip through button holes, or something along those lines, to keep the cape shut. A hooded cape? Now that sounds even more interesting. Keep up the good work. Oh, BTW, my grandmother was a seamstress and made all my clothes back in the day. I am ashamed to say that I can barely thread a needle. I regret not learning now. I would be making said cape. ~insert huge grin here~
You can make whatever you put your mind to! Some Eco printers like India Flint just hand sew their pieces together for a rustic look! It looks great especially when using a vintage wool. I KNOW you can thread a needle! Hope to inspire you more…
What a beautiful coat! Thank you for the clear explanations !
Thanks! Keep an eye out for the wool blankets! Wonderful amount of thick fabric.