Glowing Concrete Candle Orb
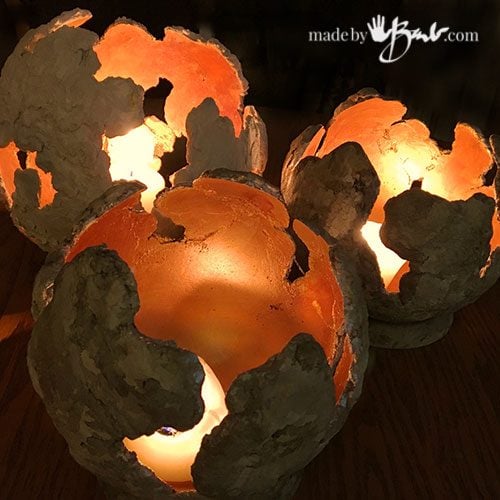
Good design involves many factors. Contrast creates interest and this is a perfect example, rough grey concrete paired with smooth shiny metal. These freeform vessels throw interesting shapes of light and emit a nice warm glow. This definitely one of my easiest projects; won’t you join me to make your own Glowing Concrete Candle Orb?
What you need:
Yes, my concrete station (really just a work-counter behind my shed) is getting quite the patina of concrete layers. It is a small space but is quite sufficient since it can be left out in the weather. I don’t wash out containers (just let them cure & knock out the bits) and everything can get wet except for the concrete. More tips here.
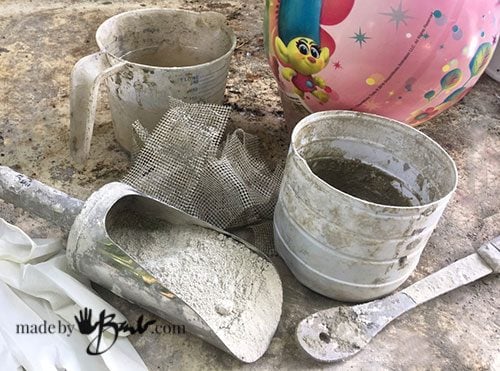
Supplies:
- Ball (deflatable/inflatable can be reused)
- RapidSet Cementall
- Mixing container (recycle plastic) & water
- Mixing spoon or stick
- Plastic knife or like
- Gloves & Dust mask
- Drywall Mesh
- Dog food Bowl (not pictured)
- Concrete reinforcing fibres
- Acrylic paint for finishing
After working with balloons I have decided to make things a bit easier. Balloons fly away and tend to not be completely round. The stiff shape of a ball and the fact I can reuse make it a better choice. Plus I don’t have to worry about an unexpected pop! Set the ball on a bowl or vessel to stabilize it.
The Layers:
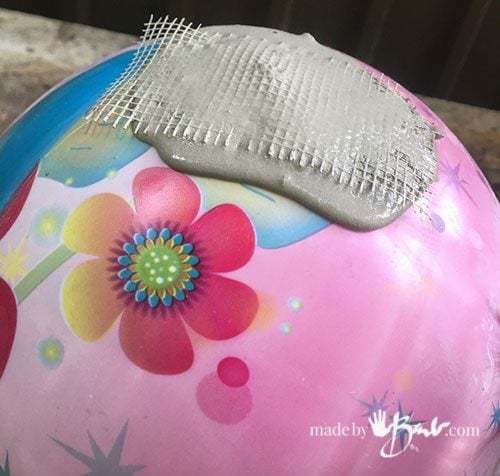
This is a pretty basic orb project with the only difference being that you are making a unique shape. The inside will be visible so make sure the fibre mesh is ‘inside’ the concrete by making a thin layer before adding the mesh. The mesh helps keep the concrete from sliding off too much as well so have a few pieces already cut.
Wearing a dust mask mix a small amount of RapidSet Cementall to a soft clay-like consistency. Let it sit for about 30 seconds and it will stiffen more. It should be somewhat moldeable in your (gloved) hand.
Work from the top down (make sure to NOT cover the ‘air hole’) Try to envision the shape as this will be the bottom.
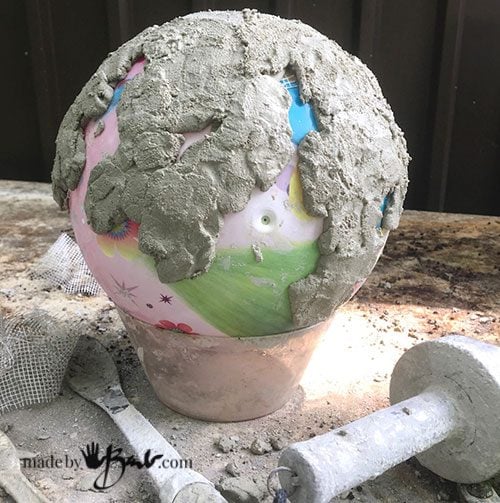
This mix will set quite quickly (sometimes too fast) so you can shift the ball to allow more accessibility. Since there will be light I am aiming to have openings and interesting edges. I am not trying to make a perfectly smooth surface; rather some natural rock like texture. A plastic knife works quite well.
Since this mix is exceptionally strong a thickness of about 3/16″ – 1/4″ is quite ample.
The Interesting Shapes:
It sort of looks like the world… Play around with the edge shapes and make sure they are not too thin. Any visible mesh can be cut/burned off later. If you’d like to further ‘fill’ the shape you can invert and continue to add (wet existing concrete).
Most people feel they can’t do something since they expect perfection. Happily, this really has no perfection expected…
Let it sit for at least an hour (yes, ‘love’ the RapidSet) Use the inflater pin to release the air.
You can easily ‘knock off’ any tiny bits of concrete edges or use emery cloth (but it is not needed since it has a very textured rustic look). Any mesh can be burned (mini torch or lighter) or cut away.
The Stabilizing Ring:
You were wondering what the Dog Food bowl was for?! I was racking my brain for some sort of way to make sure the orb does not roll away… I spied my dog’s food bowl! (easy to find at Dollar Stores) That’s what happens when you see EVERYTHING as a potential mold for concrete! Perfect!
To reinforce (optional) I added some fibres (maybe just cut a bunch of tiny mesh pieces) and filled the bowl form the bottom.
Tap the filled mold on the table until it flattens nicely. Once un-molded it is a perfect ring to sit the orb on. (Shown here with the paint finish) Add some felt or rubber pads to protect table surfaces.
Concrete does not burn, and it is quite heat resistant (means it does not build up heat quickly) which makes the paint not reach flammability temperature with usual use. However care must still be taken with the size of candle and proximity to the paint. Most tea-light size will be small enough to be a safe distance. As with any candle burning, they should NOT be left unattended.
The Easy Finishing:
Ok, so I am always feeling like I am trying to catch up… For a super-quick finish I just wanted a little bit of ‘age’ to texture the concrete. If you ‘paint’ it heavily it will usually peel in the long run.
Mix a bit of watered-down black acrylic paint and let it run over the orb. It will find the crevices and create nice details. Who said you couldn’t paint?!
Dab some on the Stabilizer ring as well to blend it into the colours. The RapidSet Cementall has a very white final colour.
Oh-La-La:
Funny how the metallic makes such a difference! Copper is my favourite, but Gold is great too! Or ‘smoosh’ both together for even more interest!
It will need a good 2 coats since it is fairly transparent.
Make a few of different sizes while you are at it… They look great in 3’s.
Best thing:
They can be tilted toward any direction! If it is windy or if you want to throw the light; turn it on the ‘stabilizer ring’ as needed. Genius! Imagine these as wedding centrepieces; glowing from each table. Probably only cost pennies (dimes) to make!
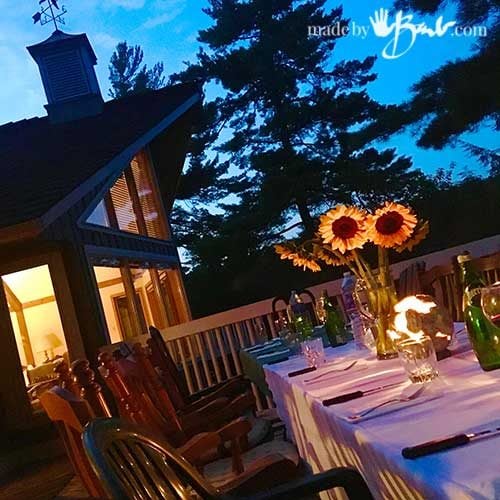
The other wonderful thing is they make great ‘Hostess Gifts’ since they are one of a kind. This was a well received gift and enjoyed the entire evening!
Everyone can use some ‘light’ in their life… I know you can do it. I’m here to help. Spread the warm glow and ‘make’ someone happy. If you are ‘new’ to concreting check some tips here. Once you are Orb-crazy I’ve got more…




Oh Barb, those are my all-time favourites pieces you made !!! I have all the needed “ingredients” already since beginning of this year but was too busy to start anything outside of our business and my painting yet. But I am getting closer since business is starting to slow down soon. Keep going !! I love getting your emails about new protects.
Take care
Shirley from the Abadin B&B and Fasting Retreat between Ottawa and Montreal
Looks great, Barb. I’d like to give it a try since I’ve never worked with concrete. I understood your directions until I reached the stabilizing ring. Couldn’t connect your directions to the photo.
You do amazing things.
Thanks for sharing
Susan
I have edited the post to show the dogfood dish. I hope you can see how it was cast.
Agree… thanks for posting Susan!
Barb – I love this! I’m a little confused about making the stabilizing ring – could you explain it a little more, please?
I love everything you do! You are so talented!
Ah yes, I may need to edit that part. It is a ring of concrete cast in the upside-down dog food bowl. See it later in the post where it’s painted. check back soon… to see it better. Thanks
Hi Barb,
I love your posts.
Can you advise if you put anything in the dog bowl to help release the concrete from the mound?
Thanks
Whenever I use plastic (usually shiny) with the concrete I find it does not stick so I don’t use a mold release. If the bowl has a bit of flexibility that is always best to wriggle the concrete out…
How did you get the ball out when it was dry ? Can the ball be reused ?
Haha, I guess you did not notice the picture of the inflating pin letting the air out? Yes, it’s an inflatable/deflatable ball. Then they can be reused…
You are simply amazing. I can’t thank you enough for your inspiration and encouragement. I taught myself woodworking with help of the internet in my late 30’s and now I”ve made about 1/2 the furniture in our home… running out of large scale items I’m looking for ways to decorate my home and organic materials and crystals are my favorite. My mind is spinning with ideas and plans after finding your DIY geodes this morning and now with these orbs I’m giddy with excitement. Please keep sharing your ideas! Much love!
Thanks! I too get giddy when I have a new idea in my mind! I run myself ragged trying to get so much done in a day. Happy making!
Love this article i am wondering about the paint on the inside what exactly is it called. And any craft store or Home Depot will carry?
There is a link in the post, it is called Metallic Acrylic paint I would check craft and art supply stores. Good luck!
Brilliant idea, I can’t wait to try! Your tutorials make us believe it is so easy, so let’s hope so!!! 😁
Good luck, if nervous do a practice tiny one. This post may also help, good luck!
Your post are amazing and can’t wait to make my first bowl :)…I would like to glue/adhere a small acrylic base to the bottom what would make it adhere to the cement?
Thanks so much and please keep posting!:)
Since the concrete will not adhere to the acrylic, you’d need to use something that works for both. 2 part epoxy glue (there are 5 minute kinds) would do the trick. You could keep it detached so that the angle can be changed. Good luck
Hi Barb,
In the materials list you have drywall mesh and concrete reinforcing fiber listed. I’m assuming, based on the directions, that the drywall mesh is used AS the concrete reinforcing fiber. If inaccurate, where do you get your concrete reinforcing fiber from and if using both, when does the drywall mesh come into play?
Thank you!
Denise M
Yes, the drywall mesh is pretty simple work with and it works well. You can substitute the fibres instead but sometimes they do show a bit. Perhaps if really nervous, you could use both depending on scale of project.
May I say you are VERY talented! I love your designs. In fact, you amaze me! I
Keep it up💕
Judy
Thank you! I hope to! I have a strong belief that everyone is creative in some sense, you just need to be patient and a bit stubborn. ‘Give yourself a chance! Happy making!