Easter Eggs Printed with Botanicals
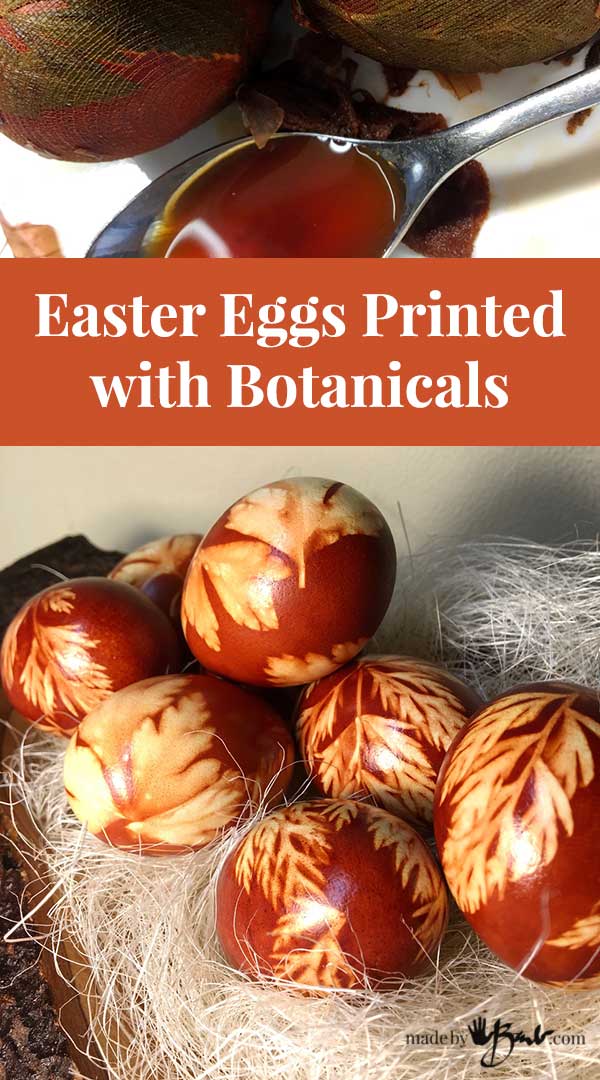
Everything that is white at my house runs the risk of being dyed… so this time it’s the eggs! Perfect, since Easter is around the corner. Easter eggs printed with Botanicals are shockingly beautiful and actually super easy to make! ‘And you know I am obsessed with Eco Printing!
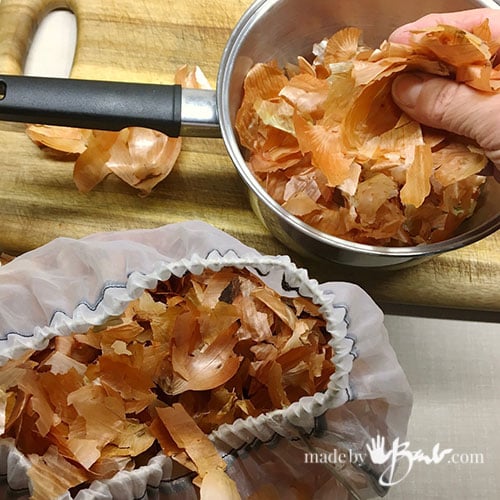
To Make The Magic Dye:
I keep a mesh veggie bag under my counter where I collect dry yellow onion skins (they don’t smell). I have also even been known to ‘clean out’ the bottom of the onion bin at the grocery store. Those skins produce the most rich warm hues of yellow to dark red. I’ve used them when dyeing wool (protein fibre) and it amazed me there as well. Use a medium sized pot so that the depth will accommodate the eggs without too much water.
Historically this art form called Eco printing or Botanical printing was discovered by India Flint when some impressions were found on an egg…
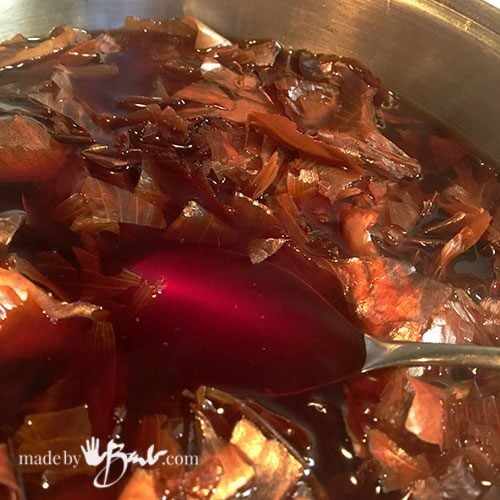
The key to having the most amazing richness of colour from the onion skins is how much you use. I ‘cram’ in as much skins (cut smaller if needed) as possible into a pot with enough water and add more as they cook, a little bit of white vinegar (tablespoon of vinegar) will help the shells absorb the colour. As the onion skins cook they will soften and shrink and emit the wonderful colours from their tannins. Let it simmer on low heat.

The Botanicals:
It seems that this year Canada has forgotten that it’s time to warm up for spring so getting fresh botanical leaves was impossible. Sooooo, the grocery store is the next best thing as certain house plants are poisonous.
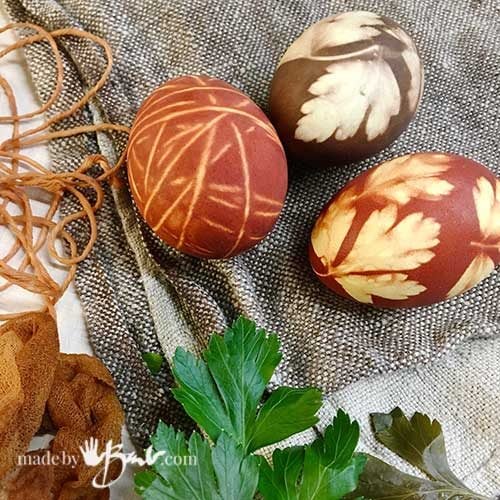
I look for nice leaf texture and small size; parsley, baby arugula, and carrot tops are easy to find but any leaves will work. This method is somewhat like Eco Printing but uses the ‘resist’ method to create the leaf shapes and images
The Trick to wrapping:
Go find some old pantyhose (nylon) or socks (transparent is best) and stretch it over a small glass/mug. Carefully place the leaves over the hose. The leaves will come in contact with the sides of the eggs.
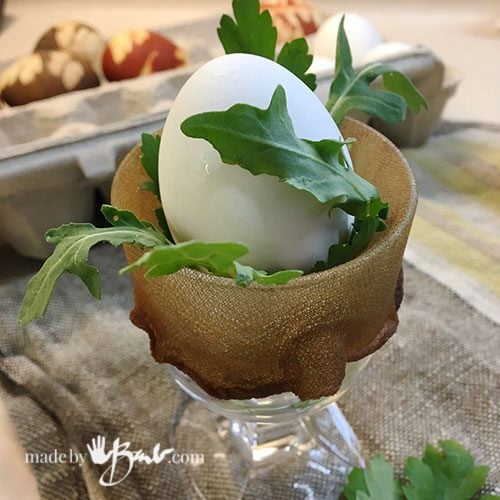
Let the egg sink into the cup and the leaves will wrap around the egg. I use white eggs for better contrasts than brown eggs would have.
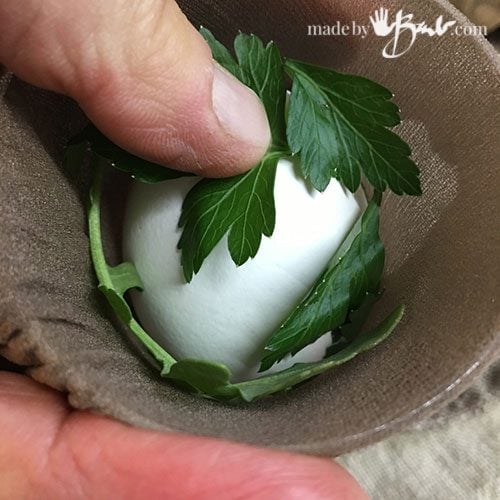
Push the egg down and keep hold of the outsides of the hose. Add leaves on top if desired. You can be fussy or just ‘wing it’ for interesting results. The key is having good contact on the wrapped egg.

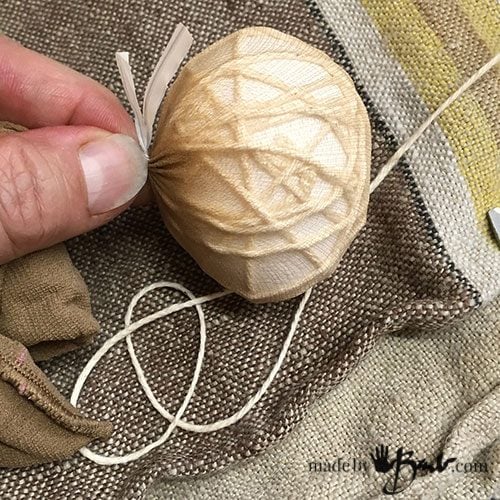
Grab the edges and pull tight together and twist closed with twist ties. How easy was that?! The hose gives good even pressure and full dye colour will permeate.
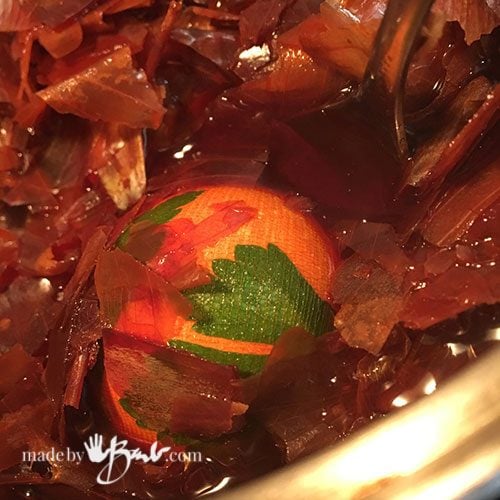
The Dyeing:
Sink the egg into the liquid, possibly moving some skins aside to have it submerge.
Let it simmer (low boil) while you prepare more. The longer the simmer the beautiful colors of the dye liquid will become richer! Pull it out (with a ladle or wooden spoon ) when desired and brush off any skins.

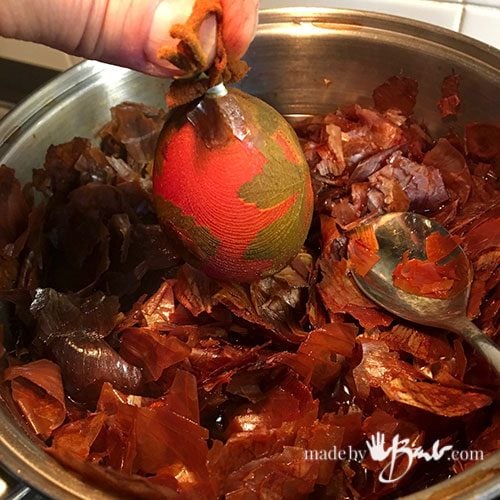
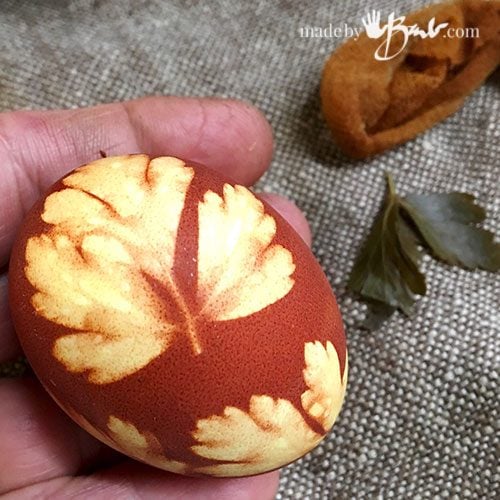
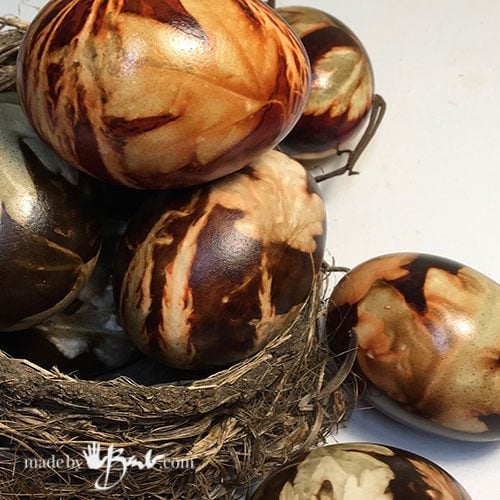
The Beautiful Reveal:
Notice my lovely stained fingers? Eco printing, especially with iron does make for some ‘colourful’ fingers! But no problem; lemon juice will nicely clean them up afterward.
I am utterly amazed at the intricate details that the botanicals print on the eggs. ‘Maybe the fact that they are not floating in a huge amount of liquid does helps make the dye quite strong.
You are not limited to only using leaves, you can use grasses, string, rice, lace, whatever has nice details. Always think outside the box! (oh darn, a bunch of new ideas just popped into my head…)
Modify the range of colours from light yellow to rich indian red with iron and acidity. You can experiment with other natural dyes like turmeric (yellow) or red onions.
Being an illustrator this amount of detail baffles my mind. Drawing or painting was not needed to make this magic… Well, ok, Mother Nature provided the ‘art’!
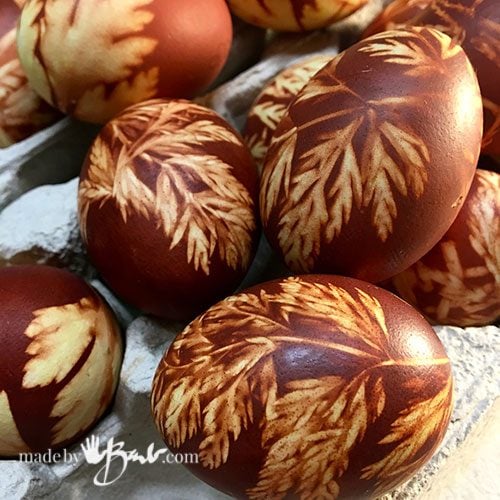
You will never look at carrot tops the same again after dyeing these. Rub on some oil (mineral, coconut or olive) to give them a nice sheen and you are done. These are for decorative purposes only as some may not be completely cooked. I leave them full and they will eventually dry out inside but you may also use blown eggs. (submerge them in the skins to cover)
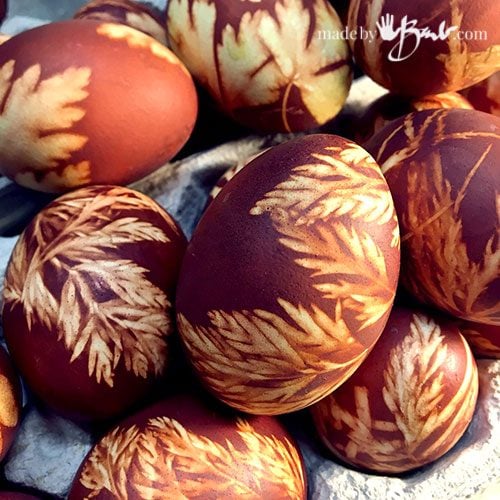
How ‘Egg-squisite’ are these? Check out my next post to see how these were taken to the next level with another trick.
Happy making & Happy Easter!
The eggs are beautiful! I’m thinking – what else could I dye with botanicals & onion skins!
Yes, I also have some plans! Hubby know better than to drink what’s in jars in the fridge!
These are gorgeous! Such beautiful colour and detail! I would love to try this, but haven’t been saving my onion skins — what an oversight! I may have to go clean out some grocery store bins… I’m so impatient for new green growth here in Ottawa, but it just keeps on snowing.
Yes, as I wrote this morning it was snowing here too! I am also thinking of visiting my favourite florist with promises of making her an eco print apron in exchange for rose/eucs leaves… I got a big bag of skins and cashier didn’t charge. happy printing… and there will be a follow up one as well.
These are lovely!
I know I did not invent it but I hope I’ve improved a few things. I love the amazing details for such an easy project.
I loved these , l leave my eggs just set in a cool place all year and they dry out inside, yours are the greatest, can’t wait to try them
Yes, I did that with some eggs I did the ukrainian way and they are now dry. I did have a couple of these pop for some reason. Maybe since they are boiled??? Enjoy!
There will now be a mesh bag under my kitchen sink, ready and waiting for onion skins!
These are absolutely stunning!
… and they get even better!
I use onion skins for dying wool. The yellow ones make a perfect orange for needle felting Halloween pumpkins which can also be used for pin-cushions!. I make a strong solution for deep orange, then re-use the solution for a lighter (more traditional) orange,) then I use the solution a third time which makes a neat lemon yellow color. And, by the way, red onion skins make a beautiful blue. Yes, BLUE.
On another topic, Barb, will all your “lessons” be always available on your website? My laptop can’t download, and I worry about being able to access some of them in the future, since I can’t try to do them all right away.
Thanks for the info! I did get that deep orange and have dyed some wool blankets as well. It is quite amazing. I did not get the blue with the red onions but I suspect it may be a PH issue. Yes, I will have all the posts on my site. So much to figure out… so little time. More eggs to come.
These are so gorgeous… will try them with the older grandkids Thank you
Sounds like fun. I’m looking forward to when my new little darling will be old enough!
Barb – That is incredible! The amount of detail you get is astonishing. Those eggs are truly stunning.
My mind immediately went to an image of an egg with feather prints (instead of leaves), reminiscent of eggs nestled in a feather-lined nest. But my concern is that the individual barbules or “hairs” comprising a feather would clump up and print as a blob, rather than providing the rich detail you get. Although perhaps pantyhose would mitigate that. Have you tried printing feathers?
In that crazy brain of mine I do think it could be a possibility but you’d need the right kind of feathers like the duck or larger foul ones not the fine ones you see in craft packages. If those details from the carrot tops managed to print then I see it happening. Oh, come to think of it I think I have some feathers somewhere… IF I make more I will try! Happy Easter!
These are beautiful will be too good to eat…thanks Barb
If you follow proper cooking/storing yes! I have mine on display so they will become keepsakes! Happy Easter!
These are absolutely gorgeous. Reminds me of younger days….50 yrs ago…when we used to forage the “bush” for tiny flowers and leaves to wrap around our eggs with onion skins and boil at Easter time. Who know we were “Eco Printing” at such a young age!
Wow! It all has to start some way and then it goes in all directions to be modified and made into much more! I do have an appreciation for all the forefathers (mothers)! Happy Easter!