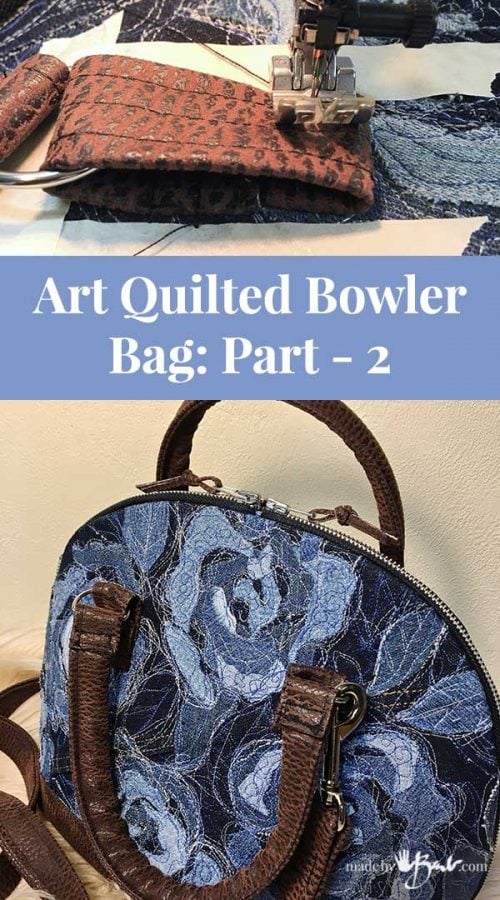
Art Quilted Bowler Bag – Part 2

You are probably waiting to finish off your Art Quilted Bowler Bag from Part -1! Details always matter and this one does not disappoint! Get your stuff, sewing machine and be happy to finish your new bag!

The Important details:
This purse has two short handles as well as a cross body option with a long strap.
To make comfortable handles there is vinyl tubing (1/4″ ID vinyl tubing) inside the handles.
- Cut 2 17.5″ x 4″ pieces of ‘leather’ and double fold, sewing at the edge (check to see that tube will allow to slide in freely)
- Slide Vinyl tube into strap


- Secure the D-rings by folding over at ends and sewing multiple times


- Make tabs by folding over and inserting ribbon as sewing to add extra reinforcement (*tip from the professionals)


- Mark Placement of tabs with tape (you don’t wan to guess!)
- Sew tabs into place (rivets can be used if desired) with multiple lines of sewing to reinforce

- TADA! Great handles for your Art Quilted Bowler Bag!
Repeat the process to make the long handles (without the vinyl tubing) using the Clasp-Clips attached at the ends. Since this is probably for yourself, you can make the strap at whatever length you like!
Make it Pretty inside!

Mark the width of the zipper pocket.

Sew a rectangle (will be zipper ‘window’) through both pieces.

Cut through middle and clip into corners. Turn and press opening.

Centre zipper in ‘window’ and topstitch into place.

Fold up inside piece and sew side seams and top.

This makes a nicely finished zipper pocket.

All done!

Make a simple patch pocket on the other inside panel.
Since the zippers open this purse all the way down the sides, it helps to have gussets to stop anything from falling out the sides.

Simple triangular ones are easy to make.

Place the gusset between the lining piece and the outside (right sides together) and sew. Tip; it is easier to sew same zipper line if you sew with the outside layer on top.

Turn and then sew the other lining piece to the other side, making sure to inset the gussets.

Sew around at zipper line again.

Using the zipper foot follow same stitching line as zipper was sewn.

Turn & you now have both sides lined.
Adding the bottom leather or vinyl.

Double check the length of the bottom and sew a seam to close the loop.

For added strength I doubled the strip by folding over.

Top stitch it into place over the bottom portion.

Be careful to not hit the zipper. Hand crank the machine through the zipper teeth.

Stay stitch a line (1/2″) where bottom will be added.

Again for stability the bottom is doubled and sewn through.

Whenever sewing a side to a rounded shape it is much easier when clipped close to seam line and at regular intervals.

Pin (or clip) and ease around shape matching centres.

Sew around at seam line and open clips to flatten sides to meet with oval bottom.

Cut extra seam allowance to about 1/8″.

Almost done…
Adding the inside bottom

Since these bags stand quite well, it is best if it has some stiffener in the bottom. I had an idea; I cut some bleach or vinegar bottle as they are plastic. To flatten I ironed at a low setting between parchment paper. Another option as shown here is using a styrofoam meat tray as it is also stiff and quite light. If you want extra stability you could use a thin plywood.

Cut the bottom lining piece and blind stitch it around.

Before closing slide in the stiffener piece.

All neatly lined and no visible seams! Turn & breathe a sense of accomplishment!

My purses need to be secure with closures – check! Be pretty – check! And unique – check!

Don’t say you can’t do it! ‘Where there is a will there is a way!’ If you’d rather not sew; this Rivet Purse one may be your style!
Happy making!
I love all your projects!!! I do a little bit of everything too. Right now I’m into cement and hyper tufa. Love looking at all your projects! You are very talented!
I tend to go in many directions! But I think my ‘personality’ is rustic and some inspiration from nature! We are all different!
WOAH – such patience, my friend. What a great achievement!
Brenda: This actually comes together quickly compared to some. The free motion sewing is like scribbling with a foot peddle! Drawing taken to the next level! 😉
Nice bag – thanks so much for the great directions!