Make Iron-in Metal Nose Pieces for Masks

Most face masks need a nose strip to get the best snug fit. Here is my way of making Iron-In Metal Nose Strips for Masks. No special materials needed.
The Metal:
Did you know that sardine cans are aluminum? That means they do not rust. Go, have some lunch, I’ll meet you back here…
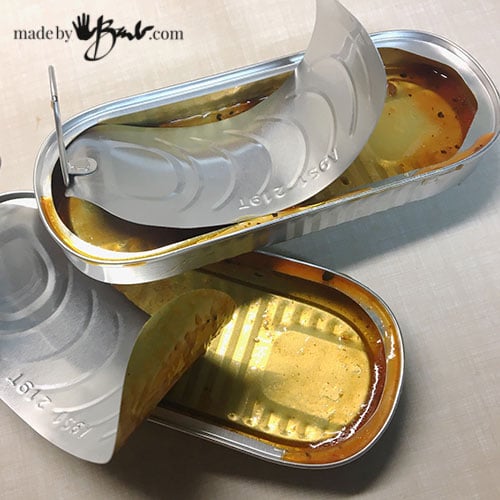
Yes, wash your can well. I mostly use the lid as that’s easiest. It is not that super sharp as other cans and cuts with some (old) scissors. The length also works well. It’s amazing how many can be cut from one lid.

Cut the strips about 1/8″ – 1/4″ wide depending on your fabric choice. If the fabric is bulky it probably needs a stronger/wider strip.
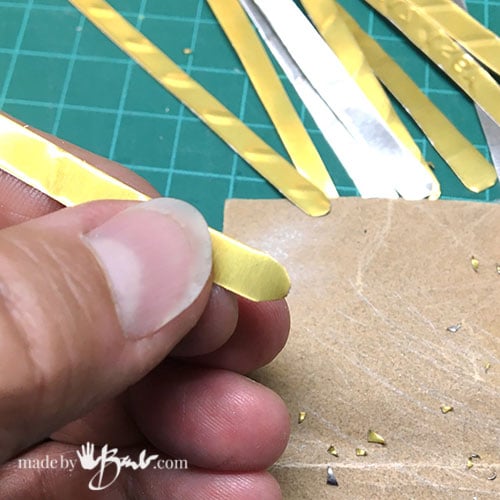
Cut the strips 3.5″ – 4″ long depending on your pattern. To lessen any poking round off the corners. The edges do not feel that sharp but a quick run over sand paper will take any sharpness off.

The Secret Ingredient:
Fusible Webbing is a wonderful stuff! That is what will bond these into place permanently. It comes as a parchment paper with a layer of heat sensitive ‘glue’ on one side.

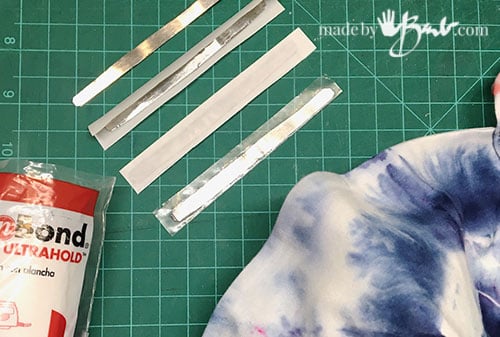
After cutting the strips of sardine can, cut thins strips of the fusible webbing that is wide enough to fold over the metal strips. Using a rotary cutter and metal ruler make it super fast.
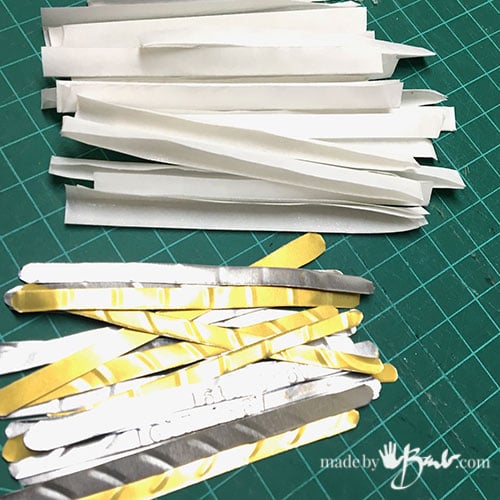
I make a bunch at a time, and then head to the ironing board.

Place a metal strip inside the folded fusible webbing and then grab the iron.
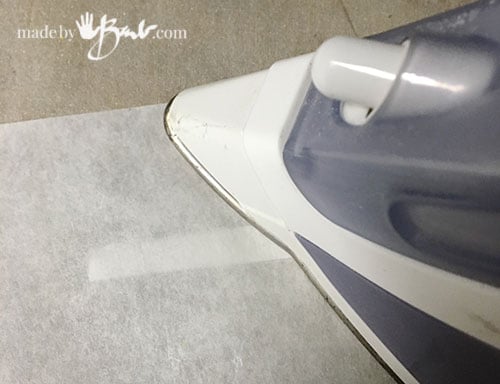
To ensure that the iron does not get any of the webbing on it, I use a sheet of parchment to protect it. Medium to high heat will melt the ‘glue’.
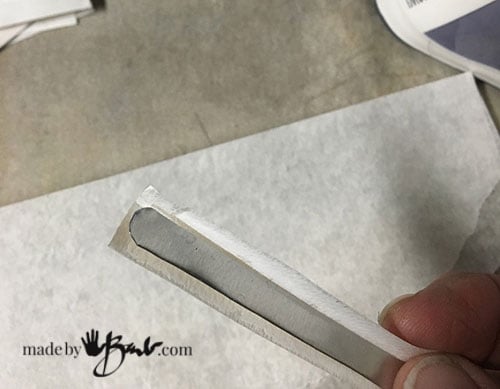
After it is ironed and cooled, peel the paper off like taking a candy out of a wrapper. Ta-da! It’s ready to insert where you like! Fusible web is wash safe as well, but I would use a ‘lingerie bag’ to protect it form too much tumbling.
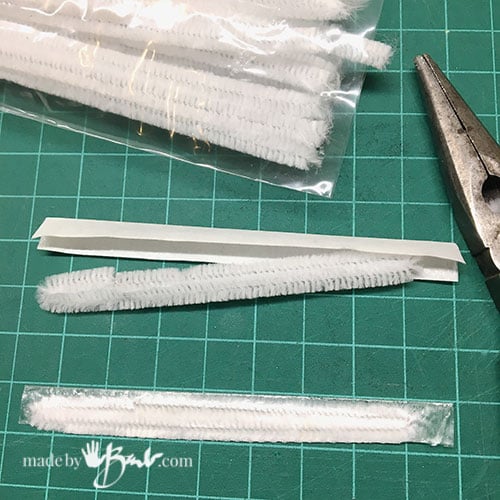
I am not a huge fan of the pipe cleaners as they break and have thin wires but in a pinch you could substitute them for the wire. Again, ironing them inside the fusible web would make them flat and able to be iron-in place.
I have used these strips in most my mask designs; Snug Nose-Bridge DIY Fitted Mask, DIY Ultimate Fitted Face Mask, DIY N95-Style Face Mask Pattern and the latest Fitted Face Mask Pattern for Glasses. The less bulk of seams makes the nose-piece flatter and then much less likely to get in your eyes and also fit well. The metal piece stays in place but can be shaped easily.
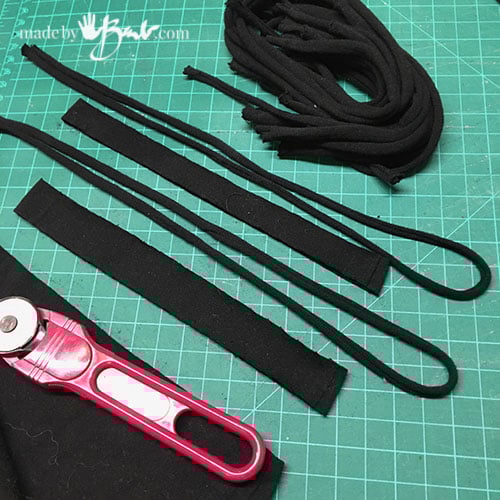
Instead of Elastic:
Due to shortage of elastic I found another option; t-shirt strips! They are so much more comfortable than the elastic and depending on the fabric can be so soft. If the fabric has some spandex it has more stretch. Test different widths, 3/8″ -3/4″.
Another tip; you can make some toggles out of ‘Pony Beads’ so that it is a slide adjustment. Test which thickness works best through the bead hole. One t-shirt/camisole can make so many stretchy straps! Many prefer these over the elastic. Using casings allows for switching out straps or using the behind the head option.
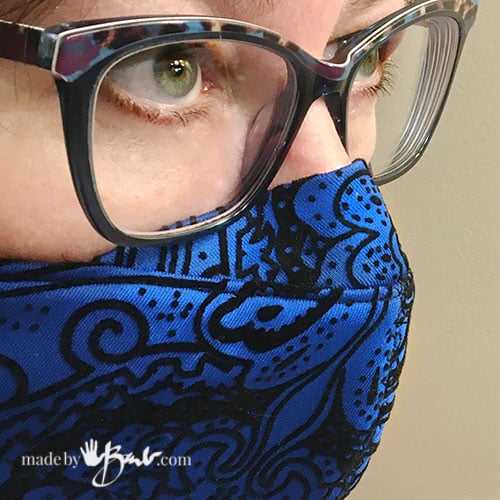
Once the strip is in place (this is the Fitted Face Mask Pattern for Glasses) it stays put and actually flattens the fabric since it is fused. This magic stuff can replace sewing in a lot of projects. It’s great for appliques and art quilts…

I hope this will make you & your loved ones just a bit safer. Do not worry, we will get over this with care and patience.
Thank you for making and wearing a mask! 😷 Stay safe & we will soon be making things for fun…
Watch this as a video:
Thanks for sharing the nose pieces! That will be very helpful for my next batch of masks. My first attempt was to order pipe cleaners – thinking they were for crafts, too – and receiving painfully bristled cleaners that could take bark from trees!
Oh my! I have been never been a big fan of anything pipe-cleaner craft. Hope this helps!
That baby ironing board! Thanks for sharing Barb.
Hope to see you soon? Sheila
Ah, ya! Having stuff on the same table helps! Yes! hope to see you soon.
For those of us who don’t eat sardines it seems that pop cans would do the trick for mask nose pieces! Barb Thanx so much for sharing your talents with us.
Have you tried the green twist ties from the produce department of your local grocery store.
No, I wanted a flat one. I also used tin cans until I discovered the sardine ones.
I’ve been using florist wire but can’t get any anymore, and after a while it rusts! I love the can idea, but cans in Australia seem very tough, I don’t think I’d get through them with scissors!
Try using the Sardine Cans! Easier to cut.
Have you tried the tops of coffee bags? They have metal strips inside but are covered by plastic so no rusting. You can get at least 2 nose wires out of one and they are slightly sticky on one side so they don’t slide around. I cut them in half lengthways so they are thin enough and for a small/kids mask I also cut them in half the other way too. I highly recommend them.
Sounds like a good idea! Nice to see everyone being resourceful.
If you don’t eat sardines what would you use for the metal strip?
You can use pipe-cleaners, or some floral wire in a loop. Also, if you have tin snips you can cut tin cans, but it is a bit harder. Maybe you ca get someone else to eat them… for a good cause.
can you use pop cans? or are they too flimsy now?
I think they are too thin. Some have said aluminum baking pans, or roof flashing may work. Tin cans can be cut but heavy duty sheers need to be used. Good luck!
I have used pop cans but I fold strips in thirds so they are a thicker and hold their shape but are still pliable.
I have seen others use the aluminium take away containers or disposable roasting pans you can often buy at the supermarket. The type you can make a lasagne in.
Interesting! Good thinking!
I buy whole bean coffee and some brands have a strip on the bags of beans for resealing. I use those strips. They work great! They are plastic coated and cut easy.
Yes, also a great idea!
What about pop/soda cans?
I think they are too flexible and thin. You can try by cutting and folding a few times. See if it holds shape enough before putting it in.
Give the sardines to a local cat.
Great idea! But then you will have a lot of at friends!
These are wonderfully easy directions to understand! One question, I ate my can of sardines several weeks ago and didn’t save the top, can I cut up a soda can, or would that be too thin? Thanks!
Soda cans are too thin. You can use other tin cans if you have tin snips. Sand the edges a bit.
Can aluminum soda cans be used? Or are they too thin?
Thanks.
I think they are too thin as we can crush them in out hand. I have heard there is aluminum flashing at hardware stores…
Genius! I’ve tried wire, but it’s definitely suboptimal.
‘And sardines are good for you!
Thank you, for all of your awesome info and tips! I have been procrastinating and overthinking it for so long, but now I’m feeling confident. I might try to add a filter pocket just to cover all of my bases. You are amazing!! XO
The key to ‘making’ is not putting too much pressure on your self and saying ‘I can do this’. I teach in a college and I’d say that I feel like a coach most of the time, I hear; ‘I can’t do this’ most of the time, before they even try… Sewing is a wonderful art form that can really enhance your life. Best of luck.
I find that this type of nose piece (as on the 3D mask) works pretty well with glasses. I worry that any metal material will, with frequent washing, eventually get all dented and uncomfortable. Can you figure out how to somehow make an opening so one can replace the metal?
(Also – I found the video a bit hard to see – if you do another, could you use light material and dark thread?)
Can’t wait to try this pattern – it’s the best of 3D and Olson. I was trying to figure out how to combine the two when I found your blog. Thank you SO much!
I think washing gently would be key. There’s probably a way to make an opening but my aim was to keep the top as flat as possible to not push up my glasses. Video making will get better… 🤞🏻 Hope the pattern is a win with you!
Use a rectangular piece of fabric or felt. Sew it on the inside top of the mask. It makes it much easier to use seam ripper on one short external seam not hidden between the front & back material. I have had to replace multiple nose pieces. The flower wire started twisting out of shape & poking out even though I had taped the ends. Nose metal strips I bought from Amazon quickly broke in half.
I use acco fasteners from Staples . cut off the ends to use as a nose piece