Concrete Burlap Bags with Handles

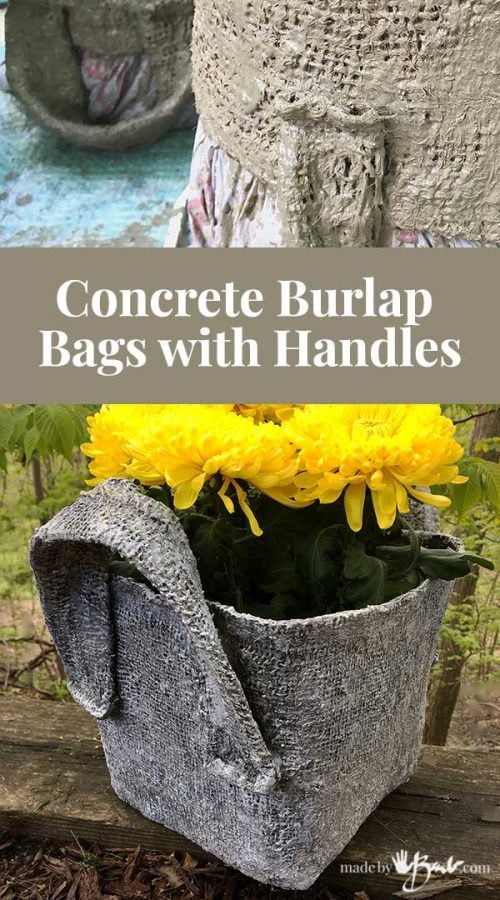
Time for some dipping into cement! Move over typical planters, and make some unique Concrete Burlap Bags with handles. They are beyond sweet, textured and rustic…

Find Some forms:
These concrete vessels start with burlap and a bit of sewing or glueing. Everyone must have a bucket somewhere! Since they are handy for all kinds of things I am always taking advantage of the free give-away buckets. The best type of form is one that tapers somewhat and that has some flexibility. Measure loosely how tall and how much circumference your bag will have. Give it a bit of extra looseness, as it looks more like a bag when it has some slouchy character.

These bags start with simple rectangular shapes that corners fold in afterwards. To give the bags some strength I used some cast-off fabric as an extra layer for the burlap so that it would be stable enough once dipped in the cement. You could also double up the burlap if you like. Some burlap has larger spacing of the mesh than others.

Once I had the basic pieces and made a dry-fit I covered that fabric in burlap. I made some strips to add the handles. You can be as creative as you like! The sewing will be hidden so any way you can secure would be fine. It does need to hold through the stage of dipping in the cement slurry though. If you are good with a glue gun that can work as well (just keep to a minimal as the cement will not stick to it).

Sew be it:
I wasn’t fussy about how they came together as they will be covered with the cement anyways. Even the colour of the fabric does not matter.

Just some simple square/rectangular bags with handles. Tall or short, wide or narrow, whatever you desire. These would make sweet centerpiece vessels for a rustic outdoor wedding! The bags can actually be used for anything, indoor or out.

Test that the fit of the bags is loose enough (at least an extra inch). I like a bit ‘slouch’ so that you can tell they are not commercial vessels. I bet if you used up-cycled sweaters they would also have much interesting character. (Yup, lots of images in my vivid imagination)

Once I’m satisfied with the fit, I just tack-sew the 2 points together at the bottom. I like to get everything pretty well ready before I get into the messy stage outside. I’m not concerned about the inside of the bag, only the outside. I have gotten questions about the use of doilies, as often they end up too soft; this would work for them as well since the inside layer would give enough stiffness. Texture is such a great element of design.

Simple burlap bags – charm at is best! For some odd reason these give me such pleasure to see… Un-pretentious bags.

Ready, set, dunk:
Here we go… out to make some mess. Or not.
The recipe: Portland cement & water
Yes, that’s it! I do not add sand as I noticed it would not get absorbed at all. Portland cement is the ingredient in most concrete mixes. It is really fine so do be cautious and wear appropriate dust masks. Portland cement often can get lumps; sifting it prior to mixing is much easier to rid of lumps.
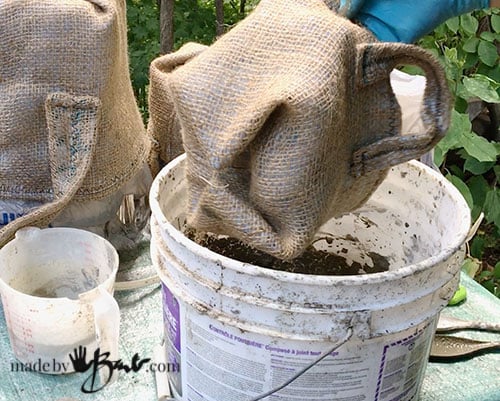
Mix the slurry to about the consistency of melted ice cream. If you dampen the fabric bags first then they will not ‘steal’ all the moisture from the mix. I often find that I need more mix than I thought I would. If you have some extra rags handy you can always make some draped bowls if you have extra leftover mix.

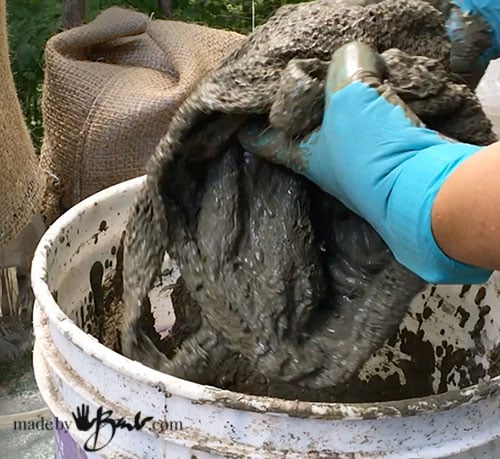
Get your gloved hands in there! Knead the mix through the fibres well, massage it in, open the bag and dunk some more. The more it gets into the fibre the better! If it starts to feel too dry add a tiny bit of water. Little lumps are hard to get out at this point so having it mixed well before hand is important. It is very ‘mucky’ since the lack of sand.

Once you have worked it into the fibres well, wring it enough to not be dripping. To make removal easier I like to use a layer of plastic (up-cycled grocery bag). Stretch the bag over the bucket and pull into place.

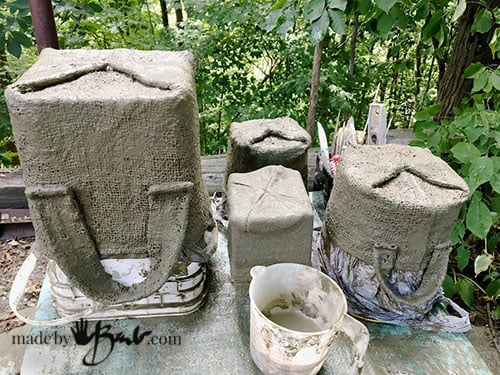
I like to make sure the fibres are not all clogged with the cement so I will use a stiff brush to even out the cement. Manipulate the handles as well. To make drainage holes, pre-plan some holes where plastic tubes can be inserted until cured.

Almost done, waiting to cure.
Set them in the shade to cure slowly. The idea is to cure, not dry. Mist them with water as they cure to strengthen the concrete.

Oh my sweet little burlap concrete bags! if they feel like they need extra reinforcement you can easily add a layer of slurry painted on the inside. If you add to the outside it may clog up the texture. Maybe you want to embellish some like the Burlap bowls.

I call my woodland-type yard rustic so these are perfect. If you plan to keep them outside during the winter they need to be emptied before freezing to prevent cracking from expansion. I have noticed that the portland cement is more dense than typical sand/aggregate mixes so the water does not penetrate.

Oh look at me; I’m a little concrete burlap bag with handles! Basic, simple and easy. I am what I am, one-of-a-kind. Use me as you like…
And see here for the secrets on How to paint concrete
Sweet lovely bags!!
There’s just something unassuming about a simple bag…
I LOVE THESE! You are a treasure with your talent. Thank you for sharing.
Treasure!? Hmmm… Nope, just crazy-making lady! It keeps me hopping, or hobbling – depending on the darn knee.
Hi, Barb – worried about you – I tried to send a comment about your concrete and burlap bags and received a message that your page could not be found. If something needs to be adjusted, please try to fix the problem so we can know that everything is O.K.. I notice that, for some reason, there have been zero comments posted and that seems unusual. nv
Love this Barb. Thank you.
Loving these bowls, Barb, can’t wait to make some myself. Really appreciating your ongoing creativity and willingness to share it with everyone.
Thank you. I’ll admit it is quite exhausting at times! Best part is when I see the final pictures!
Thanks and ur an amazing woman.nice work💋❤️😍🥰
.
It combines some of my interests of sewing and concrete crafts. I am starting to really enjoy designing this way.