Indigo & Eco Printing Magic

Sometimes amazing things happen when you are open to experimentation! Combining some usual techniques yielded unbelievable Indigo & Eco Printing magic! Come, see how simple it is and be blown away…

The ‘Usual’ Eco Print start:
I know, I know, eco printing can get very complicated, especially if you are trying to follow some detailed recipe or technique. I don’t always have the time or energy to do all kinds of prep, or weighing (actually not a fan of weighing) so I just use my intuition! Artists usually work that way, scientists not.
Reliable printing leaves are everywhere right now so it’s quick to pick, grab the basic tools and use some iron. In this case I am using silk; scarves that are pre-hemmed and ready for dyeing. I do a quick alum mordant, rinse and ready to go. Yes, those are probably the easiest fibre to get great prints on and a breeze to bundle around my used curtain rod dowels.
Reused iron blankets, barriers and bags from fruit are my typical tools. You may have your own different foliage that you know gives great prints. For this magic technique I am using my ‘printing with an iron blanket technique’.

I love the way that using an iron blanket gives definition around the leaf shape but also gives some detail in the veins. You do need to use high tannin leaves in this technique to get the most contrast though. Not all maple leaves are the same but I do love my staghorn sumac and walnut!
The large bucket of ‘iron water’ had a concentration of 2 teaspoons of iron sulphate but about 5 long flannel blankets were soaked in it for at least a half hour. I get them in while getting setup.
Bundled tightly with a barrier for no bleeding and steamed in my microwave makes my life so much easier. I do wish I had a larger microwave though…
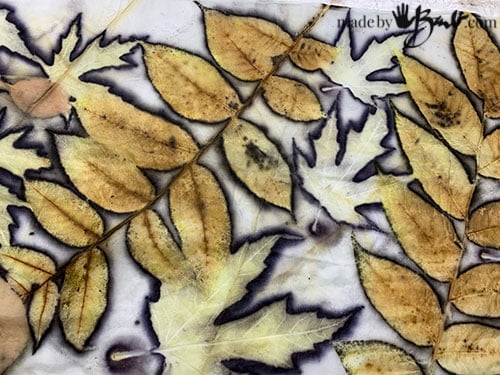
Zap, zap, insulate, maybe zap a bit more and later in the afternoon I have these beauties to unbundle! They are a bit strong on the use of iron, but feel free to adjust as you like! I tend to be quite ‘contrasty’ in all my art so this is my style.
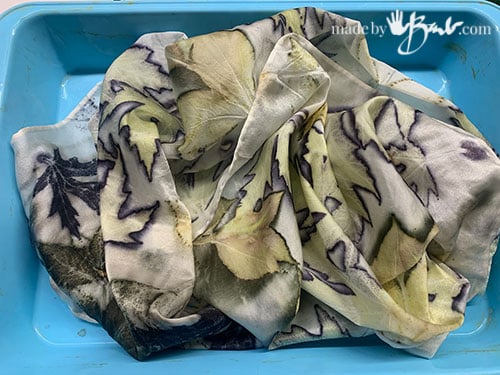
Ready, set, Indigo!
In they go! Haha. I am using the 1-2-3 Indigo Vat I made fresh for this magic. I tested if the silk could be dyed fresh from unbundling with the leaves or after drying/washing and I did not see a difference. It is probably better to rinse and wash first so that you will not be introducing any additional acid or other contaminate to the vat, you would not want to make the vat unhappy!

I’m using the medium vat (5 gram/litre indigo strength) for a fairly dark blue. Gloves on, and gently move the ‘flower’ over to submerge the silk as gracefully as possible (no splashing) into the vat. To keep it from the bottom sediment I just keep massaging it in my hand under the surface to make sure it gets into everywhere, maybe a minute or two. It is better to dip multiple times with time to oxidize in-between than long dips. Each dip will make it stronger darker blue.

When the dyed piece comes out squeeze carefully so that less air is brought into the vat. It will seem green and that’s a good sign, if it’s already blue then the vat probably needs adjusting.
As soon as the air hits the greenish dye it will turn to blue. I love watching this! So satisfying… I was quite worried that the scarf was so dark but do remember that it will still rinse out unattached indigo and also lighten as it dries.
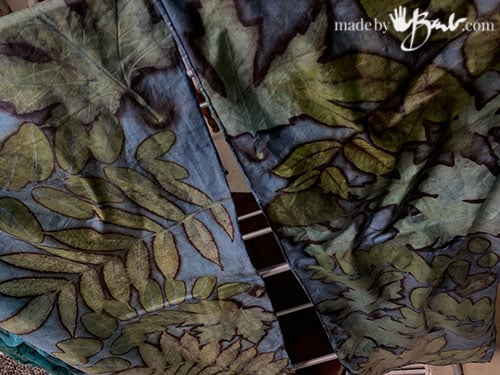
Rinse once you are sure it has all oxidized completely. After the water runs clear wash with a PH neutral soap and let dry.
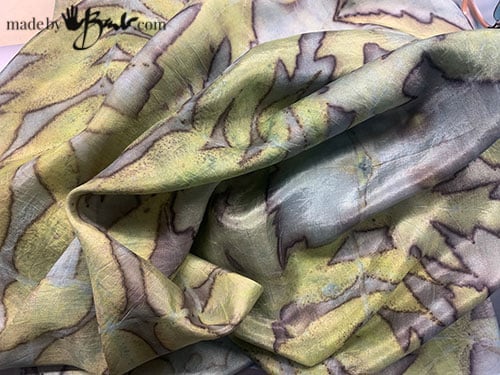
My first light vat (2 grams indigo per litre) didn’t give me that much blue colour but multiple dips may have. It is still pretty though.
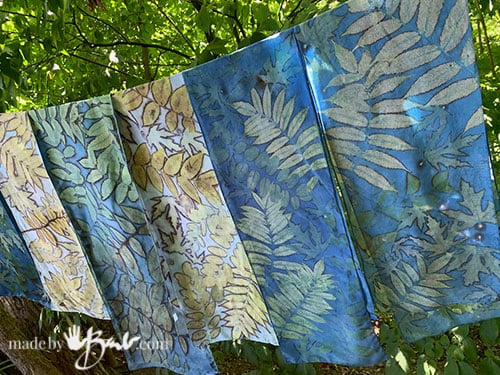
Never Two alike!
Silk scarves can be different weights, finishes and fabric styles so each will give different results. The lighter vat lets the prints stand out more obviously but I do love the contrast of the golden tones.

These walnut prints stand out from the blue background even more due to the colour now! How amazing that the areas of tannin print do not fully take up the indigo. My ‘science-brain’ would say it’s because the acid in the tannin fights the alkalinity in the indigo vat; correct me if I’m wrong.

Ah, my beloved silver maples and their little ‘sparks’ of tannin loss where I cut the stems – as if they are lit up. The greens are from Purple leaf Weigela and most of my reliable strong printers will give some contrast. Tip: if you are not sure, consider that the arrangement of leaves allows the possibility of some leaves not printing and then there will not be such large ‘holes’ in the design.

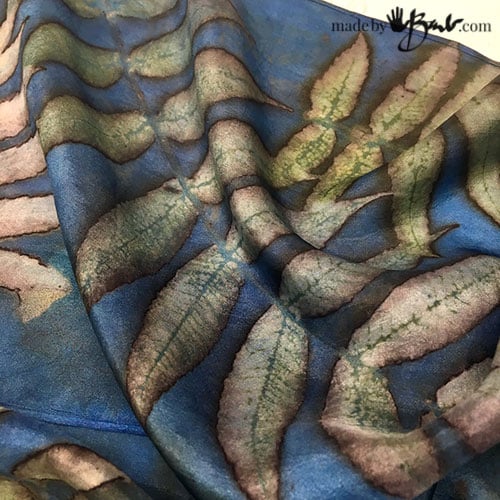
The variation from one stem to another is what makes this much more like art than perfection. As much as I like good definition of prints I do not want to mimic perfect commercial prints.

The imperfections are sometimes just as difficult to achieve as the perfections. It adds depth when they are not all the same strength, and gives focal points. As an illustrator this is what elevates it from duplicated predictable surface design.

And you ask; what about other fabrics? Well, so far I have yet to test that extensively. I know indigo will print cotton, but I wonder if the tannin would really have enough power on such an absorbent fabric. The size of the fibres does play into this magic… but never say never!
Let me know what Indigo & Eco printing magic you’ve discovered… Happy Eco Printing!
This is beautiful. You are so creative and I love your blogs!
Oh thanks! I aim to have unique projects that have my personal mission in mind.
I love this! I just harvested my first indigo. Not sure I have enough for a vat but will try both salt rub and blender method. We’ll see how it goes!
Wow, fresh indigo! Sounds like fun!
These are amazing! Each is so beautiful and different.
Hi,
Thank you for sharing your precious knowledge.
I read this post before and I found it very smart. I tried this method to colour my fabric afterwards with weld. and the result was amazing. I got a golden yellow as my background. Previously I tried weld with iron blanket and it gave me a very sad green. Really don’t know how this method gave me the amazing gold yellow. I really don’t know if I can recreate it though 🙂
I saw some artists print both very black leaf prints, and green leaf prints on one piece of fabric. Do you know how they do it? If I dip my target fabric in strong iron solution I won’t be able to get colourful prints anymore. If I get colourful prints first and then dip it in iron again they turn black. I really want to know how I can get both shades on one piece of textile. I kept rose leaves in iron solution for three weeks in the fridge but it didn’t work :))
Thank you
Are you sure they are the same specie of leaf? I often get leaves that print with different intensity. Also, the dark fall leaves like maple tend to print really dark so a dried leaf with less tannin would print lighter. Some of my silver maple have printed crazy dark purplish lately…
The one that I remember were made with rose leaves. The form and shape of the rose leaf is very easy to identify.
I’m forever inspired by your artistry! I’ve been gathering up sumac before all the leaves drop and I’m off in search of walnut now. I’ll be firing up my microwave and indigo vat today! Thank you so much for your posts!
I love the prints with the Indigo. I want to clarify that you did the ecoprint with an iron blanket first then the Indigo dye after? Thank you.
Yes, I eco printed with the IB first. That is how some areas seem to repel the indigo. Fun stuff…
Thank you so much for this lesson. It all looks amazing and so achievable with your clear instructions.
Best of Luck… It is an amazing art/science combination!
Hi Barb, these are really beautiful. Congrats!
I was surprised to read you dipped the whole fabric in the indigo as the way the leaves have retained their color and not been dyed over by the blue looks like you have used an indigo blanket
I have a few questions: Have you tried this with cotton? If so, which mordants did you use, and how did it go?
Also, your fabric seems fairly wide. How wide? And how are you able to fit the bundles inside your microwave or steamer? I can’t seem to fit in anything wider than about 25cm (10 inches) but I would love to try printing on wider fabric so I can make clothes.
Cotton can work. The brilliance of the blue is not quite the same though and I’d say the way it picks up isn’t as nice as silk. Mordant with a home-made aluminum acetate. Sometimes I need to fold the scarf or roll to the longest width the dowel is and still have it rotate….
Love your site. So much useful and practical info. This use of indigo though just raises the bar! Wow! Suddenly the yellows from the eco print are greener and the contrast with the blue is sublime.
Yes! It is one of my favourite ways to eco print! After a lot of browns, beiges and earth tones it’s a welcome option! You do never really know what you will get…