How to make Substrates for Mosaics
Do you too love to make mosaics from all kinds of found things? ‘Even so, you need something to put those great designs on! Let’s look at some base material options. Let me show you how to make Substrates for Mosaics.

What is a Substrate?
In my journeys of making mosaic artwork I am hoping to move it from the old predictable historic art to more contemporary & modern art. There really are so so many options of tesserae to use. The other thing to address however is the base material; mosaic substrates.
Deciding where and how your art will be used is also important when choosing the substrate. The backer board needs to be able to withstand the conditions of it’s environment; interior or exterior.
What Substrate can you use for Mosaics?
Often the choice material is what they use to back tiles in bathrooms. Reading the specifications of Kerdi and Schluter (sometimes called Wediboard) boards I see that the center is an extruded polystyrene foam panel with reinforcement material on each side. I was right when I guessed that polypropylene (a non-woven fabric) is on both sides of the board. Often medical wear and masks are made of polypropylene since it water & tear resistant.
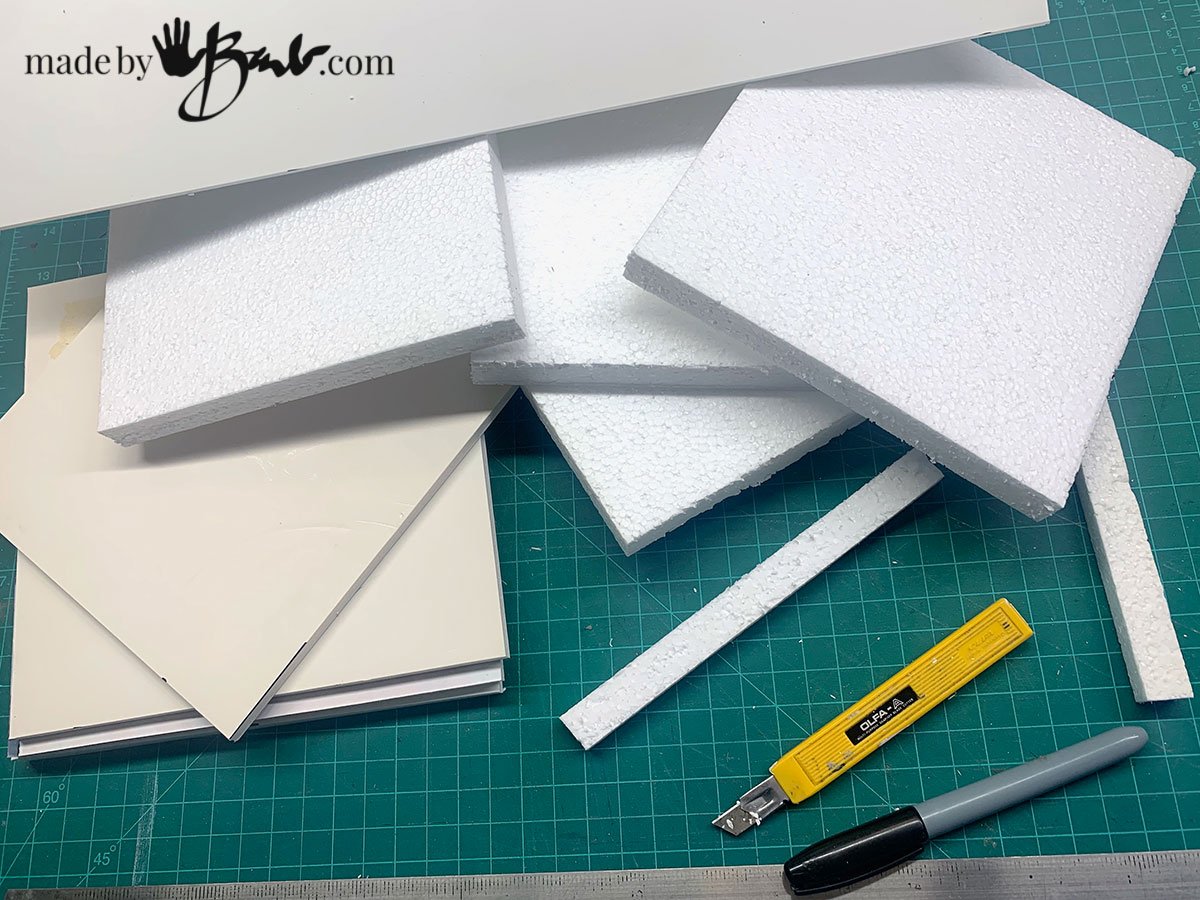
As a similar inexpensive option I have used some sheets of ‘foam core’ boards. As a reinforcement I wrapped the boards with fibreglass mesh for drywall. Thicker sheets of styrofoam were also wrapped but I could already see the finished pieces would be quite thick. The great thing is that I can cut them easily and they are also very lightweight.
Another option to mimic the commercial boards is to adhere a polypropylene fabric to the styrofoam boards. The landscape fabric I have is probably polypropylene and did adhere well (with pva glue) to the styrofoam (sheet or foam core). That, though is quite time consuming so I prefer the drywall mesh as it also has a sticky adhesive. I used the regular mesh but there are also wider options, and also some that is alkali resistant; since there will be some mortar/grout/thinset added.
Mosaic Substrates for Exterior Applications:
For very permanent exterior (outdoors) applications it is key that the substrate does not absorb water & moisture to swell. If moisture gets in then freezing will create cracks. The same rings true with the concrete crafting that I do. For those outdoor applications exterior grade plywood or cement board are a good choice, as is sealing.
One of my favourite outdoor substrates is natural stone with exterior thinset. The Pet Portrait & Glass Frog on Rock are holding well.

For this tutorial I will be concentrating on substrates for interior uses.
The foam boards are covered, well overlapped and around the edges as well. When a Schluter board is cut the fabric is then missing on the edges so I feel my method is quite promising.
Adding a base coat:
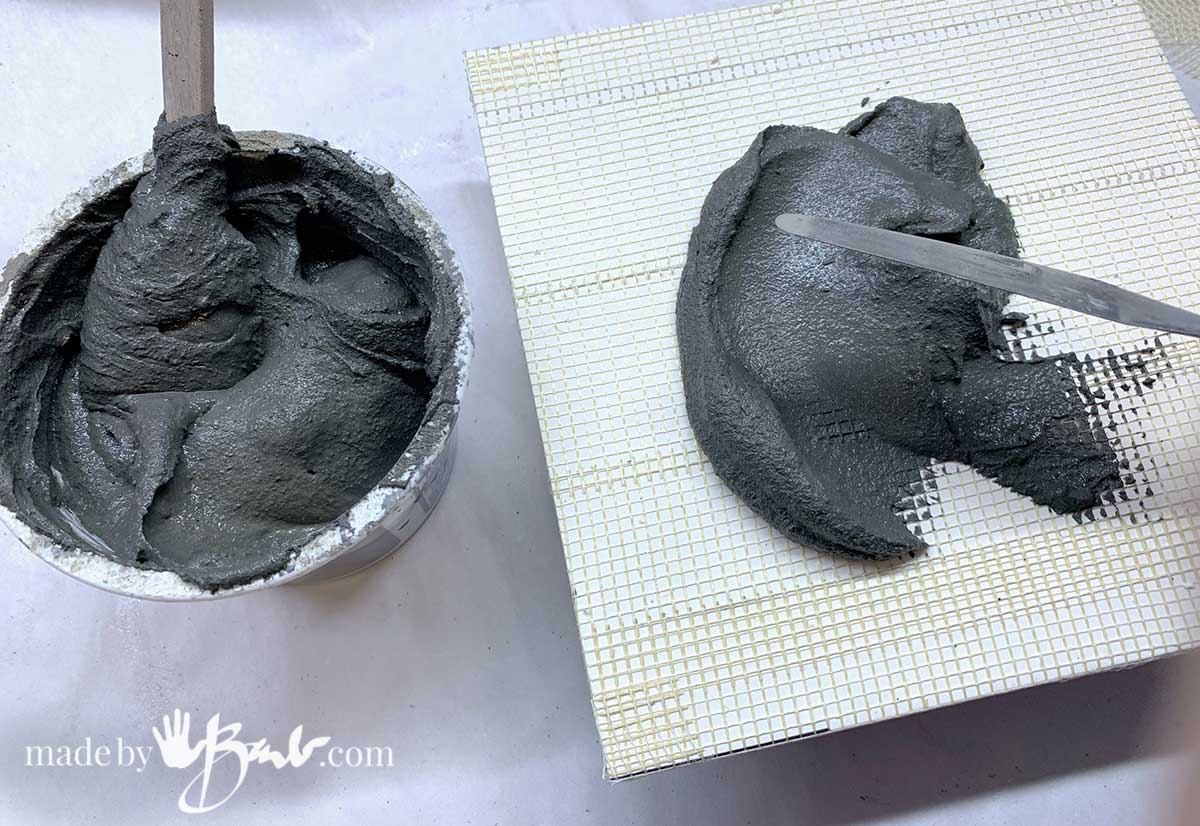
I use a thinset /mortar (Flexbond Thinset Mortar) that is a polymer-modified material that is not that fast setting. It has Portland cement, copolymers, inorganic aggregates and other chemicals as ingredients. If I want a very dark colour I use an iron oxide as a pigment.

Adding an acrylic paint can work but I find that it may cause a reaction to the original chemical makeup. This is like buttering toast with a thin layer…
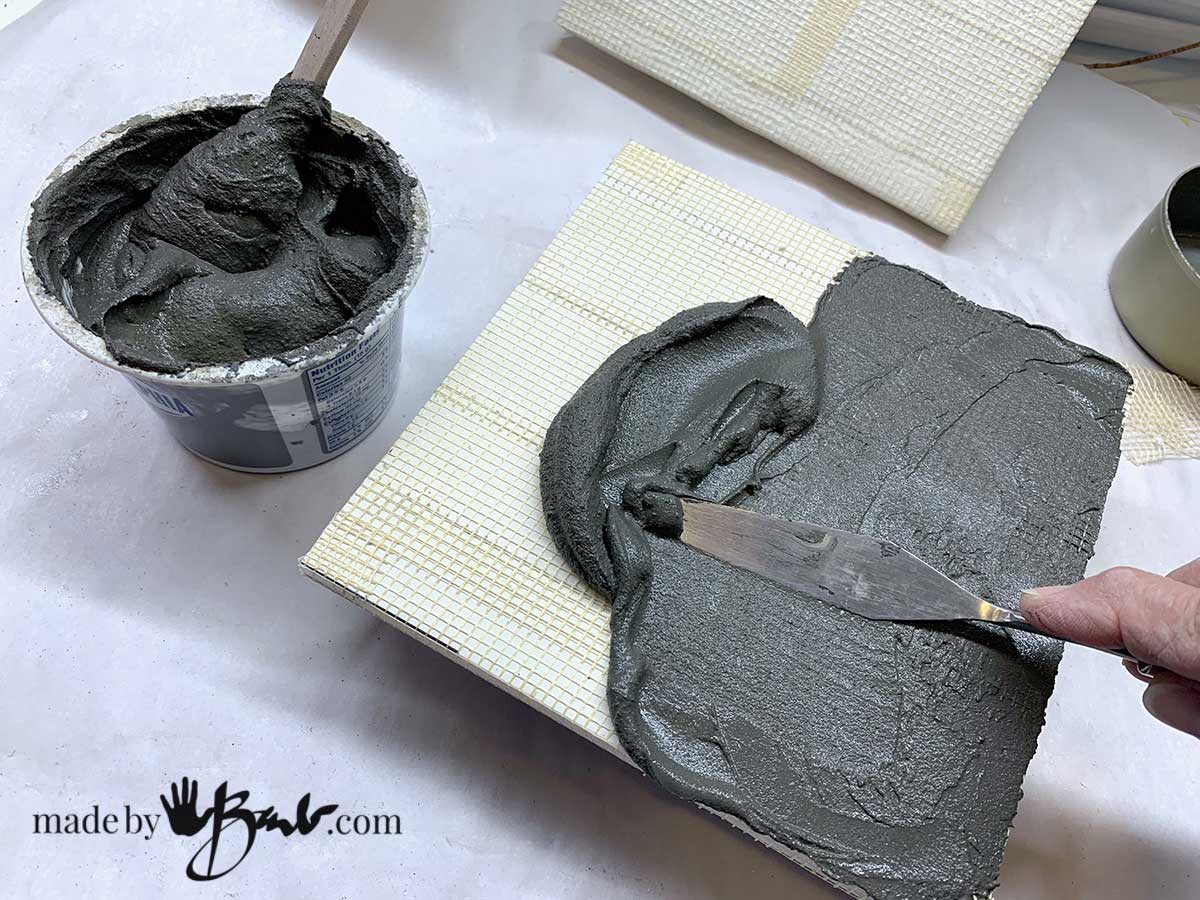
The finish is much like a fine concrete since it is a cement-based product and has Portland cement in it. (See this in action in my video:)
The mesh is now imbedded and held in place with the thinset so even if there was some minor cracks it would be held in place.

How to Make Substrates for Mosaics
Equipment
- Palette Knife or spatula
- Xacto Knife
- Mixing utensil
- Vessel to mix thinset
- Skissors
Ingredients
- Foam Core Boards, or styrofoam sheets
- Drywal Fiberglass Mesh (or Optional Polypropylene Fabric)
- Modified Thinset Mortar
- Water
Instructions
- Decide on size of desired mosaic & Cut Foam core (or styrofoam) board. Use a metal straight edge to ensure accuracy.
- Wrap with drywall mesh, overlapping and over edges
- Mix Thinset/Mortar as per manufacturers instructions
- Spread thinly across board, into the mesh/fabric, coat edges as well
- Set to dry
- Finish by coating the back side as well.

How to Frame & Hang your Mosaic art:
Again there are many varied options… The Schluter/Kerdi board systems have fasteners (hardware) that anchor through the board and hangers could be attached to those flanges.
My style of rustic mosaics seem more stable if set into frames so that edges are protected and handling is easier. To make the framing easier I like to use wood cradled panels. They are really meant to be used from the flat side but since the frame is wood (vary depending on manufacturer) it can be finished as you like.
The rustic nature of the designs let you finish them with a quick rubbing of an acrylic grey paint on the frame side. Since it is real wood the d-rings can easily be screwed into the frame edge and strung with hanging wire. 2-part epoxy is my of choice adhesives to set the art into this frame & makes for a very clean back finish.

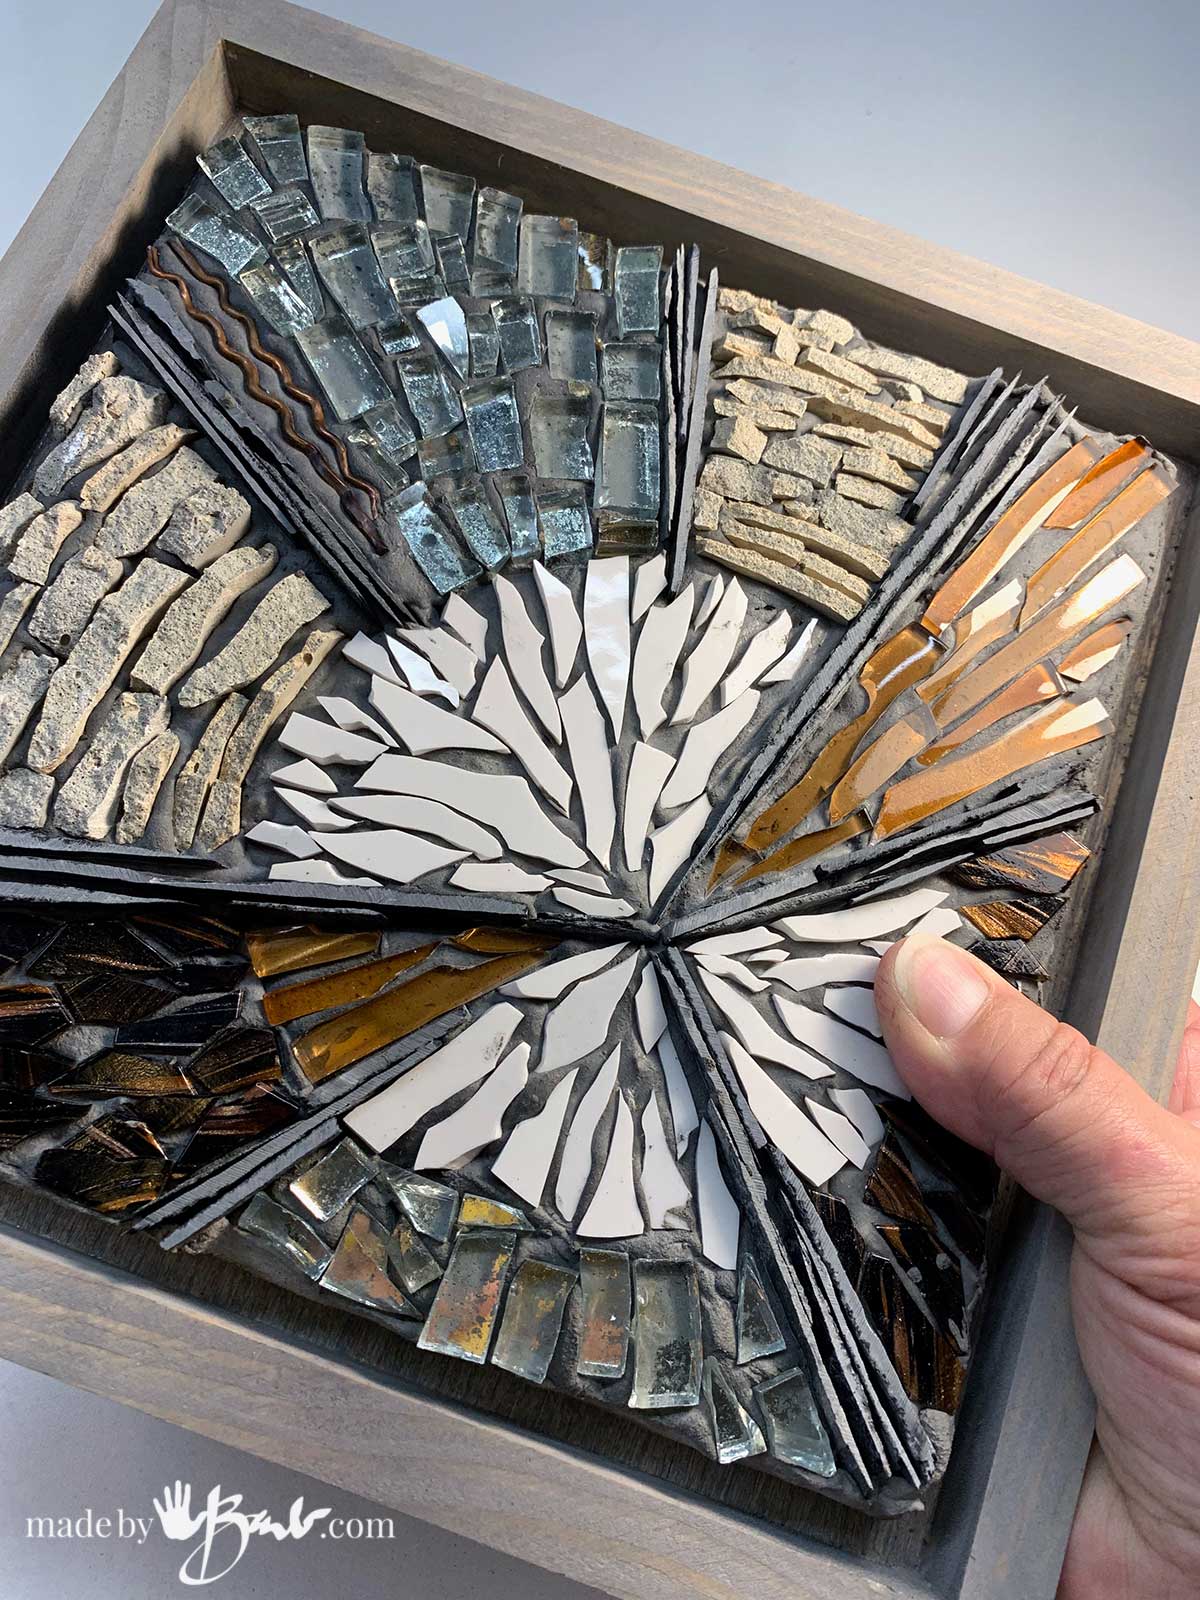
Exploring & making even more ‘Tesserae’:
Metallics and rough textures are lovely contrasts! My ‘artist brain’ sparks so much when I check out ‘stuff I can break’ at the thrift stores. It’s amazing what a couple $’s will get you.

There is something quite satisfying about making art from what others call junk! Tile nippers, glass cutter and running pliers make light work of it.

Scoring the glass along lines does help it break in somewhat straight strips.
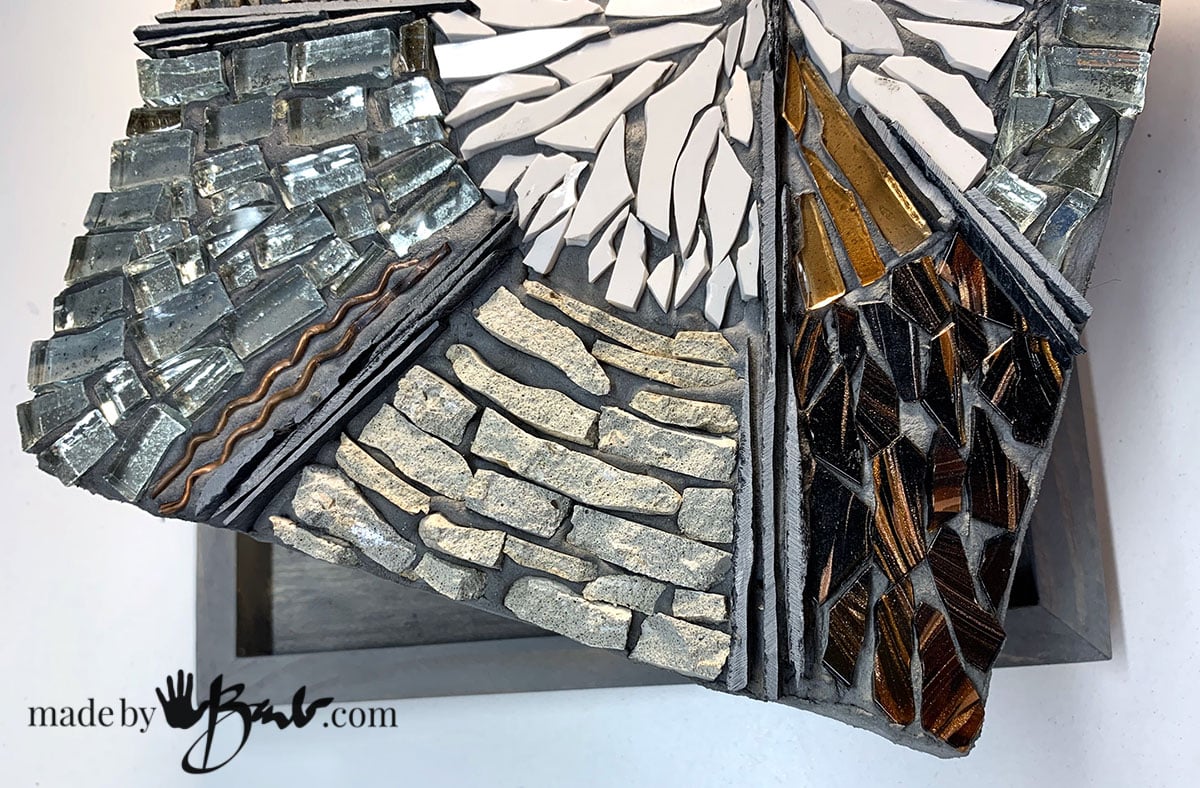
With the trends of sterile white environments these do add nice accent art. They are something tactile, ceramic tiles, jewelry, beads, wire, and even broken concrete.
How to make a Mosaic Design:
Is there a magical formula to creating a design? I recall that when I would try to force myself it would be more difficult than if I was just doodling freely. These designs often just start with a shape that is then ‘cut’ into more sections, each filled with some tesserae that just seems right. They are quite forgiving designs, not as tight as a jigsaw puzzle.

What do you think? Can we start a new abstract trend to up-cycle a ton of stuff?

I challenge you mosaic artists; instead of spending hours making a cardboard puzzle why not ‘puzzle’ together your own unique design?!

…go break something 🔨
I so much enjoy all of your creations. You are such a treasure! I have been making mosaics for many years now and still struggle with how heavy they are as I’ve used plywood for backing. Schluter board is very expensive so I appreciate this tutorial on foam board. Another problem for me is how to play around with making a mosaic that you then want to put up on a wall for example. Moving a mosaic on a platform to a wall is hard without a separate substrate. Any suggestions?
If you want to only hang a panel, then the anchors should be set into the substrate before making. There are flat flange type hardware that have a threaded hole so some bolt could be added. Perhaps a d-ring could be bolted to it. You could set them before the panel is made so it is under the art. Another option that does not have a hanging wire is a french cleat system. I like this option for heavy items.
Barb, I just love all your work! I think if anyone is considering doing a larger, heavier piece of art they could do it the way I tiled my floors: to the floorboards I stapled wire mesh (https://www.homedepot.ca/product/enigma-1-75-gauge-galvanized-metal-lath-27-inch-x-84-inch/1000808020) then applied the thinset (skimcoat) and, finally, tiled and grouted. I’m imagining something like a “feature wall” with a very large mosaic or a big art installation over a fireplace…..
Oh, that sounds like an industrial version of the mesh by using the lath. I am a bit confused whether that was on a floor or wall. It does sound quite stable though. Thanks!
So inspiring! Thank you!
Thank you for all your wonderful ideas! I do have an off subject question: the ’tile strips’ that are a porous beige in these photos- THIS IS WHAT I AM LOOKING FOR! But I can’t find it anywhere. How did you make these, and from what? What did you cut them with?
Thanks!
Oh, I think those are the pieces of concrete that I made a ‘flat-ish’ slab and then broke and nibbled them. I usually use a fast setting concrete (Rapidset Cementall) and it is also very strong even if thin. You could also add pigments. I love rustic type mosaics, and I think it pairs nicely with the cut slate (dark grey) You may like this post; How to make your own Tesserae Once I started to really look at ceramic and stone things I discovered a lot of great and unique mosaic possibilities!
Hi Barb. Thank you for another great tutorial. In the case of Schluter board or really any of the designed boards you tested – why do you need to cover it first in thinset? For an indoor project wouldn’t the glue and grout be enough to hold everything in place? Is it just for a potential flex problem? Thank you for your wonderful tutorials!
In my case I am making the substrate so I chose to have the edges finished as well. Depending on your situation you could adjust the procedure. Since they are quite light weight I did want a good coverage to then add onto. It may be overdone but preparation is key…
Thanks for all your information Barb. Very inspiring 🎈
That’s great! More art is always welcome in the world!
Gorgeous and Incredibly mind-blowing! You need classes and I need to wherever that is 😅
I shall hafta try this best of my ability without you. Thank you for the directions and listing affordable alternatives.
Happy Day!🤗