Make a Mosaic Pet Portrait with Broken Dishes
Make some great art with dishes! You will recognize my beloved Pup in this project! The best part is that the supplies & tools are easy to find. I’m please to show you how to make a Mosaic Pet Portrait with broken dishes…
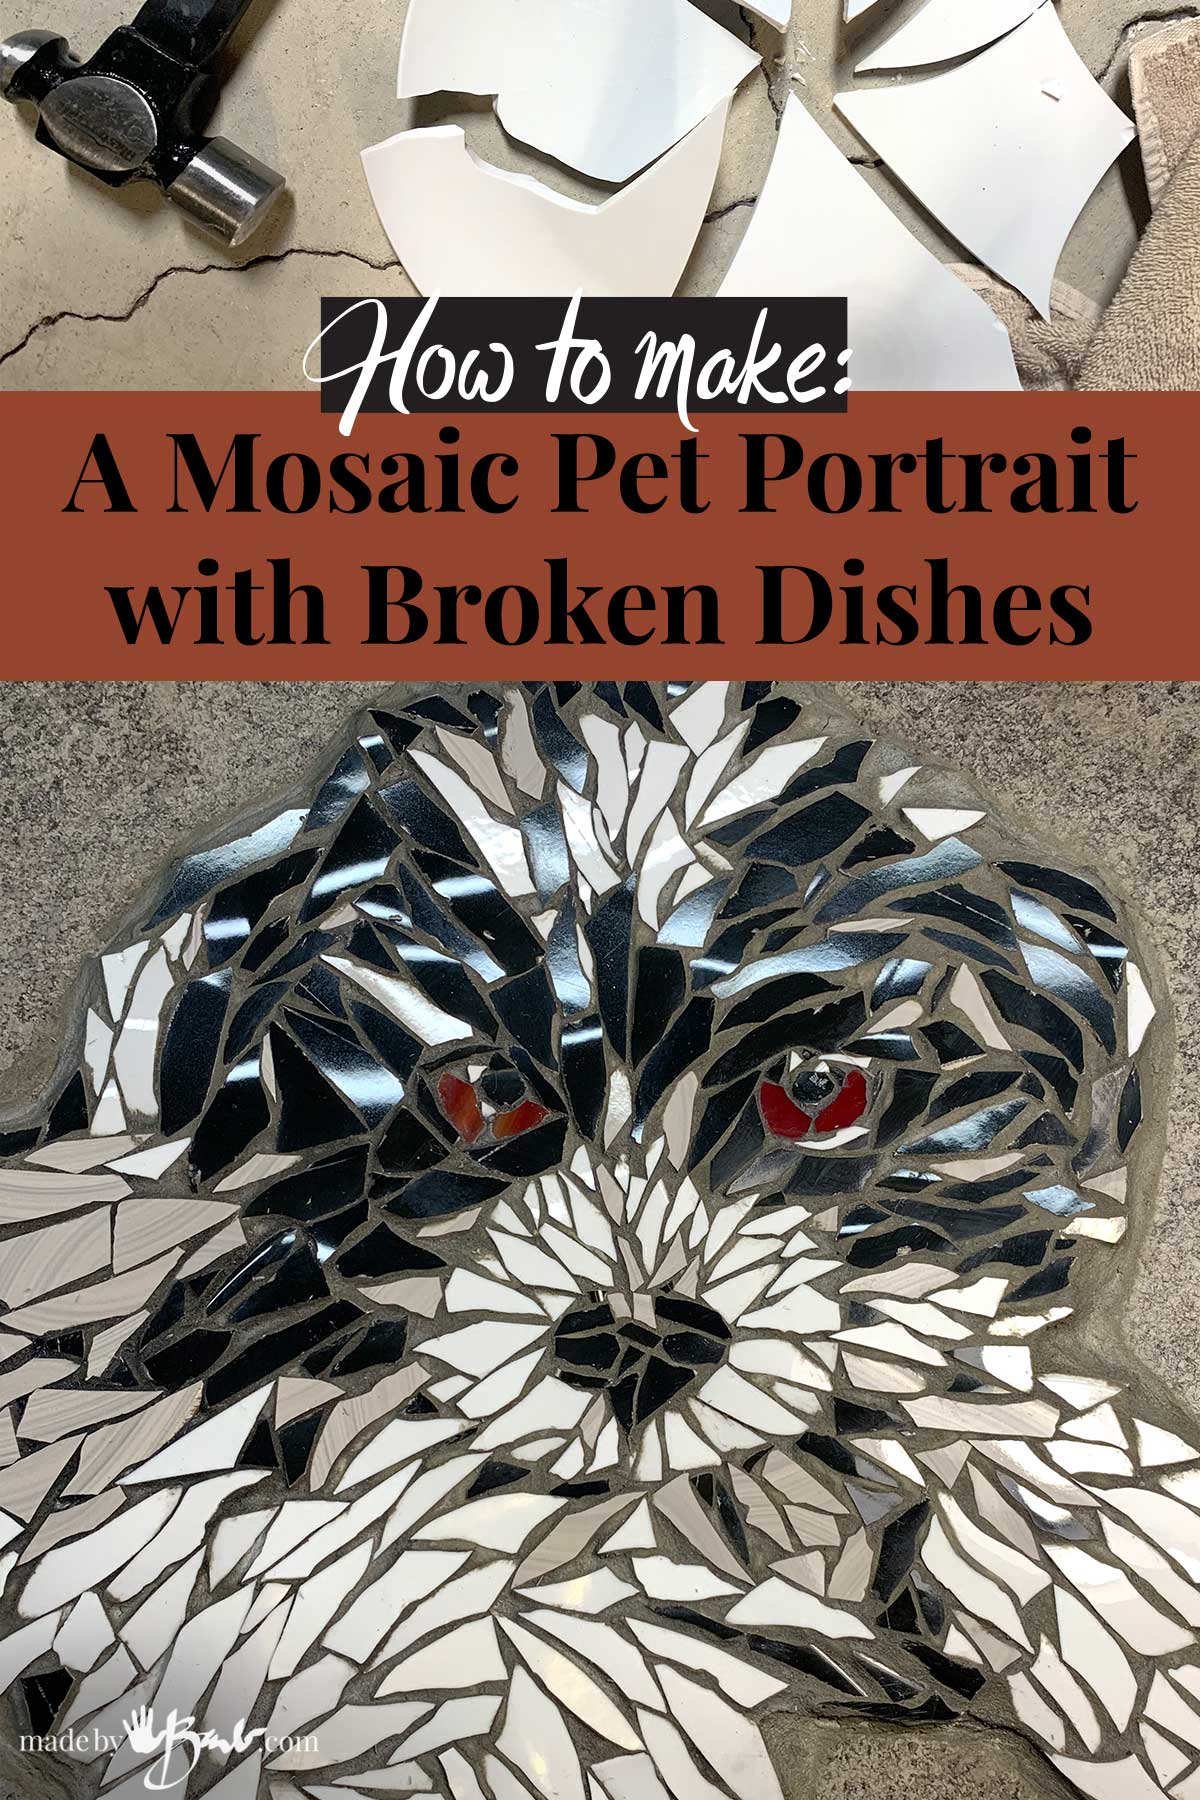
The Magic Art of Mosaic:
Let me reassure that mosaics are really quite fun. I liken them to a jigsaw puzzle as you are placing pieces together but anything goes. When I started creating this mosaic with broken dishes I thought it would need to be quite fussy but I soon realized that they are quite forgiving and do not need to be so perfectly placed. No, precise cutting was not that important. That rings the same truth when painting; you can create with super detail or less. This pet portrait is much less detailed. As it came together I was quite amazed at how much it seemed to capture the subject my beloved pet.

Design your Image:
The reason I chose this image for my broken dish mosaic was that I knew I could simplify the colours and values into just a few and therefore keep it simpler for myself. It’s your choice but sometimes we pick images that are too complicated. If you are not that familiar with seeing the different values of an image there are tools that can help you. Many image editing software apps have a way of posterizing the image into a few. values. If you think about ‘Paint-by-number’ paintings they are divided into flat areas of colour. This site allows you to upload an image and see it in a few colours or values. You can then fill in those areas with different tiles. As a helping hand I use a thin paper to trace my image from the computer screen (carefully, light touch).
To transfer it to your surface can be a challenge especially since it may be quite a rough rock. Transfer paper (has a carbon or some graphite on the back) is available for many purposes including dressmaking and illustration. I know that all too well since I have done both for many years. Retracing the lines with the transfer paper underneath should create the lines onto your base surface. If it does not, (as my rock was very stubborn as well) you can cut out the shapes or use some pokes through the paper to identify the basic proportions. You can also just draw as you see fit… but many believe they have no drawing skills so using an image feels more secure. The grid system also helps size an image.

Simple Supplies:
Sure, mosaics can be made of glass tesserae but not everyone has a selection at hand and it can get expensive. I will be testing how well this withstands the Canadian Climate so I am using dishes from the Dollar Tree. I asked about broken dishes at the thrift stores but no luck. Flea markets may also have a great selection of dishes. These 3 plates were similar thickness and I simplified my design into 3 values & colours.
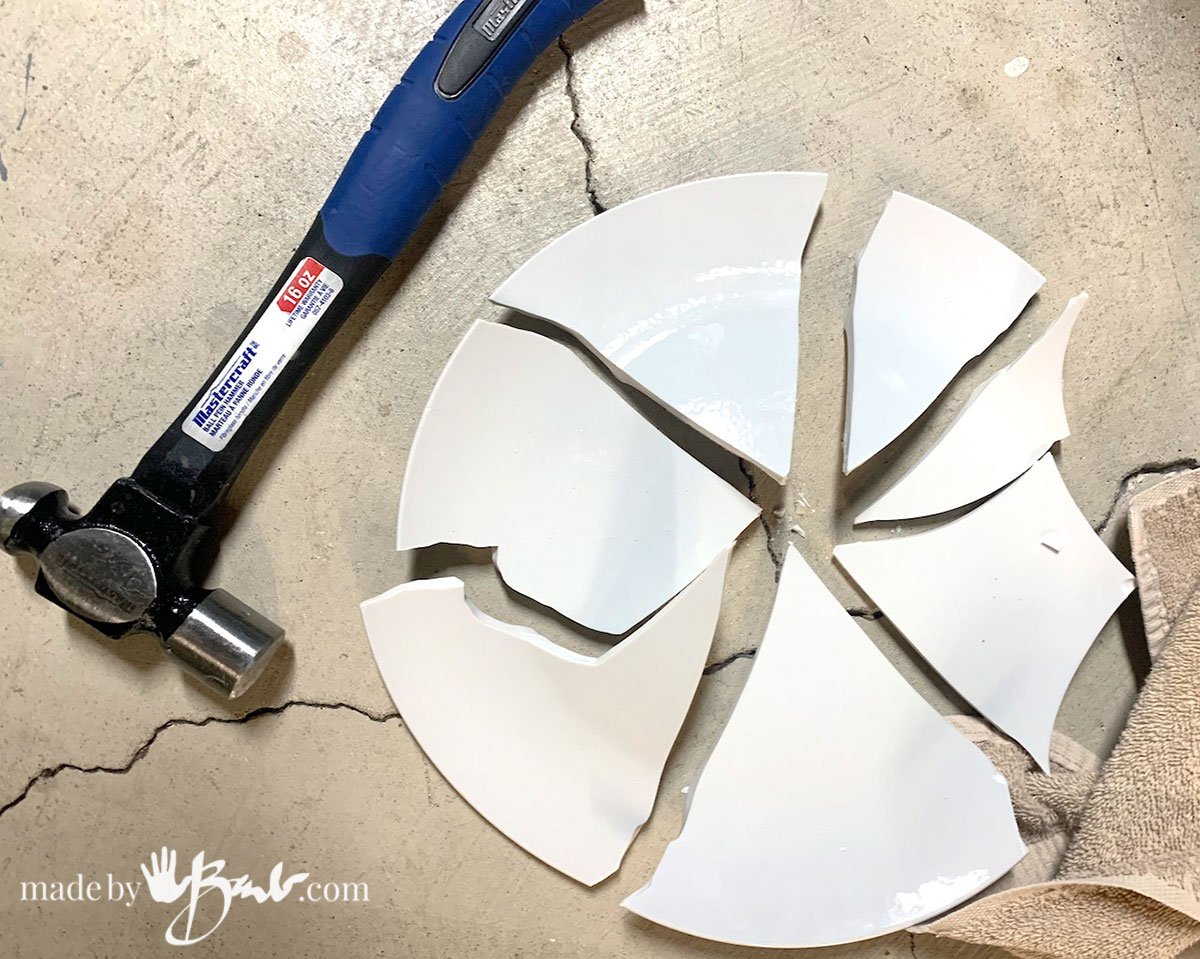
How to make the Tesserae:
Tesserae is the fancy word for the mosaic pieces. It is great that mosaic crafting can utilize other media, not just perfect tiles. The plates are thicker so I needed a very hard whack with a hammer (remember the safety glasses) to start the big cuts process of the tesserae. The shards are then cut into smaller shapes with the tile nippers. It does take a fair amount of force with my hand to nip off the little chip shapes. The hammer can be used to make smaller pieces but there is less control of the shapes.

Since I am making a pet portrait the crescent shapes work well for fur. The thicker sections where the bottom rim was are left for another use. This will be a more intuitive mosaic; fitting the shapes as I go rather than cutting each shape to fit. I find it more relaxing to just place pieces as I go.
Tip: If you dry-fit pieces into a shape and then want to apply the thinset (tile adhesive) to the surface where the pieces were you can use a piece of packing tape applied over the shapes to keep them all together in place. Lift them with the tape and apply the mortar and then put the ‘taped’ shape into place. Once the mortar is dry enough the tape can be pulled of carefully.

Applying the Thinset:
I am using Versabond Polymer Fortified Thinset rated for interior and exteriors for this mosaic project. I mix & stir a small amount (according to manufacturer’s instructions) and put it into a (up-cycled) plastic bag with the corner cut off. It then squeezes (consistency of natural peanut butter)easily into the small sections and dries less quickly. I use this as the adhesive glue and also the grout. Aim to imbed the pieces of china about 1/3 of their thickness even though grout will be added later.

Look at the reference image and areas of colour/value as you go about filling the spaces – ‘somewhat like paint-by-number in ceramic shards.’ The pups eyes are made with a few pieces of glass instead of plate pieces. You can apply the Thinset to the back of each tile as well.

Fitting shapes on your Mosaics with broken dishes:
Consider the direction of fur when placing the shards. The random chips do create an abstract interpretation of the fur. I am not too concerned about how perfect the pieces fit together as the grout will add another element of fill. The china pieces are not perfectly flat so if possible attempt to have the curve placed with the rounding upward. If there is a really pointy corners on the surface of the tiles it can easily be nipped off. You can wear safety gloves if you like protect from cuts but I find the ceramic plates are less sharp than glass.
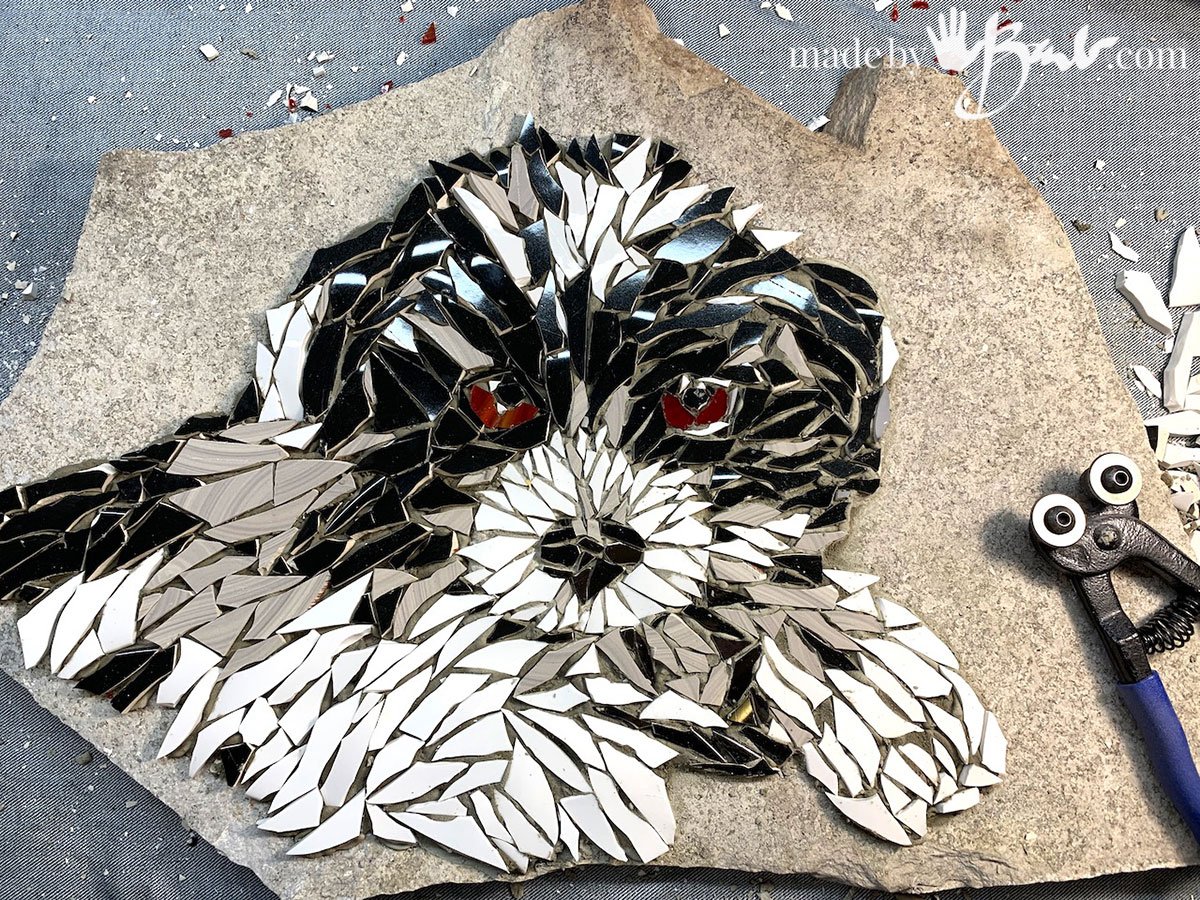
Yes, some of the pieces are a bit thicker and may not be as flat as stained glass. This is not meant to be a stepping stone so I am not concerned about how flat it is. The outer edges can be sanded (emery cloth or diamond grit sanding pad) to ensure that they are not too sharp. The wheel cutters can also nip off those really sharp points.
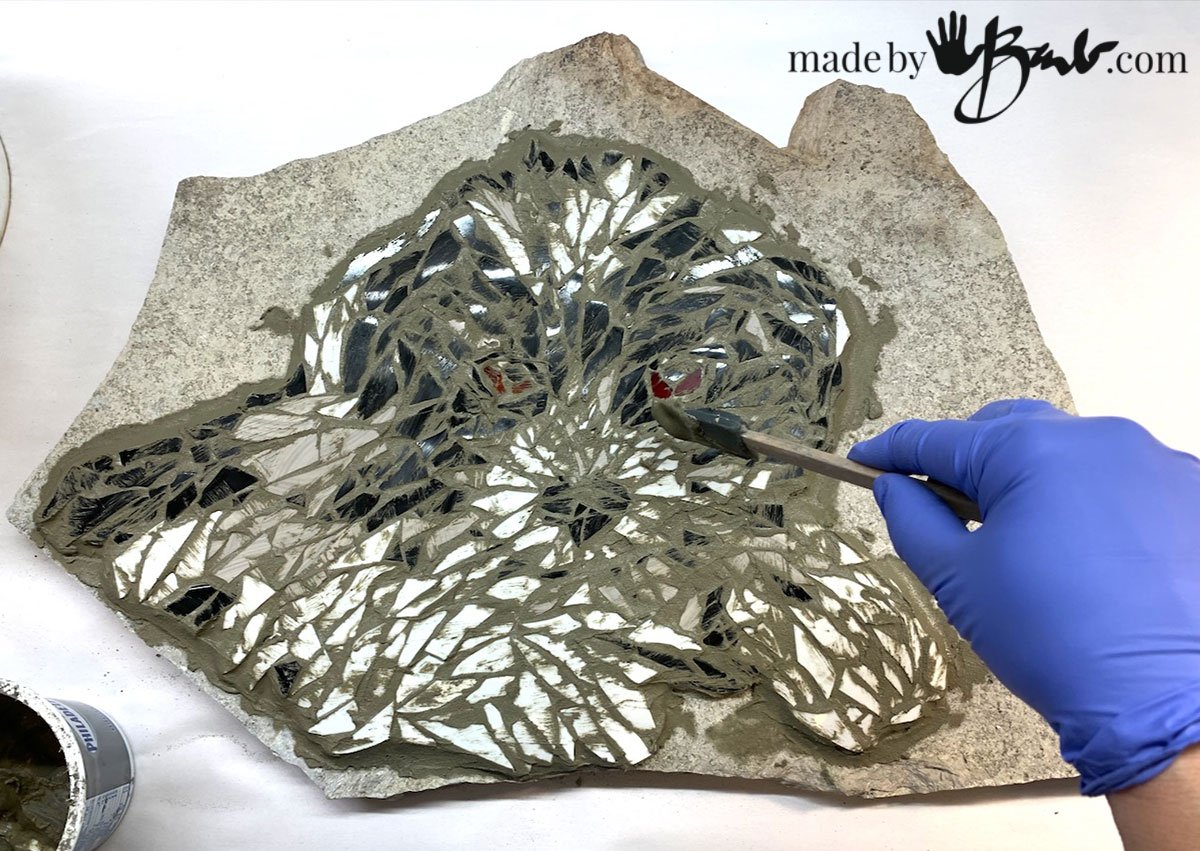
Adding the Grout:
The thinset that is used to adhere the tiles is also used to grout the finished piece. Depending on your design you may choose another colour of the Versabond Thinset. Spread the mixed grout ( according to manufacturers instruction) over the mosaic making sure to force well into the crevices. Since it is not a huge piece I use a silicone spatula. This polymer fortified thinset is meant for use outdoors and indoors.
The outer edge should have a soft curve so the edges are not too sharp.

After letting it sit for about 20 minutes (allows the polymer to start solidifying) wipe off excess grout with a damp sponge. Make sure to only rinse it in a bucket of water to keep the grout out of the drains. Working in a circular motion makes sure that the grout is not excessively gouged.

Final Buffing & Clean up
To buff off the grout haze after sponging use a soft dry or slightly damp rag that is folded up. Do not use too much force to disturb the grout.

This grey grout colour is very similar to the colour of the stone. I love the way the light hits different pieces to sparkle since they are not all flat. This stone is quite thick (about 1″) and heavy which will make it pretty stable in the garden.
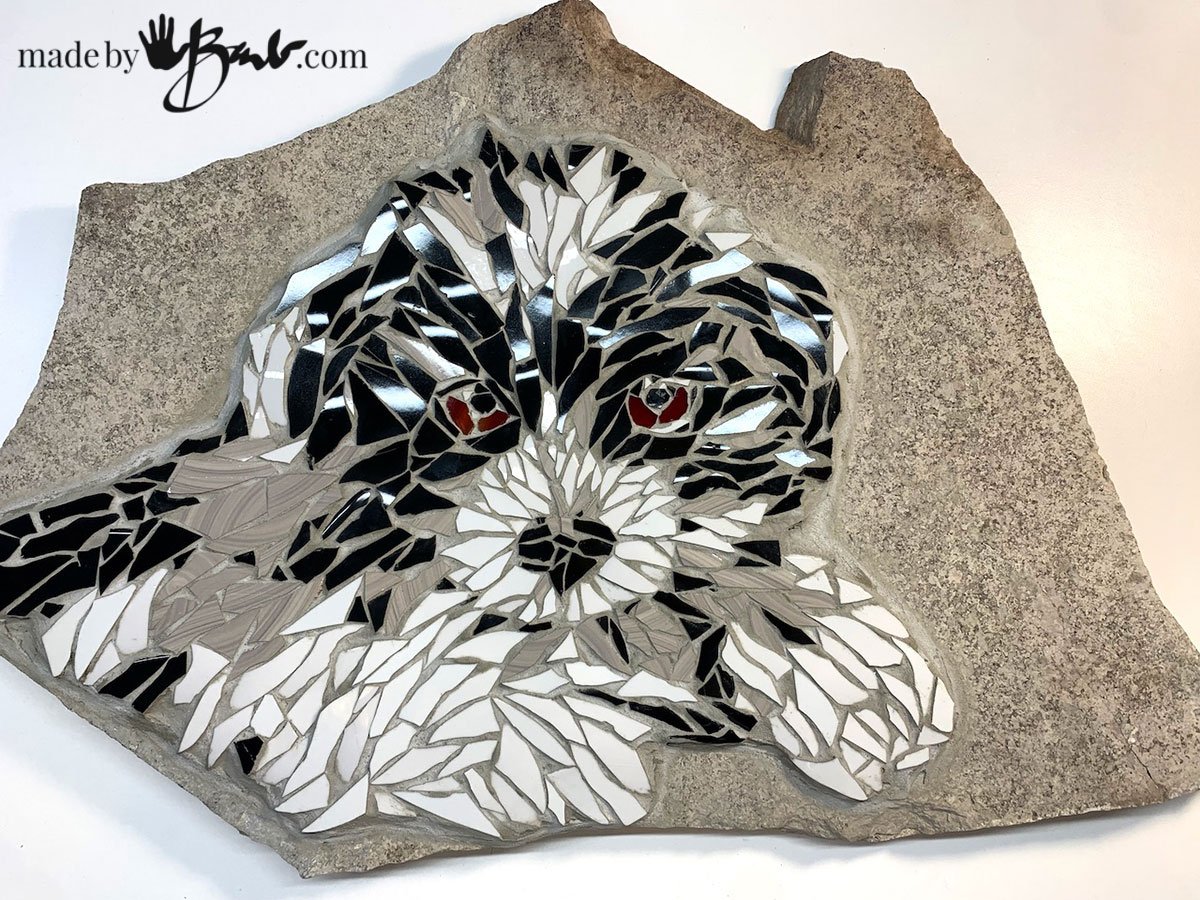
One thing that was bothering me was that the grey broken china colour is almost exactly the same as the rock. It is always important to stand back and look at your work from a distance (or squint your eyes
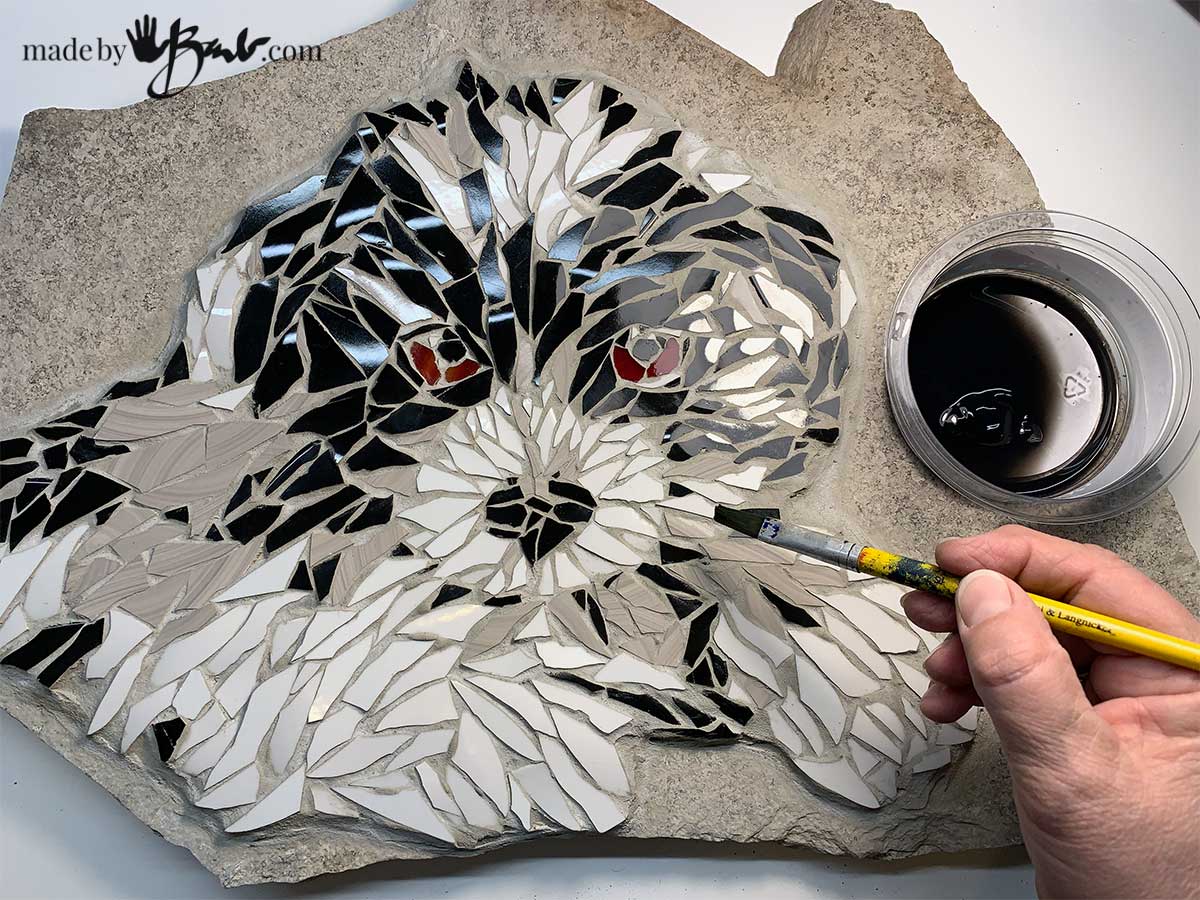
To adjust the colour of the grout I decided to darken the grout with a wash of acrylic paint. I see how grout is porous when the floor grout gets stained. Thinning will allow it to sink into the surface. Wipe off the excess with a soft rag immediately.

If you would like your mosaics with broken dishes water resistant a sealer can be applied. I personally do not use mosaic grout sealer on my work as they often darken the colour. It is a personal choice. I do not see any cracks in the grout; so water should not be able to enter and freeze.
This mosaic project and my other blog posts come together quite easily. I hope I have inspired you. If you look closely; the shapes are not that perfectly cut or right shape but they combine well to create the image… Happy National Pup day!

Hi Barb,
Wow, this is great. I love this idea. I can imagine so many different images that can be drawn and created using this method. Thank you for presenting the method so clearly!
Alice
It’s a great reason to clean out the cupboards too! So many endless possibilities. The problem is getting to them all! There’s more up my sleeve… 😉
So beautifully done. Love this❤️
Thank you!
This is a fantastic piece of art!! You have such talent, and you keep coming up with more and more ideas!! You are amazing!!
Love it! Linda
Thank you! It looks like Pip doesn’t it?! I’ve got no shortage of ideas; just time & energy… I’d say it is more determination than talent!
Hello, Barb
I haven’t even had time to read your instructions, yet, but I was so thrilled to see little Pip’s sweet face that I had to drop a line. I will get back to my reading. this evening. I is amazing how tiny shards of glass can make something look so soft and fluffy nv
Awe, that’s nice. It was a pleasant surprise how it came together. Just like in quilting almost any shards can create a design… So intriguing!