DIY Glass & Stone Mosaic Spheres
Not every pretty creative project needs expensive supplies from a craft store. I get a huge kick out of using whatever I find. Nature provides so much inspiration and also creative media. Check out these DIY Glass & Stone Mosaic Spheres; free-form design…

Spheres, Orbs or Balls:
I have an odd affection for the spherical shape; maybe it’s because I taught how to properly draw circular shapes in perspective for decades! It’s a great shape with such huge design potential. Whether they are freeform or specific patterns, they always provide so many viewpoints & design options.

The Forms:
I have made so many orbs and spheres from concrete that I’ve lost count. Some are made from ‘inside’ a mold and others over a form that is removed. Since I wanted these to be completely round without any voids or holes I needed to use a from that remains inside. I also did not want to make a solid shape as they get very heavy. No glass globe used as a form here…
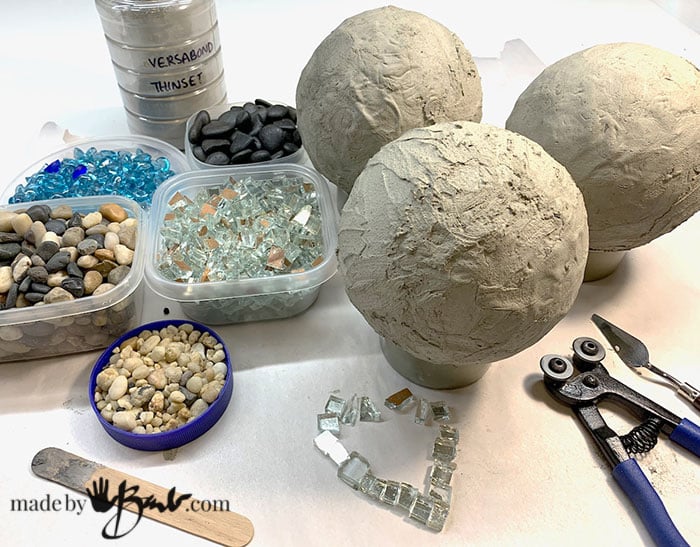
For that reason I am using styrofoam balls as they are light and also hold shape well. I am not using concrete this time but am using a Thinset that has concrete (portland cement) in the mix. A child’s ball would work as well but would have to be sacrified stay inside and not provide as much stability while working. Some use a bowling ball, but that seems really heavy to me…

The Mosaic Pieces:
When considering the possibilities there are many many options. I have collected rocks for many years, and they are also available inexpensively as garden accessories. Another great place to find rocks if you are not able to access a suitable nature place is the aquarium supply store. I came upon many types of rocks, pebbles, gravel and even slate.
Some found elements can be cut or broken to make them work for you. Glass nippers allowed me to cut the glass pebbles (flat marbles) in half to make them look less ‘manmade’. An old mirror that was also losing it’s silvering became some nice blocks of sparkle.

Covering the Form:
To provide an extra reinforcement I’ve used some drywall fibre-glass mesh imbedded in the thinset mix. Cut small sections of the mesh and cover the ball. The mesh can also be placed over a thin coat of the Versabond thinset grout. It is mixed to a peanut butter consistency so it spreads and sticks quite well to the form.

The form can not be covered with thinset in one step as it needs time to set the first half. Rotate the form and sit it on a cup or something so that it will not roll. (tuna cans are great) Once the first half is cured enough then the bottom can then be covered.
Once the spheres have cured and set you can start your design process. I have spent way too many years being a meticulous technical illustrator so I now like to be free from rules. I decided that I wanted to just design as I go along – it’s my fave lately. You can pre-draw or plan in pencil if you like. Check out the full video below.

The Mosaic Design:
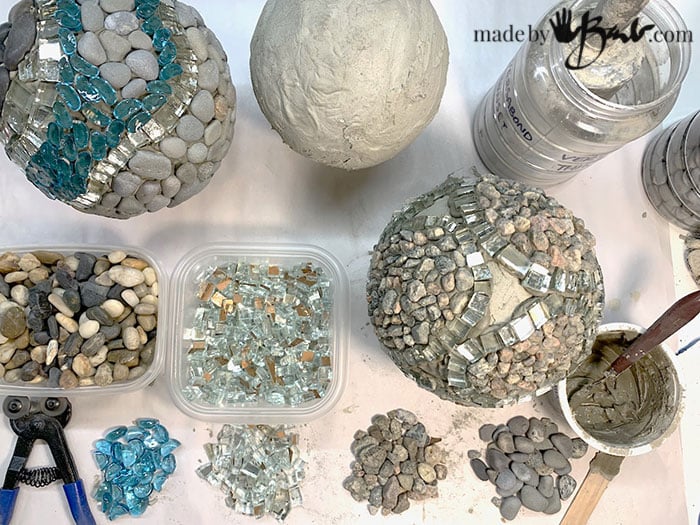
I chose my elements by colour, shape and texture contrasts. I am planning to use them as garden art so I took some inspiration from wavy lines of natural rock layers and random organic forms. The glass gems were cut to look more like crystals but you can also break them as I did when I made my huge concrete geodes.
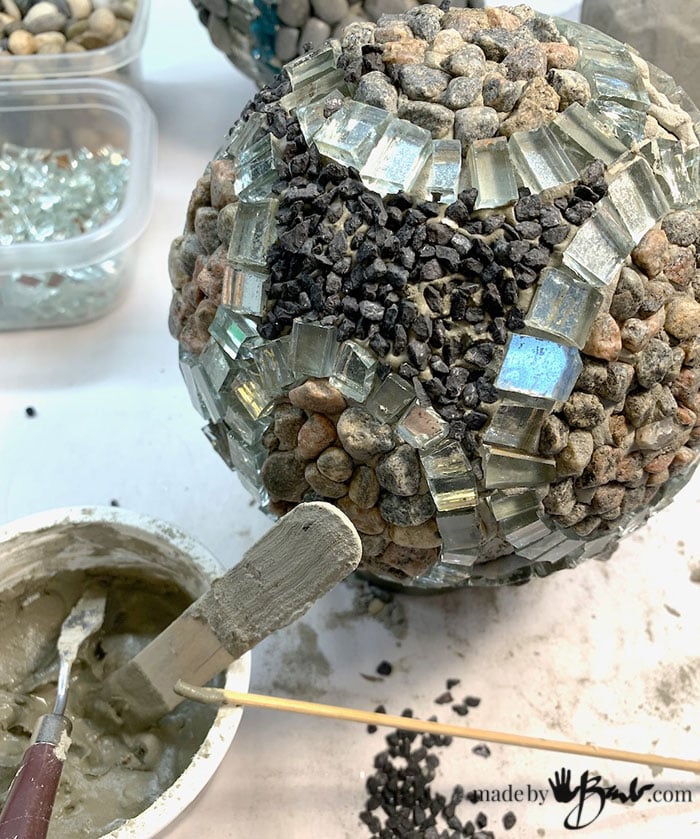
The Thinset is applied in the places where I am adding the mosaic elements. To make spreading the mortar a small palette knife or a plastic bag sealed with a corner snipped off makes a great ‘piping bag’. It keeps the fingers pretty clean…

The final piece will be grouted so an extra level of stability will be added. The shapes of rocks are not consistent but I grouped them in similar size categories. I understand why mosaics are so much fun to make, even more fun than a jigsaw puzzle.
All the mosaic pieces are already cut in this case so it comes together quickly. I can now understand why many historic mosaics were made of small squares – they are very easy to design with. Just keep scale in mind; but they are actually like the pixels we have nowadays but much bigger. The small squares cut easily with the glass cutter and running pliers, then nipped in square with the nippers.
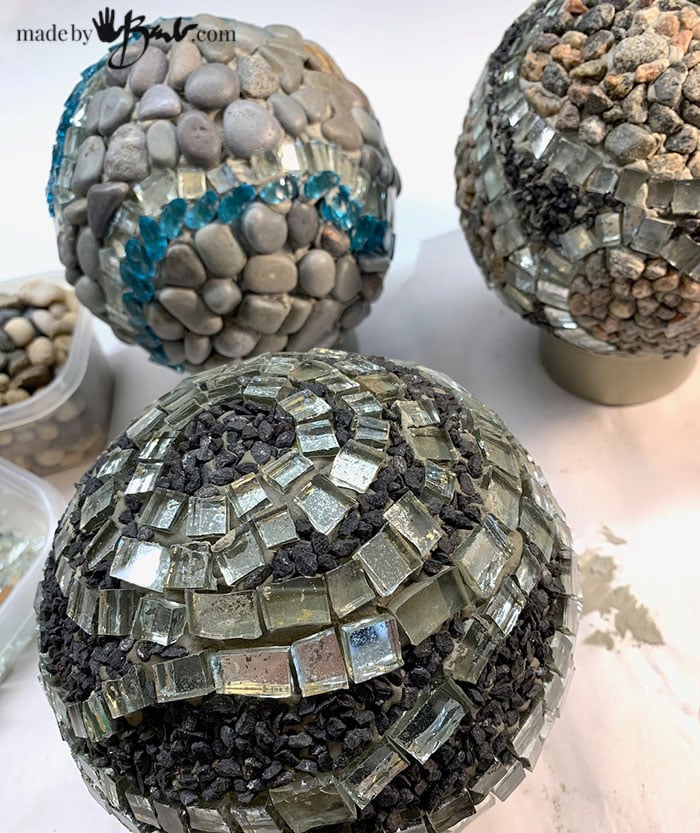
Not quite the disco ball but I love the rustic nature of the mirror and rocks. When using the stones from the store make sure they are not just painted, but solid colour so they last in outdoor use.

Adding the Grout to the Mosaic Spheres:
Sometimes when applying something like a concrete or mortar over a porous surface like rocks it may soak into the surface and change the colour. For that reason I gave the rocks a coat of a clear acrylic varnish to seal them. That is optional.

The same Versabond Thinset is used for the grouting. Mix it again to peanut butter consistency and spread into all the crevices. Rubber spatula or hands with gloves work well.

How to Make DIY Glass & Stone Mosaic Spheres
Equipment
- Glass Nippers
- Rubber Spatula
- Tile Cutter (Optional)
- Fine Sponge
- Soft Rag
- Scissors
Ingredients
- Glass
- Rocks
- Acrylic Medium (optional)
- Versabond Thinset Polymer Grout
- Fibreglass Drywall Mesh
- Styrofoam Ball in size of choice
Instructions
- Cut Glass pieces or Collect Stones
- Gather other supplies and protect surface for working
- Cut Drywall mesh into small segments
- Mix a small amount of Thinset with water to a consistency of peanut butter, let sit 5 minutes
- Mix again and start applying to Styrofoam ball (about 1/8" – 1/4" thickness) sitting on a bowl or container
- Add drywall mesh and spread to imbed into Thinset
- Let first cure/dry
- Once hard enough to turn and rest on other side continue covering with thinset/grout, let harden
- Arrange your tesserae (elements of mosaic) as you wish in planned (drawn) or random arrangement (half at a time)
- To protect from grout staining a thin acrylic layer of paint can be added before grout application.
- Mix up more Thinset and apply with a rubber spatula to cover. Let sit for 15-20 minutes.
- With a damp sponge wipe off excess, follow with buffing with a damp rag.

Let it sit for about 20 minutes and then start to sponge off the excess. Do keep the sponge damp and skim the surface. Rinse the sponge in a bucket of water (DO NOT RINSE in the SINK). After letting it haze over a bit a dry rag can be used to buff off any haze.

The contrasts of rock to glass make these unique. Choosing different sizes of rocks and glass also make design interests. Thick glass, beads, even old costume jewelry can make interesting design additions, not always being craft supplies. Do be cautious as plastic tends not to adhere as well.

The Garden Sphere:
Since this Thinset (cement in the mix) is rated for exterior use these spheres can be used as decorative garden balls. If you had a glass orb you could make a Glass-on-glass version. Orbs in the garden can sit amongst the plants or on pedestals. At my place the raccoons sometimes knock things over though…
These will definitely not be my last Mosaic orbs; who knows what I will find to stick on next… hmmm. What do you want to use?
Great post! Thank you! I’ve been wanting to make something like this for a while. Thanks for the easy -to-follow instructions.
I had it bouncing around in my mind too… I had to collect stones before the snow, as the beach is still under a few feet of ice. The idea of finding interesting rocks may get me out hiking soon…
Great idea and instructions. Barb, you are so inspiring and have so many great projects I will be busy for the rest of my life playing with them all.
Haha, you and me both! In my mind I’m about 15 ideas ahead! You can fly with this idea! ‘Just wait until you see what’s coming…
I love this tutorial! Thanks so much for sharing it.
Do you think it would work to use a 12″ inflatable beach ball as the form? (I realize I would have to leave it inside.)
Thanks,
peggy
Well, I also would like a larger size. I think I’d make the first layer with The Rapidset and then use the thinset. Rapidset sets/cures pretty fast. The fun part is working around the form and keeping it from sliding off, the drywall mesh does help. So many orb visions in my mind…
Oh, how I needed to see this project. It makes me happy to just read about it. …Like you, I’m very attracted to “round” whatevers. .. I look forward to following the clear instructions for making balls out of ‘thin-set’, found babbles, stones. Yes, it makes me happy just thinking about it.
Thank you so much.
I’m so glad I am not alone… I know I am peculiar and old enough to be perfectly accepting of it now! Enjoy!
I took a class several years ago and we used bowling balls
Oh yes, I have seen that but they must be heavy! As soon as weather permits I want to make an orb/mosaic combo! How well has the bowling ball lasted outside?
Thank you for these fantastic tutorials. I have learned so much.
I am a self taught mosaicer from Australia, using rocks, stones and shells. At long last I have found an art form I really really enjoy. It satisfies my need to collect, sort and design. Thank you again for sharing your expertise and enthusiasm. Cheers Jen
Thanks! I like that it involves nature and a reason to go searching! I’m hoping this art form gains interest in the future for a morse sustainable way to create! You will also like this post
These are brilliant. Time to experiment is the problem.
I know that problem well!!! I have more ideas than I can ever get to. ‘No limit to the ways you can be creative!
Barb – you are one of the most creatives! Thank you for continuing to share your ideas which continues to inspire me. I started this project thinking I could get the teens (and some adults) in my family interested in doing a craft project when I see them this holiday. Well I thought I’d get the mud on the spheres to get it ready, then I began to realize the multiple steps and thought I need at least to start a design on each to give them a head start. Well it seemed to be more than I thought we could do in an afternoon and ended up completing them. They are close now, and wondering if putting on acrylic is a good option for longevity? I missed that step earlier. Also, any other suggestions?
I’m so glad you persevered! I have good success with my mosaics outside so far, but perhaps you want extra assurance with some water repellant sealer. The key is that no water gets into the shape. Keep in areas that do not collect water…