How to make an UpCycled Lamp with Concrete and Gold Leaf
When it comes to light fixtures almost anything goes… It is also a great way to be unique and use what you have or found. I’m excited to share my new tutorial; how to Upcycle a Lamp with Concrete and Gold Leaf.

I am always amazed at how inexpensive lamps seem to be at thrift stores but super expensive at the furniture store! Even if you buy each of the electrical components and assemble them yourself they are still quite pricey.

No Electrical Knowledge needed!
I collected a few to Up-cycle myself. Transforming an old or thrifted lamp into a sleek, contemporary piece using concrete is a fantastic way to upcycle while adding an industrial touch to your decor. Since I have tested the lamp for function it is a design makeover, no wiring needed!. This project is not only budget-friendly but also allows for plenty of creativity and customization.
Materials You’ll Need
- An old lamp base: Choose one with a sturdy structure and a shape you like.
- Non-Shrink Fast setting Concrete mix: Opt for a fine concrete mix for a smooth finish.
- Mixing container: A bucket or plastic container to mix the concrete.
- Tools: Trowel, small tools, paint brushes, old kitchen utensils
- Painter’s tape/Plastic Wrap: To protect areas of the lamp you don’t want to cover.
- Sandpaper: Optional, for smoothing the cured concrete.
- Optional finishes: Paint, sealant, or metallic accents like Gold Leaf.
- Dust mask, gloves: Safety always!
What to Look for:
When looking for a lamp to up-cycle make sure it works and shows no signs of wear of the wires or plug. The switch should also work well and the parts are not loose. I have often taken lamps apart as they have a common shaft that can be rearranged (with bolts and threaded rods) and then wired back again to the socket. However, if the light fixture is in great shape you can start from there.
Imagine how you can change the surface of the shape, colour and material are not that crucial. There are many ways to make it look completely different without actually changing the shape.

The Simple Design Principle
I looked at the shape of this one that I obtained with a lamp shade (they too are quite expensive new) for under $8. Since it is clear glass, I could have fun with the way I would apply the concrete!
Since I do like to take a bit of nature and organic shapes as inspiration I started to sketch some shapes on the glass with a Sharpie. I drew inspiration from Geodes and stone.

Adhesion for the Concrete:
Concrete will stick to glass more readily than plastic however if it is very smooth it may just keep sliding as you apply the concrete. For this reason I use a fibreglass drywall mesh that is slightly sticky. Since the shape is not flat I used a lot of small pieces to cover the area that will have the concrete.

Once I had it covered with the mesh it is time to prepare for the Concrete.
Make sure to use the Proper Concrete Mix:
Not all concrete is the same! Since this project is built on an existing shape it is crucial that the concrete mix does not shrink during the curing as then it will crack. Read the specifications on the mix carefully.
It is also important that it s a fast set type to allow the progression of applying the mix around the shape. For these reasons and my years of great experience with Rapidset Cementall I chose it. If you are new to it or concrete crafting see this post.

Applying the Concrete Mix:
This concrete mix is very fast setting, especially when it is warm. It requires less water and has much more ‘plasticy’ consistency when mixed with water. It is very easy to add too much water.
There is no coarse sand or aggregate in the mix so it gives a quite smooth finish if wanted. Mix small amounts and let sit for a minute or so until it becomes moldable like soft clay. (see video for process) This mix is very versatile for this reason as it can be applied around a shape and start to harden quickly.

My concrete utensils are quite primitive as they get coated in concrete over time. Palette knife, old kitchen utensils, spatulas, brushes all work well. Often a gloved hand is the best! Spread the mix around the surface and smooth as much as desired.
The Industrial charm of concrete decor is the texture so I like to leave it rough. Why would I want to make it look like plastic?!

Work Around the shape;
Keep rotating as it permits during the hardening. If you need to add more concrete later to hardened areas make sure to wet it before adding fresh mix. This will ensure that the drier areas do not ‘steal’ the needed moisture from the fresh mix.

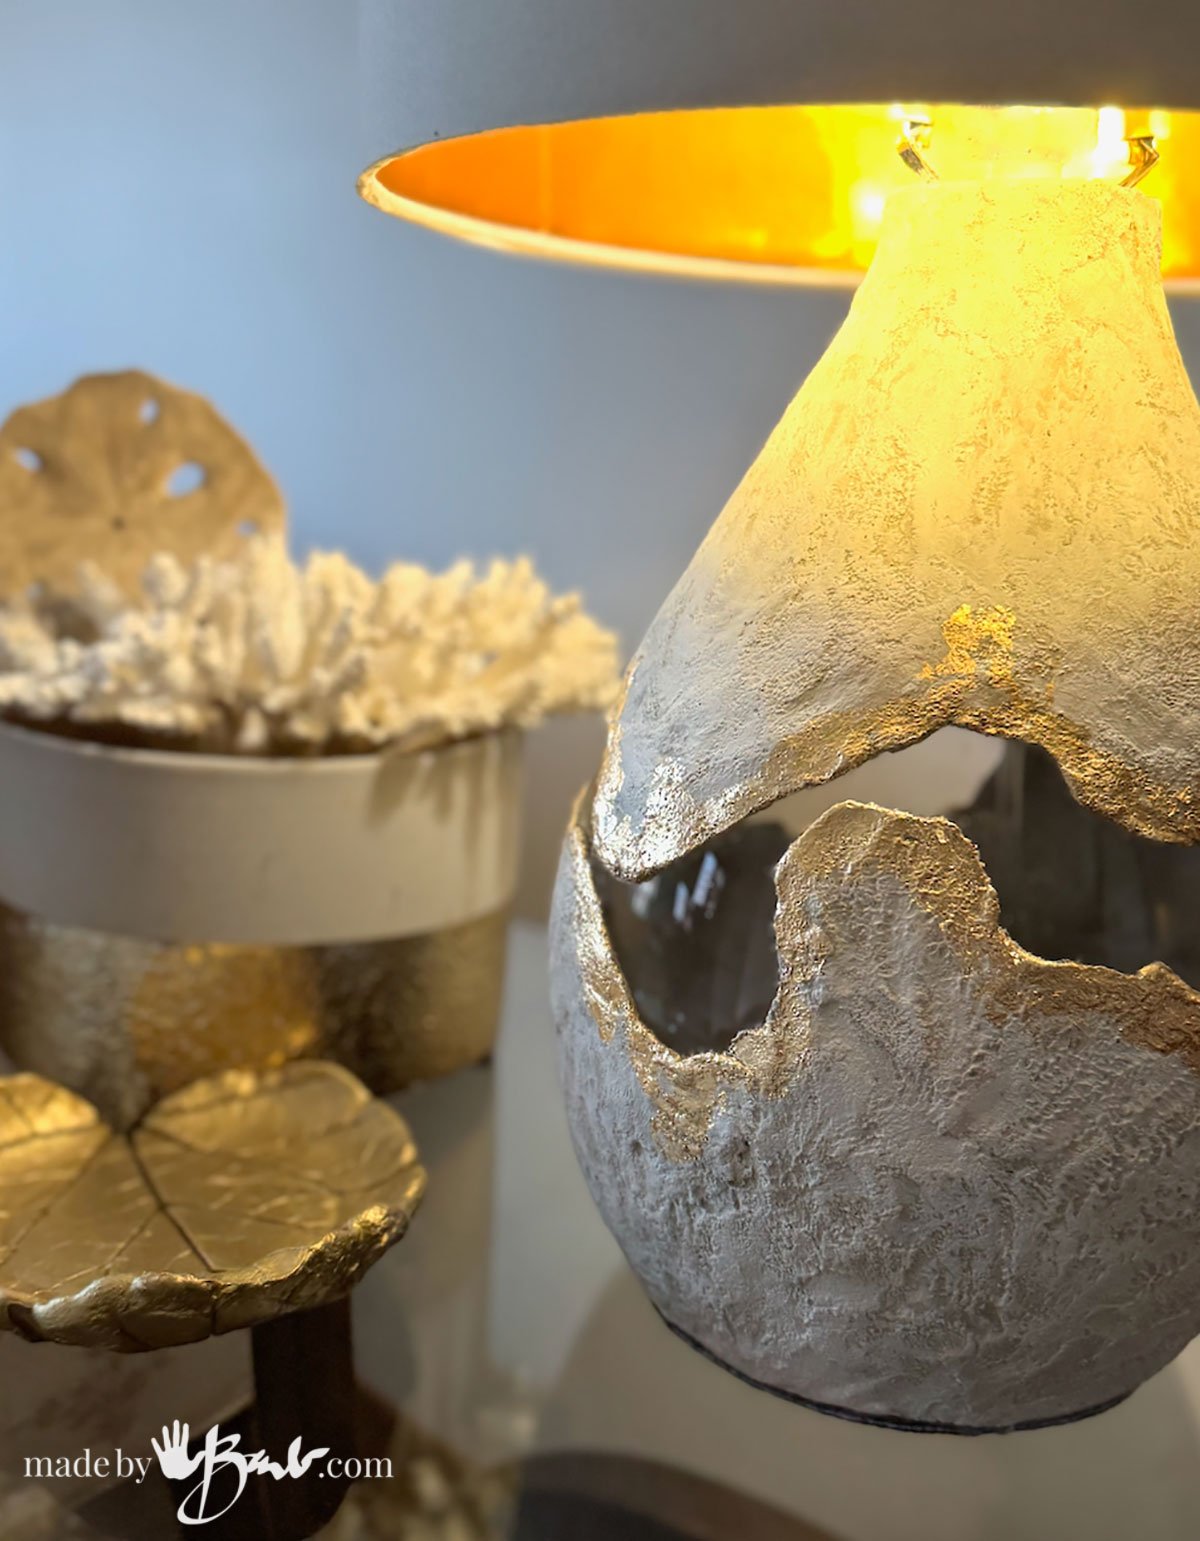
Concrete Beauty!
What do you think?! I like the allure of it looking like there is a magical missing section but it could easily have just been completely covered for simple beauty.

Bring out the Texture:
If you want the texture to stand out even more it is a quick simple paint application. I do really hate when concrete is covered with thick though, so this is just a very unnoticeable affect; Drying brushing. With minimal paint (usually a good quality acrylic/latex paint) on a big brush, rub most off and then just quickly pass over the surface. It should be minimal and only accentuate the parts that protrude & stand out.

The divots will remain untouched and darker, unless you use a dark colour. Be creative! I want it to look like stone from nature.

Clean any residual concrete off the glass, use a knife or scraper if needed.

Adding some Metallic Bling!
The current trends have much gold and brass on everything! Years ago, I used to have a lot of of brass…. I should have known it would come back!
To achieve the most striking gold affects you need to use gold leaf rather than paint. It is quite inexpensive compared to the actual real gold ones. Gold leafing can get messy so have a vacuum handy!
How to apply Gold leaf to Concrete:
Apply the proper adhesive; Gold leaf Size Adhesive (Speedball Brand is my fave) to the areas that you would like the gold to be. It will not be very visible so remember where you applied it. I wanted a rustic edge as then there is no error to application. In nature’s geodes there is a lot of texture.
The Leafing Adhesive will stay tacky as it dries to adhere the sheets of gold leaf. Very gently press sheets or parts of sheets onto the glued areas. Keep piecing with little bits of needed for the final result.

Using my fingers or a stiffer brush I press it to adhere. The excess can then be brushed of with a brush ( like a small broom). These excess pieces can be used again or discarded. (The gold bits can be lovely when in Epoxy Resin by the way)

The natural organic shapes of gold work well with the rustic concrete characteristics and enhance the texture. It is also available in silver, copper, and rose gold. Before you know it you will be wanting to add it to all kinds of things to make them trendy! Sneak peek, I seem to have some gold in my next few projects…

Contrast Beauty of Materials:
Perhaps it’s the way that the gold looks like it was molten metal here, but I love the way it ‘plays so well’ with concrete! I see a lot of gold in my future concrete! Perhaps the idea came from the Concrete Geode Candles!
Add some felt padding to the bottom base of the lamp as a protection for furniture.

Upcycle a Lamp with Concrete and Gold Leaf!
Remove the tape and clean everything up, insert a new bulb. The lamp harp gets reattached (snaps in) and the simple white lampshade finishes the modern look. Alright, I’m ecstatic! I imagine this would be super expensive in a fancy decor store, am I right!?

The glass table helps keep the airy feel and of course there’s a gold leaf…. made of concrete! (tutorial coming soon)
Up-cycling with concrete is an eco-friendly way to breathe new life into old items. Concrete’s versatility makes it perfect for achieving a new modern, minimalist aesthetic. Plus, it’s durable and timeless, ensuring your revamped lamp will last for years. I hope I’ve enticed you…
Oh how you stimulate the creative juices. Great tutorial. Thanks. Barb
Thanks! ‘Perfect when you want a change without much cost! Stay tuned, more to come…
I love this project and can’t wait to try it! Thank you for always inspiring others to think outside the box. The results are incredible!
Another fabulous tutorial. Thank you so much for sharing your wonderful visions with we mere creatively challenged mortals!!
Lovely, thank you for sharing 🙂