Up-cycled Sweater Quilt
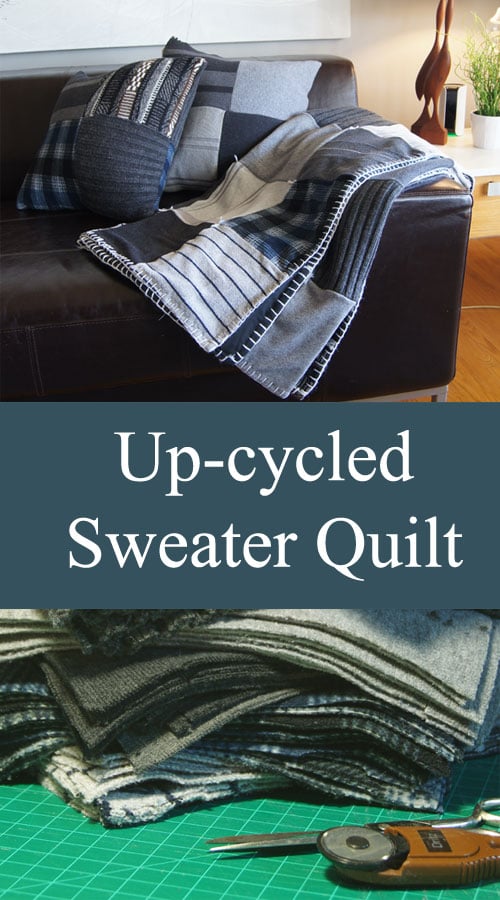
 I really hate to be wasteful. Post-winter purging time of sweaters and also my son’s birthday, hatched a bright idea. Previously-loved sweaters are cozy and warm, so why not give them a second life? Up-cycling is so rewarding. My son’s decor is grey tones and somewhat casual, so this will fit right in. My mother always taught me not to waste as she lived through difficult war times… So here goes…
Quite a stack of tones of grey and blue. They don’t need to be very “matchy”. The real charm comes from the blend of textures and knits.
I decided on a 9″ square so that I could get quite a few out of the pieces like the sleeves and across the fronts. You could use smaller as well. Larger sizes will leave more waste. I used a cardboard template and a rotary cutter for speed. Since the knits are stretchy there is some “forgiveness” in the exact shapes. This is not as fussy as true quilting.
Quite a stack came from 6 sweaters. 81 squares!
Since I have a three thread serger, I used it to piece random couples. I was hoping for a random pattern, and only tried not to have same colours next to each other. I then added doubles, then added quads, to make long strips. Do ease the knits together and not over-stretch them.
Once I had the long 8 square strips, I laid them out til I was happy with the random pattern. It allowed some switching and flipping. After sewing the strips together, I used a soft bedsheet as a backing. Place right sides together and sew all around, leave an opening and then turn right side out, close the opening with slip stitches.
Once turned, I laid it out on the floor and tied knots with yarn at the corner points. This gives it a rustic handmade look and is quite easy. It’s too hard to try to jam it under a sewing machine.
In keeping with the look, I added a large blanket stitch around the outside edges in contrasting yarn.
I did not use the traditional batting filler as I wanted it to be softer and not so puffy and bulky.
I had so many squares left over that I was able to make a couple pillows. They are 4 squares on front and back. Since these were well worn sweaters, they should wash quite well. Happy Birthday my son and Enjoy!


I simply want to tell you that I am just very new to weblog and certainly enjoyed your web page. Most likely I’m going to bookmark your website . You definitely have tremendous writings. Thanks for sharing your blog.
Hello There. I discovered your weblog the use of msn. This is a very smartly written article. I’ll make sure to bookmark it and return to learn extra of your useful information. Thanks for the post. I’ll definitely comeback.
thnx for sharing your great internet site
Appreciation to my dad who told me concerning this site,
this weblog is the truth is amazing.
How cozy and special would it be to receive one of these as a gift.
Thanks! Especially if it is some favourite sweaters and patterns!
Hi, I am just finishing a sweater quilt I made for my daughter and hubby. Well…..I started it at least 7 years ago and just have to back it as of now. Lol! I struggle with threading any tapestry needle with the yarn. Any tips?
I had a pretty large eye needle. However as a tip, you can thread a loop of strong thread through the eye and then run the yarn end through the loop to pull it through the needle eye. Have you ever used the little treading tool? Must be available at the sewing notions section. Good luck and enjoy the quilt!!
Does the wool sweater quilt have to have a backing????
I suppose it doesn’t. It may have some rough seams showing though. If it’s too expensive, consider just using a nice soft well-worn bed sheet. It also allows the edges to be more finished. Good luck
Hello,
This is the nicest upcycling idea for my sweaters. Nice work, i’ll try this one for sure. Thanks allot.
Greeetings from germany
Sindy
Thanks! It is a simple project but can be so special! There’s a special place in my heart for germany!!! 🙂
Such a good tutorial you make everything seem possible. The blanket looks so warm and cosy and with its personal history, which my son would appreciate also, it has become a family heirloom. Well done.