Live Edge Concrete Bowls
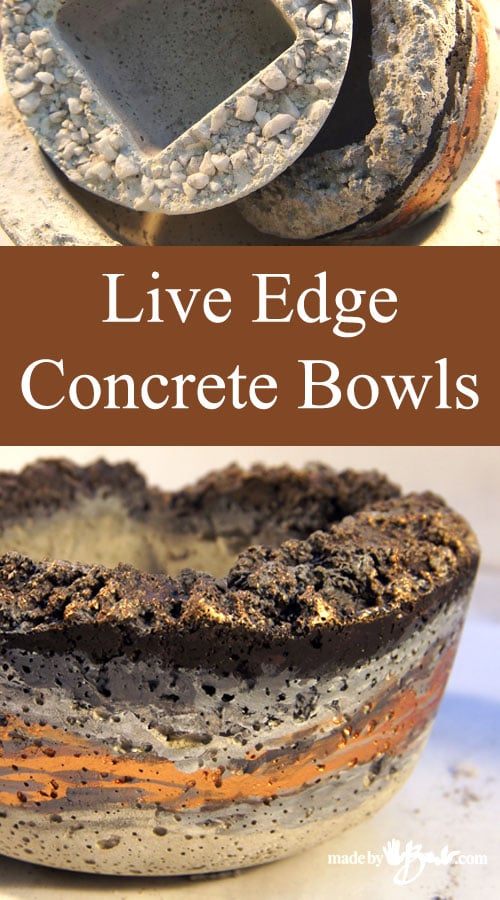
I’m a nut for nature and always marvel at the amazing textures that miraculously appear. Have you taken a close look at a stone or rock lately?! These Live Edge Concrete bowls mimic the beautiful layers of colour, texture and grain that nature offers. It’s really not as crazy as it sounds and nature has been inspiring artists for centuries. Make a concrete bowl and amaze yourself!

The process starts the same as my ‘Rustic Concrete Bowls’ here to create the vessels. Keep the concrete on the more textured side with less agitation and let the top stay rough. The less uniform and conventional the more it is like nature.
You will need:
- rustic concrete bowls
- acrylic paint (black, white, orange (or red and yellow) metallic (copper,silver) teal optional
- paper towel
- brushes, wide and thin, cheap ones will do
- Clear acrylic varnish optional
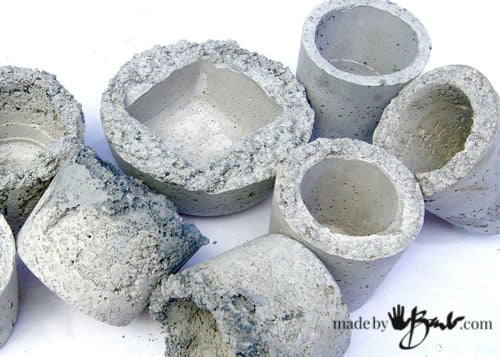
The Shapes:
Here are a few starting pieces. Rough eh? Don’t worry, it’s not an exact science and you can take it any direction you like.
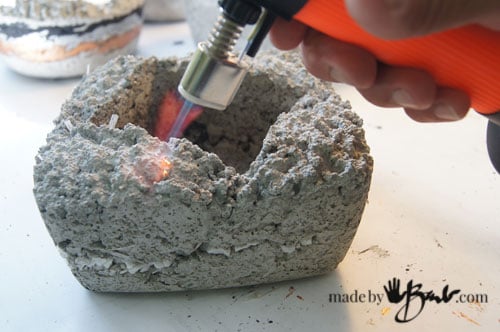
Ever torched the sugar on top of the Creme Brulee? I torch the polyester fibres that happen to poke out of the concrete. I love tools and often reprimanded for ‘stealing’ other’s. (hehe)
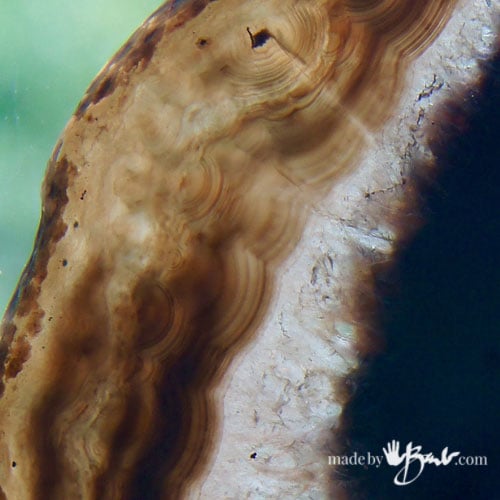
I had recently bought a slice of a stone (not exactly sure of name as I was in awe of the layers) that gave me the idea.
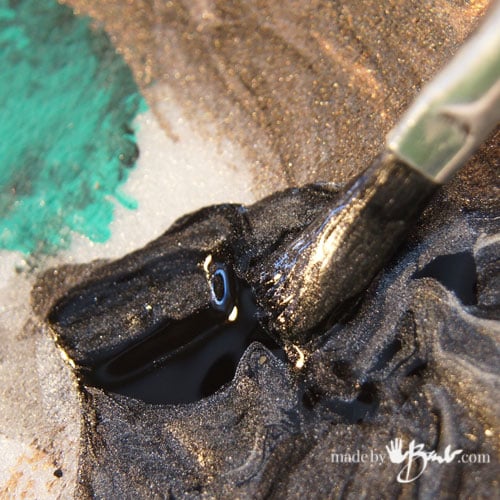
The Paint:
My palette included black, white, copper, red, yellow, and teal acrylic paint. I like the flecks of metallics to add depth to the colours.

The idea is to make it look like there are layers in the stone that the bowl was cut from, so anything goes. Doesn’t matter if you have a steady hand or not. Think of the last time you drove by a hill cut through a mountain. Imagine away… maybe there is a vein of copper (?) or turquoise, you are inventing your ‘nature’! The texture is already there.
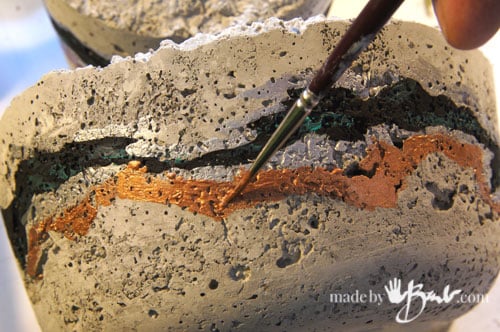
Isn’t it fun?! Thick, thin, wavy. Add some small bits for even more detail.
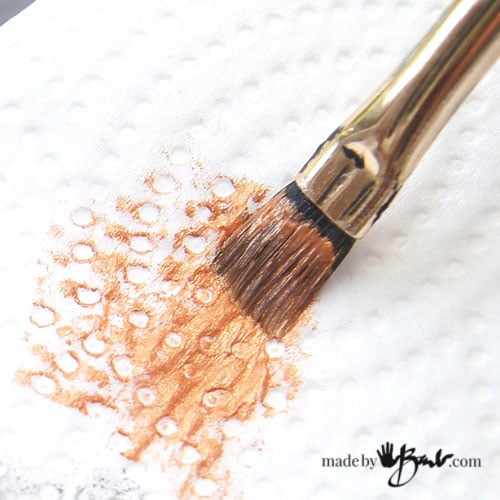
One of the ‘magic tricks’ of painting is ‘Dry Brushing’. It makes texture stand out so much and could not be easier. I always strive to empower all who think they can’t paint or be creative. Just get a bit of paint on the brush and wipe most off on towel, then brush over the textured and it only hits the top surfaces making them stand out.
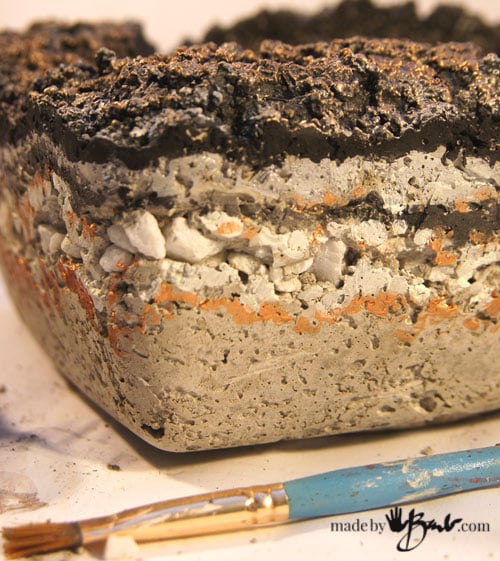
Much live edge wood has a layer of bark, which I love. Sooooo, why not add a dark layer on the top here?! Dry brush it and it comes alive! This bowl was an experiment with layering some small marble rocks when pouring. How cool is that?!
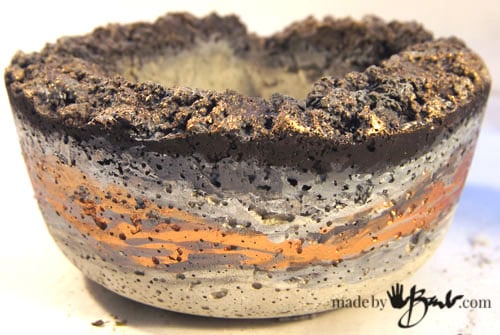
Keep the edge of the ‘bark’ quite dark as it represents the cut and go crazy on the top. Wowsa, so much effect for so little effort.

Some were more ‘graphic’ meaning less small details. Try some odd colour combinations, using nature as your inspiration. Veins of silver or gold…

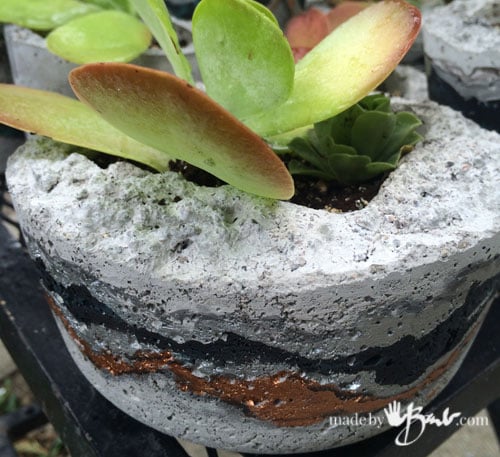
Small marble stones accented this bowl surface. Try what you like, it is so economical, you can’t go wrong.
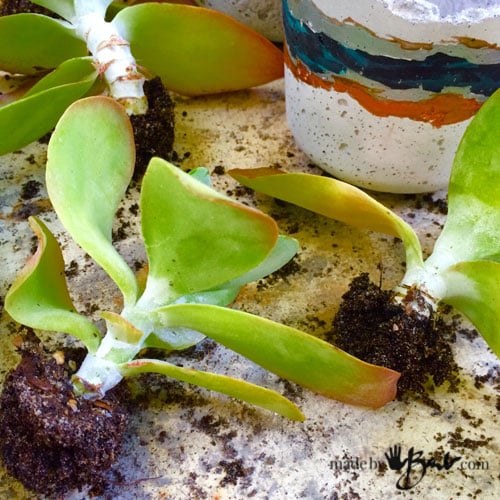
Plant your masterpieces with some great plants, here is the propagating of Paddle Plants (Kalanchoe thyrsiflora) as they compliment the stone so nicely.
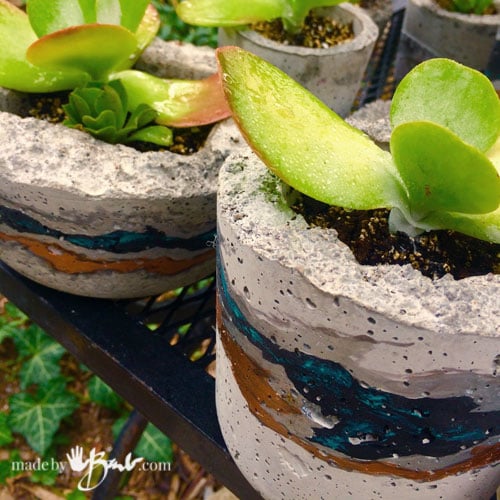
Need a bunch of gifts? Pour some Live Edge Concrete bowls and then propagate some plants and voila… ridiculously easy cheap gifts. Table centrepieces for a unique wedding? Think outside the usual.
Good job! Be proud, you made these wonderful easy Live Edge Concrete bowls!
Love those textured middles and edges + colours
I have a theory: Since in this modern virtual world we tend to be void of tactility; we long for the textured and tactile. I strive to have the images be the ‘eye-candy’
Seal the inside of the pot with paint or varnish else it will absorb the plants moisture, Making a hole at the bottom also not a bad idea. Love the pots!
Yes, you may be right. I find that the porosity of the concrete does somewhat ‘help’ eliminate the overwatering issue with succulents as well. I’m not sure what would best seal the inside as almost everything has a hard time against water.
Appreciating the persistence you put into your website and detailed information you provide. It’s great to come across a blog every once in a while that isn’t the same old rehashed material. Wonderful read! I’ve saved your site and I’m including your RSS feeds to my Google account.
Thank you! You can subscribe as well. I am glad that you notice it’s not just a rehash. I am an artist and designer at the core so I like to be original.
whoah this blog is fantastic i love reading your articles. Keep up the good work! You know, many people are looking around for this info, you can help them greatly.
Your way of explaining everything with this article is truly pleasant, everybody can without difficulty
know about it, Thanks a whole lot.
Awesome thanks for the tips
The chances of me implementing even a fraction of your ideas is minimal, but I must say, I’ve enjoyed reading through about 8 of your tutorials. I don’t think I’ve ever read any that are as perfectly written and well-photographed as yours! I’ve worked with cement and concrete, so not each was new content, but you’ve inspired more creative approaches! In addition to being so well-detailed, your ‘personality’ and ‘voice’ uniquely makes each tutorial sound as if you’re standing along side the crafter during the project!! You inspire confidence and eliminate all the guesswork with incredible detail, yet none of this sounds the least bit overwhelming! Bravo!!!
P.S. I wish you lived next door!!!
Wow, thank you for such nice words and taking the time to comment! I have been teaching adults for almost 20 years and I believe that encouragement is almost the most important part as well as sharing those tips along the way. If more people could realize how great that sense of accomplishment from making things is there would be much less medication needed… That’s my belief
Hi Barb – wonderful site, and these pots are beautifully painted.
I’ve been making pots for a while, but yesterday, tried out your idea of inserting some white rocks along the sides. i very carefully placed them against the sides of the mould, but once I added the rest of the concrete, they shifted and disappeared!
Any tricks or keeping the in place?
You could use hot glue to hold rocks in place then just heat outside of pot when you release the mold. “Voila” they stay where you want them 😅
Sounds like it could work. Possibly using a mix that is quite thick will also eliminate stones sinking or waiting a bit as it gets stiffer. Pros do the top finishing after a rest period.
Hi Barb…I have 2 lovely plastic urns that I’d like to turn into concrete. I don’t plan to use a mold because they have great detail which I’d like to keep. I was hoping you could provide some instruction. It’s my 1st concrete project and I’d hate to butcher it up. I thought who to better ask than you. Thank you so much!
That’s a tough one. So many factors can be a problem. Size, dimensions, ‘undercuts’. I’m not sure why you state that you would lose detail by taking a mold of it. Even once a mold is made there may have to be some way to support it when filling with heavy concrete. Note most of mine have been small planters. Frankly I hate a planter that is so heavy that I can’t move it! Have you seen this?
Barb, your projects are all so lovely. I am inspired to try working with concrete, which has till now been a little intimidating. I am wondering if some of your bowls could be used as pet watering bowls. We have cats and I am not sure if concrete could be made food safe to prevent leaching dangerous chemicals into the water. Since you have obviously done tons of research I thought I’d ask if you have come across this information. So far I haven’t found any answers.
My thoughts: I would not do it. Even if you could get the concrete to the point of being leached it would need repeated treatments just like concrete pools and who knows where the sealer/paint is going? If you want why not just incorporate a nice cat bowl into the shape of the concrete bowl? Then it can be popped out to scrub clean and fill without having to move the concrete one!
You are so gifted and very kind to share your ideas, they are superb! clever lady! Thank you