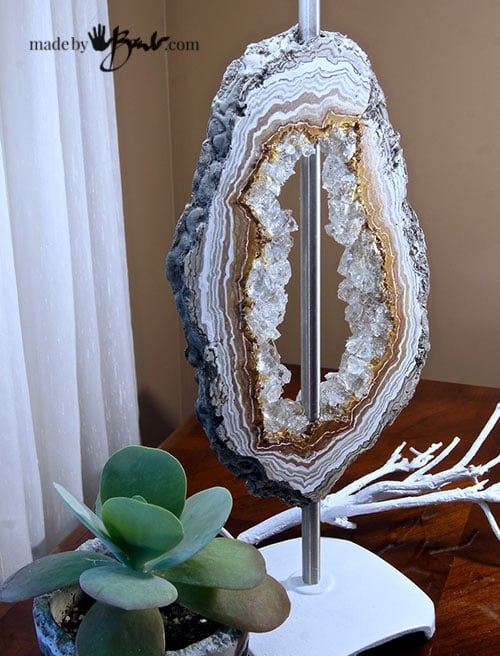
DIY Concrete Faux Geode Lamp

Those geodes seem to be everywhere lately! They even appear as wedding cakes and cookies in sparkly sugar versions. But, myself I’m a practical gal and if I can make function part of a great design then so much the better! I had been racking my brain for a while to make a lamp design that is easy; as not everyone likes to ‘play’ with electricity. Success! This simple tutorial with many pictures shows how to make your own unique DIY concrete faux geode Lamp.
I had found some interesting results while working with my ‘RapidSet Cementall and used those characteristics for my original design.
Tools and materials needed to make the form:
- purchased lamp with simple shaft like Ikea Hemma
- smooth plastic sheets (2) large enough for shape of geode (plexiglass, container lid…)
- RapidSet Cementall & Water
- container, mixing utensils, (hint: flexible plastic allows easy cleanup)
- Dust mask, rubber gloves
- Concrete reinforcing Fibers (optional)
- Lighter/torch for burning off fibers
- Emery cloth/sandpaper
Materials to finish:
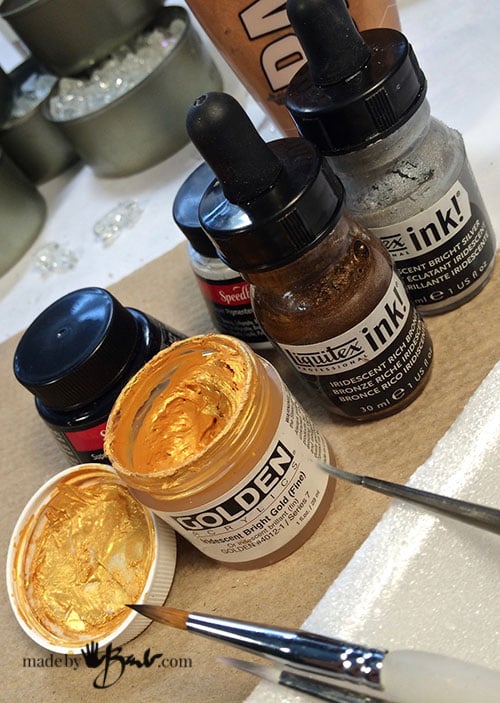
- Liquitex Acrylic Inks (black, white, silver, gold, copper, bronze)
- Brushes
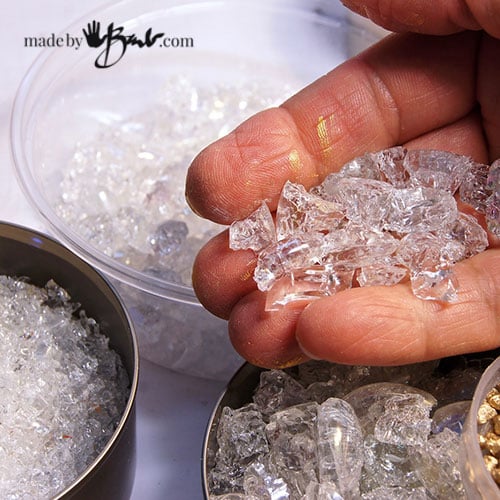
- Glass ‘Crystal Pieces’ (made from glass pebbles)
- Hot Glue (and gun) & Permanent adhesive (5-minute Epoxy, Gel Super Glue, E6000
- Clear Lacquer (nail polish) optional

Making the Concrete Shape:
The trick behind this easy tutorial is that there is no lamp-making in the process; as it uses a complete lamp.
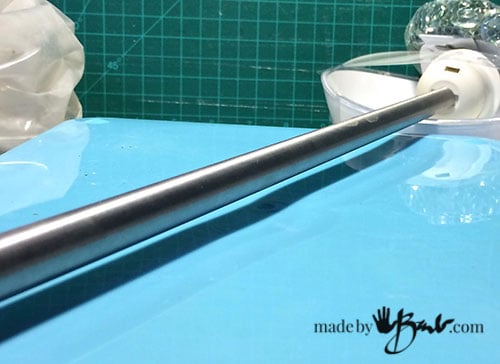
You will be making the ‘concrete shape’ around the shaft so you will need to jig up a place that will position it slightly (2-5mm) off of the surface to allow the concrete to cover/encapsulate it. I’m using a tray here as it is shiny and elevates perfectly. You could just stack some things like books under your base. Secure it so it will not slide or move, packing tape works well.

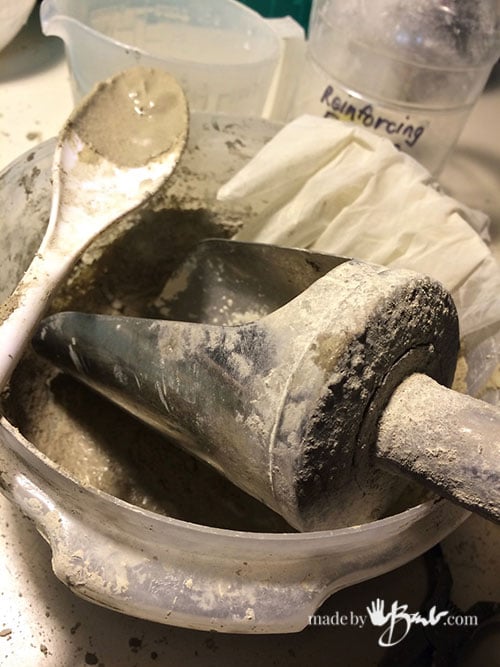
This RapidSet Concrete has a lot of ‘flow’ meaning; it will just flatten out. For this application we are not using a mold so it will need to be of a thicker consistency to hold shape. I find that last bit of mixing by hand works better here. Add a pinch of fibres if you have them. (maybe even small pieces of yarn would also work the same way)
Ya, I’m a problem solver…

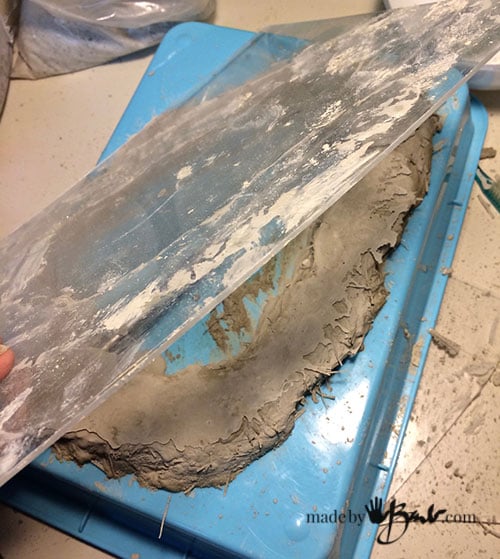
This looks odd but what we are after is a rough edged shape with an opening in the middle. Play with the mix as it has quite the plasticity to it. Nature is not perfect, so make it random edged. Push the cement back into shape if it flattens. This concrete starts to set quickly so it will start to stay put.

Once you are happy with the shape, take the top sheet of plastic (preferably clear to be able to see through) and press it flat to allow good contact with the shape (some wriggling helps). If you want to adjust you can poke from the sides with some skewers.
I have been working indoors, so for clean up I just let everything set. Later I knock out the dried concrete into the wastebin.
After an hour this amazing RapidSet Cementall is set hard! The plastic will pop off easily…
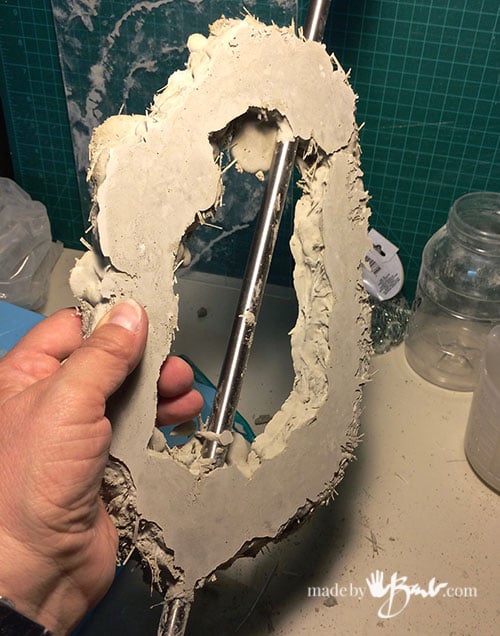
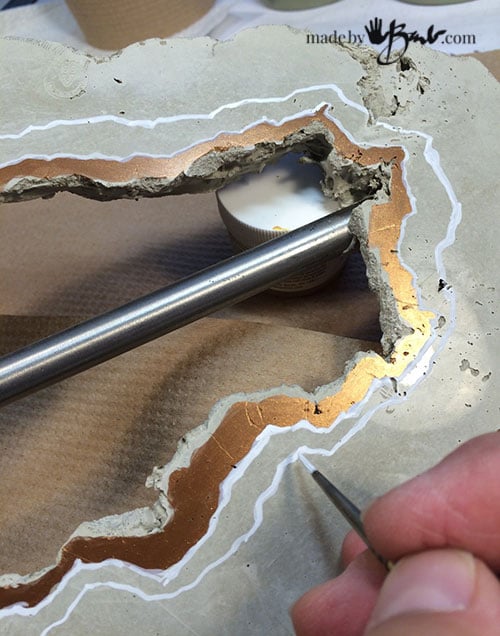
and now you have your ‘slice’ of rock!

Sand off, chip off any dangly pieces. The roughness resembles true stone in nature. I love how this concrete will yield a shiny finish if poured on a shiny surface.

The fibres can easily be singed off with a lighter or torch. Just don’t light anything else on fire…
Adding the layers to the Geode Slice:
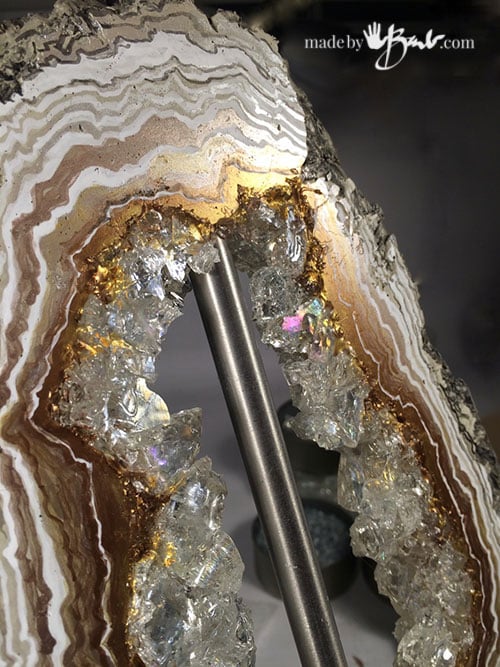
The messy part is done but it was super easy. This part is very therapeutic I find. Gather some nice metallic inks as well as some black and white. Inks are very highly concentrated pigment wise so they provide a good amount colour with no thickness to the surface. You want this to be quite flat and shiny.
Don’t worry about your painting skills here. No need to fuss as some squiggles is perfectly fine. If you want some inspiration search pictures. I just follow wiggly layers from the ‘hole’ shape. Vary them in colour and width, use a nice fine brush.

The metallics offer a great catch of light so I like to use them the most. Finish off the edge with some antiquing. I did paint both sides but they don’t perfectly have to match since only one can be seen at a time.
Adding the crystals to the center:
Once you have made your crystals by baking/shocking (as in my previous geode post) you are ready to adhere.

When it comes to a adhesive I did a test. The Super glue works well but it has to be a perfect matching surface. The E6000 works well, but will set after a few minutes. The Shoe Goo is similar but has too much ‘rubberiness’ and takes even longer to set. Since I have a LOT of crystals to attach I like FAST SETTING!
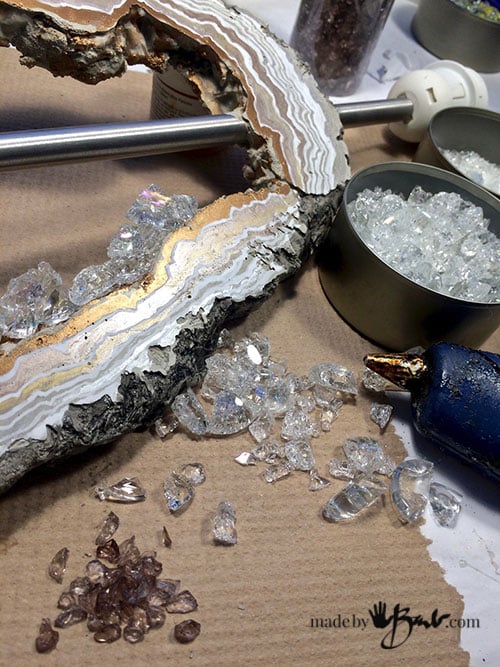
I use a hot glue to set with minimal amount of glue. I will make make it more permanent later on. The ‘pebbles’ will have some round edges that I like to conceal.
There really are no rules. You could use some aquarium gravel as well. Use the shapes to fill spaces and keep it relatively flat at the front.
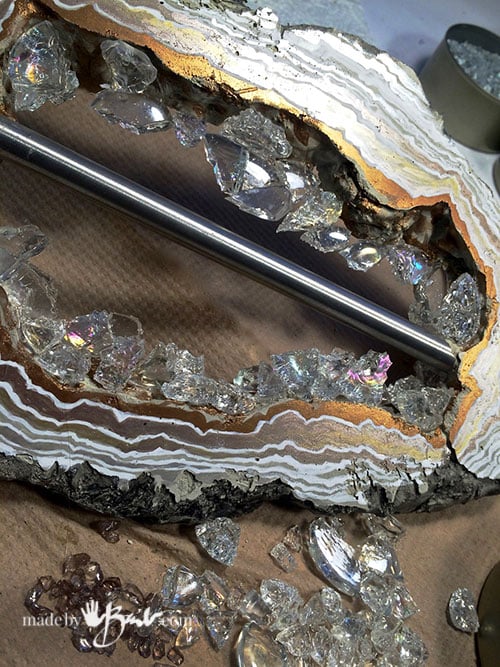
Work your way around. Smaller pieces will fill later…
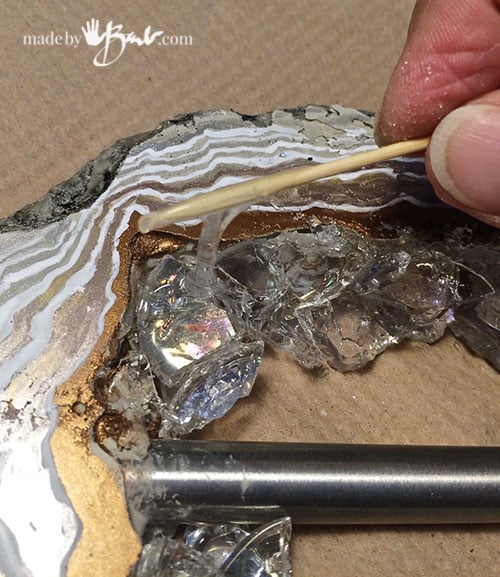
One of the strongest glues I use is 5-minute epoxy. It sets clear and fast! Mix up small batches and drizzle over the seams. This will make the bonds permanent.
Ok, I am a bit of a perfectionist so for even more realism sprinkle some small pieces into the epoxy.

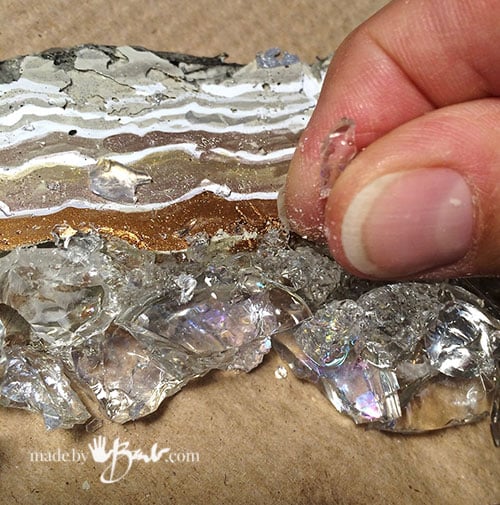
Finishing Off:
To make the edge less obvious add a bit of the paint/ink. If you are worried about little fingers or sharp edges you could give it a coating of lacquer (clear nail polish) to round off the edges. I have made quite a few of these now and the edges are not like the ‘broken bottle’ kind.
Are you not amazed how a hunk of concrete can look?! No whimpy styrofoam here. Looks like stone, feels like rock…

All set in place and no wiring to do before connecting. I must say; it’s one of my favourite projects as it has a function as well and you can use a colour palette of your choice without having to hunt for rocks.
The weight of the concrete also gives it good stability.

Now you are rocking the amazing geode decor design!
But don’t go too far… I’ve got another lamp project up my concrete-stained sleeve!
I love your job, you’re great!
Awe, that’s kind! I’m blessed with a mind that can imagine so many ideas! I just can’t keep up with making them all… And more ideas hatch along the way. Glad you enjoyed it and hope that you give it a shot!
Beautiful projects thanks for sharing. Your tips are very helpful and useful.
Who can resist sparkles?! Thanks
I can’t see any of the diy photos. Pls help.
Do go to my official site as often the other avenues won’t show the pictures. ‘Bling on!
Love the lamp! GREAT job on it and on explaining how to make one.
I enjoy it in my dining room, and love the sparkles! They are quite easy…
Hi Barb!
I loooooove this idea and it looks so realistic!
I want to make it as a gift for my sister for christmas but i can’t find the fibers…
What kind of string can i use instead? Wool or sisal or maybe something else? And do I need to cut it in very short pieces or not that short?
You are so creative and you inspire me a lot!
Thanks! I think you can get away without the fibres. The RapidSet Cementall is such a strong concrete mix. If you want to substitute may be some fine yarn pieces, cut short. This concrete sets so fast, perhaps you could do a small test to see how strong it actually is. The coasters don’t have fibre and have been quite good.
I fell in love with the lamp. Thank you for sharing your love and your skills. Did you break up the crystals or buy them like that ?
If you are lucky you may be able to buy some. I made mine as in this post. Look around the craft stores, also there is ‘fire’ glass used for fire bowls. Happy hunting and Making!
Please sign me up for your newsletter. You are amazing ! Thank you for sharing all of your brainstorms!!!!!
That’s very kind of you to say! I’ve filled the form for you.
WOW Barb ….fantastic !!
Gotta try this too 🙂
Yes! Sparkle on!
I LOVE what you do! You are so kind to share! I just wish i could take a class with you or just hang out and learn from you! Creativity is a beautiful gift! Please sign me up for your blog or newsletter!
Thanks! That’s funny, as I have had that request before. I do teach but in other discipline, so my time is very tight. I’m pretty sure you can just use the form to sign up for the newsletter.
I really like the idea of this lamp and would like to make it, however, this blog post would be much better with some pictures of the process and much less of the ads.
That’s funny! I had thought that 38 pictures of the entire process was quite thorough. Sadly since the information is free some ads will help offset the costs of running servers to provide so much content. Not sure why you can’t cycle through…
Just a quick comment about the photos. I could tell from your writing that photos were posted, but they are no longer showing up. The entire post is filed with ads. Sorry to share that news with you. I would have loved to see the photos too.
Thanks for the input! Could you send me the link through my main contact page?
Barb the pictures did not come through…
It should be here…
I ‘m not sure why not as there are very many. Possibly wait until they load?
Felicitaciones…Hermosa obra. Idea admirable
Quiero saber qué tintas o qué otras pinturas podrían reemplazar las (tintas acrílicas Liquitex) y que proporcionen un terminado igualmente bonito. Te pregunto esto, porque en Colombia no las consigo.
Mil gracias
Mona, did you access this blog via a Facebook post? I had the same problem when I did that. Open it in chrome (or whatever browser you use) and the pictures show up.
Barb, the entire post is filed with ads when I followed a link from a Facebook post. Sorry to share that news with you. I don’t know if it would help to post a comment telling people to open the blog in their browser.
I was determined to see the pictures of the process which is why I read the comments and spent the time with some problem solving.
Hmmm, not sure what that facebook post is. I do have a page but I don’t run facebook ads. I’ll try to figure that out. The internet is a strange place sometimes!
LOVE this and I already have the lamp….hmmm!
‘Rock’ On!!! And sparkle of coarse!