Faux Fossil Forest Coasters
As summer is soon coming to an end I am sad to think about losing all the ‘green’ in my lush garden. I appreciate nature and it’s wonders, especially up close. These ridiculously easy concrete Faux Fossil forest coasters use wondrous leaves and things you are sure to have! Mother nature is so very generous with her gifts…
To Cast the Coasters:
- Large Leaves
- RapidSet Cementall concrete or similar (and mixing container, water, spoon)
- CD cases
- Dust mask and ‘rubber’ gloves
- flat surface/table
Step #1: Get your leaves ready
Go for a walk and look at the leaves. Be conscious of where you get them please. I look around the sides of the road etc. Look for leaves that have a size large enough to cover a circle of at least 3.5 inches (8cm) and a pronounced vein pattern on the back. Cut off the stems close to the leaf. The old grape vines seemed rampant and maple leaves also work well.
I am sure you have some old CD cases somewhere, so take them apart for the flat top and bottom pieces. Any other clear plastic sheet can work as well (prefer not glass)
Step #2: Mix the concrete
Suit up with mask and gloves… I have used this RapidSet Cement all for many projects and I am quite happy with how strong the finished product is. It sets really fast as well so make sure you re prepared. It is an all-in-one mix that only needs water added. This product has quite the plasticity and will seem a bit odd when mixing. It is recommended to add the water first, however I am a bit of a rule breaker! Be careful not to add too much water as it uses less than most mixes, work slowly and add a tiny bit at a time.You want a mix that will somewhat not run away. Waiting about 30 seconds also lets it just thicken a bit. You will see that it ‘flows’ at an even thicker consistency.
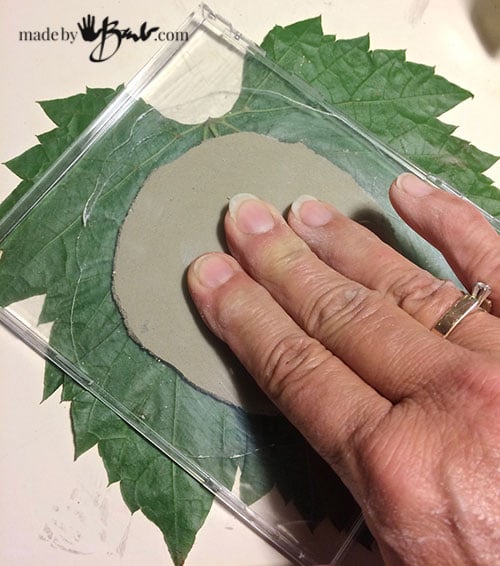
I use about 1.5 -2 tablespoons of mix for each coaster/leaf and make a few at a time. Be sure to put the leaf with the back/vein side up.
Once you have plopped a bit on each leaf, take a CD case and centre over top, and slowly squish it down. Wriggle it a bit and it will make quite a consistent round shape. Do not flatten too much, aim for about 3mm or so. Yes, I know that is thin, but this mix will be able to handle it. To rid of air bubbles I smack it lightly a couple times too.
Yup, that’s it! No mold needed! Just make sure your table surface is nice and flat. See, those childhood playtimes in the sand box come back to haunt you…
Step #3: The Magic Happens:
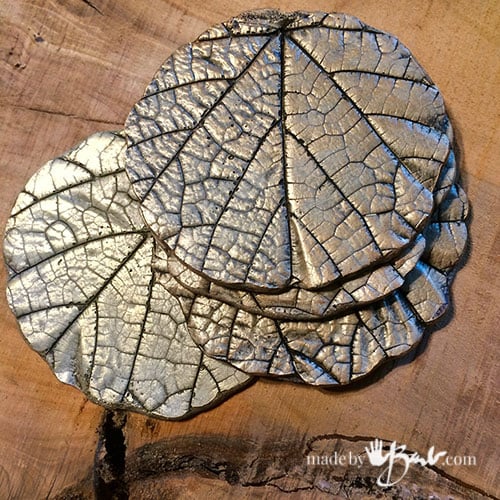
Voila! After about one hour go ahead and peel off the leaf. If you are careful you make even be able to reuse it! I marvel at how this concrete mix picks up each detail of the texture!
The edges are quite clean already however you can sand them a bit.
HINT: to make sanding easy and cheap, I make little ‘sanding discs’ when I have mix leftover. I just plop it onto a flat surface and let it set. Once cured it can be used like a sanding block, as it does have sand in it and does not rip like paper.
Step #4: Finishing the coasters
You will need:
- Acrylic Paint black, copper, silver, gold, (or acrylic inks)
- tacky glue
- Clear acrylic Matt medium optional
- brushes, water, paper towel/rags
To make the texture just ‘pop’ I use the typical method of antiquing. I have been using this method since the my days of glazing beer steins 30 years ago. (ya, I’m kinda old)
Mix a bit of a black acrylic paint with some water to make it quite runny and thin. Use a big brush to sop the entire coaster. You want it to get into all the grooves, and can be messy.
Before it dries, grab a rag and wipe off the surface paint. It will have absorbed a bit of colour to be darker but will now accent the veins.
For the ultimate effect add some dry-brushing with a metallic paint! It will amaze you. Make sure you only have a bit of paint on the brush, (wipe on towel) and then scrub across surface and it will come alive… trust me. It’s the best painting technique ever.
Amazed aren’t you?! (gold version here) I think a bag of concrete can make hundreds…
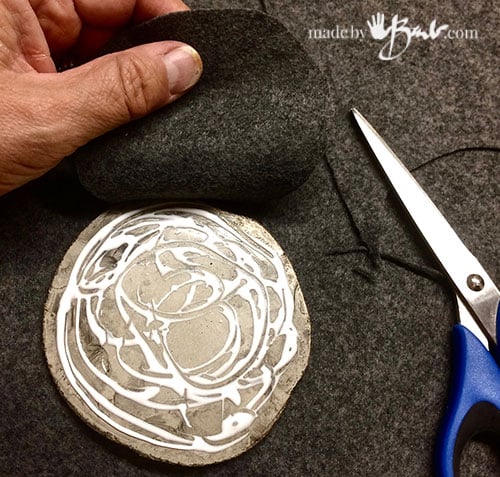
Add some felt backing for protection of the table tops. For extra protection you can also add a coating of acrylic medium in matt or gloss; whatever you prefer!
Imagine bringing some as a great hostess gift! They pair awesome with live edge tables as each is a unique shape. I can’t get enough of these since they are so crazy easy and quick… and love looking at the details.
You now deserve a drink of something sparkly… Good Job!


Once you add the paint or acrylic, don’t you lose the absorbency of the concrete?
Yes, you could leave them ‘nude’ but then they may absorb stains. Everyone has their own preferences… I generally like them natural when outdoors, ‘hate the look of chipped concrete. You may like this: Happy concreting!
I love your ideas and they look easy to do..I will look forward to your topics. thank you
Thanks! Check out all the unique concrete projects under the ‘Home’ Menu. I have a lot of following for my concrete projects… Happy making!
Every weekend i used to visit this site, as i wish for enjoyment, since this this
website conations actually pleasant funny data too.
These are wonderful. Spring is working of growing some leaves for me right now! Meanwhile, what is the cement you use for this? (The link you provided did not go anywhere for me.)
Thank you so much!
Sadly the company has mades some changes so I can’t seem to get a reliable link but here is a supplier Can’t wait for some welcome greenery!!! Happy making!
Love all your projects! Planning on doing a few very soon.
Can you use plastic leaves for the leaf projects?
I suppose of they are really well textured. Real ones provide a flatter finish and have so much detailed texture with this concrete it’s unreal! Make sure to use the Rapidset Cementall!
I made some of these coasters last night. They were a lot of fun to make. However, I used hosta leaves and a lot of them are curve. I noticed when I set them on the table they rocked. How can I make them and stop the finished product from rocking?
Thank you for sharing this fun and easy project.
You are truly gift Barb.
The leaf is flattened by pushing down with the CD case, Maybe you need to weigh it down with something heavier. Good luck
I loved the way youve explained how to make the leaf coasters. Will definitely try to make
Thanks for the guidance
Can you please let me know as how to smooth the rough edges of few small diy made by my grandson , as they are very sharp n uneven after drying .
Regards
I would make some little ‘pancakes’ of concrete with leftover concrete mix. These made nice little sanding blocks since there is sand in it. You can also use a very strong emery cloth but it wears out quickly. Maybe even some rough rocks could be used to sand with.
THANKS FOR HELPING ME WITH WHAT I NEED TO KNOW I REALLY APPRECIATE YOU AND LOVE YOUR WORK
I missed this project at some point. I made leaf stepping stones for my garden years ago. I use my hosts leaves. I loved it then wound up teaching many people in my horticulture group. I charged a nominal fee to raise money for the group. I loved teaching, donating and being busy. The stimulation of teaching others was intoxicating. I was amazed that I could help others and that I had skills others actually valued. I understand some of your motivation Barb