How to Antique Concrete to look Aged

Congratulations on those great concrete masterpieces that you have poured! But don’t you just love the look of really old concrete?! This technique shows how to antique concrete to look aged as I am not a fan of very colourful ‘plastic-looking’ finishes. It is super simple and requires no special painting skills, just a bit of paint. Go grab some concrete…

The Paint and Supplies:
- White and black acrylic paint (I used this )
- Matt Medium
- Flat Wide brushes
- Paper towels or rags
- Your favourite Concrete Pieces or I’ll help you make some:
I have a lot of experience with paint, not just for crafting but as an illustrator I have been using acrylic paint for more years than I’d like to admit. Acrylic has come a long way and am quite impressed at it’s longevity. I have painted banners that hang outside through all elements here in Canada and they have withstood for years. Sometimes they are not even meant for exterior use, imagine that?! I sometimes like to live life on the edge… haha. But if you are concerned you can find the exterior version of paints and work them to this same technique.

I drew inspiration from these old leaf stepping stones that I had cast many years ago. They show off their great texture.
Step 1:
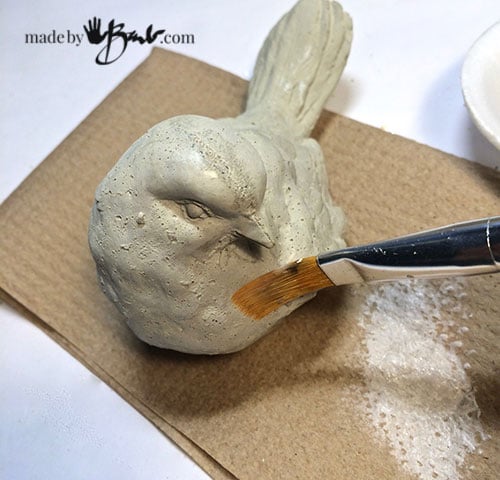
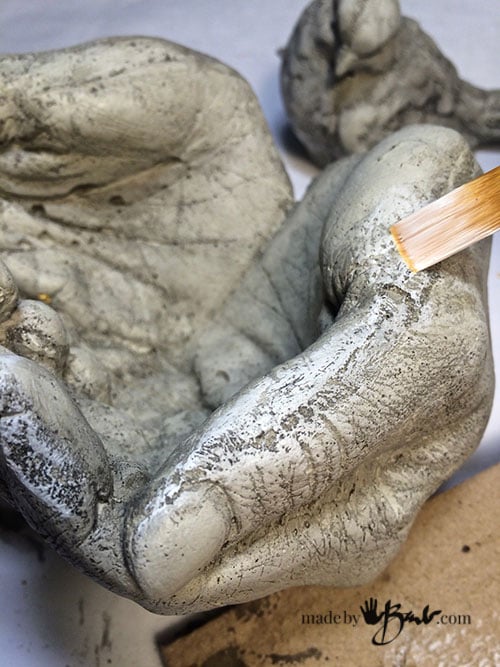
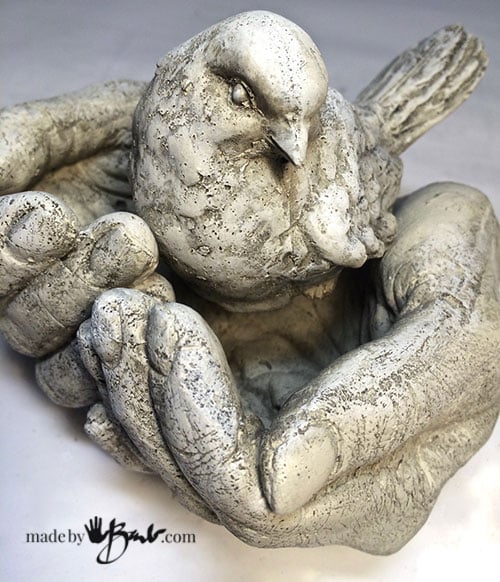
I’m using some of my own cast concrete pieces like the Critter and the Hands. Concrete is very porous and will ‘suck in’ any paint quite readily which will not allow you to control the amount of colour coverage. To maintain most of the concrete colour on the surfaces I give it a dry-brush type scrubbing with matt medium. Make sure your brush has very little medium on it by rubbing off on paper towel. It should NOT be a complete 100% coverage, but just on the ‘top’ surfaces to keep them from absorbing the next layers. Let this dry for a few minutes. (By the way this technique works on many things such as plaster too…)

Step 2:
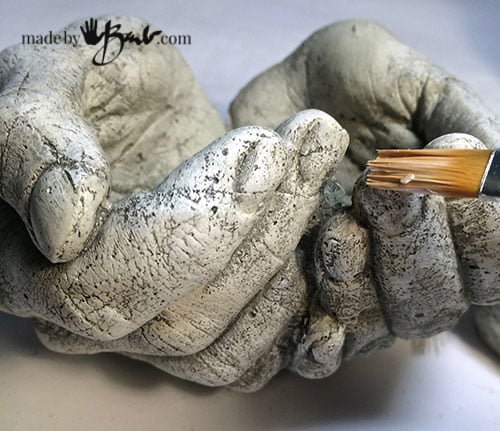
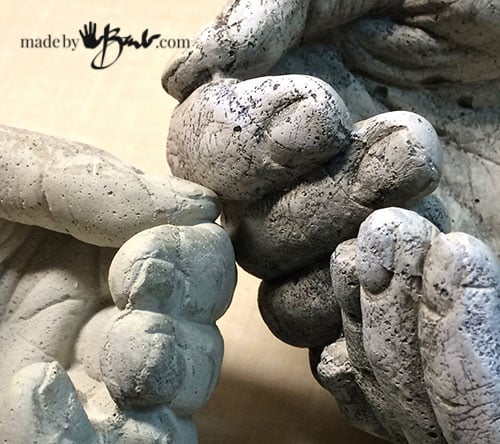
To enhance the textures, mix some black paint with a bit of matt medium and water to make it quite fluid and transparent. This ‘Antiquing stain’ is meant to get into the details and be absorbed by the concrete. It should not be too thick as too fill the details. Spread it without being too fussy, and quickly dab and rub off what does not sit in the details. If it dries it will not give the details enhancement, so work quickly. A damp rag will help to remove the excess as well.
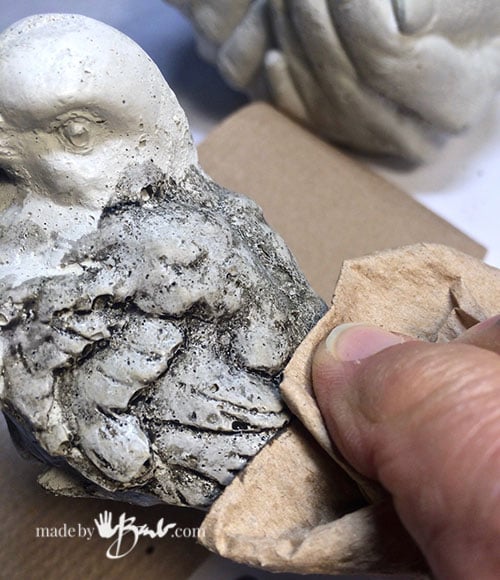
I usually work in smaller sections due to the speed that it dries. See how much it brings out the depth of details and texture.

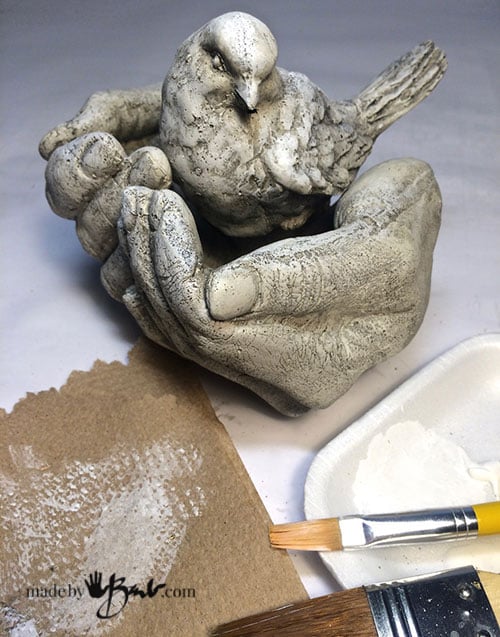
If it needs more feel free to do another layer. This is meant to be a subtle technique that should not even look painted, but just naturally aged. The colour of the concrete still shows through as the matt medium first coat had no colour. If you are happy, consider it done. It is only antiqued, it isn’t really considered waterproofed though. I prefer it not to be so I leave it like this.

Step 1: (as above)

Step 2: (as above)
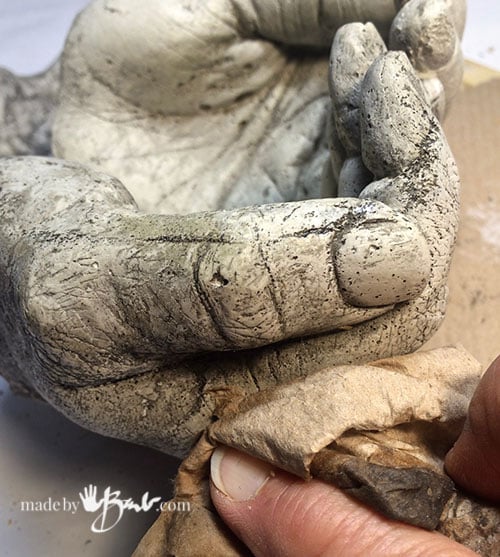
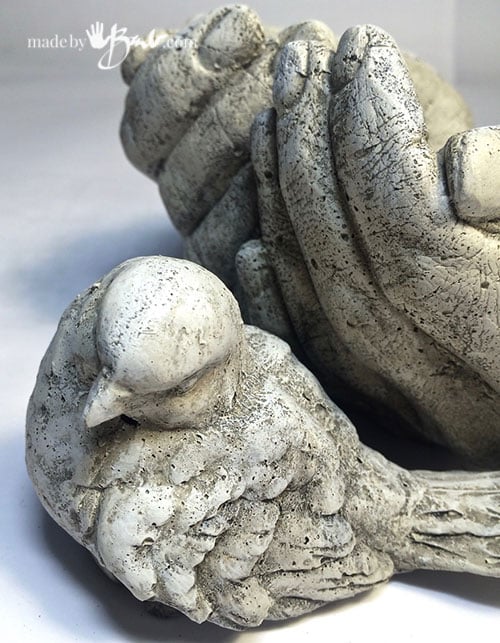
Rubbing off the excess and exposing the details of the concrete fingers. Lovely! This life cast method of concrete pouring is perfect for this as it picks up so much detail in the hands!
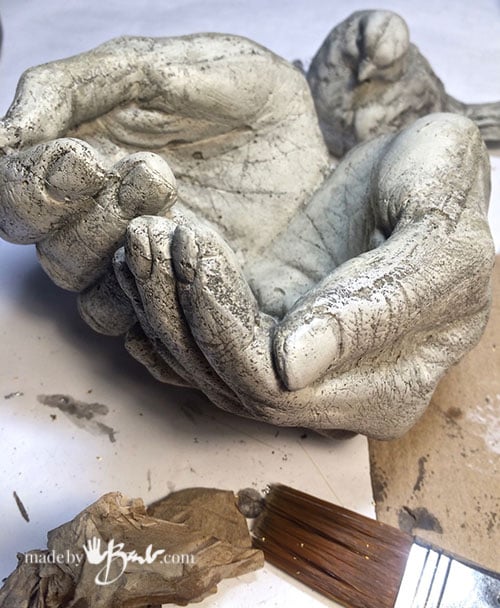
Well done! If you’d like even more aging you could consider adding some mossy green, to mimic the natural growth in the recesses.
Step 4 (Optional):
Yes, I know, the artist in me always gets ‘picky’. For more contrast with the recesses I added a quick ‘dry brushing’ of white to further lighten the top surfaces. Dry brushing is easy, rub off most of the paint from the brush on a dry rag and then ‘scrub’ it on the surface. Very little paint will transfer but it will lighten the top surfaces.
It is a magical painting technique I use all the time…
How easy was that?! You can now call yourself an artist and through around some fancy painting terms.
It makes such a difference to any form that has texture. The options of colour are endless once you use this method. The method of my metallic cast leaf planter is similar but uses copper paint.
As for exterior use, there is such good absorption that it lasts well. The paints fail when they are very thick and water pushes them off. This is a thin technique that lets the concrete colour through. If there is any loss or peeling it will be very unnoticeable due to the transparency. As this is an antiquing method you would use further steps if you wanted to waterproof. My motto: ‘less is more’.
Raw concrete – faux aged concrete… You have the power…
Thanks for the info. How woukd i waterproof it? And the matte medium. Is that something specific?
Matt medium is a clear acrylic paint that is waterproof when dry. It is quite resilient but harsh outdoor conditions will always be a challenge, as anyone with a house knows… It depends how waterproof you’d like it. Best scenarios is where much exposure to water, and temperature change is limited. Sadly even a sealed concrete pool needs regular maintenance.
Hi! Thanks for sharing but may I ask what matte medium you recommend? You have a link that is no longer available on Amazon so it doesn’t say what it was.
I like to use a quality one like Liquitex Matte Medium ‘Hope that helps!
Your technique creates beautiful results! My statues are for outdoors. Do they have to be sealed first, like with acrylic driveway sealer? Or using Liquitex Matte Medium does that seal sufficiently ?
My usual thought is to not seal regular ‘naked’ concrete. I would say that since there is some painting added hear another coat of sealer would be good. But, sadly just like the driveway it may fail over time. I would try to protect it where possible. Outdoor concrete starts to look aged all by itself, I used that technique for mostly indoor decor items. I hope that helps!