Slush Pour your Concrete Mold

Move over ‘Chia Pets’! Everyone is allowed to be silly sometimes, so it’s my turn. Yes, a ‘head planter’ is a bit odd but it’s purpose was to test a new casting system. Make your concrete pouring simpler and see how to slush pour your concrete mold. I love this method! Besides, I could not resist that baby pout!

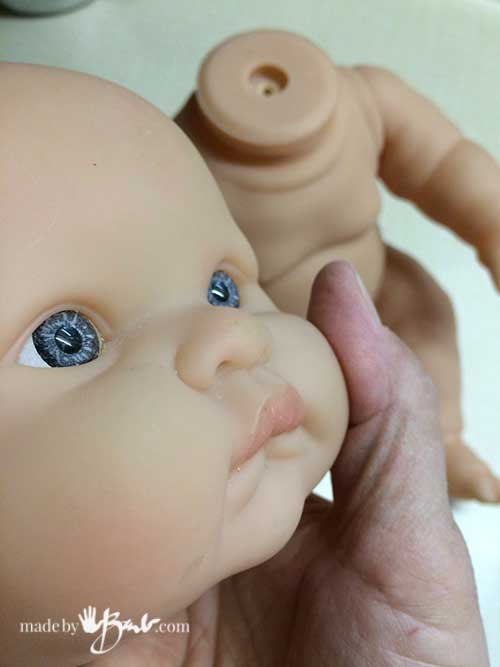
To start this mold making I used this cute little fellow…
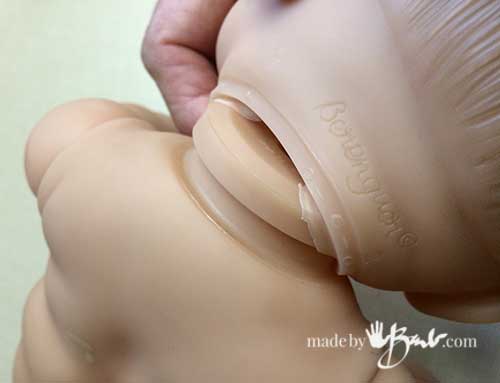
And I popped his head off. (Don’t worry, he is back together now)

My inspiration is this favourite planter of mine. She has aged well and her veil keeps growing gloriously…
Find yourself some type of head or perhaps even a mask.

Before casting I needed to fill the hole on the bottom of the neck. A quick patch of — ya, duct tape!
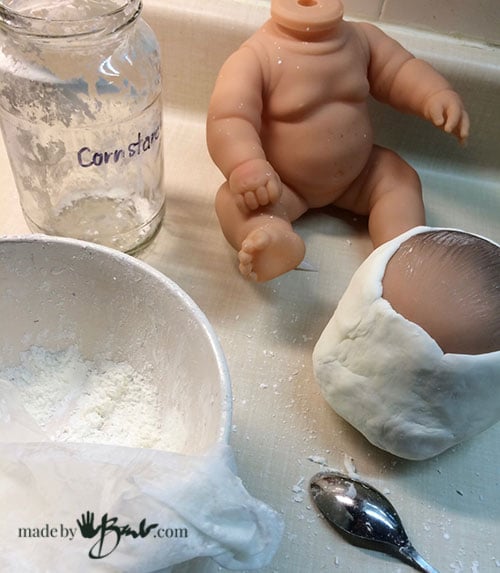
Tools and materials needed to make the form:
- 100% silicone caulking
- cornstarch
- head form
- gloves, bowl (mixing)
- rubber bands/pins
Materials to Cast and finish Concrete:
- RapidSet Cementall & Water (mixing container, utensil, Dust Mask, gloves)
- Concrete reinforcing Fibers (optional)
- Landscape Grass Flocking (moss)
- Liquitex Acrylic Matte Medium & black acrylic paint
- Brushes
Making the Mold:
The method to make this mold is the same as my first mold making tutorial. Lightly apply some vaseline on the master shape (the head). Mix the cornstarch and silicone carefully in the bowl without getting it all stuck to your fingers. Add cornstarch (just as you would add flour when working with dough) until it becomes workable without sticking.
It should be pliable to spread it around the ‘head’ and keep pushing it till it covers up to the rim of the head and fills the bottom. Spread it until it is an even thickness of at least 1/8″ thick.
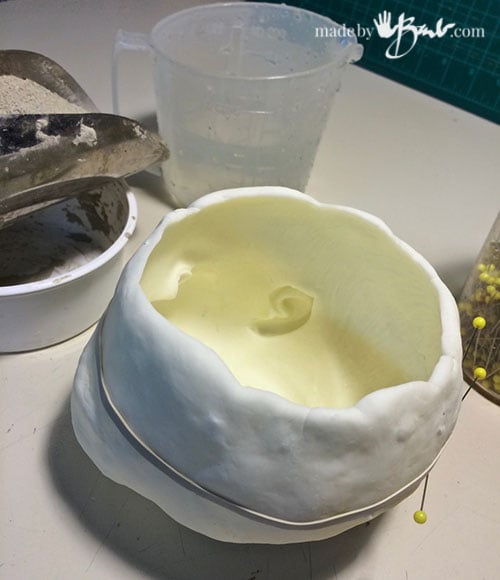
It will set in about 30 minutes. Once it is completely ‘rubbery’, you can cut up the back, or at each ear side. Remove the ‘head’, adjusting by cutting as needed. I am alway amazed at the strength of this recipe! Mold is done!
Slush Pour your Concrete Mold:
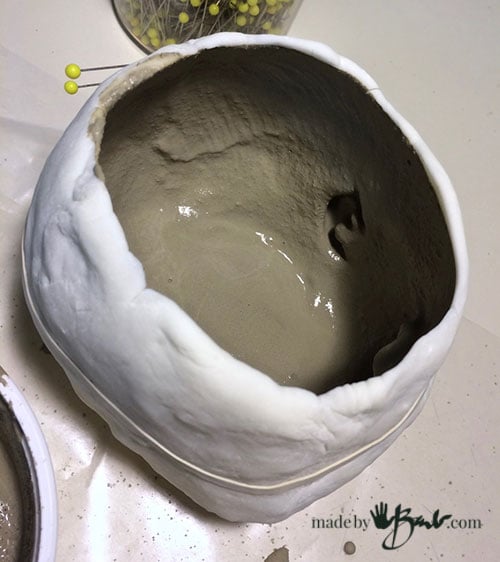
To ready the mold, use elastic bands to keep the seams closed. Since it is a round shape this works well. To ‘line-up’ any seams you can also use my trick: securing with pins. This works well, as they make sure the edges stay together and later pull out without leaving a hole.
As with many of my projects this casting method works best with a strong, rapid setting concrete. This concrete is quite ‘plastic’ and will mix better if water is added first, and then slowly add premix until it has some flow. It has a working time of about 10 minutes. The flow should be ‘slow’ and somewhat thick.
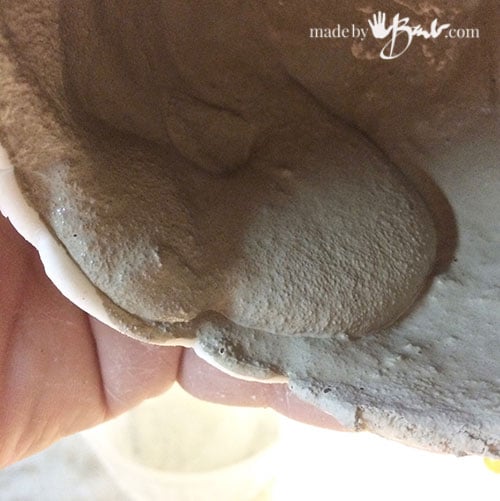
Pour it into the form and start to turn it to coat all the inside. It may take a bit of trial and error until you have the right consistency. Turn slowly and watch for the flow to eventually stop. I discovered this slush-pour method when making the ‘balloon-cast’ monster eggs.

It may not be pretty, but it is easier than having a center form. Let it sit for an hour and then repeat and pour another layer. Depending on the thickness, you may need a third layer. This concrete is VERY strong and can hold well at only 1/8″ thick.
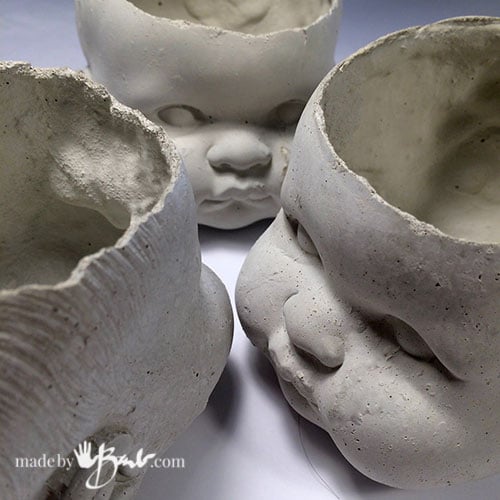
The top edge may be a bit uneven as well, but you can sand it as desired. As a planter it looks quite nice as a ‘broken’ edge style. Don’t worry about any texture that the mold has picked up, it IS concrete afterall.
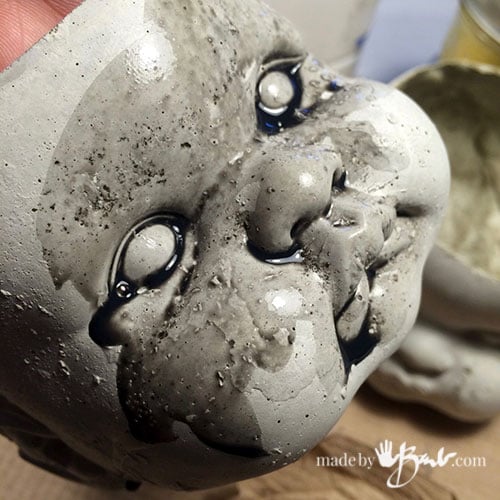
To make it look aged, use some ‘washes’ as in my antiquing tutorial.

Instant Moss:
Do you want the ‘mossy’ look instantly? I came across some of my flocking material from my days as a ‘model builder’. It is also used in model train landscaping and can be found at hobby shops.
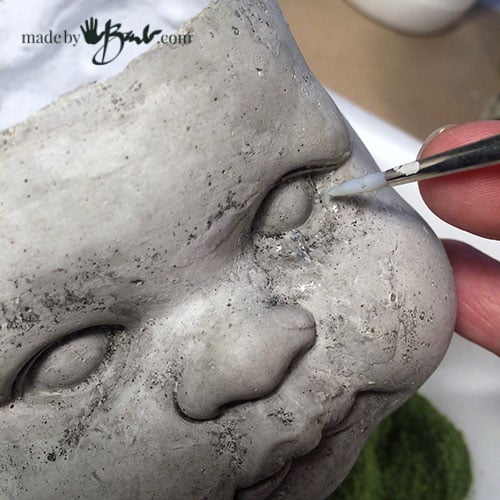
To adhere the flocking; use a bit of matte medium. Brush it in places that would naturally grow moss; areas that would tend to be in shadow.
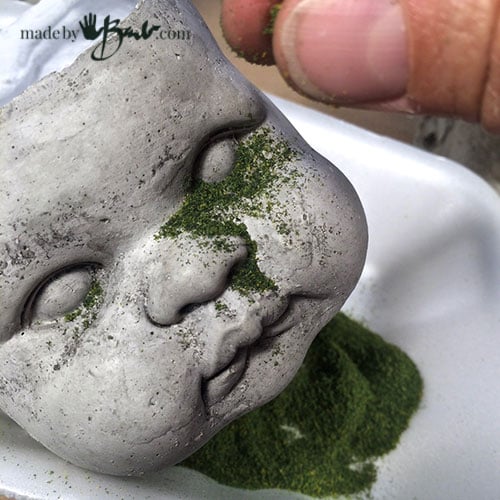
Sprinkle the flocking into the wet medium. It’s the same method you would use for glitter. It’s your preference how much or little. To make it less likely to continue to lose bits, add another layer of matte medium. (If you can’t find flocking maybe you could put some moss in a sacrificed blender/coffee grinder)

I have tested some sealer methods (soon to be posted) before I planted up these fellows. Succulents are my favourite as they never seem to complain and they propagate like crazy!

Quite the hairdos! But this method is not limited to heads. (more projects in the works) It is somewhat reliant on a strong mix or perhaps a thick wall of multiple pours.
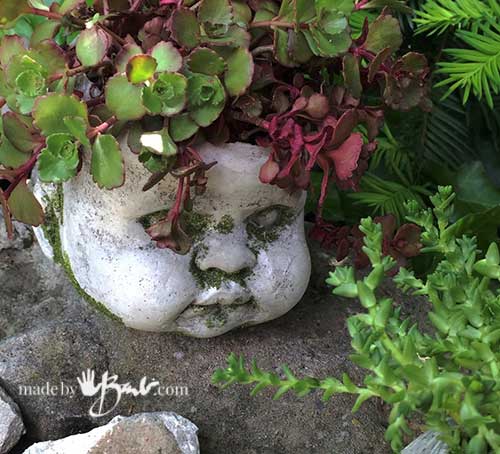
Happy casting and planting!
Can’t get enough concrete projects?! Check out my concrete obsession
I have recently completed some Stain Glass classed and hate the thought of all the Scrap glass. I have seen some cement crafts done with ground glass. Do you have one?
I have some geodes that use glass. ‘Maybe a version of this? Or imbed them in the surface of a trivet like these
Think outside the box…
Got your information about your site from your sister-in-law, Sonya. We have cottages just down the road from each other. She speaks very highly of you Barb and I can definitely see why. I always have 5 girls up for a craft week in late summer. Thinking of trying your Slush Pour molds. They are very interesting, and we can pick up some exciting pieces I’m sure when Thrift shopping. Will continue to follow your work. Good stuff, thanks for sharing.
Great, Concrete is so much fun! Do be aware that there are different mixes that act differently! See the tips & tricks post as well… Good luck!
Can you patch/repair your mold with additional silicone caulk/corn starch after it’s dry? My mold was too thin in spots and tore through.
I had run of silicone one time and had to finish later. I used a bit of the silicone as a glue to the added parts. It worked well.
Hi Barb. With a little experimentation I discovered that I could indeed patch a thin area on my molds. I use Naptha or Mineral spirits as a glue. Just brush it on & put a small patch of new silcone mix over the top. Feather the edges. It is standing the test of time. Im delighted
Interesting, I would think the spirits just acts as a cleaner to assure a good bond. ‘But whatever works! Thanks for feedback.
Ok. I’ve tried 5 separate times and just can’t get it right. Are these one-time use molds? The first three completely shredded as I was taking the original out of the molds…too thin at about 1/8″ thick? So the next two I made at about 1/4″ thick. These completely stuck to the CementAll and had to throw them away. One part even looked like the silicone didn’t harden. At this point I’m invested (money and time) and am determined to get at least one usable piece. Thanks for any insight. P.S. I’ve worked with different clays in the past: ceramic, polymer, etc. and have never had this much trouble manipulating a medium.
Hi barb, I love your website! I’m making the doll heads, and was wondering if you add sand to your slurry? I’m having trouble with the consistency. I’m using quickcrete, which is a quick drying cement. I haven’t been adding anything, and I’m wondering if this is my problem. My heads are not coming out of the molds smooth. I find myself doing a lot of sanding. How do you get your doll faces looking so perfect? Thank you.
Your fan,
Carrie
I’m glad you did not say they were breaking, that’s a good thing. Honestly, the RapidSet Cementall is such a dense mix that it almost doesn’t look like usual concrete. I’d rather have more texture but it is super strong at a thin wall. I don’t add sand, and the ‘sand’ that is in the mix is super fine, unlike other concrete. Maybe a thinner pour to be smoother to fill the mold followed by a thicker will make it fill in the shape better, and do tap/vibrate to get the little bubbles out. I have even tried a thin pour of portland cement to coat the mold walls and then the regular concrete after. Lots of options in the concrete world 😉
Quikrete makes many mixes, not sure which you are using.
Thank you for responding so fast. I’m using hydraulic water stop quickrete. Ill try a thinner pour again. I absolutely love your ideas…so inspiring!
Thanks again,
Carrie
Awesome tutorial! I’m trying to figure out how to make a version with a slightly flattened backside so that I can use it as a wall mounted planter. I was thinking that I should make an initial mold of just the face and neck with the back of the head open, fill the mold fully with the face so I get a solid piece with a flat back. Then make a mold of that piece as you described here? Does that seem like it would work? I am a beginner with no experience on adapting/changing molds.
Maybe you could find a doll to cut through and add some clay into the void and flatten. Maybe even pour plaster into it so it good and stiff for the making of the mold. You would have to cut it quite well though. Maybe a dremel with a cutting wheel? You could also try to make a very flat piece of a stiff board that could be well glued to the half doll head at the back. What to use though? hmmm… Good Luck and let me know.
You are simply Amazing! I have been making Hypertufa planters. Off and on for 18 yrs. I ran across your site and saw the doll head pour. I’m in love with these. My problem is that I can’t purchase Rapidset creteall. Not within a 100 mile radius. And I SO want to try the doll head planters. Is there anything that is equivalent to it in the Quikcrete brand. Thank you so much! Your such an inspiration.
Haha! I have been testing the Quikrete brand lately (wish they were would be more supportive, hint hint) I have used the FastSet Allcrete and it sets fast and strong too. It ends up darker colour though. So far I’m happy with it!
Why are there no images of any of the processes or end results?
There are many! see here Have some concrete fun!
Hi Barb, thank you so much for sharing this. A quick question I made my first head and it came out perfectly, I did deviate a bit using a Quickset brand of concrete but it took awhile to set so I followed your directions to T the second time including brand of concrete and while it set very fast and was very hard it stuck horribly to all three of my molds when the first batch simply popped out. Any ideas or experiences with this issue?
I find that the concrete does need a bit of working at it to release from the mold. When had used some ‘Pam’ spray on my concrete bowls it did build up in the mold so I’d rather keep it clean. If you want to try a release maybe a thick oil like vaseline or silicone may help. I was also worried if it repelled the fluid concrete then the slush pouring would not work. It’s all about trying and testing. Hope that helps!
Thank you for your inspirational posts. I love concrete!
Yes, I never knew how versatile it is! I think it all stems back to when I was a young kid and wanted my parents to buy me a potters wheel and a kiln so I could make ceramics and they said no. Concrete is my way to make pretty solid things without a kiln. Well, maybe I still want one… since I love trying/perfecting all kinds of media.
I believe in the potting industry they call this approach, slip casting. They make a very wet, pourable clay mix called slip, then rinse it around inside the mold, and pour out the excess. When the clay shell dries inside the mold, they pour some more to build up the structure. It’s like dipping candles only in reverse.
Ah yes! ‘Sounds like you are quite the maker! I remember working with green-ware many years ago. There were shops everywhere and they would also do the firing of the pieces. I miss them. Thanks again!