Simple Soda Can Concrete
Once you really start to look around there are so many ways you can make things, especially concrete things! This project can’t be much easier; it’s probably easier than making pancakes! Soda cans are everywhere, and can make cool shapes when wrinkled. (lightbulb-over-head-moment) Why not use them as a disposable mold?! Ta-da! Anyone can do this! Ok, I’ll soon have to join ‘concreters-anonymous’…
I am using a quick setting concrete again and using the same concept as my other slush poured heads.
To make the Simple Soda Can Concrete:
You will need:
- soda cans (I make a few at a time)
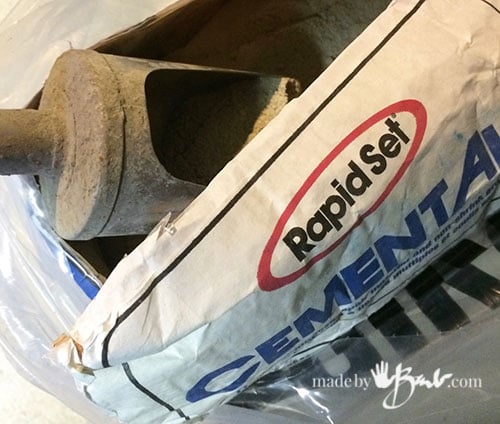
- RapidSet Cementall
- Rubber gloves & Dust mask, gloves for hand protection
- Mixing container, utensil, water
- strong scissors or tin snips
- pliers of some sort
- stick or broom handle (will not be destroyed)
- acrylic paints to finish
Step #1: Get the cans ready
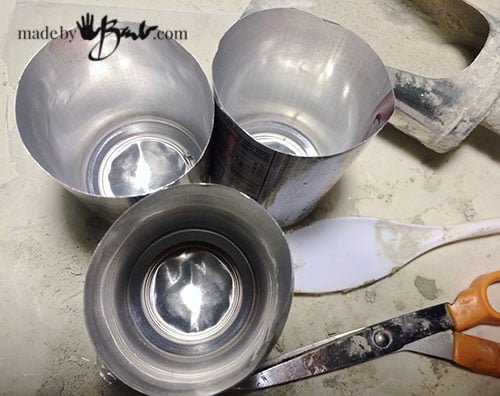
There is something about the engineering of the bottom of the can that makes it so strong. To make removal easier later on I found that pushing the bottom to bow outwards helped. Force a broom stick or other stick into the can bottom until it ‘bumps’ out the bottom.
Tin cans are quite thin and can be cut quite easily with some scissors (just don’t use your best ones) Protect your hand with some gloves as the edges become sharp. Cut the top off just after the top ‘neck’.
With gloved hands, manipulate the can til it has a nice amount of dents. Have fun with it, it will hold it’s shape.
You can cut some small slits into the top rim to make pealing back later easier as well.
I get a few ready to do at a time.
Step #2: Mix the concrete
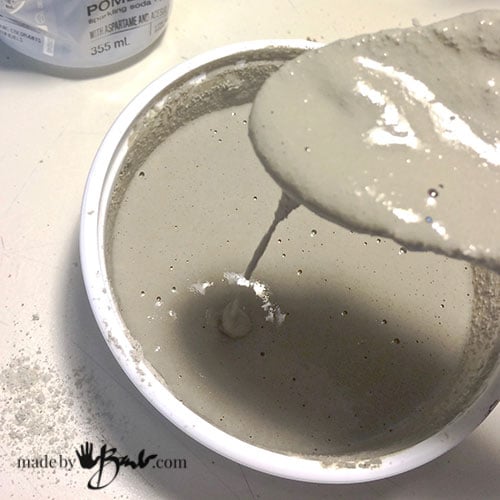
This mix is quite fast setting so you want to be ready. It also mixes a bit differently than most mixes at about 1 : 4 ratio of water to mix. I add the water first, not adding too much since it readily absorbs more mix than you’d think. (like working with icing sugar)
The consistency should be on the thin side, so that it will pour and flow. It does also tend to just thicker after a half minute. Mix again until flowing.
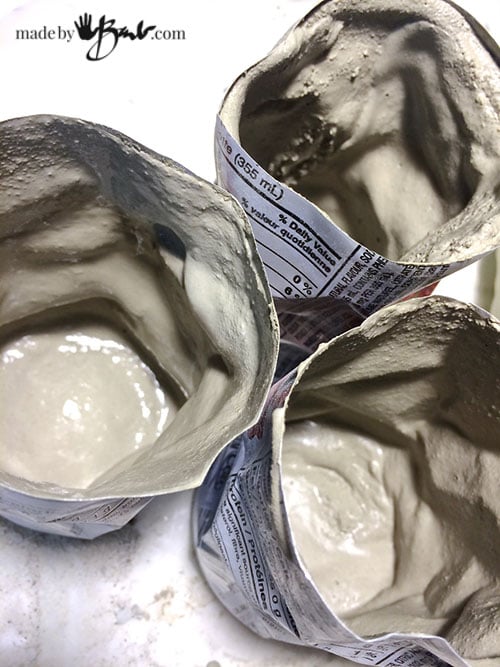
Pour some into a can and rotate to coat the insides. Slightly tap to keep it flowing. If you had mixed a lot you can pour some into another can. It will stop running after a few minutes so slowly rotating will help stop it all from gathering at the bottom. It isn’t that difficult as you can see inside. The top edge can be irregular as well so don’t be fussy.
Being an artisan isn’t about perfection, it’s about managing media to work with you. You’ll be much happier of you just let it have it’s characteristics.
Turn slowly, it will set, I promise you. (10 minutes, tops)
There you go… Wasn’t that hard was it?! It may be quite thin depending on the consistency of the pour. Within the hour you can add another layer of pour to strengthen. Since this is a high strength mix it can be as thin as 3/32″.
Step #3: Taking it out of the Soda Can
So, you didn’t have to make a mold, but now you will sacrifice it. Rip some strips down the sides.
My bad! No gloves, but I was using the pliers with that hand.
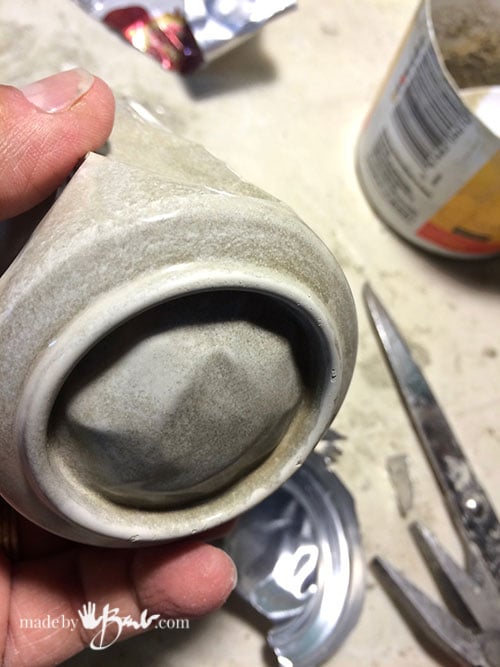
It is easiest if you make some slits in the top edge to tear strips downward. Work to the bottom as it is the most stubborn part. Tear across the bottom to finish the removal. (the dented out bottom has made it easier)
Since the surface inside is shiny, it casts very shiny as well. It is also very strong for a thin pour. They are quite lovely already. Imagine some marbeling with colour mixing…
Step #4: Finishing your Simple Soda Can Concrete
If you know me by now, you know that I think part of the charm of concrete is the natural finish. So, by all means, just leave it natural… Or give it a slight finish.
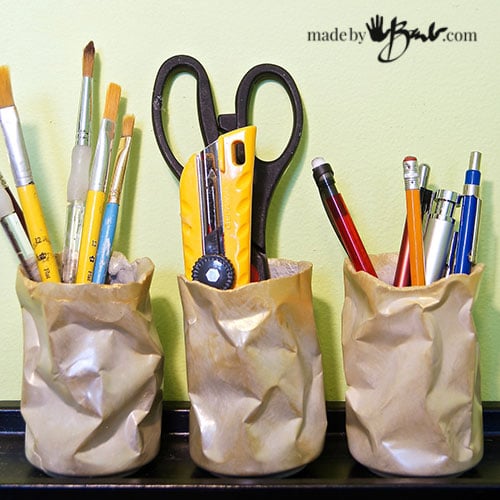
Yes, you guessed it; I dry brushed with some metallics. That adds a new metal look and is subtle. It will have everyone scratching their heads wondering; ‘what the heck?’
Ok, so how cool is that?! Made from what you throw away (I mean recyle)
The details that it picks up is great.
Make a few, so quick and cheap. I bet this could be developed into something even more elaborate (there goes my ‘concreting brain’ again…)
Enjoy!








I like this one, too. Might need to buy some pop! heheh
It’s a funny project. I look at the recycling bin in a whole new way! You could use beer cans too!
Very cool!
I had come across a large beer in the forest (darn litterers!) and made a taller one the other day! Fun stuff!
Barb I see you use Cementall, but I purchased Quickcrete because it was a whole lot easier to obtain. Is there a big difference or can I use what I have? Love your projects…keep them coming..
Well, Quikrete is a brand. Which mix do you have? They make a Sand Topping mix that I have used for the stepping stones as it is strong when it is thick enough. Unless you have a quiksetting type that is similar to Rapidset Cementall it will probably not be strong enough at that thin a thickness.
You could use the sand topping mix for the Concrete Bowls
Hope that helps…
Doing stepping stones with my students for our community garden.
Awesome! I make some every time I cut rhubarb since they are so easy!
For manipulating the can once the top is cut off, I took a dish towel, folded it into thirds lengthwise, then rolled into a tight cylinder. I inserted it into the can opening. It made it easier to crinkle the cans.
Good stuff, Barb. Thank you for sharing!
I’ve got three cans ready for concrete or to make molds from them. Choices choices choices.
How long do you leave it before you try removing the can? I see where you said 10 minutes before pouring a second coat but when is it safe to completely remove the can mold?
That Rapidset Cementall concrete will cure in one hour! It will go through heat stage and you will see once it’s cured. Be careful with the very bottom removal, it can be stubborn!
I make small cement items and have some that would look great if they were shiny. Is there brand of glaze (brush on preferred) that you can recommend? Or an alternatve?
I am trying to achieve a glazed ceramic look or close to it.
Thanks for any info you might have
I would look for the products for concrete counters in your area. It also depends on whether it will be outside. A pretty strong/shiny finish could also be resin. Most will darken the concrete however.