
Colourful Cochineal Eco Print


It never ceases to amaze me what treasures that ‘Mother’ nature has up her sleeves! As I fall deeper into that obsession of dyeing and printing with natural materials I discover even more wonderment! Combining some pre-dyeing with eco printing leads to a colour explosion. Let me introduce you to Colourful Cochineal Eco Printing!

It always amazing me how I get drawn it… On a recent trip to a small shop with all kinds of fibre and dyeing goodies I went berserk! I was on a mission to get some indigo (more on that soon) but I found something else; small little bugs!
What the heck is Cochineal?!
Cochineal is a tiny tropical scale insect which creates natural carmine dye. Amazingly, there it was, a little container of dried tiny tiny bugs. And according to the knowledgable fellow it is an amazing dye that gives great colour. I was quite intrigued!
Cochineal is known to give much colour for the small amount of material. As little as 3% of the weight of fibre that you are dyeing can give good colour (calculate weight of material against weight of cochineal) 10-20% will give string colour.
How to use Cochineal
The little dry carcasses (don’t worry, you can’t really see any arms and legs) can be ground up either in a mortar and pestle or a coffee grinder as this is a food safe anyway.
It grinds quite small so it can be used as is or strained out of the water. I have tried both methods with success. I use a scrap of organza as a fine mesh strainer similar to making tea.
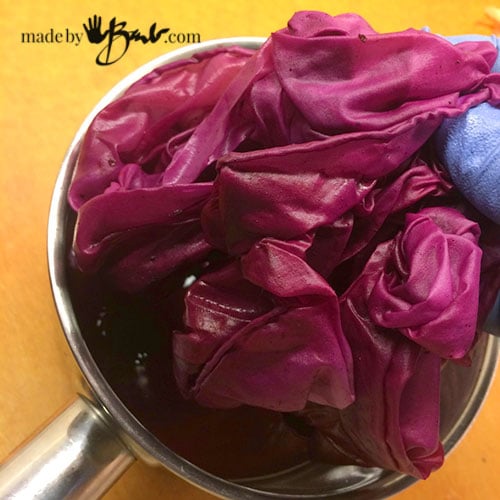
Once the dye water has been made I add my silk fabric to the pot and slowly bring it to a low simmer. Heat can kill the colour so I’d rather bring it to a low simmer gradually. I hold the heat for about an hour and then let it sit and cool over night to set even more colour.
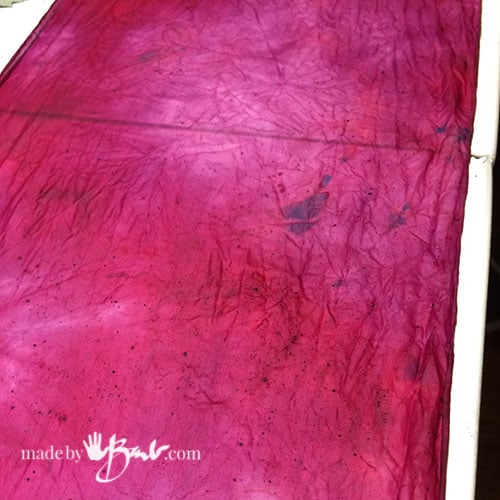
Lovely strong pink! Note the dark specks? Those are the residue of ground cochineal. They may give some darker spots so you may want to strain the dye-water. I am not too concerned with perfect even colour.

The Bundling
I rely on my favourite leaves to print; sumac and maple. These were used fresh however dried can also work. As stated in the introduction you will need something to wrap the layers around.

Lay the silk flat and place the leaves. The fronts and back print differently so vary the pattern as you like. This method does not dip the leaves in iron water.

The key is to have everything as smooth and flat as possible for defined prints.
Rather than soaking/dipping the leaves in an iron-water solution I use an iron blanket here. Old cotton sheets ripped into strips are soaked in a weak iron-water and wrung out well. This way the iron comes into contact around the leaves rather than on them. It is then carefully laid over the leaves.
As a barrier to stop bleed-through another layer of plastic is placed above the iron blanket. (strips cut from drop sheet plastic can be tailored to the right width) Flatten and smooth before rolling tightly.

The bundles are then wrapped with string and ready for the pot.
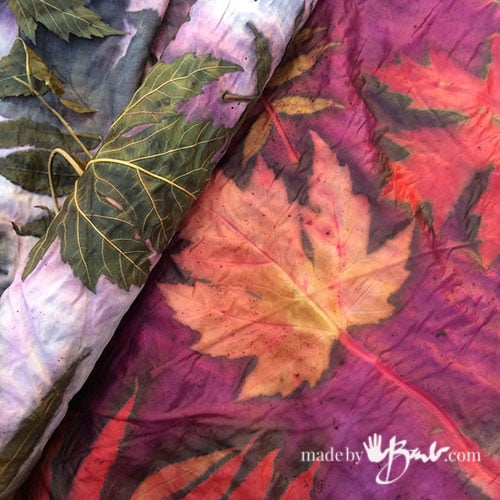
Be aware that this instruction shows how it has worked great for me however results may vary according to many factors. The iron-water strength, the leaves, the fabric, the water PH, all play some role in the final outcome. But that is what makes it interesting! It truly is ONE OF A KIND!
The Eco Print Processing
I prefer to steam my bundles as then there is less water and also less darkening at the ends of the rolls. These have been steamed outside on a BBQ side burner in an aluminum lidded roaster. Make sure to check that the water does not disappear! I steam for about 2 hours. I can usually start to smell some odd aroma from the leaves ‘cooking’.

When I unrolled my first Cochineal dyed piece I almost lost my mind with the amazing colours! I was hooked even more now! I can barely keep up with buying silk…
To allow a bit longer chance of picking up colour I sometimes place the steamed rolls in a blanket as they will hold the heat and ‘process’ even longer. Once cool they can be unrolled.
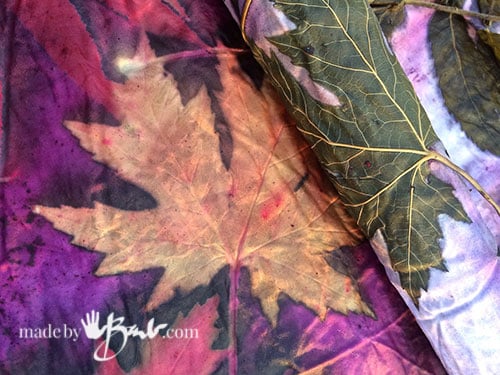
Go ahead… Do a ‘happy dance’! I am sure that I did! As an artist who has painted for so many years of my career this just astonished me so much. The variation of the pinks and purples and reds! I believe (no chemistry degree here) that it is all about the acid and alkali reacting with the dye. Many reds change according to acidity as seen with red cabbage. Cochineal however is not fugitive and has great lasting ability.

Once dried and ironed I can’t seem to stop looking at it…

…or taking pictures!

Oh, by the way, my apologies to the little cochineal fellows (actually it’s the females, figures)! Take comfort in the fact that your ‘colour’ shines on for many years to come and we will be in constant awe of your amazing abilities! Thank you!
And thank you to my readers for joining me…
Hi Barb,
Toni here, with another question.
I mentioned in my email earlier today that I am using a silk scarf with your technique.
I have also been reading about the need to mordant fabric for permanence. Can you tell me if something in your process acts that way or should I be doing something with the white silk before I start with your process?
Thank you so much! Can’t wait to get started.
Toni W
I do sometimes use a soak in 50% vinegar-water mix with silk. The iron in the blanket provides the mordant which reacts with the tannins of the leaves. Some also use presoak in Alum. Cochineal is very PH sensitive so doing some pretesting with your specific conditions/materials is best! There’s such an element of surprise in this art form, don’t get discouraged if at first the results are not as expected. Good Luck
Thank you for sharing your knowledge!! Found you on Pinterest looking up Eco-Dying. I have seen you comment that you make your iron water by soaking some rusty iron items in water…and I know it is a matter of experimenting but could you advise if you soak for minutes vs days or longer? Trying to get a good starting point. Thanks again. Your tutorials definitely warrant a donation which I am making now.
Oh aren’t you kind! I would say you need to soak the rusty stuff until the water gets an orangey colour, which is usually days. Another option is to buy ferrous sulphate. It’s all a process and experimentation…
Did you let the cochineal dyed scarf dry first before setting up your next step as a bundle? did you mordant it before this step?? I love the effect with sumac and maple but do not have these in my climate…do have eucalyptus and other more Mediterranean trees and plants ..any suggestions as to good foliage ?….Very Interesting what you said about not letting the cochineal tincture get too hot….I am just gonna experiment with all of it….
Thank you for this great tutorial…when I am flush will chip in Abrazos
I did not let it the dye dry, as I feel that the bundling needs the slight moisture as well as from the iron blanket. I am envious of the euca but I am not sure what other you may have. I had to do a lot of experimentation until it all just worked. You can always do a second dye as well… The mordant is the iron from the iron blanket. Sometimes I use a vinegar dip for the silk prior to printing. Have fun!
Hi Barbara…I have tried several times now with paper and getting ready to do some silk. A question…do you wet the silk first…and with what? Vinegar, Alum? Was a mordant used with the cochineal? Thanks…..for all the great photos and advice.
I have used a diluted vinegar soak for the silk as well as mordant. Silk is a protein fibre so it prints easier than paper or cotton (cellulose) The cochineal is quite PH sensitive so it can sway the colours into different directions. It’s quite an experimentation. The iron blanket gives the mordant as well. Do a test run. If it’s too light it can be printed again. If too dark, lemon juice/citric acid will lighten it… Have fun!
Where do I find the cochineal bugs?
Thank you for the wonderful tutorial on this Dyeing method! I can’t wait to start experimenting.
I got mine from a local canadian shop but you can also get it (them) at Dharma or other online dye supply shops. They usually come as shown in the tutorial, little dried bugs.
Thankyou again Barb these posts are a real help to get me playing and going in the direction I want to…I’ve had some beetles for years and have wanted to try them and now feel confident. I believe you can also use acid dyes so. will try those too. Would like to print onto wool as well as silk
Each fibre reacts differently so do a test run first. Those little bugs are temperamental! And very sensitive to PH. They have been giving me a wide variety of results lately! (lil’ buggers)
Barb, hi from Australia.. thank you sooo much for sharing.. I found your microwaving technique.. then followed the links and loved your teaching style so much I lost myself in your website! .. wow.. I have had eco printing lessons, .. but sometimes I just plain forget how to do something…..I found you ‘talk’ and explain things really well.. I’m hooked! And will be following with glee your next adventure. Perhaps .writing a step by step book for dummies????
Thanks for the kind words!(I also teach in a college, so that’s nice) I may consider an eBook if I can tear myself away from the ‘leaves’ long enough! And you have eucalyptus; I am so envious! Happy printing!
Thank you for this! clear instruction for eco dyeing/printing can be so hard to find but this is wonderful 🙂
Yes, I know!!! It took me so long to decipher the mystery as no one would divulge!
can you use the bottled cochineal instead of the real bugs Im assuming that the stuff you buy in the supermarket is made from real bugs at some point thanks for all your tutorials they are truly invaluable and interesting to read Im also from Australia
I have no experience with that as I have not ever seen it. When in doubt do a tiny test. I’m in Canada, no eucalyptus here 🙁
Hi, I loved reading your blog about cochineal dye. You wrapped the silk and leaves in an iron blanket. What is that ? I never heard of an iron blanket.
Thank you , Maria
Haha, since I’d get many of those questions here it is! Happy making!