
DIY Gigantic Concrete Leaf Orb

I like competition and especially winning! This was my entry to the Quikcrete-1-Bag-Wonder Contest. ‘Take a bag of concrete and create something unique.

Well, I’d say I should have won, but I guess ‘beer’ won out. I’ll get over it eventually as I can now enjoy my unique creation in my garden (which incidentally won a Trillium Garden award). You too can join the fun and make your own DIY Gigantic Concrete Leaf Orb.

The Concrete Mix:
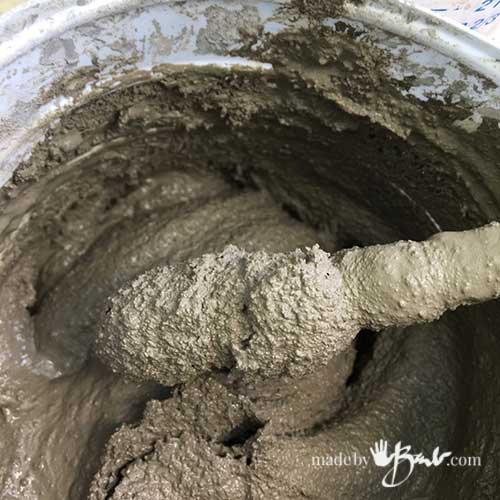
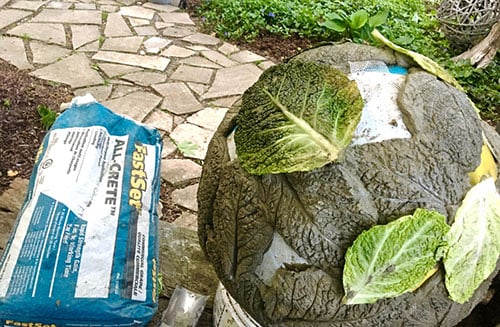
As you know I love to use Rapidset Cementall but since it was a Quikcrete contest I needed to use their product; Fastset All-crete. (may be under a different name in the US) I know it can get confusing when choosing a mix so I’ve made a post here to help you.
Once you have used fast setting mixes it’s hard to go back… I know.
The Mold Material:
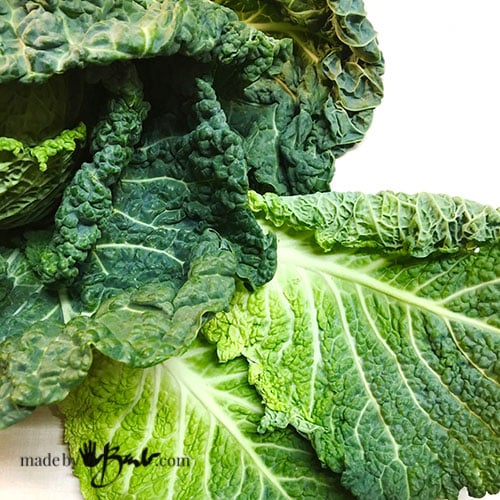
It’s old news that many use Rhubarb as a way to cast nice detailed leaves. I don’t have enough production of Rhubarb so I was looking for an alternative and came across one at the grocery store! ‘Artist brain’ is always looking at things in a different way. I’m the only ‘crazy’ looking at food for it’s great textural value.
Savoy Cabbage is perfect! It has such great pronounced texture and it is quite sturdy so it lasts well.
The Process:
Get Ready:
Gather your supplies
- large inflatable form (24″ beach ball worked well)
- bucket or bowl to stabilize the ball
- Gloves and concrete dust rated mask
- FastSet All-Crete
- Fibreglass drywall Mesh
- Mixing Vessel, spoon & water
- Savoy Cabbage leaves
- scissors
Step 1:
Blow up the ball and set it in an appropriate container that will keep it from rolling or toppling.
Mix up only small batches as this will set quite quickly. I use a container that is about 500ml (yoghurt). If you let it sit for about 30 seconds it stiffens nicely to make applying easier. Aim for a consistency that is quite pliable and plastic-like. You will get the hang of the consistency after a couple mixes, don’t worry.

The Forming:
To ensure strength it is key to have good over lap of the shapes and reinforcement material. The first layer is thin leaf shapes that join allowing the mesh strips to be layered over.
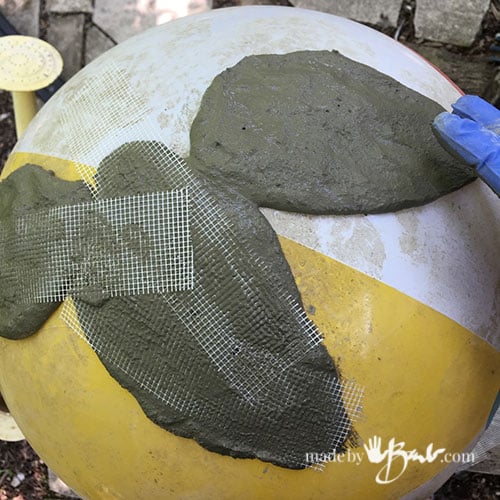
Make sure that you have good connection to the shapes. I work form the top middle outward.

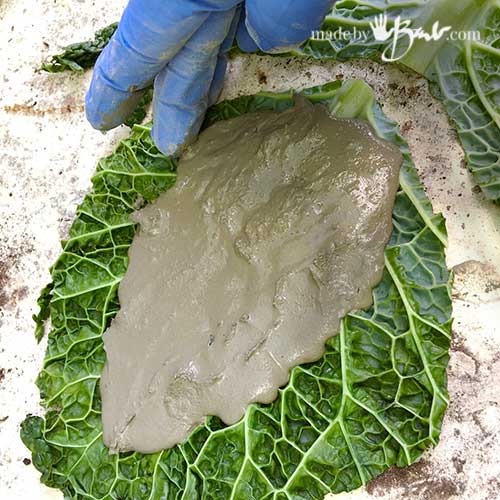
Since the Cabbage leaves are quite large they will probably need trimming to shapes that match roughy the size you intend to use on the orb. You can use larger if you like as they tend to have some curvature as well. If they are too stiff, you could leave them to wilt a bit in the sun or zap in the microwave for a bit.
You are using the underside where the veins are. Put some mix on the shape replicating the size that you have on the orbs.

Quickly but gently ‘slap’ the leaf onto the one on the ball. Wriggle it to make good contact with the concrete. You can peek under to see how the shapes are joining and adjust if needed.
You can be fussy or more ‘rustic’ if you like The overall charm is the leaf textures anyways!
Around & around:

I work outward from the middle of the top and slightly rotate the ball to work outwards when it is hard enough. Keep the idea of gravity in mind. Do leave the valve opening accessible as well. The mesh also helps any shapes from sliding.
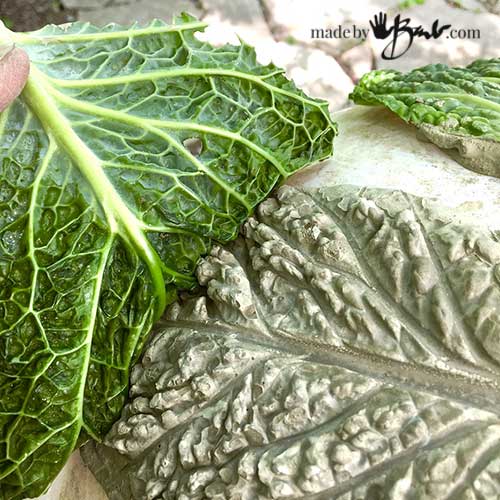
Since this mix sets so quickly I found that the leaves could easily be pulled off in a short time (will depend on your conditions like temperature etc) I even discovered that the cabbage leaves are so hardy that they will last through repeated use!
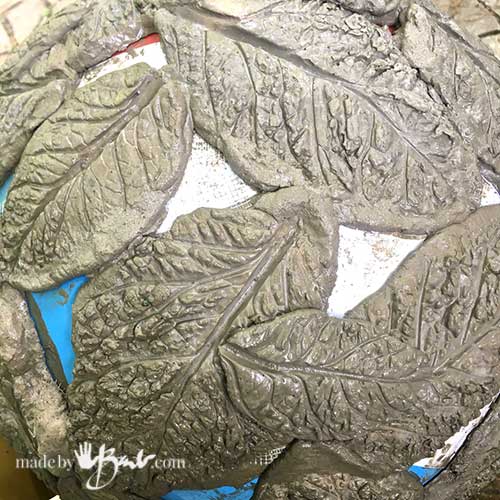
Wonderful Texture! If you have any concern that there are some weak spots where overlap did not occur that much you can add a leaf on top extra assurance. If it is really hot misting with water will help slow the curing a bit.

Do let the final shape cure well. I’d wait 24 hours to be sure. Open the valve and start to deflate the ball until it is small enough to pull out.
Any excess mesh can be cut or singed off with a mini torch as I did with these orbs.
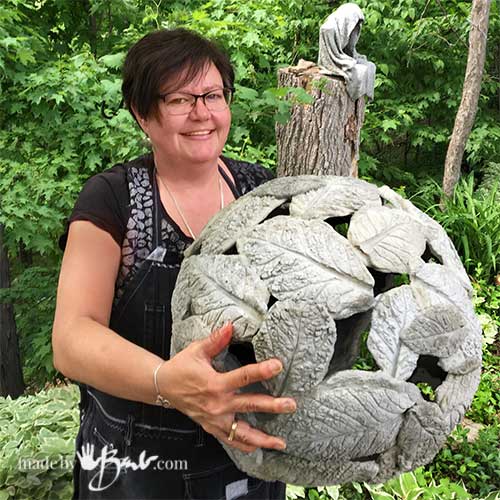
The wonderful thing about these orbs is that they are light enough to carry! That one is about 25″ across and I can hold it no problem. It has such interesting shapes I’m hoping to install lights as well for great night lighting effects.

As a garden designer I believe that the ornaments should look natural in the garden not ‘kitschy’. That’s why the leaves work so great. They also echo the stepping stones that I have a ‘million’ of!

I am so delighted with this orb, I think it’s my favourite of all the orbs (but who knows) And I keep getting bigger! Bring on the exercise ball…
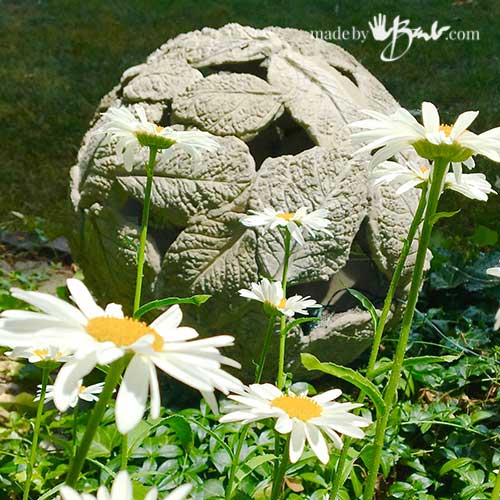
Garden delight… and wait til the snow in winter. Thanks for joining me in my garden and my concrete obsession! Go beautify your space!
Barb-
Thank you so much for taking the time to write these instructions! I absolutely love all of your work and will definitely attempt this soon as it is spectacular!
Yes, I tend to have posts that are too long… Too many pictures! I love ‘eye-candy’! and making…
I think all the extra pictures and info help a lot I like that the more pictures and for the better I think great job love it
Never too many pictures or words! Some of us are visual learners and some are auditory learners. I, for one, am very visual. Sure I could read ( and 1. 2. 3… steps are best) but I catch on much quicker with pics or hands on. I can’t wait to try a small version of this as a first project! I have a project in mind that I need lots of practice on. Thanks, Barb!
Yes, I know from my many years teaching at a college. Expectations are changing nowadays…
This orb was not only different but a wonderful addition to a garden. My question is, will it last throughout a Michigan winter?
Well, since it doesn’t hold or collect water it has lasted well through my Canadian winters! It is a pretty dense mix as well. I don’t seal my concrete either. My other smaller ones have also faired well outside Happy making!
Oh, I LOVE this!! So want to try this, thanks for sharing.
Just sooooooo cool! 😀
I’m glad to inspire! If it’s your first concrete, do some tests and check out here. Welcome to the concrete obsession!
Thank you for this great idea! I attempted last summer without success. This may be obvious to others, but am I to understand that there are two layers of concerte for every leaf? One that sits on the ball, with mesh on top, and one covering that; with the leaf print on its outer surface?
Thanks again! I’m hoping yo give this another try.
Yes, that way the mesh is not visible through the holes. The key is having good connection/overlap of each leaf so that it gives supporting structure. Perhaps, start with a smaller version. Also, make sure to have a high-strength fast setting concrete mix. Also, if there is some curing make sure to dampen the cured concrete to make sure it doesn’t ‘steal’ the moisture from the ‘fresh’ concrete. Hope that helps!
I guess vices (beer) will always win out, but in my books, this is a clear winner! Love it!
I think concrete is considered somewhat of a ‘man’s world’! We need to start prettying up the ‘concrete box’ look! Onwards and upwards!
I adore this! We recently overhauled our ENTIRE yard – tree removal, new fence, retaining wall – and planted over 150 plants!
Now I’m looking for ways to personalize the space and make it even more beautiful and a bit unexpected!
Thanks for the beautiful work and the inspiration!
I only ornamentation that looks like it belongs! And that does not need to be taken in… You’d also like the stepping stones Have concrete fun!
Barb,I have learned so much from your site and videos. Thank you !
I have just finished several cement orbs (11 to be exact) for the yard, but after a long week of curing and drying several are showing hairline cracks all over the surface
How can I cover these up and prevent from happening again. Would I use a resurfacer or another coat of cement. Your help is appreciated
Oh dear, maybe I need to do a troubleshoot post. Are they curing too fast? If it’s hot/dry that might be the problem, Also what mix are you using? Some may a higher shrinkage factor and if they are on the outside of a form that might be an issue. I like to mist/spry mine as they cure as concrete loves moisture. Good luck
This looks SO cool! Thanks for sharing and the great photos! I can see how this could become additive! I will bet that next you can make something even bigger -a leaf house-maybe using chicken wire (?) Love your creative brain! And of course I am sharing 🙂
This is fantastic! All of your stuff is – thank you so much for sharing!
It is one of my favourite and was pretty peaceful to work on!
I absolutely adore this. I awoke in the morning and this was on my screen. Must have pushed some buttons in my sleep that popped it onto my screen (phone). What a happy surprise. I want to make my own fountain for my garden. If I figure out the pumps and lights I think this orb could be the top of the fountain. And another orb for my sister’s garden as a gift! Love this.
nice to see your smiling face – love that these aren’t too heavy to carry around to different locations and how they add another texture along with your other ones in the garden!
Yes! ‘Cause I’m always moving my orbs around! Freshens the view!
Hello, Let the first coat dry before covering the concrete footprint ? Thanks for your blog.
No, don’t wait til dry. It will set slightly but add second layer as soon as you can. I’ll edit. If you are a bit nervous for this as a first concrete project you may try these stepping stones first. Or read the Tips and Tricks post… My smaller version may also be a good start.
I hate it when things don’t work so if I have doubt I do tiny tests. Cast a couple leaves and weight an hour to see how they worked out and how strong they are… Have fun!
Absolutely love your Artist Eye, and Thinker. One of these days I will make the time to play with concrete and thanks to you there is a growing list of projects to attempt. Thank you for your courage to experiment and your generosity to share your discoveries and processes.
Oh ya, I have the courage to try all kinds of things! I learnt that from a fabulous mother who always said if you put your mind to it you CAN do it. Children absorb what they see so I see the drive in my daughter too! Cheers!
I’m not sure I understand the mesh. Is it put on the underside of each leaf shape,? Is it put on the top of each shape and pressed into the concrete by the Savoy leaf? Or??? This is a beautiful project—you are, indeed, an artist.
The mesh is imbedded by being applied above the first layer and then the second layer with the leaf is applied on top. Try to aim for about 3/8″ or so thickness. You could go thicker for assurance it will just add some weight. Have fun!
Beautiful! I am in awe of the way your mind works. Thank you for taking the time to share your thoughts and ideas.