Giant Concrete Garden Orbs

Really, orb is just a fancy word for ball, or sphere. It then makes it sound like you paid big bucks for a landscape designer. Myself, I also come across orbs/spheres in my other line of work which is to teach drawing. It IS such a complex and wonderful shape with so many hidden talents; probably why mother nature constantly uses it for her treasures! These Giant concrete garden Orbs are not fussy and simple to make with readily available materials.
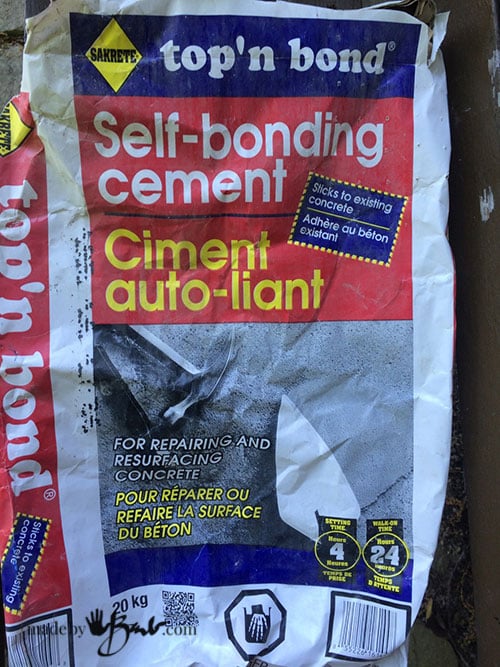
I have used a multitude of ready-made concrete mixes. It just makes things more simple! Some mixes are very economical and some are not but set really fast. This mix; also called ‘vinyl patch’ has some great qualities and these orbs have already lasted through a Canadian winter and multiple moving around.

You will need:
- Sakrete Top N Bond Concrete Patcher
- Mixing container, utensils, water, metal trowel/knife/shovel
- Rubber gloves, Dust Mask
- Inflatable round form (beach balls, exercise ball )
- Drywall mesh Tape
- scissors
- Acrylic paint for finishing (opt)

Step #1: Ready the Forms
It is much easier to get everything ready before your hands are covered in concrete. Blow up the forms well, and make sure they are holding well. Last thing you need is a deflating form! I make sure they are quite hard. You will also want some resting places (buckets, pots, planters) that support the size well. It is also a good idea to weight them (rocks or even water) as then there is less chance of toppling over. Since it is difficult to unwrap the mesh tape with gloves on; ready some strips of varying lengths to have available later on.
Tip: Beach balls are better that balloons! I just hate it when a darn balloon decides to pop! My favourite are the 20″ beach balls; they make a huge concrete orb that is still light enough to carry!

Step #2: Prepare your mix
Get suited up with your dust mask and gloves (apron is a good idea too). Add some mix to your container and add water slowly, mixing well after every addition. Mix slow to lessen dust and mix to bottom corners of container. The mix should not be too liquid, but hold it’s shape somewhat.

Test some of the consistency by doing a squeeze test. If it holds shape pretty well then it is right. If it crumbles – too dry, runny – too wet. Don’t worry; you will get the hang of it!

Step #3 Application
Remember the days of playing in the sandbox!? Well, this is much like that, patty-cake-patty-cake. Work from the top and add small sections of mix and flatten. Gently patting the concrete makes the ‘cream’ come to the top and be smoother, as well as having the air bubbles release. This mix is rated for 1/2″ thick topping so that is what I strived for, however some sections may have been a tad thinner.
Wow, you would think I have been working with concrete for a while… yup!

There are a couple of choices of using the mesh. You can have it between 2 layers of concrete mix or put it on the form and then cover. I would say both methods work, however the mesh is less visible if between layers. It is not problem to have some showing as it easily cut or singed off later.

My intention was to have the sphere look like it was a mysterious meteor that crashed to land. I was NOT trying to have perfection, rather some rough natural stone like texture, cracks and holes. This would give many possibilities of use later on…
Work your way slowly down the sides. It may slide off, and you can reapply. To keep gravity in your favour, adjust the ball to keep what you are working on centred on the top. You will have to work in sections and let it set before finishing. Depending on conditions, it sets in 4 hours. I know I am always impatient, but that can be detrimental…

The use of metal tools can make the finish smoother, if you like.

Once a section adequately set; you can start to work another section and add it in, overlapping somewhat. Spray the dried area with water to allow better adhesion as it would draw out too much of the water of new section. The rustic quality makes for being very forgiving…

Leave open areas that are quite random and interesting shapes.
There are many options if you have openings, drainage, lighting, planting etc. AND they are visually intriguing!

The testament of a true ‘maker’ – always dirty hands…
Step #4: Wait… and wait

During the setting time wet down to add strength and allow slower curing. Once they are completely set, you can have more fun with them!
Step #5 Finishing:
The mesh that is visible can be cut with a mat knife or singed off with a mini torch or lighter.
My intention is to eventually add some lighting into these giant concrete garden orbs, soft subtle glowing light. As if it is ‘hot’ from falling to earth… (artists have visions in their heads…)

I did find some acrylic paint that is very ‘neon’ coloured and seems to glow by itself. It will be fairly protected inside and should not be sitting in water so it should hold up well. Garden design should be subtle and accent the surroundings. This concrete sets at a fairly dark colour and that was fine for me, as i am not a huge fan of ‘painted’ concrete. It’s the grey industrial look that is the allure anyways.
To look very random and ‘glowing hot’ inside I was purposely messy when applying the paint. Squirt some inside and then swish it around. Super-simple! and looks less contrived.

Hold the brush vertically and it will easily cover the edge with no fancy painting skills. I know you can do it!

Yes, my deck is full of balls… but that is all for a reason.
To see how to make the smaller ‘Monster Egg’ ones here see my tutorial here

Step #5: The ‘Before’ & ‘After’
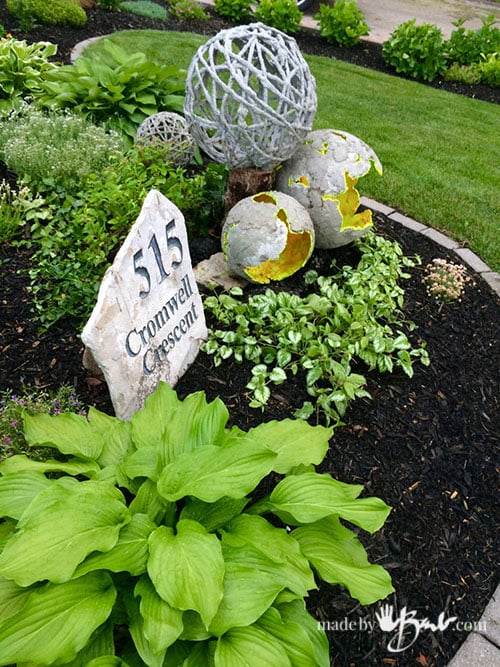
Remember the garden makeover? Well, the birds finished their nesting in the tree (yes I had to wait) so it could now be cut. I brought a bit of muscle power… I decided against the monumental task of digging out the roots. They will decay and I will use the stump for a pedestal!
The large top orb is from my first exclusive ‘Orb design adventure’ and you can see the tutorial here. It is one of my most visited posts! The faux engraved address stone tutorial is also simple

Design works well in odd numbers and sizes. The top concrete dipped yarn orb is a nice compliment to the others shape since it is lighter on the eye with all the negative spaces.

A few screws in the top of the stump will hold it in place.

Wrap some tie-wire around, as there was an opening large enough for a hand.

The stump is barely noticeable and will be sturdy. The stepping stones are one of the easiest things to make. Can’t wait to add some lighting…

It is a sculpture, statement piece. ‘And the plus is that it is portable AND can be adjusted to different configurations!
Can you see me doing the happy dance?…

I bet the neighbours were chuckling again… What is ‘crazy garden lady’ doing now?! And what is she rolling around?!
When it’s done, it;s all a different story. Last time I was cutting branches off the tree until I came upon a nest; and then had to abort! The birds had moved on now and the tree left me a pedestal.
Go ahead, have some concrete orb fun of your own…
THANK YOU!!
I have been eyeing beach balls for the last two summers, wondering if they would work for this kind of application.
I always love your projects, but this one is just like you and I were channeling the same stars (or something). Thank you for being the brave lead experimenter for the rest of us.
That’s funny! I’m glad to help. I’ve been feeling a bit crazy lately as I’ve got orbs all over the place. AND I have been perfecting a completely new design that is even more unique… I was even eyeing an exercise ball; even bigger!
The biggest obstacle most need to overcome is just the fear of failure. Me, I am the most stubborn and will ‘beat’ it ’til it works out!
I WAS LOOKING FOR A DIFFERENT KIND OF ORB. THIS ARE GORGEOUS. THANK YOU.
I love your site! So inspiring!
I would like to know with the beach balls did you deflate them to get them out? Thank you so much!
Thanks, yes I deflate them and then I can use them again. I was thinking of perhaps having a really large one like an exercise ball! ~ Happy making! (PS: there is a new orb in the works too)
I just love the orbs you made for your garden….wow, what an impact!! I made some smaller balloon orbs for my kids for Christmas this year and gave some to friends. They were awed!! Thankfully I kept three for me and love the look of candles glowing inside which I painted gold. I didn’t use the same mixture are yours unfortunately but am looking forward to trying it. Did you have to screen any aggeragates out of your mixture?
Happy orbing trails!! You do fantastic work!!
Thanks, I never tired of the orbs. I think I still have one up my sleeve… That mix was a somewhat fast setting one. No, I did not screen out anything. Lately I have been using the RapidSet Cementall which sets so quickly and is really hard. It is a much finer concrete. I think you referring to the ‘Eggs’ which I love too! The use of leaves in this one is also fun. Happy concreting!
such beautiful and original works of art. I’ll be creating my own concrete art soon. Great!
Thanks! It has finally gotten warm enough to think about outdoor concreting again!
Great info. ..want to make one soon. What type of “neon” paint did you use? Will it withstand below 0 temperatures? Thanks for any info. Love your posts!! Thanks for sharing.
Thanks! I’ve had these orbs in my garden for over a year and they are still holding strong. I used a normal acrylic paint but there is an outdoor craft acrylic as well. I have things kicking around the yard like painted rocks and rusted shovel art that have held on for longer than I can remember when I painted them! The key is not too thick and avoid constant wet conditions.
Hello!! I’m a little late to the game. I’ve been avoiding Pinterest like the plague but just got hooked in my accident. Ha!! I am so in love with your concrete everything. I’m wondering, with the orbs, can they have plants in them as well? I have a weird, maybe unhealthy, obsession with moss. I’m thinking large garden orbs with moss inside them. Thoughts? I just don’t want to create something and have the moist soil and plant matter breakdown the orb itself, if that makes sense. Thanks so much!!
Yup a bit late… Since you may have missed this orb and this one. I have a few with moss in the shady parts of the garden. Do be aware tough that moss can be somewhat ‘picky’ about where it will be happy. Also do leach out the alkalinity before planting. I was going to make some of these as planters too… happy concreting!
I wish I could find someone in Louisiana that does this because I’m not the craftiest person in the world but I want to make these spheres really bad. I noticed that the cement you used for this project looks pretty gritty, today I bought cement mortar just because it said something about molding plus it’s obviously very powdery and of course I hadn’t seen this yet. I got it thinking I would make those planters where you put the cement in a large bowl and then press in a smaller bowl and let it dry but now I see these spheres and I want to make it. I seriously don’t know what has happened to me, I’m telling you, I went to bed after our New Years party and woke up in a crafty mood and it hasn’t gone away but I have never made anything to brag about so I’m literally guessing, do you think that more powdery smoother cement will work or should I get something else? and if so, can you please tell me specifically what you recommend??? Thanks for your time, Addie
Wow, maybe you should start with the bowls as they are using a simple (cheap) SandTopping mix and plastic bowls. The geodes use a specific strong mix (more expensive) There is a post for working with concrete tips as well as figuring out which mix After you get the hang of it… the sky’s the limit!
Hi Barbmaker. STUNNING.BEAUTIFUL ART. Great website. I learn a lot from you. Thank you for great directions. So I decided to make big ball from exercise ball. You are using Secrete N bond concrete. Can we buy that in Canada ? I’m from Edmonton. Are there other options. Thank you for sharing with as. Take care
Yes, I am in Canada too. I get it at Home Depot Another option is the Rapidset Cementall. I also used the Quikrete brand Fastset. Many rands carry similar products so checking the specs is key. See here as well. Have fun!
Addie, hi there! I just found Barb’s amazingly fun and inspiring page and saw your message posted. I’m in Louisiana as well, what are the odds of that!! Lol. Anyway, I’m burning to make these Amaze-balls and can’t wait to go to the hardware store for supplies. Have you made these yet? I’m wondering if the high humidity does a huge number on the cement and\or drying time. Everything else seems to take so long to dry down here with our high humidity. It’s been a big adjustment since I moved here. I think we need to have a MakeBarb’sAmaze-balls party and have some grand fun. Also, maybe a support group for the addicted to Barb ‘s projects while we’re at it. 😉
Also, a GIANT thank you for your clear instructions and overall awesomeness.
KIm
Wow, sounds like I have a fan club! As far as I know concrete likes humidity, as it helps it cure to have more strength. When in doubt, pour a small test piece first. All the power to ‘concreter’s’! I’d love to se the finished ones!
Hello, Barb. I can hardly wait to try these. They are so u inquest and make a statement. I tried last night with a balloon and it popped.😬 Thanks for great detailed directions. Judy
I love your work! Your little halloween spook inspired me to make my own. Mistakes were made but I think I turned them to advantage. I’ve made a cement ball using used dryer sheets dipped in the medium and forming over the ball. It worked. Next I’m trying it with a beach ball (have been collecting dryer sheets for ever.) One vital question: Where do you find spherical (not teardrop) latex balloons? They seem to have disappeared. Thank you so much for sharing your ideas and technique!
Olga
Great to hear! Wow, dryer sheets are so thin! I often keep an open mind when thrifting to see what fabric I can find especially in the linens aisles – so much yardage for so cheap. Once I got fed up of the balloon bursting and it not being round I started to use play balls that can be deflated. As for round balloons, I do not know, unless specialty party stores would have them for display purposes. Good luck!
Barb –
Since my last year’s beach ball orbs became the victims of a different project (not of my making lol) I need to make new ones. I discovered had 2 big ol’ exercise balls but have run into an issue I know you can help with, if anyone can!
The exercise balls have ribs and are NOT super smooth like the plastic skin of a beach ball. My question is this: to grease or not to grease? The other I tried I must not have greased well and the concrete stuck in a few places, making the ball unsuitable to use after that (it leaks in places i cant find for the life of me). I don’t mind good ol’ Vaseline, and I don’t wanna ruin this other exercise ball. Any suggestions?
Uber orbs done, I am moving on to step spooks while I still have time. Thanks for ALL the stuff you share – yours is the place I always look for new ideas!!
Happy Independence Day!
CC~
That’s interesting! If it is plastic or rubber I usually do not use a mold release as I find it does not stick. If is leaves a bit I can usually wash/scrub it off. I don’t like how the thick vaseline may make some of the concrete stick in it. You can also use WD40 or a cooking spray. I’ve also used a Castor Oil & Isopropyl mix as a it is more natural. Strange that your ball got a hole. Maybe it was too old and had some breakage/cracking already. Happy making!