Tips & Tricks for Foam Pumpkin Carving
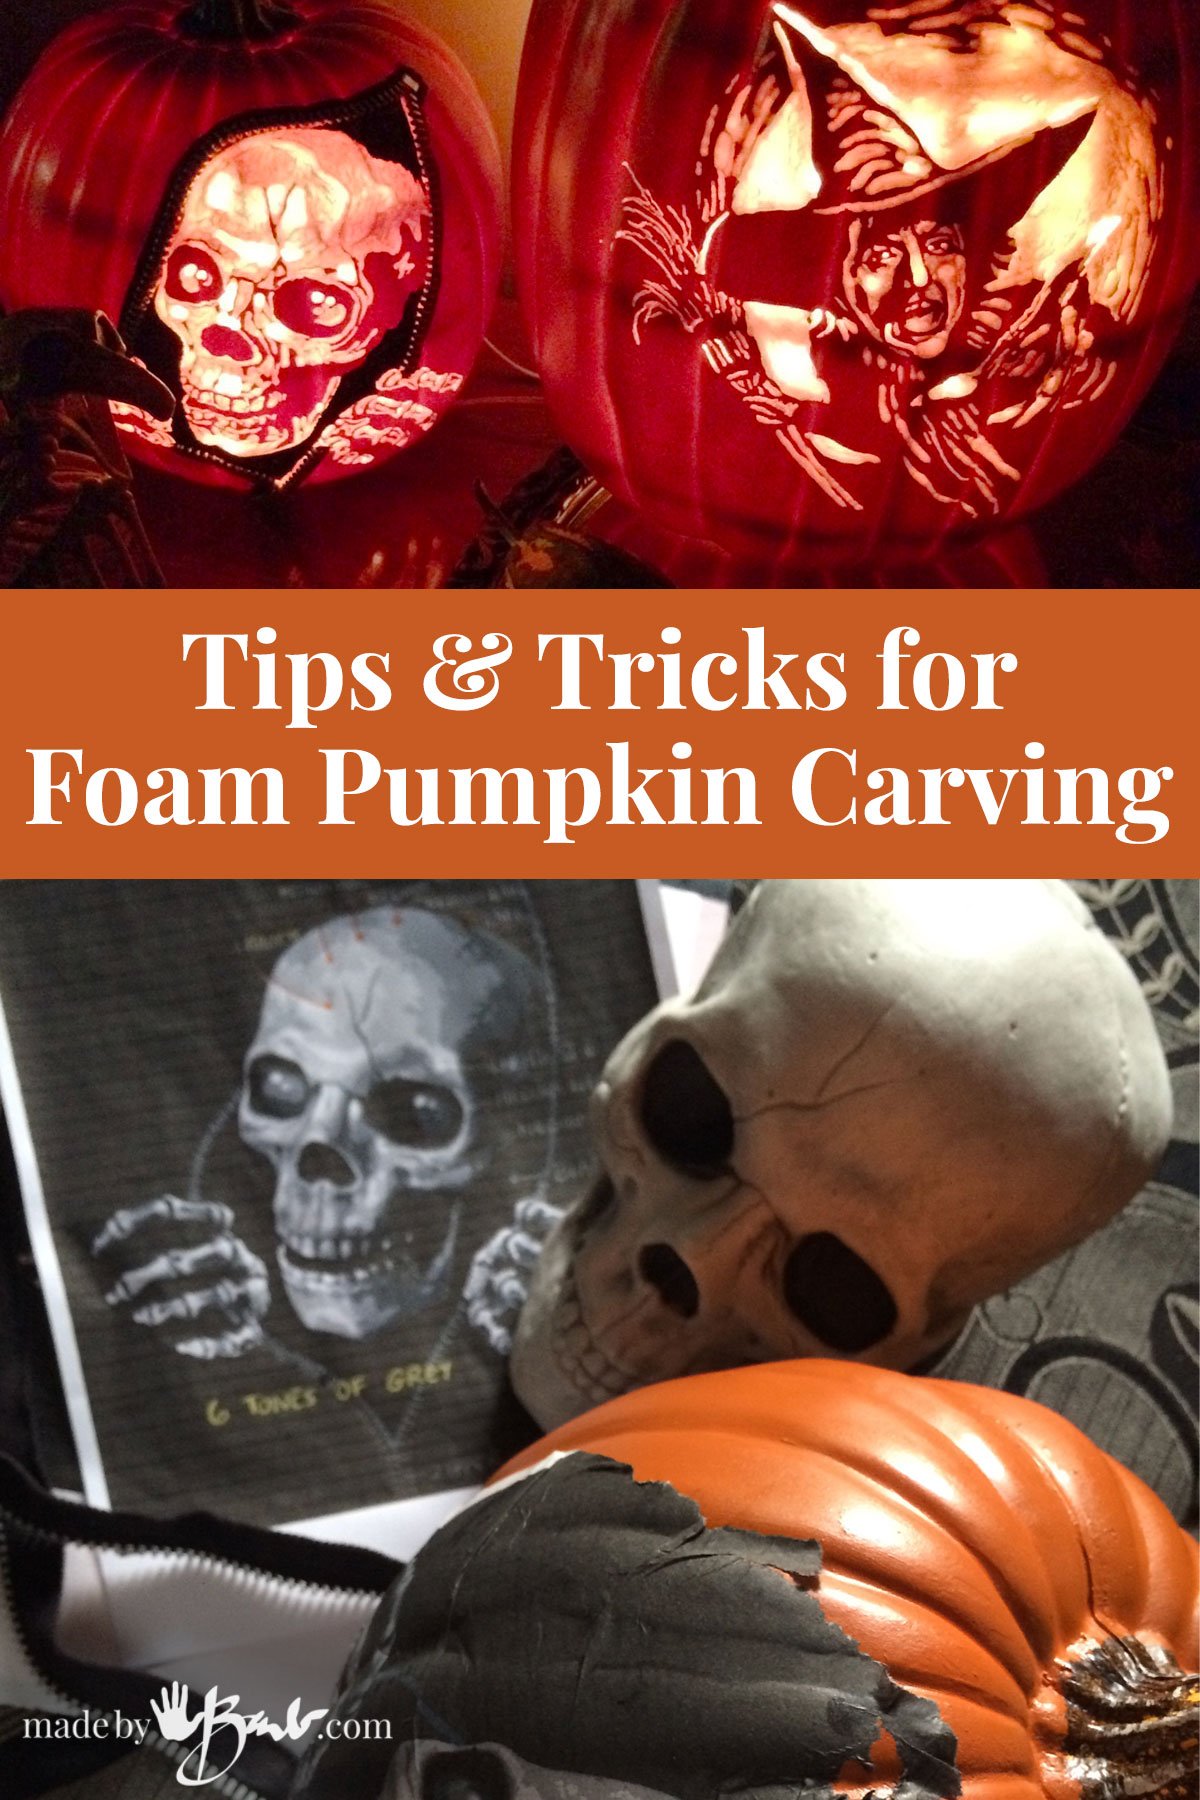
Every Halloween I enjoy pulling out my collection of faux Pumpkins as they each have quite the unique history. Don’t be scared, they look more difficult than they really are. There is no limit to what you can put on your pumpkin so let me guide you with some of my tips and tricks for foam pumpkin carving.
Why Choose Faux Pumpkins?
Before diving into the step-by-step guide, let’s explore some of the advantages of using faux pumpkins over real ones:
- Durability: Faux pumpkins don’t rot or collapse, so your carvings last for years.
- Mess-Free: No slimy pumpkin guts to deal with!
- Easy to Carve: Foam pumpkins are lightweight and much easier to carve than real pumpkins.
- Reusability: You can store them and use them again for future Halloween seasons.
- Customizable: They can be painted, carved, or embellished in ways that real pumpkins can’t always handle.

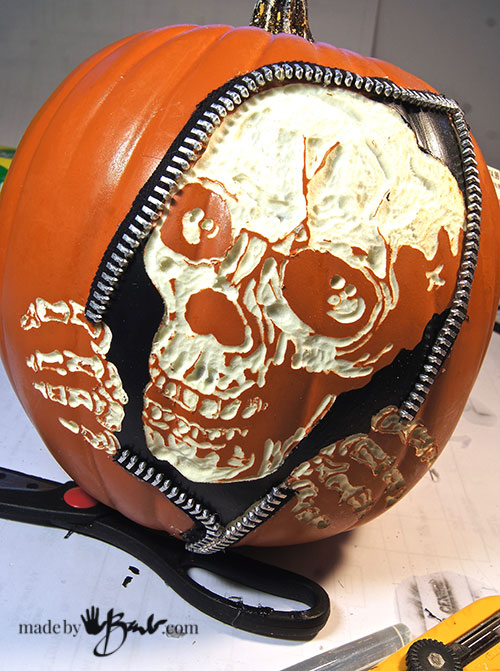
In 2016 I won second prize in Instructables.com Halloween Contest for this zippered Pumpkin. The prize was a great Pumpking Carving Dremel tool just made for this task. Thank you so much!
Before diving into the step-by-step guide, let’s explore some of the advantages of using faux pumpkins over real ones:
- Durability: Faux pumpkins don’t rot or collapse, so your carvings last for years.
- Mess-Free: No slimy pumpkin guts to deal with!
- Easy to Carve: Foam pumpkins are lightweight and much easier to carve than real pumpkins.
- Reusability: You can store them and use them again for future Halloween seasons.
- Customizable: They can be painted, carved, or embellished in ways that real pumpkins can’t always handle.

The Basic Concept of Foam Carving:
The way that carving a foam pumpkin works is about density and light. Once you realize that the thinnest is the lightest and the uncut is the darkest you can plan the different depth levels for the various darknesses that are called values (artist term). Any image can work as long as it has a range of values.
Step-by-Step Guide to Carving a Faux Pumpkin
Step 1: Choose Your Design
Before you start cutting, decide on your fake pumpkin’s design. Faux pumpkins give you the flexibility to get creative, so think about patterns or characters that fit your fall decor. You can stick to traditional jack-o’-lantern faces, go for spooky Halloween themes, or opt for something more intricate like personalized images
- Tip: If you’re a beginner, start with a simple design. Complex designs may require more patience and precision.
Digital image editing software can help with getting the images ready for the pumpkin. Here is a sample:

Ok, so I may not be that scary looking, but it’s a starting point. I can edit out anything that I don’t want.

Change the image to ‘grayscale’ and adjust the image using the ‘Brightness & Contrast’ controls until it has a good range of light and dark.
The Range of Values:
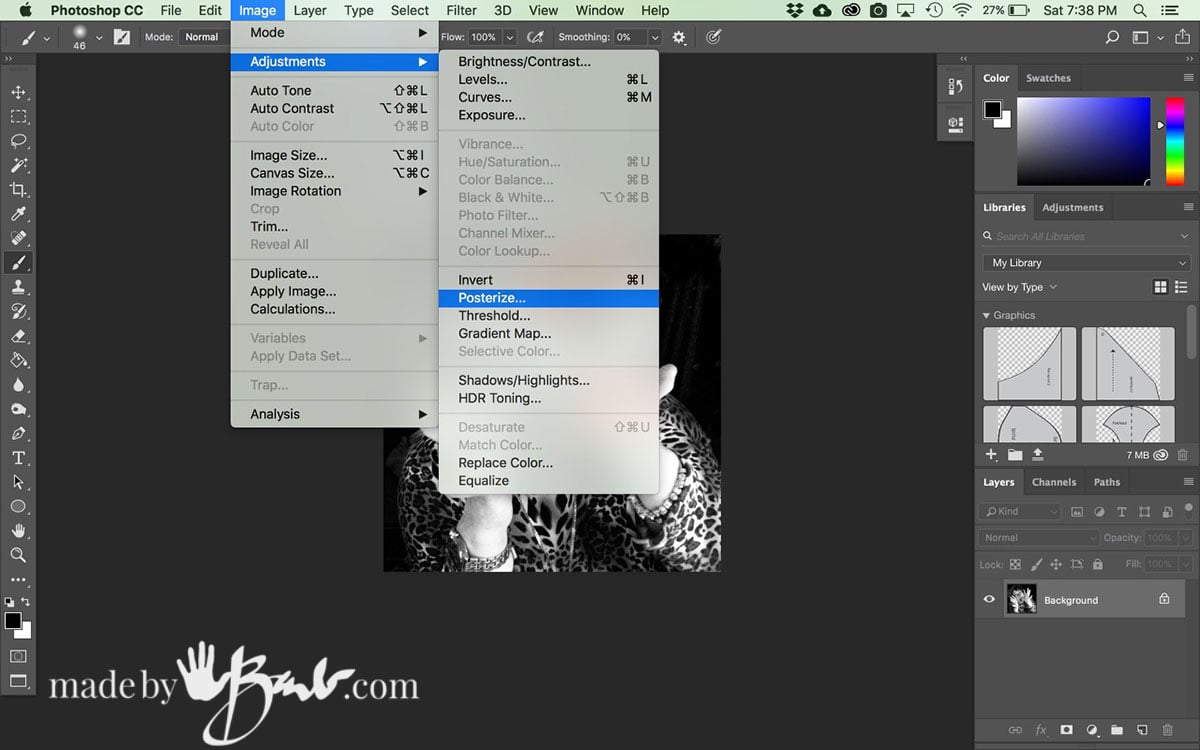
Modern software is so amazing these days! There is a control that allows you to break any image into simple areas of flat ‘values’. That is called ‘posterization’ (Image > Adjustments > Posterize)
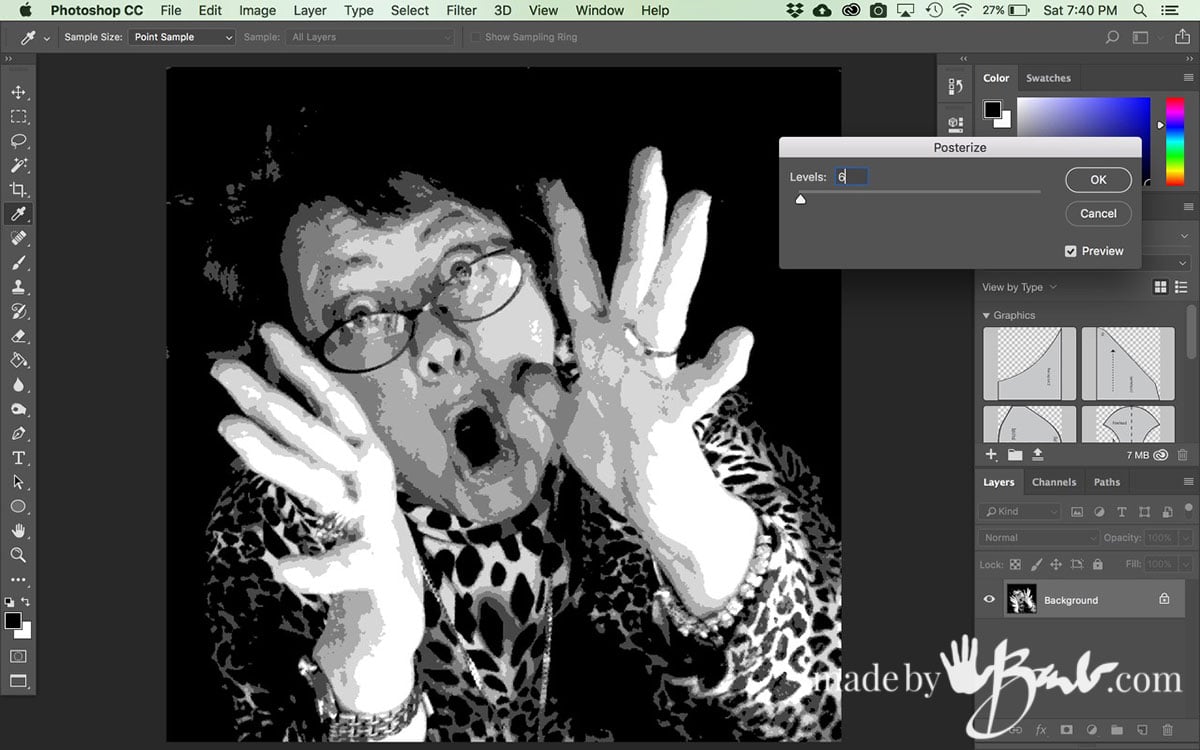
Choose about 4 – 8. I used 6 values for my stencil. This that gave me a good number to work with since one is white and one is black. Feel free to make any other digital changes or just go with what the image is.

Step 2: Draw or Attach the Design
If you’re using a stencil or custom design; Print the posterized image on some thin tracing paper. Size it to keep the height to about 2/3 of the pumpkin. It will have some wrinkles but that will not be a problem.
- Print out or cut your stencil to fit the pumpkin.
- Dilute basic PVA school glue (water-soluable) and attach the print as flat as possible to the pumpkin. Make sure though that it is completely dry before carving.
- Alternately use a pin or toothpick to poke holes along the design lines to transfer it onto the pumpkin’s surface.
If you’re drawing your own design:
- Use a black permanent marker or pencil to sketch your design directly onto the pumpkin.
- Tip: Light pencil marks can be erased or modified if needed, whereas marker is permanent.
The most difficult part for most is to get the image onto the Pumpkin. Being an illustrator I have used many methods to transfer images but many are very labour intensive. This method is very easy and requires no drawing.
Step 3: Cut a Hole for the Lights
Decide where you want to place your lights. For most faux pumpkins, it’s easiest to carve a hole at the bottom rather than the top (as you would with a real pumpkin) because this allows for stable placement over a battery-operated light.
- Use a utility knife to carefully cut out a circle at the base, wide enough for your lights to fit through.

Step 4: Start Carving
The Pumpkin Dremel comes with this bur type tip or you can buy some for your regular Dremel. It works effortlessly but will create a lot of dust so have a vacuum very very close by and wear a dust mask. I also love my Dremel Flex Shaft attachment to make holding much easier on the hands for detailed work. Be aware there will be much dust so wear eye protection and a dust mask.
Now it’s time to carve! Faux pumpkins are often made of a hard foam material, so you’ll need a serrated knife or a utility knife to get clean cuts. Follow these tips for safe and precise carving:
- Small, Controlled Strokes: Start by cutting out small sections at a time, following the design you transferred or sketched.
- Go Slow: Faux pumpkins are easier to carve than real pumpkins, but they can still crack if too much pressure is applied. Slow and steady wins the race!
- Power Tools (Optional): For more intricate designs, you can use a Dremel tool or a drill with small bits to create precise details like dots or patterns that mimic lace or filigree.

Carving out the levels:
Make sure to have an extra paper print of the posterized design to refer to in case you are not sure of where you are. Take your time and work one ‘value’ at a time.
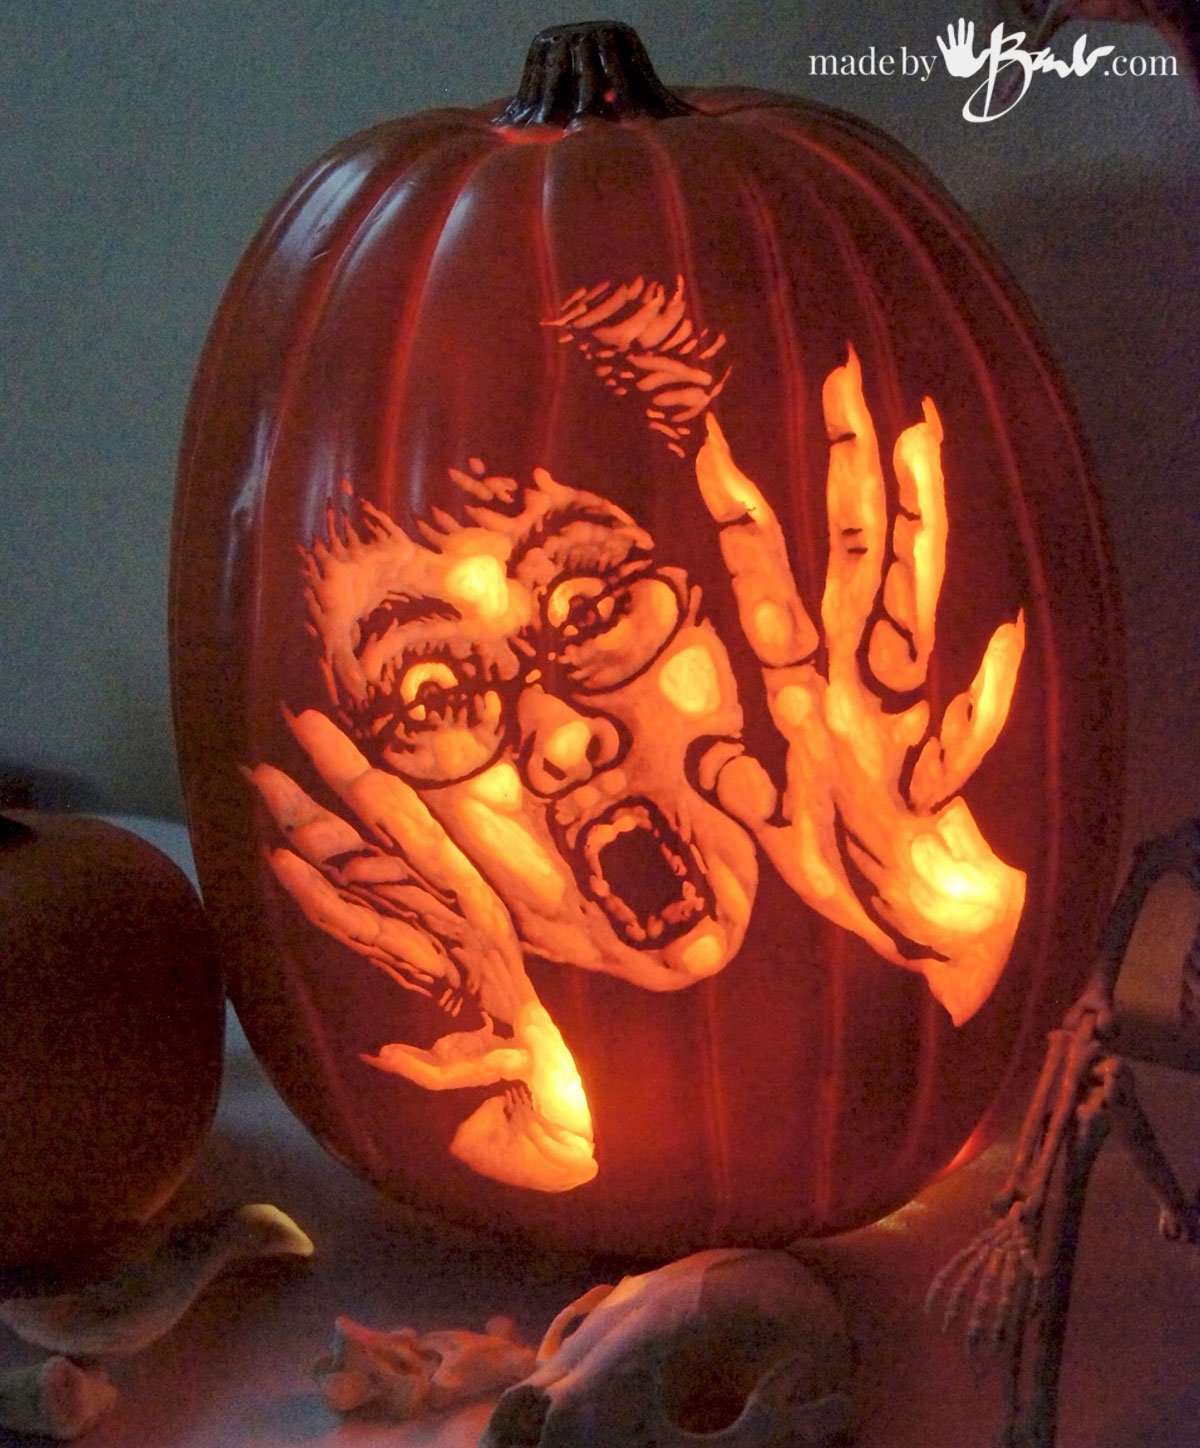
The ‘black’ areas will have no carving. The next darkest will have minimal carving, the next lighter will have a bit more etc… You can always carve deeper but not replace, so go slow. I like to ‘outline’ the area and then carve the depth in it. Have a little light near by to see how it looks.
Any area that is really bright white can be carved completely through to be a hole. Just be aware that you will need ‘attachment’ pieces to make it not fall apart. I prefer to keep the ‘holes’ to a minimum.
The thin paper print will carve away with the pumpkin skin. The Pumpkins I used from Michael’s were about 3/8″ thick walls. You can check your progress by inserting a light to see.

It will look a little strange when not lit. Notice the deeper areas in my cheeks, that will be the lightest parts.

Clean off the Paper:
Once you have it all cut you can easily wet and soften the glue so that the paper will slide and rinse off. Use a soft cloth to wipe any pieces off. The foam will not be damaged by water.
Step 5: Smooth the Edges
After you’ve finished carving, check the edges of your cuts. If they are rough or jagged, you can use sandpaper, a nail file, or the edge of your knife to smooth them out.
- Tip: If you’ve accidentally over-cut or chipped an area, use a bit of hot glue or craft adhesive to repair the damage, and then paint over it if necessary.
Step 6: Paint or Embellish (Optional)
One of the great things about faux pumpkins is that they take well to paint and other decorations. If you want to give your pumpkin a personal touch:
- Paint It: Use acrylic paint to add color to your pumpkin. You can paint it all one color (such as white or black for a modern look) or add details like shading, patterns, or glitter.
- Add Embellishments: Stick-on gems, sequins, ribbons, or even zippers can take your carved pumpkin to the next level. Just use hot glue or craft glue to attach any additional decorations.
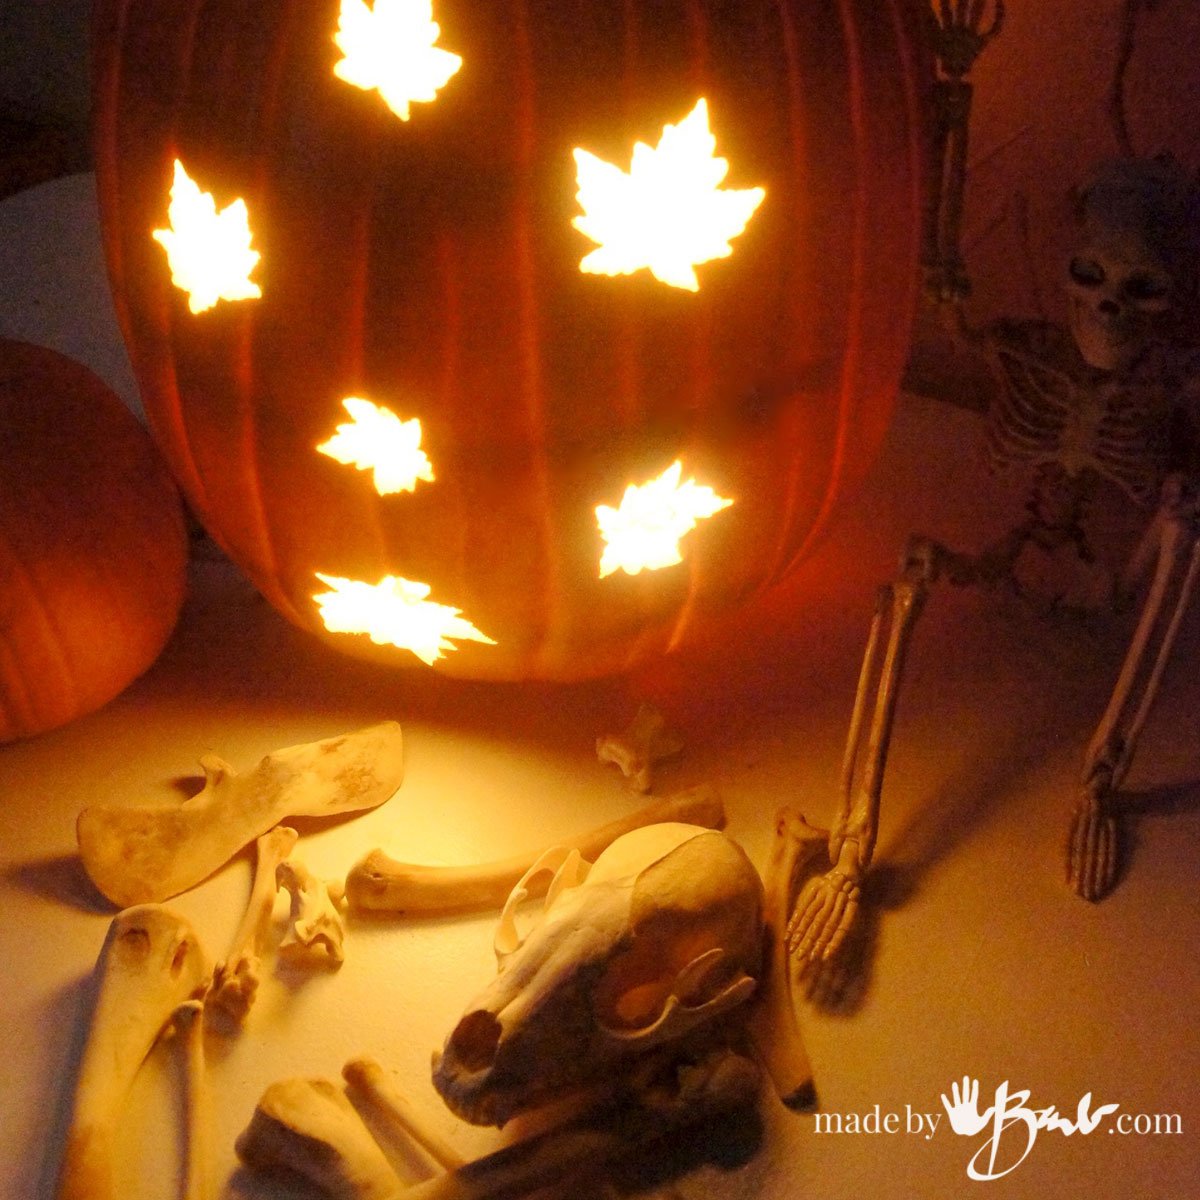
Glow your Art:
To light the pumpkin do not use a candle. There are battery LED lights as well as the little bulbs that clip into the bottom. I prefer the LED since they do not have any heat.
Other Cutting Method:
If you are not wanting a detailed image type of pumpkin then there is also another option. Using a ‘Hot Knife’ makes cutting the foam pumpkin as easy as cutting butter.

I absolutely love my Versa Tool! It has so many attachments but one is a knife blade which makes such easy smooth cuts into plastic and foam with no pressure at all. I have also used it on my Easter eggs as well and am amazed each time I use it.
Cut simple shapes or letters into the Pumpkin and the edges are flawless. You may also print your designs and attach in the same method as above if you prefer. Imagine all the beautiful Fonts that you could use! I feel another tutorial coming on…

Happy Carving! ‘And be so thankful it will last until next year!
Great unusual ideas , my favorite kind . , .looking forward to seeing more in the future
Have a great day. The Curious Cat
The only limit is your imagination (and time) Thanks!
Thank you Barb for all your tutorials you share. I try a lot of them and get super results. Can’t wait for your next inspiration!
I will def try the foam pumpkins! Never thought about doing them. Thank you for sharing. The carving tips are great. 🎃
I bet they are already on sale! Have fun!
Have you ever tried to remove those thick grid lines inside the pumpkin that are visible when it’s lit up? (As seen in your last picture the wicked witch pumpkin)
If so, what method did you use? The lines showing through mine drive me absolutely crazy!!
Hmmm, I had to go look and I did not even notice before. I’m wondering if it is really a thickness issue or a density one. If it is due to thickness you could possibly shave off some layers from the inside.