DIY N95-Style Face Mask Pattern
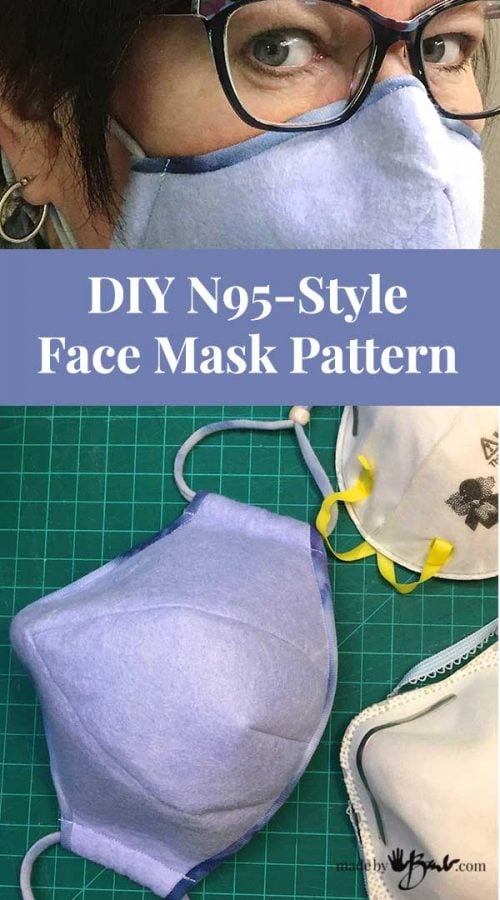
After having my mask keep sticking to my face I knew there was a better way… Welcome the next in my series; the DIY N95-Style Face Mask Pattern. It closely mimics and holds shape as the N95’s.
Am I a mask expert? No, but I am one of those particular people. When I see something that is not functioning well I want to make it better. It’s how I have been pretty well as long as I can remember. The curve of the Ultimate Face Mask also scared some sewers so this only has a point.
What fabric?
I have been going through my stash of fabric (trust me, it’s a pretty extensive collection) and holding it up to the light (to see the holes) and over my mouth to test breathability. I question the high thread count cotton as it’s so difficult to breathe through!

I saw some advertising of using faux ‘Shammy’ fabric. These brand-name products are a non-woven felt like fibre made of rayon and polypropylene. It’s quite thick as it can hold a lot of water. Since I do a lot of dyeing and sewing I have to know my ‘fibres’. Rayon is a natural fibre made of wood products, absorbent as well. You may have a blouse that is quite comfortable to wear and also very silky soft; it’s probably Rayon. Viscose is almost the same as well. Craft felt is often only polyester and much thinner. There are some wool felts but I am not sure of the comfort level.
I was told that cotton can take the moisture from the covid partical where as polyester does not. Odd, as any professional N95 masks have no cotton in them. (Do your research)

These shammy’s (like Sham-wow) are machine washable and some even bleachable. I love felt type of fabric since it does not fray at edges, can be sewn so easily and hold shape well. I have used industrial felt for purses and containers often.

Back to Designing:
My N95 mask (from concreting) is sturdy and stiff. I like that. It stays OFF the face and he round outer edge rests pretty well around a wide variety of face shapes. So, from that shape I took my inspiration.
I teach a technical type of drawing so I understand form quite well. I love the challenge of working with forms (I guess that’s why I like concrete) and constructing or deconstructing them.

Fabric is flat and then needs to fit a rounded form. How ‘cool’ is pattern making?! I have never had to ‘fit’ faces; usually just my ‘bumps and lumps’! Round becomes flat… awesome.
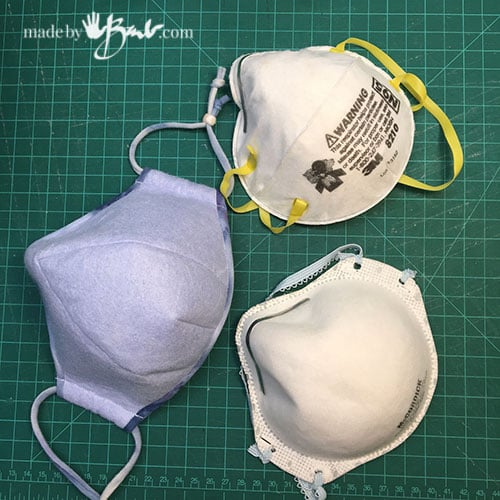
I have fond memories of my mother working as a milliner, over a wooden head form making exquisite hats for some very sophisticated ‘dames’. She would cut and sew and steam and get such amazing shapes. It’s been over 50 years but it must have made an important impression. Look how similar to the N95 the shape is!

I have made a pattern for you; download it here:
The DIY N95-Style Mask Pattern:
- Can be left unlined
- Bias edge finish, no turning
- Optional extra stiffening insert
- Very flat Metal Nose Piece
- Keeps form & shape
- Innovative 2 piece Pattern
- Adjustable tie casings
Print the Pattern at 100% (note folded piece) and cut the pieces. I like to trace it on the felt with a fine marker as then I can cut it more accurately.

As with the ‘Snug-nose Mask Pattern’ I love using the iron-in nose strips. You can put it in place before assembly if not lining or between the layers if lined. For the unlined version cover the inside with some folded bias fabric. Keep it .25″ from the edge.

The Scary ‘Point’:
The nose section is sewn in 2 stages. Match the dots after clipping to the dot.

The stitching starts at the ‘dot’ and continues to the edge. Clipping around the face curve helps sewing the curved seam.

Not so scary… 1/4″ seams.

After the first half, open at centre and match the other side and sew to the matched dots again.

It is like 2 seams that meet at the dot, and clipping is vital. If, it is too complicated, feel free to add seam allowance at the centre and then treat as separate seams (but still match dots)

The bottom centre seam is much like a dart; and ends curving into the edge at the dot. Trust me, after one, it’s super easy.
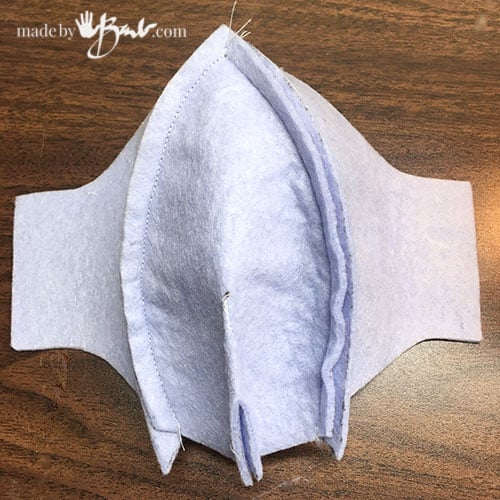
Looks odd, but has great shape already.

Since this felt like ‘shammy’ is a felt, it does not fray and can be trimmed very close. I love that about working with felt.

Turned right side out it holds shape already, without any pressing at all.
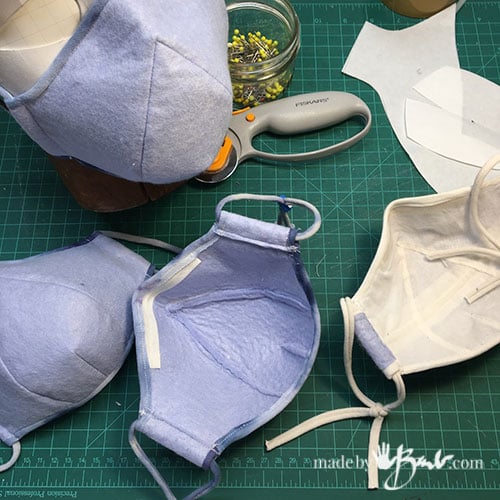
See the unlined and lined option. Rayon is not uncomfortable and this mask pattern does not really lay on the face, so I actually like it in one layer… but suit yourself. (skip down to the edging if no lining desired)

Lining Optional:
If desire you can also line this N95-Style Face Mask Pattern. Repeat the same steps as for the outside with a cotton fabric. Be aware of breathability. I like to top stitch to keep seams as flat as possible and less ironing.

Shape Stiffener:
To make a mask not be able to keep collapsing you can also add some ‘boning’ as they call it in the fashion industry. Remember the corsets? To add a flexible but shape hugging strip ‘zip ties’ can be easily cut and inserted into an added casing.

Determine where you would like the strip to follow across, higher near the nose is better as that is where the space in the mask is most comfortable. Cut a 3/4″ strip of fabric on the bias (45˚ angle) and pin across.

Stitch across on the wrong side of lining.

Sew the casing by leaving a space wide enough for the zip-tie.

When using a lining the metal nose piece is ironed into place between the layers. (make sure to keep at least 1/4″ from edge)

Stay stitch lining to outside, wrong sides together.
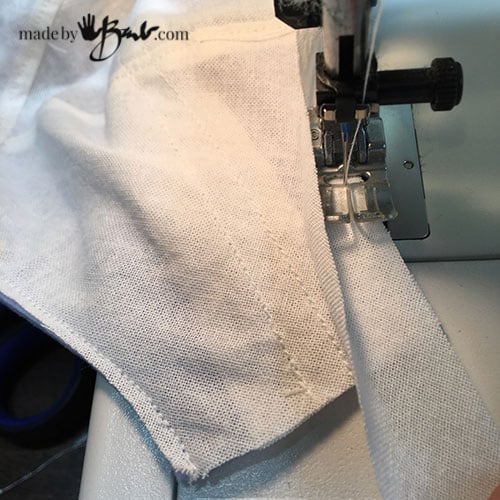
Edge Finishing:
As an edge finishing, the outside edge has a bias strip applied. You can use purchased bias band or easily make your own.

I like to stitch the outside last so I sew the first seam from the wrong side.

Fold over to the right side and topstitch the bias band only on top and bottom edges. (side casings will be folded)

Sew the casing line on one side. Insert the zip-tie and cut to length taking in account of the fold for the casing.

Sew the other casing line. This will keep the zip tie in the channel.

As an alternative to double folded bias, you can ‘cheat’ by only folding back and leaving the raw bias edge on the inside. Bias edges tend not to fray. The seams are also cut very close so there is no large seam to bother your face.

Tie one on:
Rather than elastic, (which is getting scarce) I love to use t-shirt strips! If you use a t-shirt with some lycra it has a great stretch, and is soft in the ears. 3/4″ wide or so works well and a ‘Pony Bead’ can act as a toggle.

So, what do you think of this N95-Style Face Mask Pattern? It holds shape nicely, stays off my skin, breathes well, and is blue. But you be the judge… I have a few patterns to offer. We all don’t like the same.

But above all, make good decisions and practice good cleanliness. I hope to just help keep you safe and comfortable one mask at a time.
Barb,
I love this mask and can’t wait to make it!! Like others I’m not having much luck downloading it. Could you please send the pattern to my email. Thanks so much.
Keep up the great work!
Stay safe.
Becki
Happy making!
Ah! I will save you the time. I went to your main digital downloads page:
https://www.madebybarb.com/digital-downloads/
And was able to download from the button on that main page.
Thank you! Wish you good health.
Barb, you did an outstanding job on this one! As a former costume designer turned art teacher, I too appreciate how you you were able to construct the pattern for this. As a teacher I am very interested in using fabrics that protect me, since I am with many students in indoor spaces. I think felt, though slightly warm from breath, has the type of fibrous makeup that mimics filter material pretty well. My adaptation was just to sew a layer each from felt and fabric, and do the sew and flip right sides out then topstitch method. Worked amazingly. I also create a thin fabric casement “pocket” across the inside top so the metal nose strip can be removed for washing or replaced. I get the aluminum ones from Amazon real cheap. I really love the structure of this mask and how, like the N95, it sits away from your face and doesn’t collapse when I breath in. AWESOME! Question: I have a fairly large round face and this pattern fit me well. How would you suggest making it slightly smaller for a smaller face. I was considering reducing the percentage to 90% when I printed, or do you have other suggestions? Thanks again!
Awesome to hear! If you wan to size smaller do a bit of basic math. measure your finished mask and a measure a smaller face. Divide the desired ‘size’ by the larger and you will have a percentage to print at. (P.s. I love math, especially the useful kind!) Stay safe!😷
I have COPD and most mask out there are to close to my nose and mouth making it a little hard to breathe. Just saw you mask and would love to make it. Could you please send pattern to my email. Also is
one for 2 pieces. Thank you
Enjoy!
Greetings from Mexico, I am your fan, my family and I thank you very much for your creations, they are very comfortable and practical for daily life.
Thank you so much for your patterns, you are very generous! My niece has quite an aquiline nose, and it is tender. Every pattern I try pushes against the tip of her nose and hurts her. She’s a fine metal worker, so loose fits are a safety hazard. What changes can I make to have your mask fit her. I did try your perfect fit, it’s not quite right. I can’t wait to try this one….
Have you seen this one It has a pretty good shape for the nose point.
Do you have a more condensed version of instructions fo n95? I tried to download the ultimate mask, filled out the form, hit download and nothing. I have Chrome and i have a pdf program.
Thanks
Cheryl johnson
‘might be in your email junk folder… I only have the post for the N95
I cannot wait to try making the N-95 style masks. Did you just use a faux “Shammy” cloth to make the one pictured here? Any idea where I can order some from? You also mentioned felt. Any particular kind of felt? Would regular craft felt work as well? I was just getting ready to construct a bunch of triple-layer masks made of quilting cotton, but these are so much better.
What size zip tie would work best? The heavy-duty ones? Light-weight ones? Also, how long? Does it go from end to end?
Sorry for all the questions. Thanks for this pattern – you’re a creative genius!!!
Yes, I used the faux shammies I had. I am in Canada and like to check the consistency of the shammy. The key is the fabric’s ability to hold shape. Please also consider if any fibres would release so washing prior to making would help. I’m sure there are older substitutes as well. I usually have medium weight ties and extra length to cut. I am not sure what craft felt s made of. I have a wool one that seems promising for the cooler weather. ‘Hope that helps!
Love, love the idea for the plastic strip…..I make masks to give to anyone and everyone, can you provide me with written instructions for installing the plastic strip???? I have already asked for your pattern of your “masking tape” mask, which I think was a riot….good to see someone who enjoys what she is doing, as I am….much appreciation, and stay safe, 🥰
Sorry, the only written instructions are on my site.
I love this pattern! It’s perfect for keeping the mask off my face. With Lupus and fibromyalgia, my cheeks is super sensitive. My kid sister has rosacea and can’t wait to show hers off. Just need to figure out how to adjust up for hubby or down kids.
Awesome! You may try to just measure and then do the math (divide desired width by the existing and the percentage = to print should be over 100% for bigger and less for smaller)
I was wondering if anyone has found a compatible substitute for the Wiz Cloth that is available in the US.