Fitted Face Mask Pattern for Glasses
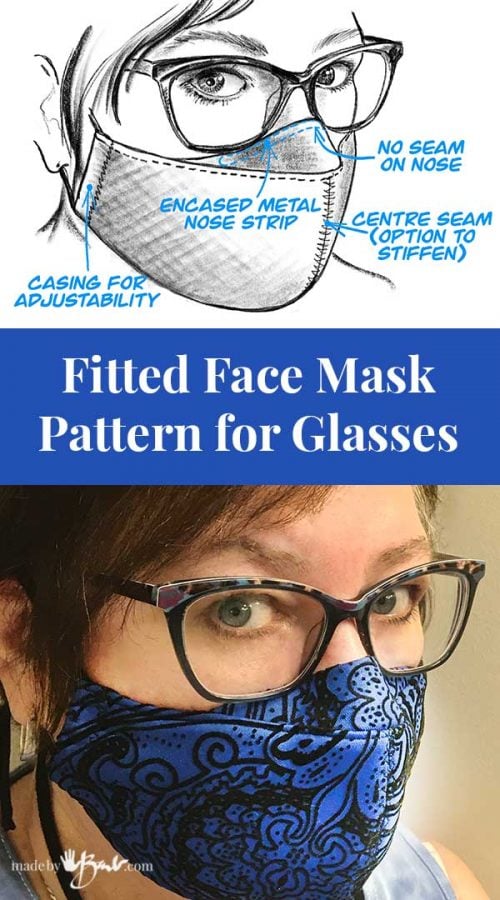
Design should always be about necessity! ‘And that is my purpose here; to fill a need for so many frustrated people who wear glasses and want a good mask pattern. My Fitted Face Mask Pattern for Glasses comes to the rescue…
The Unique Nose Piece:
Oh dear! I am appalled at the way people wear their masks, so each shopping trip is like research. I’m seeing commercial ones but have still not seen that many that look like they are really comfortable or fit well. Maybe that is why there are so many ‘un-masked’ rebels! Fogging glasses and touching mouth are very common complaints.
I know the ‘Olsen style’ mask is very popular and my first design has had great reviews and mass amounts of downloads. The problem would arise when there was just too many layers at the centre seam and that would push glasses up or out, which would affect visibility. To remedy that I removed the centre seam AND the top edge seam to make a single piece for the nose in this fitted mask pattern for glasses. Also, even better; it has a super flat aluminum nose piece ironed inside to make it super flat and adjustable!
To make this Mask:
Download & Print the Pattern. Cut one nose piece, 2 lining and 2 outer pieces. (you can add layers/filter pocket as you like) Fold and press the nose piece in half.
You can also watch it in video form: (please subscribe, so that I will continue making videos)
Make you own Metal Nose Pieces:
Check out my video & instructions to see how to make these nose pieces. Trust me, it’s easy.
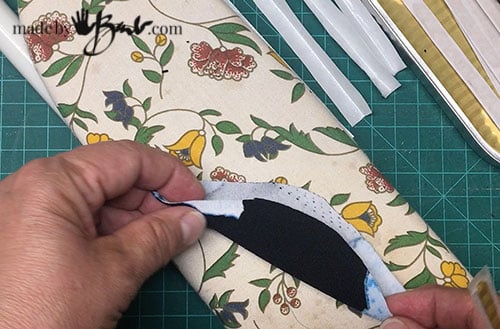
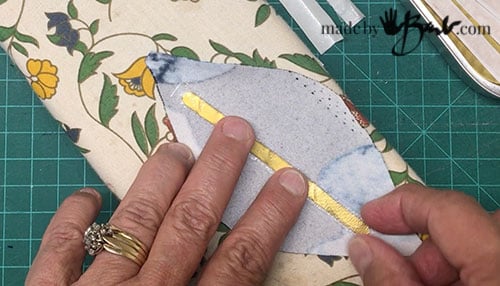
They are made with fusible web so they can now be ironed into place and stay there. Place it next to the centre fold.
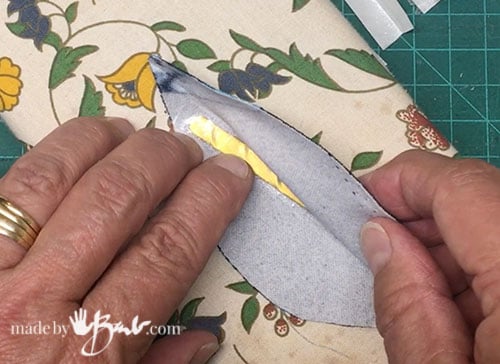
Fold over the fabric and make sure the metal piece stays centred. It should be at least 3/8″ away from edge.
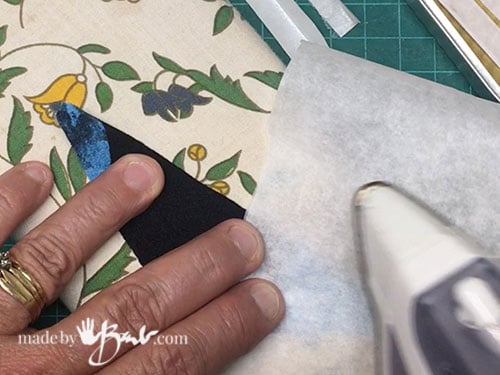
Use some parchment paper to protect the iron from any possible contact with the fusible webbing. (don’t ask me how I know that!)
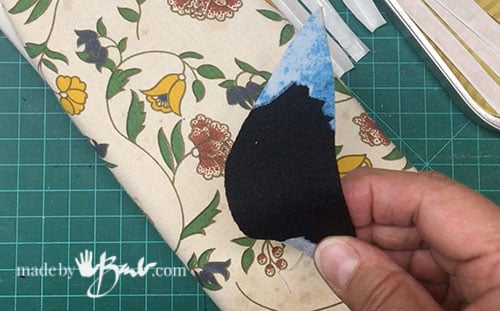
Ta-da! You now have a ready to use nose piece. It is bendable and very slim. Yes it is only 2 layers but if you desire you could do more and use more fusible webbing as well.
I have found that breathability is making the decisions for mask fabric choices… but that’s a whole other discussion. Do make your own decisions.
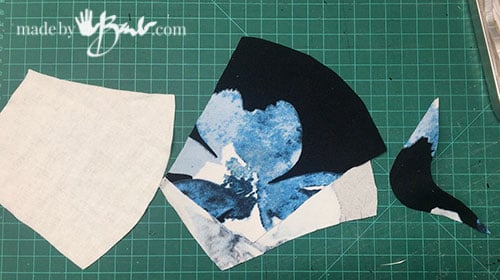
Cut 2 of lining and 2 of the outside fabric. I have decided on a polyester knit here.
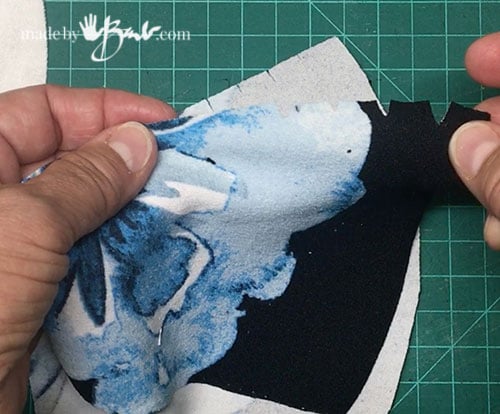
Since the nose piece is not flat, clip at the markings on the top edge.
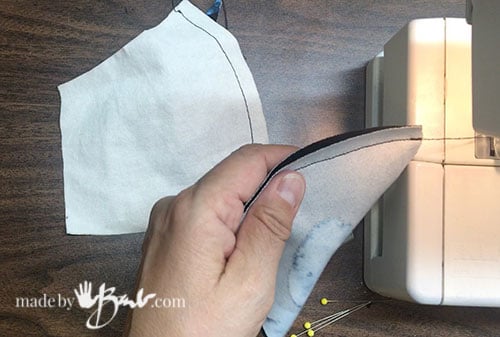
Sew the front centre 3/8″ seams of both the lining and outer fabric

Fold open the centre seam and flatten with top stitching (zigzag or mending zigzag work well)
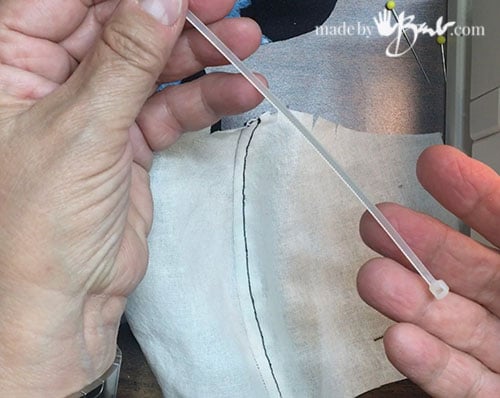
Top stitch a line slightly over from the centre seam and there is the opportunity to put a stiffener in this channel. Zip-ties or pipe cleaners work well and prevent the mask from collapsing at each breath.

Centre the nose piece on the top seam (right sides together) and sew seam, spreading at clips to flatten nicely.
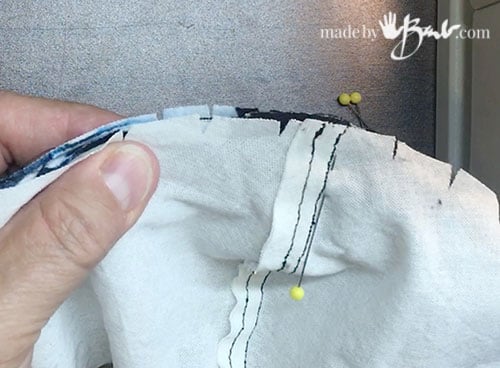
Repeat by adding the lining piece and sewing seam.
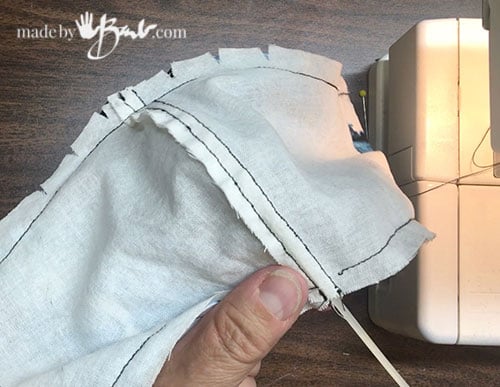
Insert Optional Stiffener:
Push the zip-tie (or pipe cleaner) into the channel and cut at appropriate length and stitch closed. This will help keep the mask off your face. I do not particularly like having something touch my lips, just saying.
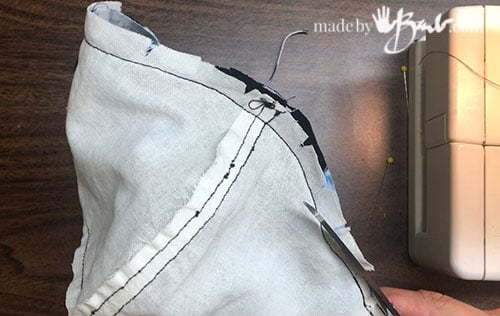
Trim excess seam allowance to make as flat as possible.
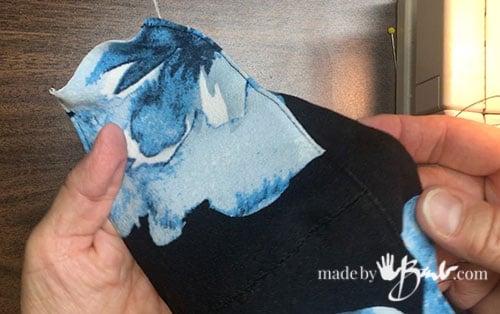
Right Sides Out- Fitted Mask for Glasses:
Turn right sides out (ends are still open) and top stitch close to edge to keep flat and in place.
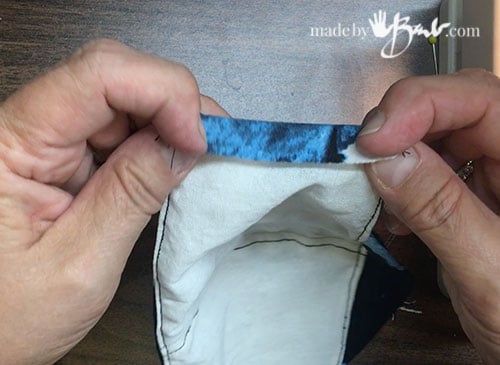
Fold over ends to make casings for the straps.
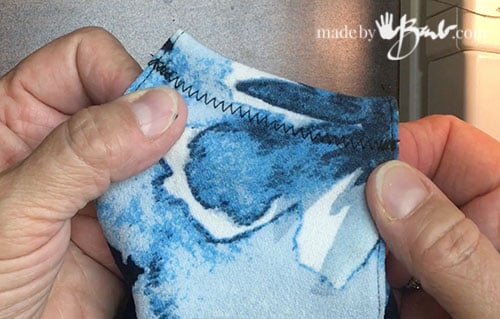
Zigzag or straight stitch depending on how much the fabric frays. I prefer to use some cut strips of spandex-mix t-shirt (like camisoles) to make soft easy-stretch straps/ties. They can be looped around as one long tie or just behind the ears. This is better than permanent elastic.
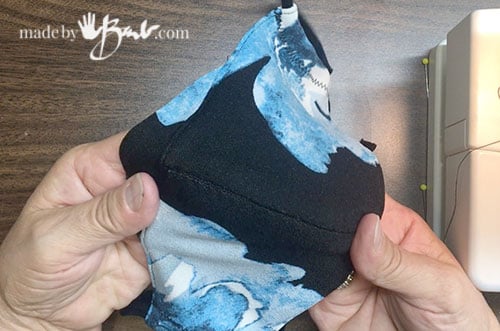
Extra Stability:
Another thing that makes for a better fit of this Fitted Mask for Glasses is that all the layers stay together. I know, you do not want to stitch and makes holes through the fabric, but it can really help keep it more comfortable, off the face so that makes breathing easier since it allows more surface area to bring in air. (You decide) I like to stitch through the layers to keep the lining stable. You can stitch through the front centre and/or across the width.
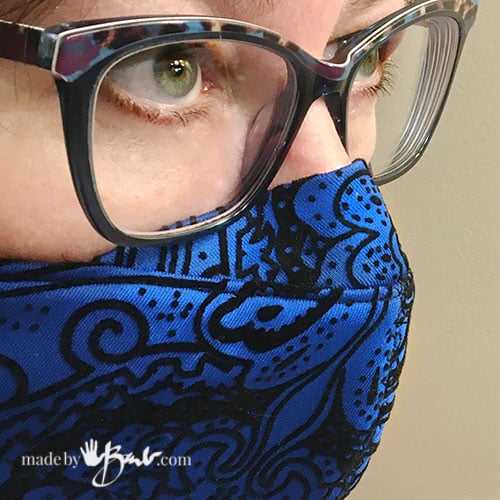

The nose piece set in this way allows for better angle and is much less bulk than having a top seam. Keeping as much stability at the front seam also makes it less likely to keep suctioning to the face.
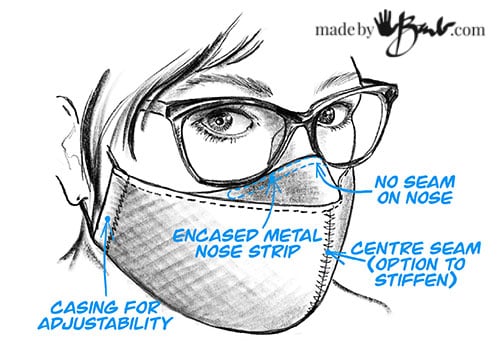
I know I have the other styles like The Ultimate Face Mask & The DIY N95 Style face mask but they also have edge seams at the nose or do not ‘scoop’ lower over the cheek. Small differences in this Fitted Mask for Glasses can mean a lot… (think about the fit of your pants – we all have a favourite)
Whatever you do, please keep yourselves and loved ones safe. We do ths for ourselves AND others!
I’m having trouble understanding how the nose piece is affixed to the face mask and lining. I’ve been watching the video over and over but that step is really hard to see. Can you clarify? thanks so much!
The nose piece is attached to the outer layer, right sides together, and then the lining is added (could be done in one step if desired as it sits between the 2 layers). Turn right side out and then it is between the layers.
Where did you get your bodkin? I have a couple of different ones, but like the looks of the one you are using.
Oh, I just checked… so many available! I may need to stock up as this fellow likes to hide on me!
Hi Barb. I am looking to modify masks I already own – do you think I could sew the nose piece (in the shape in your pattern) onto a pleated rectangular mask to make the nose more fitted? Thanks!
I think it could work. As a test you could just tape the right size piece out of some paper towel or something to see how it would feel. The difference is that the pleated mask does not curve outward but I don’t know how big your nose is. It may be fine. Good luck!
Hi Barb
Are the lining and front face pieces the same size? Trying to figure out the pattern.
Yes, they are!
I’m on a roll with this fabulous pattern. Everyone I know who wears glasses has at least one now. Now I would like to make some for the men in my life. How would I measure up the pattern and the nose piece?
Thanks for all your patience and help. You’re the Best!
I would do the math. Measure the length of the ‘made’ mask, and then measure the desired length on the man (like the middle front, chin to nose) Divide the Man-length by the ‘made’ mask number and you should get number over 1, multiply by 100 to get the percent to print pattern at. Ie – (man) 6″ ÷ (made) 5.25 = 1.14 x 100 = 114%. You can then multiply that number by the width to see how wide it will end up. The seam allowance will need a bit more taken off.
Is there any other way to download the PDF mask pattern without having to add an extension to Chrome? I had Adobe on my PC so I should be able to access the pattern with no problem. But when I go to the “download pattern” link, it goes through instructions for downloading an extension which I prefer not to do on my PC.
You should not need a that extension. It is a PDF so should be viewable. I’ll email…
Having a difficult time downloading the pdf. Could you email it to me? Can’t wait to sew this and love the sardine can nose bridge DIY !
…done
I just want to mention that quite a bit of scientific research has been done on face mask materials. The best masks use a combination of materials to filter the virus according to different physical properties. For optimal protection, you should use a tightly woven cotton layer (one scientific article suggested 600 count sheet material, but sheets are expensive), a polyester layer (stretch chiffon, to be exact), and another layer that can be a blend. Three layers block sneezes really well. The researchers recommended putting the cotton layer on the inside, but I use it as the outside layer.
I found this site because I am doing another round of mask making. Nasty Delta!
do you sell these masks?
No, sorry. The cost of shipping etc makes it not worth it. There may be people making that are local and you could give them the pattern…
This is a great pattern! I’m going to make one for myself.
It has gotten many rave reviews! Stay safe!