Make your own Relief Mold for Concrete
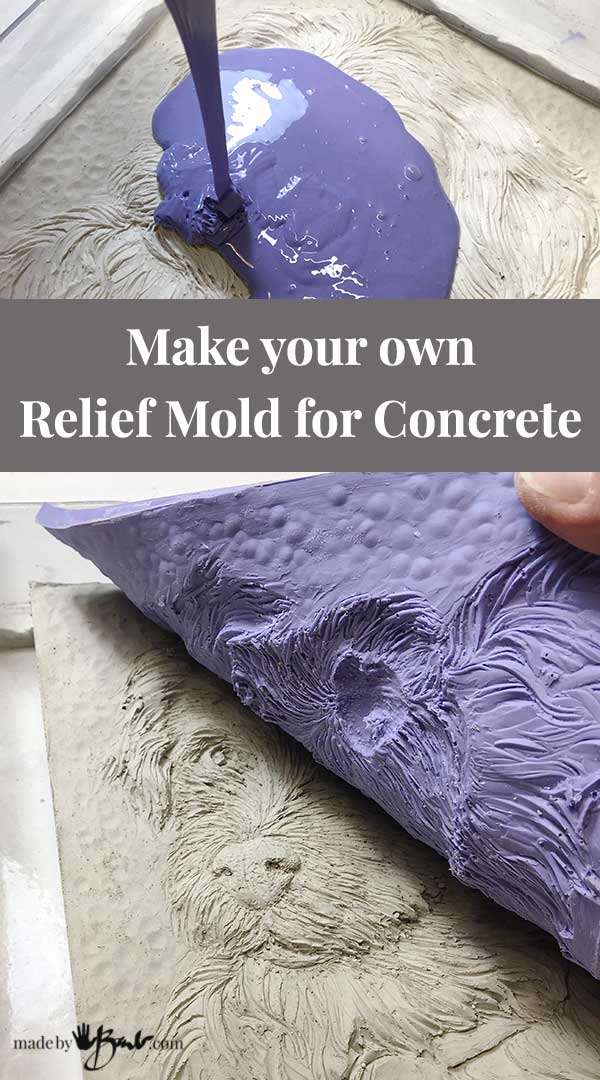
Take your work to the next level… Make your own Relief Mold for Concrete from your own bas relief sculpture. I figured out a little secret! Don’t tell anyone…
Plasticine Sculpture Original:
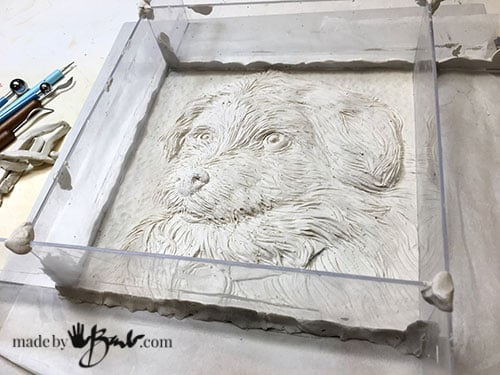
In my last post I sculpted my sweet Pup in plasticine. Actually, I like Plasticine even though it seems like a juvenile media. It doesn’t dry out, it’s smooth and forgiving. You can keep working on it and it holds it’s shape quite well.
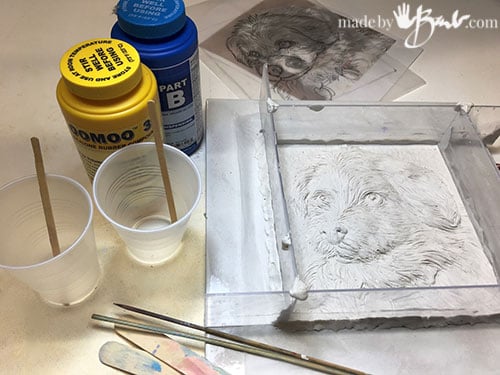
My issue was; can I make a mold from this oil-based clay? I researched and researched and there was discussion about a reaction between it and the molding silicone. I have discovered the wonderful Oomoo! Yes, this 2 part silicone ‘magic’ has been completely wowing me! It comes in a few different varieties but I used the Oomoo 30 which has 30 minutes of working time. If your clay has sulphur in it then it reacts with the Oomoo, but that was impossible to find out… Sooo, as I like to learn by experience I just did a small tiny test piece – and crossed my fingers! Yup, amazingly it cured perfectly and picked up every detail of the clay; no coating it with any paint or otherwise. Yay!
Silicone Mold! Here I come:
That meant I could go straight to mold making from my plasticine sculpture. It also ‘told ‘ me that I can use it as a barrier to help in the making the mold form.
I use a few strips of plexiglass plastic that I got from cheap dollar store frames. Just score a line a few times with an xacto knife and snap it over a table edge. These strips are pushed into the clay and sealed at the corners with more Plasticine from the outside. The strips can be extra long at each corner (same ones I used for my Botanical relief prints) Measure the square/rectangle (or whatever shape you want). Make extra sure there’s no holes where the Mold silicone can sneak out. I also mark which is the top so that I know where to put the loop for hanging.
Also use a level to make sure your surface is level.
Oomoo Magic:
Oomoo 30 comes in kits with 2 Parts; Part A & Part B. They are to be equal parts by volume. Mix each container before starting to measure. The beauty is that this does not need degassing for removal of bubbles.
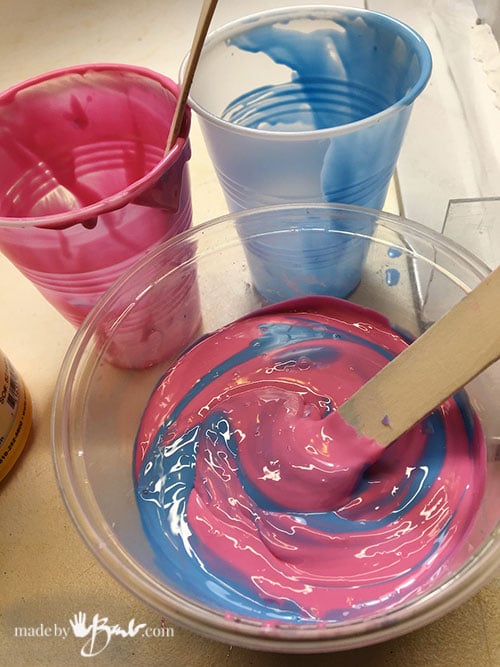
For my Relief Tile I used about 1/3 of a 2.6 pound set of the A & B. Using clear cups to see side by side equal amounts and then poured into a new container to mix until the colour is homogenous.

Oomoo 30 has 30 minutes of working time which I appreciate.

Pouring from one stream allows it to flow without adding voids of bubbles. It moves slowly but efficiently. Since this method does not have a huge box to fill it takes less mix.

It will need at least 6 hours to cure… Be patient.
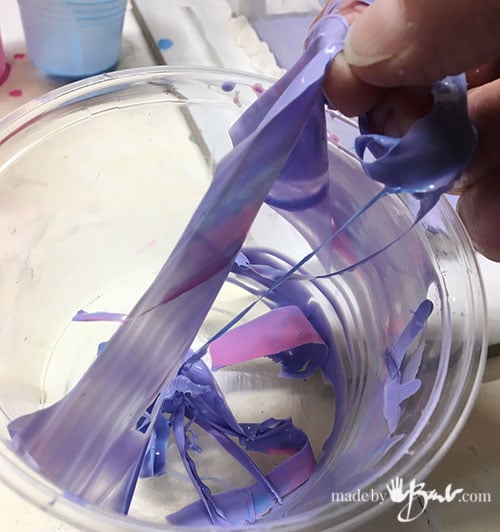
I leave the mixing cup nearby as a gauge to see if it is set rather than poking my finger into the mold. It peels out of the cup with amazing stretch. Cleanup sometimes teaches a lot of valuable lessons.
Oh, The anticipation:
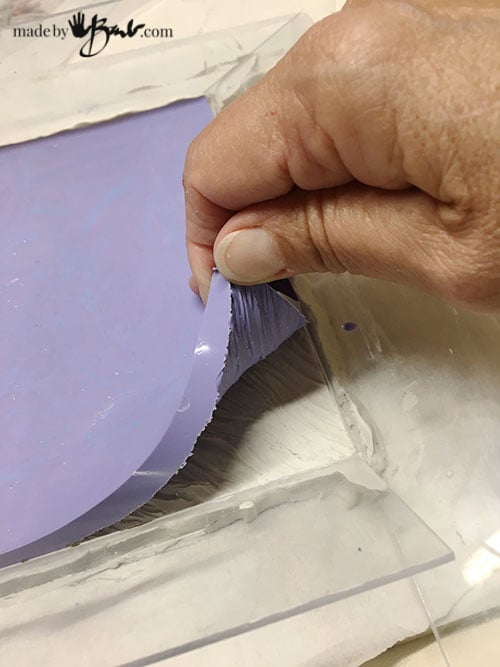
Finally; I have my silicone mold!
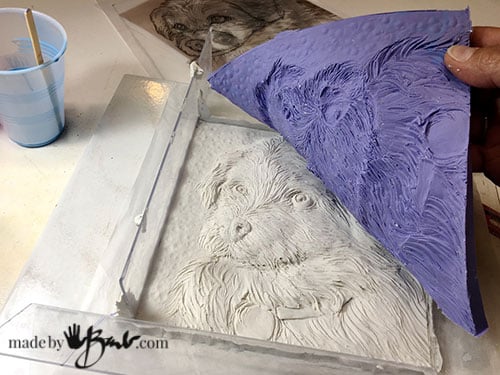
Easily push a side open and peel off the top mold. Oh, such great details it picked up. I am very happy! There were a lot of small ‘hairy’ details that could have been troublesome for bubbles but I only see a few tiny ones that do not interfere at all. The deep eyes also faired quite well.

Such a great flexible negative copy of my sculpture. It does not distort it all and could be used again if need be. Mold Done!
Get Ready for the Concrete:
I use the same plastic strips (from the cheap frames) to make the form to pour the concrete. They can be adjusted at the corners to be used for any size. Again, I use the Plasticine clay as the barrier to seal the edges and corners very well. Again make sure you are working on a level surface.
Important: Place a sheet of paper under the mold to make sure it can be lifted after curing.

As for the type of concrete; I always prefer an extra strong mix for these since they are fairly thin. My preference is Rapidset Cementall as it is quite dense & strong; setting up in 1 hour.
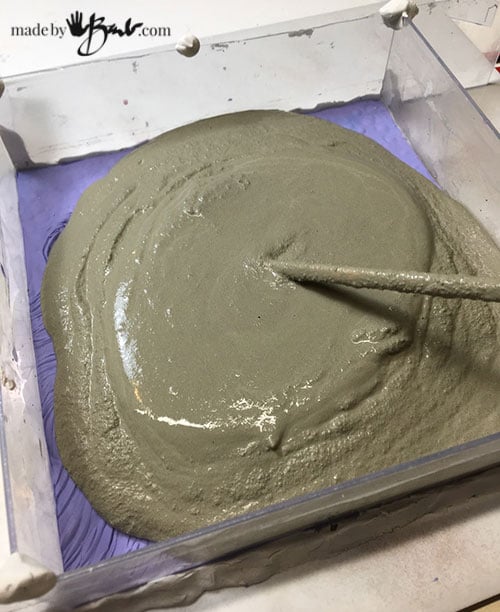
It flows quite well and has no aggregate. If you are concerned for more strength you can add some fibres or Drywall mesh into the tile. After pouring make sure to tap/vibrate to push out air bubbles. It will also level itself. Make a loop of wire to imbed into the back for hanging.
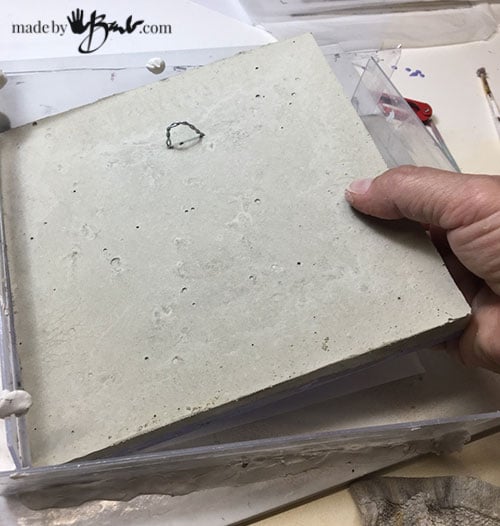
The loop can be bent after curing to be able to catch a hook on a wall.

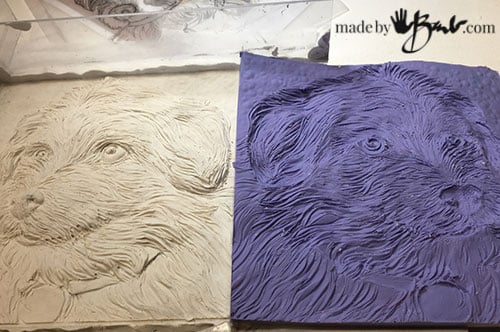
Turn over the tile with the mold and peel the mold off. I am so impressed to see the amount of detail that is now translated into the concrete. “and I can make as many as I like.
Yup, as many as want. Oh Pip… if only!
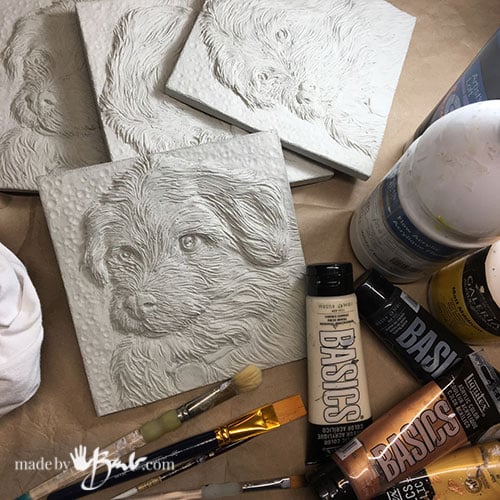
Now come the decisions… do I add colour? Just leave ‘Naked’ or what?

Get your concrete ready and I’ll show you how to finish… very soon. If you like this one, I’ll share
That’s brilliant!!!
Pity you can’t copyright it all before your wonderful idea is stolen
Well, in this case it is a 3D object… a bit harder to copy. 🤞🏻
Barb, thanks so much for sharing your explorations! I am inspired and hope to use your technique 🙂
That’s great! It wasn’t as difficult as I thought. Enjoy!
Do you think someone with no experience can make this?
Or should I just order one from you!!
Since you can work from a photo and hopefully take some tips… You never know until you try. I have been teaching at an art college for over 20 years and the thing I hate most is when a student proclaims they can not do it before they even try. It’s so rewarding when the ones who try surprise themselves!
I love what you have done! Such a cute puppy!
He was almost 12 but since I gave him odd puppy cuts he always looked like a puppy. ❤️
on the mold of the puppy. do you have to use a mold release? Also do you seal your projects if they are going to be outside? If you do seal them do you seal before or after painting? thanks so much as you have my brain turning! Merry christmas
I tend not to like to smother my concrete in paint or sealer. I have observed how the driveways keep needing upkeep. If I just antique the item then I leave it as if it can breath there is less chance for it to peel. Water & moisture in concrete pushes paint off. So far the sparing acrylic paint has held well outside. I have used a small amount of mold release on the puppy but I do not think it needs it at all. See also here
Hi Barb!
Wow, this brought back memories! Long ago (in the early 90’s) I worked for a company called Scioto Ceramics in Grove City Ohio, as a sculptor/mold maker. We used plasticine for the original sculpture, then used Smooth-On products to create our molds. Anyway, thanks for your information on the concrete, Ive got a little project and came to your site via that google search, then found this gem. Things have change SO much since back then, being able to order this stuff on line is amazing. Your work is beautiful! Thanks for taking the time to share your skills and hard-earned knowledge with everyone!
Patti
That’s great to hear! The more I do the more ideas I get! The relief sculpture allows a bit more fun I think since it is flat. I also like hanging it on a wall!
Hi Barbara, thanks for you pup I liked it. I found it whilst trying to get arough mould of a live dog insections perhaps. I wanted to getahead start on bo Rd y proportions then bend and add details after to make a lifelike statue. Canyon suggest a medium please as shaving dfirst isn’t an option. Thanks george
I am a bit confused at the question. I think you are making a statue? Maybe you can use styrofoam? (like here)
You are so talented and so kind to share all you learn! You have taught me so much about concrete! Thank you so much! I can not wait to try this ! Patsy
It’s always nice to hear that I inspire someone to be creative! There’s lots of potential in this media but also stay safe…
You’re awesome. I follow you and get so many compliments on things made from your guidance.
oh cool! Please tag me on IG @madebybarb. Glad to inspire!
I really enjoyed reading this and learned about two new products. Thank you for your generosity.
Thanks so much!