DIY Cold Porcelain Clay Ornaments

Peek-a-boo! Who doesn’t love a super cheap and easy way to make some lovely decorations. I’m impressed at how these DIY Cold Porcelain Clay ornaments came together, even with the little fingers helping!
Just a few minutes before my grand-kiddo was to arrive I decided that we needed a craft to do since I can’t be hobbling around after this energetic almost 3 year old. This clay cooked up really quickly and I had everything I needed at home.
My Story:
I’ll share my little story about crafting as a youngster. I vividly remember when I was in kindergarten and given a craft task to do. We would thread the string through alternate pieces of straw and paper squares to make a necklace. I was so impressed with how it came together; that feeling of accomplishment had made such an impression on me that I remember it over 50 years later! That was the start to my whole lifetime of making and creating! Help a little one discover their inner creativity…
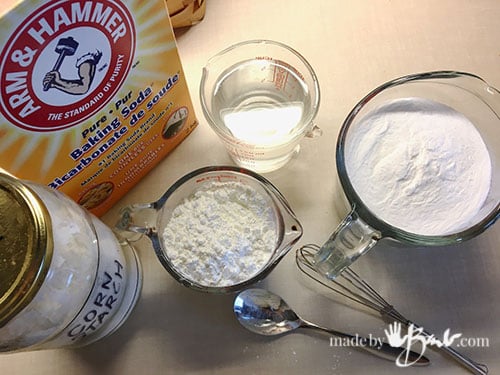
DIY Cold Porcelain Clay Recipe:
- 2 Cups Baking Soda
- 1 Cup Cornstarch
- 1.25 Cups Water

Mix the dry ingredients with a whisk in a saucepan.
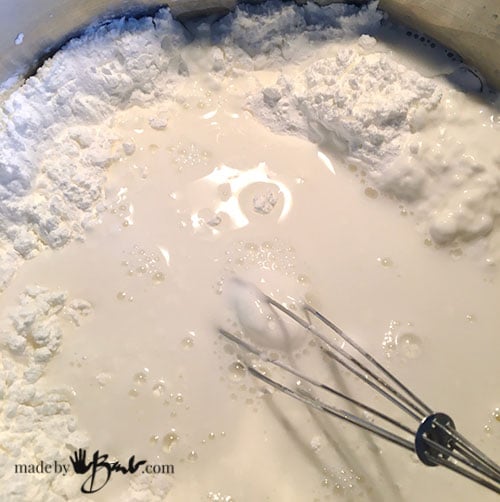
Add the water and whisk to incorporate.

It dissolves easily and quickly. Turn on medium heat.

Mixing constantly the cornstarch will start to cook quickly.

On low heat stir until all has thickened.

Plop it out onto some wax paper and start to push together as soon as it’s cool enough for your fingers.

Turn and fold over to knead into smooth clay. I was fascinated at how smooth it is.

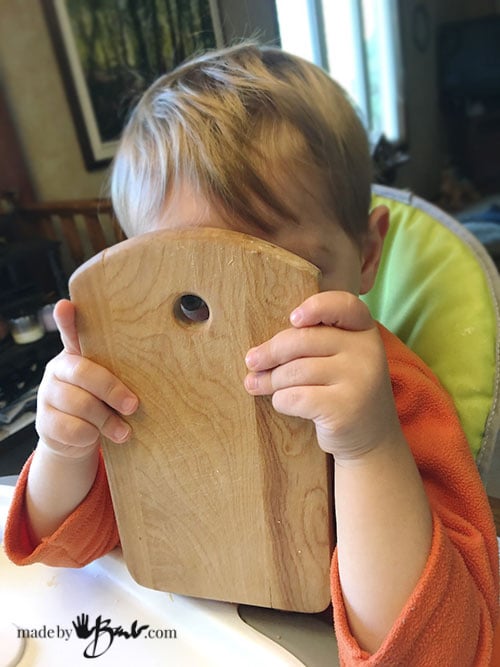
Tada! A ball of smooth clay… now just to coax the ‘munchkin to sit in his highchair.

To keep it simple I figured rolling and cookie cutting would be best. There are so many rolling pin patterns available! I had one of puppy dogs so this would be perfect. Keep the clay covered when not using as it will start to dry.

This cold porcelain clay has a nice consistency and rolls easily. It does not stick either – bonus! It has not questionable ingredients so it’s great for the ‘kiddo’! He loved cutting the shapes especially the ‘wabbit’!
Ok, it’s all fun and games. This ‘giggle monster’ knows how silly grandma gets! Nothing quite like endless babbling and laughing, tickles or not.

A few minutes and there’s a huge bunch done. Now that they have dried I realize that they can be quite thin and still be strong.
They Multiply!

I placed them on something that would allow air movement underneath as well. They do take a few days to dry unless you use some heat source. I put some on the vent and used the residual heat after cookie baking to finish the drying.

Some of the heart ornaments were imprinted with crocheted doilies. Anything that you can push into the clay can be great!
Imagine an ornament with tire tracks, or botanical branches… So many possibilities! Maybe foot or hand prints! To finish off I used some lace ribbon and a bead to make hangers. I have a few hundred pounds of beads but simple pony beads would work.

I love white on white! Simple and textural. So quick and inexpensive! This would be great for a classroom craft!

Once I hung them I realized that the thinner ones allowed some light to filter through. Ooooh, more ideas!!! In my frenzy I dropped a couple on the tiles and they did not break! Woohoo, I’m impressed even more. Move over ‘playdough’!

You know I like simple colour for Christmas… and this makes me smile. ‘And so do the little puppies.

Grab the little kiddo’s and make some fun crafts with them. Trust me, they will remember and that feeling of accomplishment is like no other.
‘Wishing all of you the warmest holiday greetings & thanks for being here.
Love this ornament came out great. So simple so beautiful.
I think I’m over whelmed with colour from all I do so I am in love with white lately for a refreshing break. I think that’s what happens to visual people…. Thanks!
I made these ornaments a few years ago and they are still perfect. Mixture is so much better than the old salt dough. Wonderful craft for kids and adults. My art experience in elementary school wasn’t as positive as yours. I went “out of the box” on a drawing project and got reprimanded for it. And I still do whatever comes to me when I do my art crafts;
Yes, mine are still perfect as well. I had some ideas to use my molds from the Botanical relief casting with this clay… Oh, I wish there were more hours! That’s a shame about your art experiences. Good for you to follow your own heart and path, especially nowadays when everyone is ‘influenced’ by the trends!
Thank you so much for the clay recipe. I’ll try it. Going to make flower beads. Hope it works. I loved your post. with your little ones. bye thanks again Barb. sincerely connie
Have fun! I’m looking at making some paper maché clay soon! So much to make – so little time!
I have used this clay for many projects… l just love it … but for added strength I add Elmers glue while I knead the dough…it adds strength and I am able to make figures .. such as Santa’s and snowmen
Thanks for the tip! I guess it is much like how I make my own glue for Paper Maché clay, (some use Elmers glue) Do you cover a form to keep the weight and amount needed down?
Thanks so much for not calling them No Salt ornaments. Many people don’t realize the sodium in sodium bicarbonate is salt. Sadly these people also cook and bake so I wonder how many recipes flopped. I agree the white on white is quite stunning. Now for some little cut outs, slits to enhance the light effect.
Yes, so many ways to be creative! Have you even tried Paper Maché Clay? Enjoy!