How to Eco Print on Ceramic Bisque

If you really enjoy Eco Printing, every surface becomes a possible media to use. Fibres are great but I am amazed at how other solid surfaces can also be printed. With excitement I share how to Eco Print on Ceramic bisque…

What is Ceramic & Bisque?
When I was younger (much younger) I used to dabble in clay work. After sculpting the clay it would be fired in an electric kiln and it was then considered ceramic bisque. The clay has hardened permanently during the firing but has not been glazed at all. Usually the bisque ware is then glazed and fired again where it often gets some type of water repellant surface (like a glass, depending on the type of glaze)
Since these will be Eco printed the surface needs to be able to absorb so it is unglazed but fired to become bisque. It can also be a clay pot since they are usually not glazed. The Pizza stone is also a clay that is a different colour than the red clay. I wish I had the time to be a ceramic artist and make pots on a potters wheel… I guess I just have to use what I can easily find.

What method of Eco Printing to use:
Through my experimenting on these bisque pieces I have found that it needs a fair strength of iron use in the process. Generally I like a strong print so I use leaves that I know are good printers since they have a lot of tannins. The silver maple and red maples are some of my favourite ( as well as sumac, rose leaves, blackberry Leaves). Your experimentation you will also give a sense of which work well. The colours from their natural dyes will transfer but may not be quite as strong as on a white fibre.
Soaking the leaves in an iron solution will somewhat guarantee that the tannins print and also adhere. The basic principal of eco printing works here as well as on fabric but I find that I need extra strength perhaps since the clay is so porous and strong.

Wrapping the Bisque Pieces:
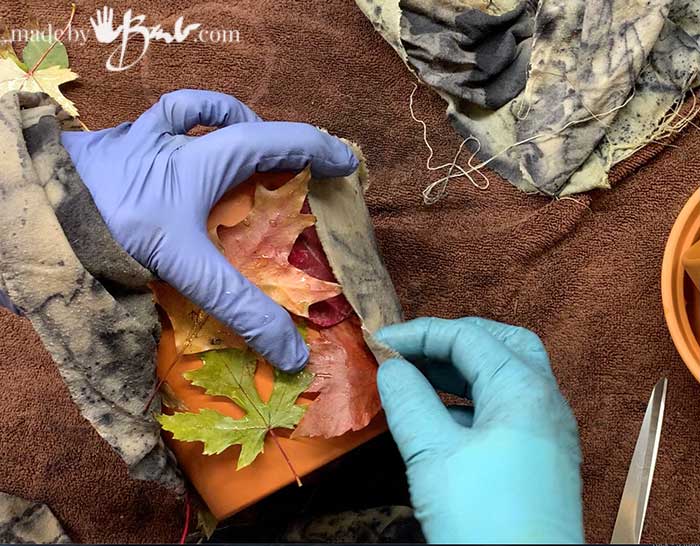
Since I do not do pottery work I have looked for easily accessible clay items such as clay pots and even pizza stones as they are not glazed. The main thing to remember is that the clay piece needs to be wrapped very tightly. Since this is a rigid piece it does not have the same ability to ‘mold’ to the way that fabric is tied. The foliage needs to be in direct contact with the bisque to give good leaf prints, especially since I do not immerse these pieces to process them; I will be using the microwave.

The flat stones/tiles are a bit easier to work with since they can made into a stack and tied tightly. For extra force I like to use elastics or bungee cords to keep them tight. Using some damp fabrics will also ensure that the moisture needed is available. If you like, the fabric can also be dipped in iron water to provide some more iron mordant to this printing process.

What to Wrap with:
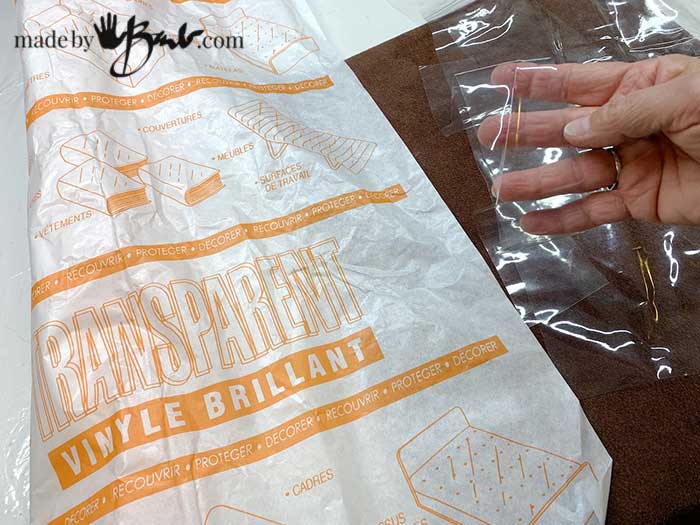
There are a few options of what to use to keep the leaves pressed to the surface of the vessels. Elastic bandages & rubber bands would work but may not last long from the heat and excessive stretching. Fabric that has a stretch to it will be helpful to be able to adjust to curves of the ceramic pieces. The vinyl table protector has a certain amount of stretch and can be reused. It also adheres/clings to itself so it allows wrapping quite nicely when cut into long strips. Being able to reuse it is also great.

Readying the Ceramic Pieces:
When I Ecoprint fabric I often dip/soak the fabric in an iron solution (iron sulphate & water) before adding the tannin rich leaves; so I do the same here with the bisque pieces. Perhaps the red clay already has some iron oxide in it’s makeup.

Bundling the Vessel:
It will depend on the shape of the vessel you are printing on as how you manage to wrap it and place the leaves. Sometimes it can feel like you need a third hand to hold leaves and then place the fabric to hold it.

When I Eco printed the easter eggs I used a pantyhose to stretch nicely and it worked well. Hmmm, maybe a stretchy sock might fit over your vessel as well. In other words; almost any fabric can be used.

The strips of vinyl have a little stretch to them and they like to stick to themselves so that makes them work well as a outside barrier to keep the moisture in.

The tighter the leaves are against the surface the more likely you will have a detailed print.

Can you process an Ecoprint in the Microwave?
Since my preferred method to apply the heat is with my laundry-room microwave I also keep the bundle wet enough by wrapping with damp fabric. In a microwave, the water is what heats so there has to be enough moisture, if it is too dry then there may be some chance of fire. I always watch carefully and only cook for short bursts. If it is puffing up with air it is too hot, boiling inside. You can also simmer or steam your bundles.

Once it seems just too hot for my bare hand I grab it with a mitt and pop under a few blankets and let the heat continue. It will last for hours in insulation, and save so much cooking energy. If you want you can ‘zap’ it a bit more again. Often, I leave it tile the next day; and it’s a great treat for the start of my day to open bundles!

Opening the Bundle:
You never know exactly what you will get; it’s so exciting to unwrap the bundle! If you did not wrap tight enough, you will see. You can also wrap/print it a second time. If the prints are too light you can paint on some iron solution to darken the tannins in the print. That works great on paper prints as well.

Try a batch of vessel eco printing, leaf prints on ceramic surfaces. You can use these for a variety of uses, however not for food items. Planters and decor vessels are fine. If you want an extra layer of protection a layer of acrylic polymer will make the prints look richer.
After rinsing, let them dry thoroughly.

This cheap pizza stone would make a nice trivet/tray.

Admire Your Ecoprints:
A clay pot + ‘iron water’ + leaf = detailed print – AMAZING.

Be creative, try different Eco printing methods, add in some of the natural dyes, dip or use in a carrier blanket. If you are a potter, I envy you… oh how wonderful to design the shape AND the print!

This reminds me a bit of the Raku method since prints tend to be less colourful. I do really like the simplicity of colours. As per usual, there’s much more to experiment with.


How would these look with some added paint in the background? My mind wonders…

Let me know how you make out with yours… We all learn from each other!
Hallo Bärbel, ein wunderbares neues Jahr für dich! Wieder hast du sooo tolle Ideen und vielen Dank, dass du sie hier teilst!
Hast du schon mal richtiges Leder mit Ecoprint bedruckt?
Das würde mich sehr interessieren.
Ich freue mich immer sehr auf die nächste Post von dir!
Liebe Grüße von Dagmar aus Brandenburg /Germany
Do you want to know a secret?! I can read German It’s actually my mother-tongue! How wonderful to see my name in German! Yes, I have tried Leather (Leder) and it is also amazing! Stay tuned; it may be a post soon!
This is a fantastic idea! They look marvelous! BTW, my daughter loved your mittens I got her for Christmas!
I’m so glad she loved the mittens! They are fun to make!
Thank you so much for this detailed how to. Your posts are so helpful and I learned a lot of your Pinterest posts.
Regard
Gerda
These are beautiful. Every time I’ve tried to print on clay the prints look great when first unwrapped, but then as they dry the print bleeds and ends up looking very messy.
Oh really? That makes me think that the print isn’t absorbed. Could it be that the clay is not absorbent enough or may be glazed?
Thank you for sharing, Barb!
Have you tried firing these after the print? Maybe with glaze inside? The iron should darken, right? I might need to experiment. I have a bisque load running tomorrow
That’s interesting… Please let me know, I have not come across that answer yet. I love it when media & techniques cross boundaries!